

This is in continuation to the articles of the series “Learning Ansible”. In our previous articles, we have learned about key-based authentication and a lot of other things. But here, we will be learning some very interesting things about variables in Ansible.
So, in this article, we will be covering the below topics,
- Creating database and adding a user in MariaDB database.
- Using Loops in Playbook
- Variables Precedence
Let’s get started now.
Create database and add a user in MariaDB database
In this, we are going to see how we can create a database and add a user in the MariaDB database. There are lots of database modules in Ansible that we can use and they can be found here.
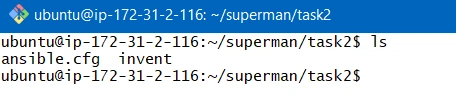
Currently, in our directory in Ansible machine, we have local Ansible config and inventory file which we saw and improved in the previous article Getting started with Ansible – Part 6.
Let’s first create the playbook db.yml and write some tasks to create a database.
Below is the code for our playbook.
- -- - -name: Display Database Setip and variables
- hosts: DBServerGroup
- become: yes
- gather_facts: False
- tasks: -name: Install Mariadb service
- yum: name: mariadb - server
- state: present - name: Start and Enable Mariadb service
- service: name: mariadb
- state: started
- enabled: yes - name: Create a new database with name "myFirstDB"
- mysql_db: name: myFirstDB
- state: present
ansible-playbook db.yml
OUTPUT
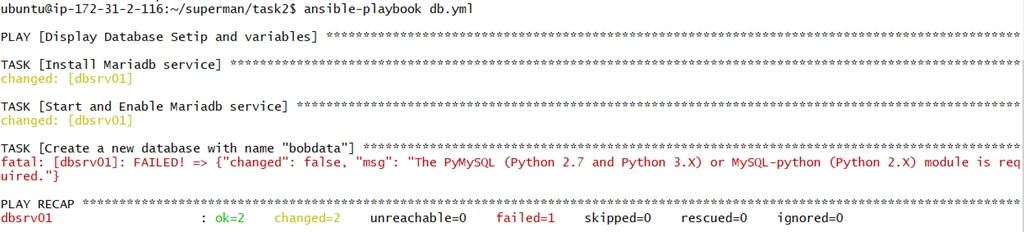
Clearly, it says mysql_db module has a dependency for either PyMySQL or MySQL-python.
NOTE
Ansible modules also have dependencies and those dependencies could be for the host machine or could also be for the target machine.
Ansible modules also have dependencies and those dependencies could be for the host machine or could also be for the target machine.
So now, we are going to add one more task where we will be installing the MySQL-Python module on the target machine which, in this case, is the database server 01.
Below is the code for the updated playbook.
- -- - -name: Display Database Setip and variables
- hosts: DBServerGroup
- become: yes
- gather_facts: False
- tasks: -name: Install Mariadb service
- yum: name: mariadb - server
- state: present - name: Install Python MySQL module
- yum: name: MySQL - python
- state: present - name: Start and Enable Mariadb service
- service: name: mariadb
- state: started
- enabled: yes - name: Create a new database with name "myFirstDB"
- mysql_db: name: myFirstDB
- state: present
Using Loops in Playbook
Here, we can see that to install 2 modules, we have to write two similar tasks and they just differ in terms of the module name that we want to install on the target machine.
So now, suppose we have a lot of other modules to install or we want to add a list of users, then we would have to write a lot of similar code. Well, that is not a good approach as it will make our playbook very lengthy and not optimized as well.
Thus, to make it better, we have something called Loops in playbook which simplifies our work. The detailed documentation can be found here.
After using the loop, our updated playbook will look like below.
- -- - -name: Display Database Setip and variables
- hosts: DBServerGroup
- become: yes
- gather_facts: False
- tasks: -name: Install Mariadb and other tools
- yum: name: "{{item}}"
- state: present
- loop: -mariadb - server - MySQL - python - unzip - git - wget - name: Add list of users
- user: name: "{{item}}"
- state: present
- loop: -amit - ankit - sumit - rohit - name: Start and Enable Mariadb service
- service: name: mariadb
- state: started
- enabled: yes - name: Create a new database with name "myFirstDB"
- mysql_db: name: myFirstDB
- state: present
Now, let’s run the playbook and see the output.
OUTPUT
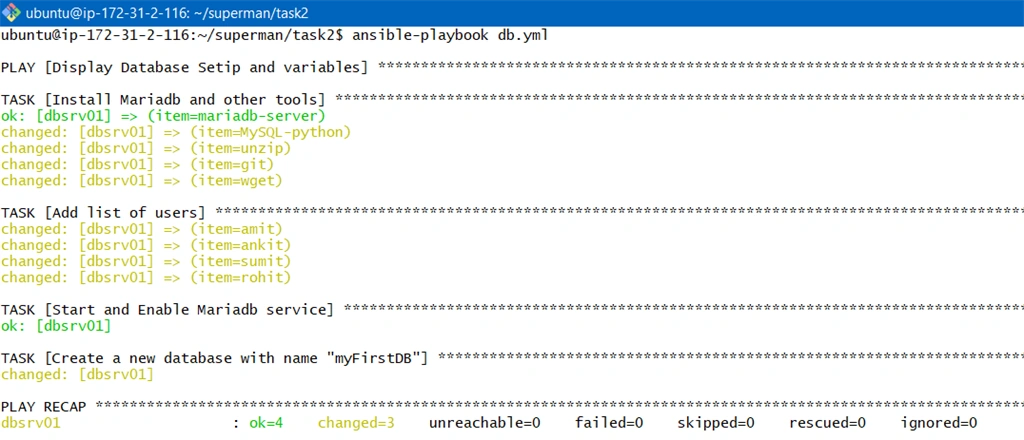
We can see from the output that all the packages in the first task have been installed and loop has executed 5 times and also our list of users got added to the database server 01.
We are done with creating the database; now it 's time to add a database user with password.
Below is the updated playbook for the same.
- -- - -name: Display Database Setip and variables
- hosts: DBServerGroup
- become: yes
- gather_facts: False
- tasks: -name: Install Mariadb and other tools
- yum: name: "{{item}}"
- state: present
- loop: -mariadb - server - MySQL - python - unzip - git - wget - name: Add list of users
- user: name: "{{item}}"
- state: present
- loop: -amit - ankit - sumit - rohit - name: Start and Enable Mariadb service
- service: name: mariadb
- state: started
- enabled: yes - name: Create a new database with name "myFirstDB"
- mysql_db: name: myFirstDB
- state: present - name: Create user in database with name "admin"
- mysql_user: name: admin
- password: 12345
- priv: '*.*:ALL'
- state: present
OUTPUT
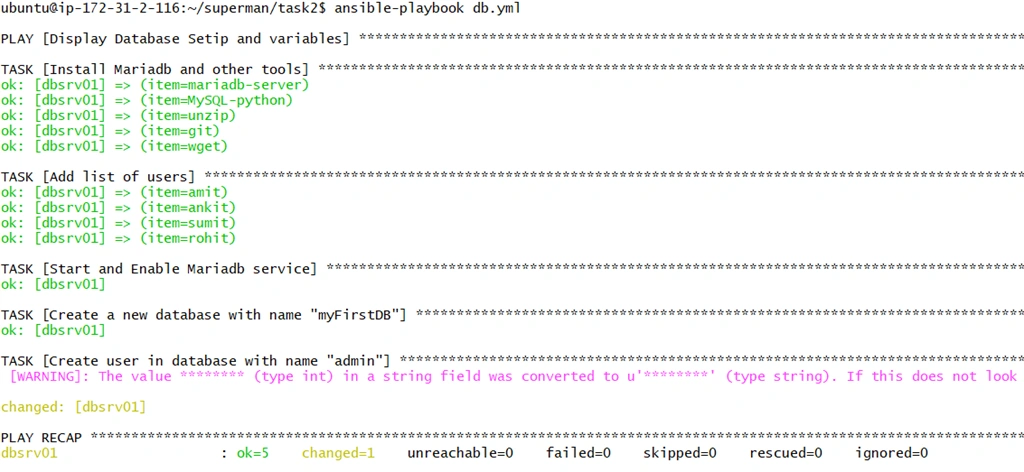
User has been created successfully.
So, we have seen different modules provided by Ansible like user module, mysql_db module, mysql_user module, and loops. Next, we are going to look into the variables and their precedence.
Variables Precedence
There are different types of variables in Ansible and each type has different precedence. So, let’s first understand their precedence and then we will go into the practical examples to demonstrate how do they work.
Below is the order of priority or precedence for the variables.
- Command Line variables
- Playbook variables
- Host_vars/hostname
- Group_vars/groupname
- Group_vars/all
Few Important Points to Remember,
- Top priority always goes with the variables defined through the command line using -e option.
- Next priority goes for variables defined inside the playbook using vars keyword.
- Then priority goes for variables defined in hostname file inside host_vars directory. So, suppose we have a hostname websrv01 then we will create a file with this name under host_vars directory and will define all the variables related to this host.
- Next priority goes for variables defined in groupname file inside group_vars directory. So, suppose we have a group name WebServersGroup and this group contains 3 web servers then we will create a file with this “WebServersGroup” name under group_vars directory and will define all the variables related to this group.
- Last priority goes for variables defined in all file inside group_vars directory and this is a common place for holding all the variables.
Summary
In this article, we have learned how we can use loops to write playbooks efficiently and also learned about the different types of variables and their precedence in Ansible. Next, we are going to see some practical examples to understand them better.
I hope you find this article helpful. Stay tuned for more … Cheers!!
You can also check out some of my previous articles of the series “Learning Ansible” here.
Join the conversation! Your thoughts help the community grow.