
After successfully installing Windows Server 2016 operating system ( Read my previous article on how to install Windows server 2016 ), you have to do some initial configuration before starting to work on it. This initial configuration includes,
- Naming the computer
- Setting the clock and region
- Configuring network address (TCP/IP)
- Adding Roles and features.
- Configuring Firewall
- And, enabling automatic updates
Note - Changing the computer name requires system restart.
- Name Your Computer
Let me show you how to change the computer name in Windows Server 2016. There’s a unique name that’s been already assigned to your Windows Server 2016 by default. You need to change this name to have a meaningful name and to easily identify your computer on the network. Changing the name of your computer is very easy. As you can see below, “WIN-183PHTUHDEF” is the default name that my computer already has. I just want to change it to have a meaningful name. This can be done very easily by following the below steps,
Open Server Manager —> click on Local Server —> click on the default computer name (see below image) .
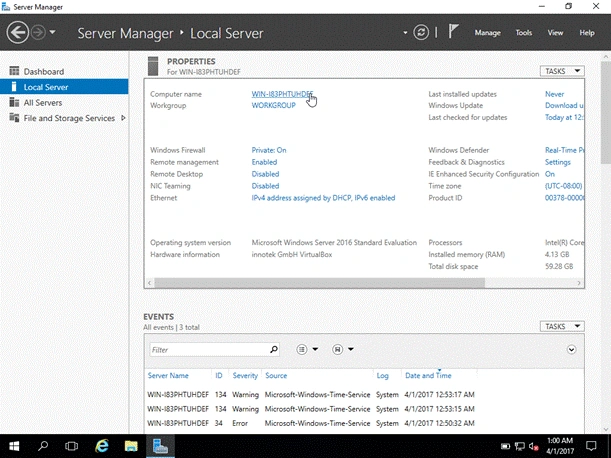
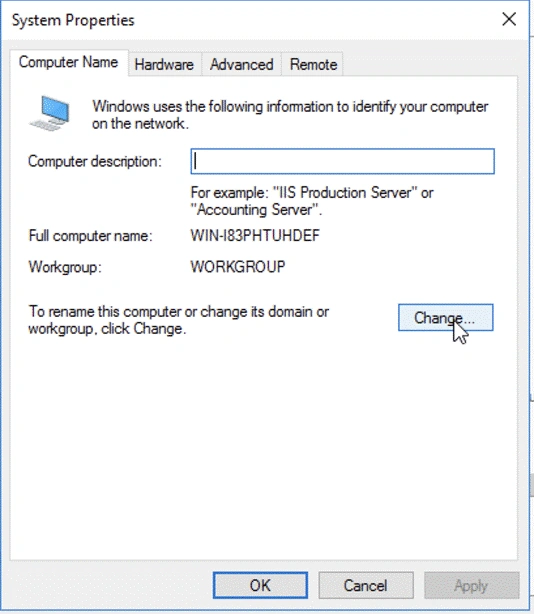
Image: Server with a default NameNow, on the System Properties window, click on Change, type whatever name you want to give followed by a click on OK.
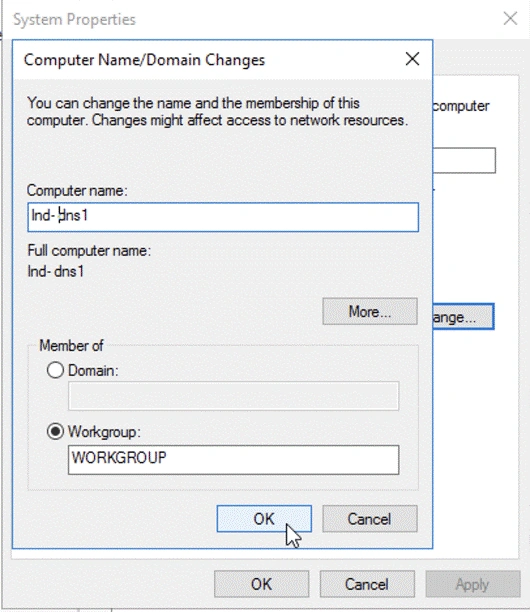
I have given my computer the name “Ind-dns1”.
You can also change your computer name using command prompt.
Go to your command prompt and run it as “Administrator” and use the below command,
> hostname
> Netdom renamecomputer %ComputerName% /NewName: NewComputerName
- Set the Clock
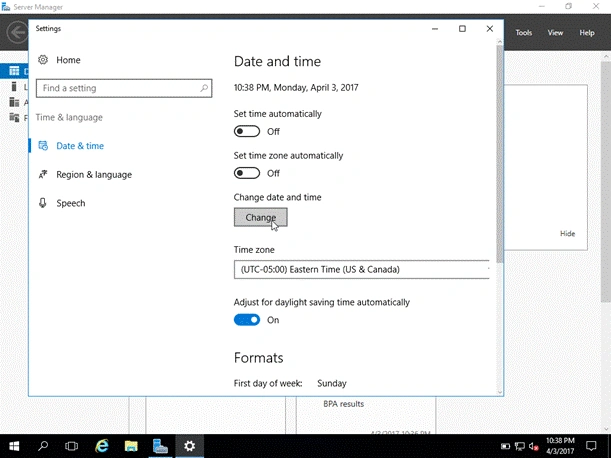
To set date and time, click on Start —> Settings —> Date and Time settings —> Select Timezone and click on Change ( See below image ).
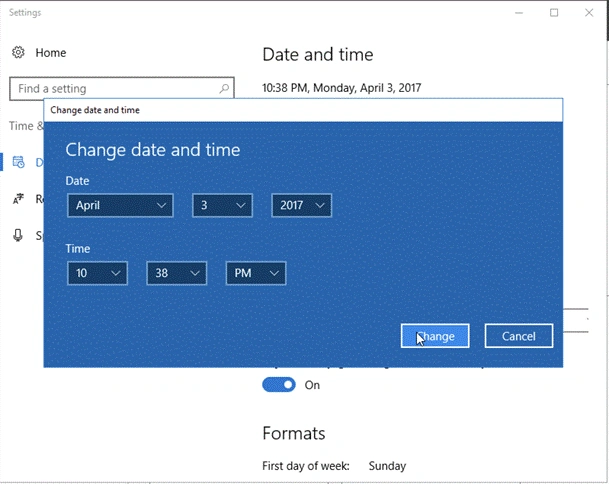
In the "Change date and time" window, give your current date and time and click Change.
- Configure Network Address.
Your Server should have a static IP address to use other roles and features. Follow below steps to configure your computer’s network address
Steps
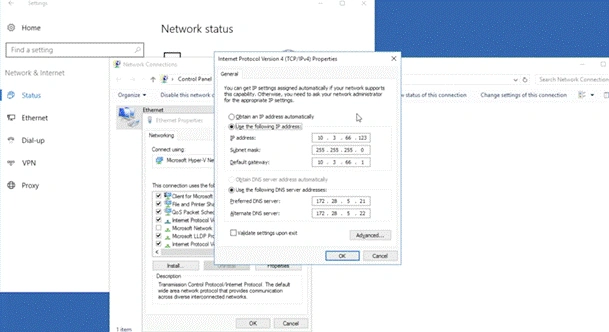
Go to —> Server Manager —> Local Server —> click on your computer’s network interface hyperlink(Ethernet) —> select the network adapter and right click on it —> click on Properties —> Now double click on Internet Protocol Version 4 (TCP/IPV4) — > select Use the following IP address radio button —> type your IP address details,
In my case, I’m using IP address (10.3.66.123) , Subnet Mask (255.255.255.0), preferred DNS Server (172.28.5.21) and the default Gateway (10.3.66.1). Now, click OK.
Set this TCP/IP configuration from command prompt
cmd> netsh interface ipv4 show interfaces
cmd> Netsh interface ipv4 set address name=Ethernet source=static address=10.3.66.123 mask=255.255.255.0
cmd> Netsh interface ipv4 add dnsserver name=Ethernet address=10.3.66.123 index=1
To verify your IP address
cmd> IPconfig /all
It will show all the details of network including IP address, Subnet mask, DNS IP address.
- Add Roles and Features
To add Roles and eeatures, go to Server Manager —> Add roles and features — and select installation type.
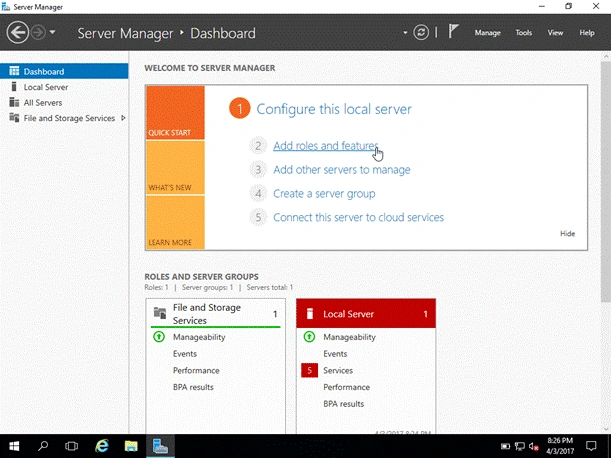
In this article, I’m selecting “Role-based or feature-based installation” and click Next.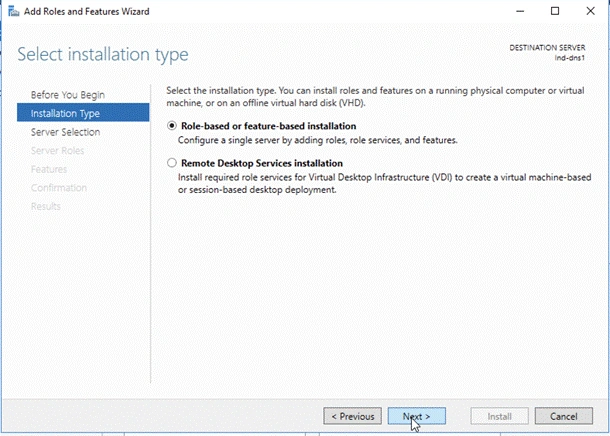
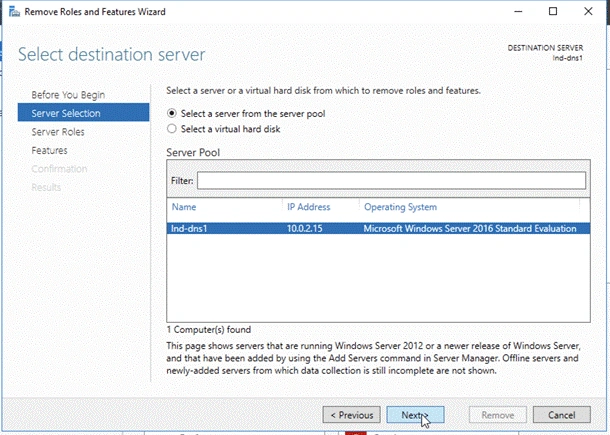
After selecting installation type, you have to provide your destination Server. In my case, I only have one Server so I’m selecting this “Ind-dns1”.
Now, this is where you can add whatever roles you want, by selecting the check box from list of roles. And then, click on Add Features.
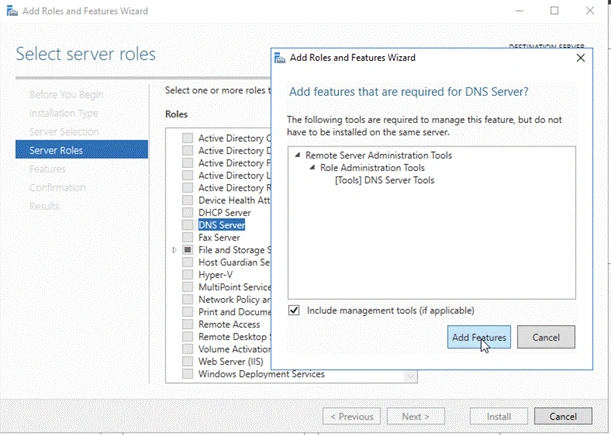
Once you successfully add the role, you will be able to see it under the dashboard of your Server Manager.
Join the conversation! Your thoughts help the community grow.