

Introduction

In the world of modern automation, an autonomous agent is a virtual assistant powered by artificial intelligence that can perform specific tasks based on instructions and knowledge provided to it. Copilot Studio is a platform that helps you build such agents that can respond to questions, execute workflows, and even automate certain actions, making processes more efficient.
For instance, one of the common use cases is to automatically concatenate dynamic column values in a gallery view. If you're dealing with a dataset where two columns need to be joined dynamically, setting up an agent in Copilot Studio could save you a lot of time and effort. These agents use predefined instructions, as well as knowledge uploaded by the user, to respond to queries and perform tasks effectively.
This blog post will walk you through the entire process of creating your first autonomous agent, configuring it with actions, adding knowledge, testing its responses, and publishing it.
Features of Copilot Studio Autonomous Agents
- Customizable Actions: You can specify exactly what actions your agent should perform, such as sending an email or retrieving data.
- Knowledge Management: Upload files, documents, and other resources that your agent will use to answer queries and perform tasks.
- Easy Integration: Copilot Studio allows you to integrate your agent with other platforms and services like SharePoint, email, and more.
- Interactive Learning: Your agent can improve over time by learning from the knowledge you add to it.
- Conversational Building: Use natural language to describe the agent’s behavior and the tasks it should perform. Copilot Studio will guide you through the setup process.
Advantages of Using Autonomous Agents in Copilot Studio
- Efficiency Boost: Automate repetitive tasks, saving time and reducing manual errors.
- Scalability: Create agents that can handle a variety of queries, making them suitable for businesses of all sizes.
- Easy Customization: You can customize the actions, appearance, and knowledge base of your agents according to specific business needs.
- Seamless Integration: Works with various systems and data sources to enrich the capabilities of your agent.
- Conversational Setup: With Copilot Studio, you don’t need to be an expert. You can build your agent by simply using conversational language.
Disadvantages of Using Autonomous Agents in Copilot Studio
- Learning Curve: While the platform is user-friendly, there may still be a learning curve for beginners in understanding how to structure knowledge and instructions.
- Data Dependency: The performance of your agent depends heavily on the quality and accuracy of the data and knowledge you upload.
- Limited Advanced Features: For more complex use cases, you might find that Copilot Studio's built-in features are somewhat limited compared to other more advanced AI platforms.
Steps to Create Your First Autonomous Agent
Step 1. Login to Copilot Studio

- Open your browser and navigate to the Copilot Studio platform.
- Enter your credentials and log in to your account.
Step 2. Open the Home Page.
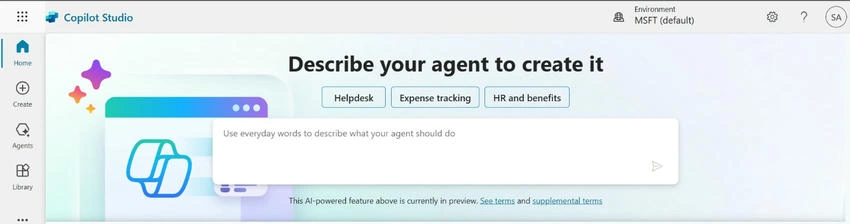
Once logged in, you’ll be directed to the home page of Copilot Studio, where you can start creating your agent.
Step 3. Click the ‘Create’ Button.

On the home page, click the "Create" button to begin building your autonomous agent.
Step 4. Select 'New Agent'.
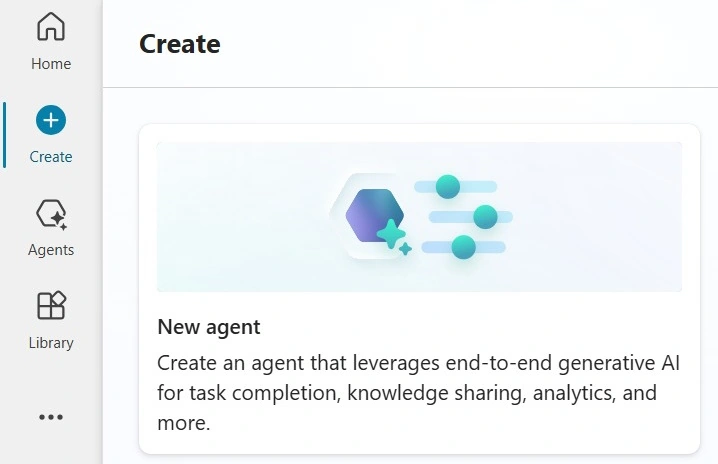
Choose the "New Agent" option. This will allow you to start from scratch and configure your agent according to your needs.
Step 5. Give Your Agent a Name.
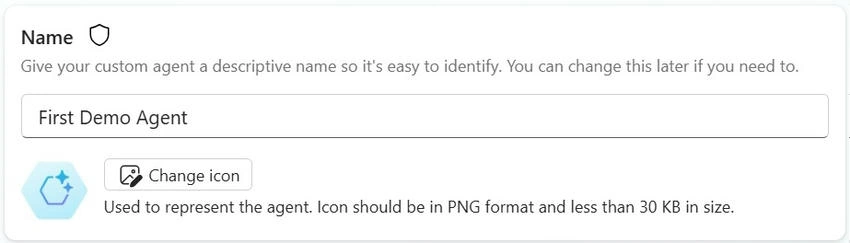
Now, it’s time to name your agent. This name will be used to identify your agent in the Copilot Studio platform. Choose something descriptive to make it easier for you and your team to recognize.
Step 6. Change the Icon (Optional).

You can personalize your agent by changing its icon. Simply upload an image that reflects the agent's function or purpose. This adds a visual touch to your agent’s identity.
Step 7. Add a Description.
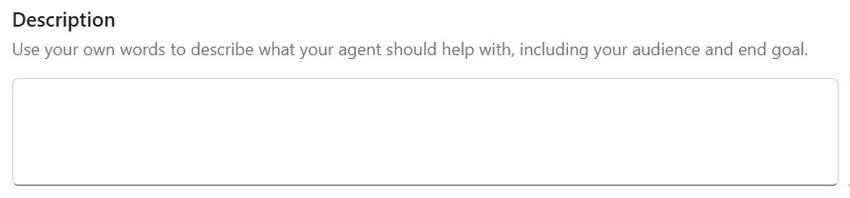
In the description field, explain what your agent is designed to do. Use your own words to describe its purpose, audience, and the end goal it aims to achieve. For example, "This agent helps employees quickly concatenate dynamic column values in a gallery."
Step 8. Provide Instructions.
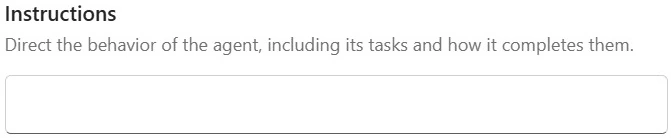
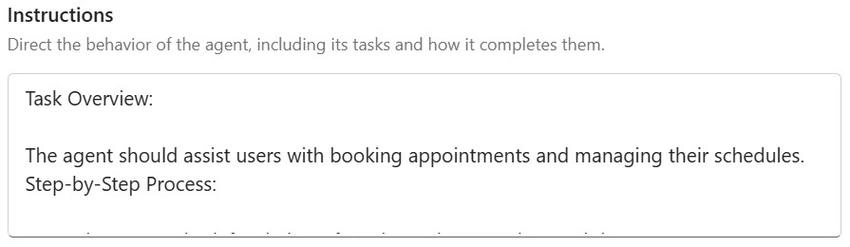
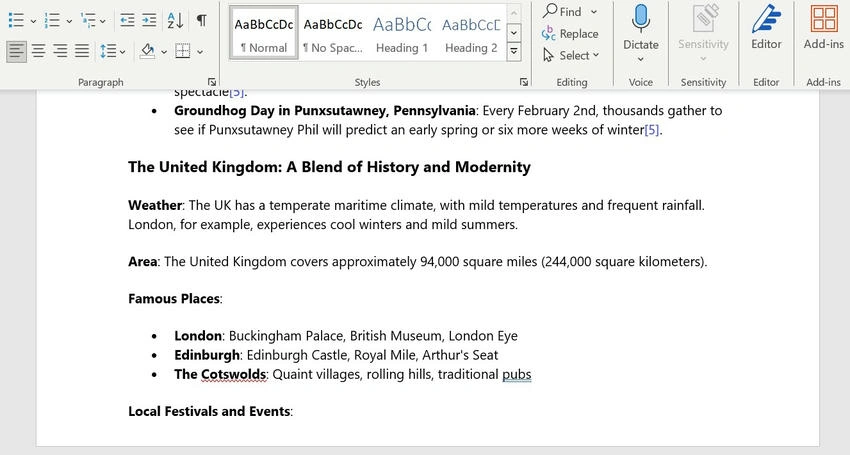
The instructions section is where you define the tasks your agent should perform. Be clear and detailed. For example, if the agent needs to concatenate two columns, specify the columns and the format you expect. The more detailed your instructions, the better the agent will perform.
Step 9. Add Knowledge (The Most Important Step!).
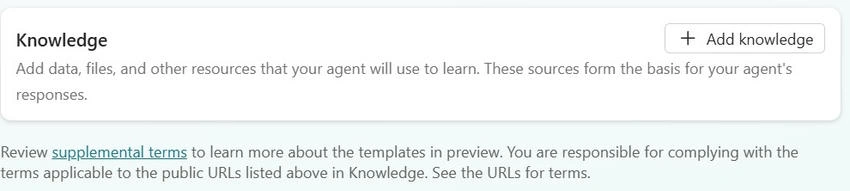
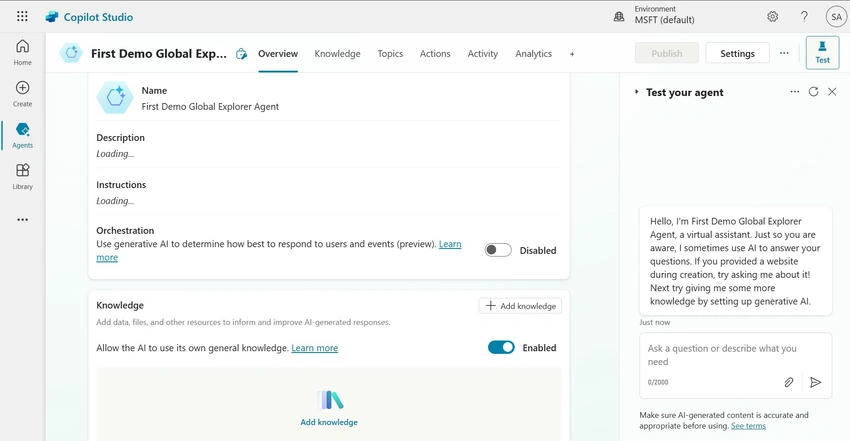
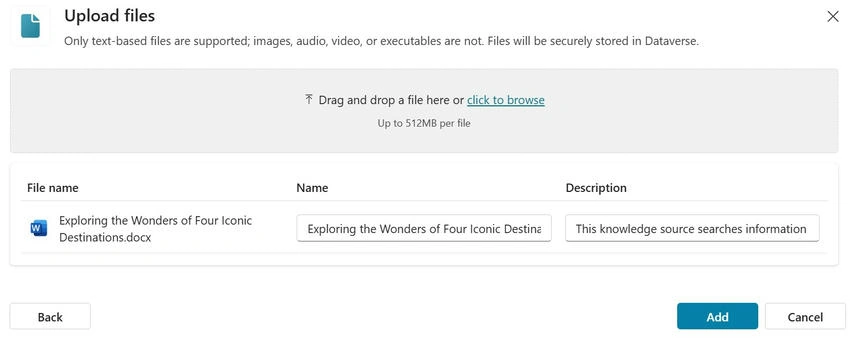
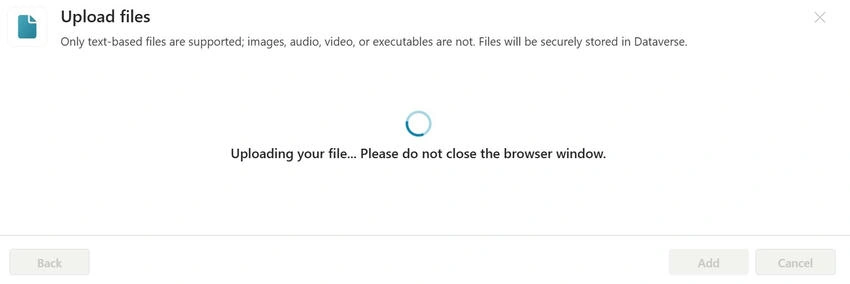
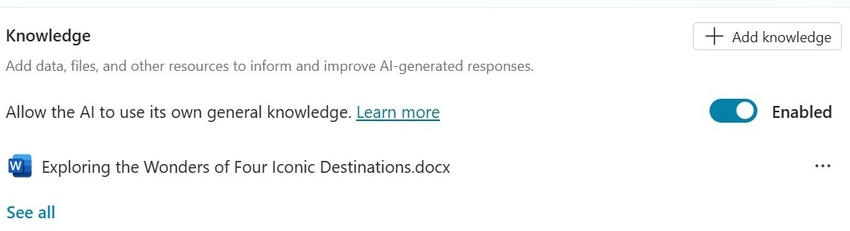
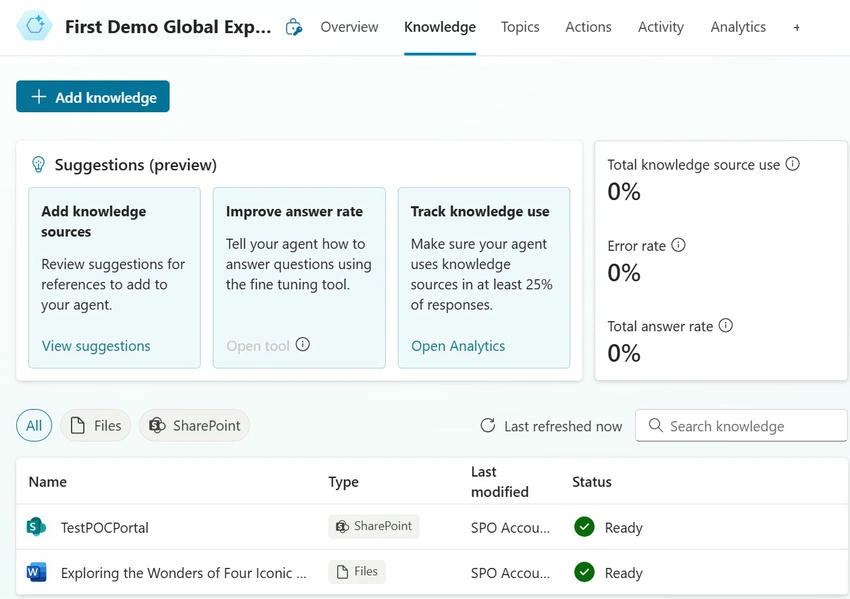
- This is where your agent gets its intelligence. The knowledge base consists of all the files, documents, and data that your agent will use to answer queries and perform tasks.
- You can upload Word files, Excel spreadsheets, or even point to data in SharePoint or other sources. This data forms the basis for the agent’s responses.
- Knowledge Integration: You can also add specific knowledge sources, like public websites or SharePoint documents, to your agent’s knowledge base.
- Ensure your knowledge is well-organized and relevant to the tasks your agent will handle. You can disable the agent's general AI knowledge to make sure it only references the knowledge you've specifically provided.
Step 10. Select an Action (e.g., Send an Email).

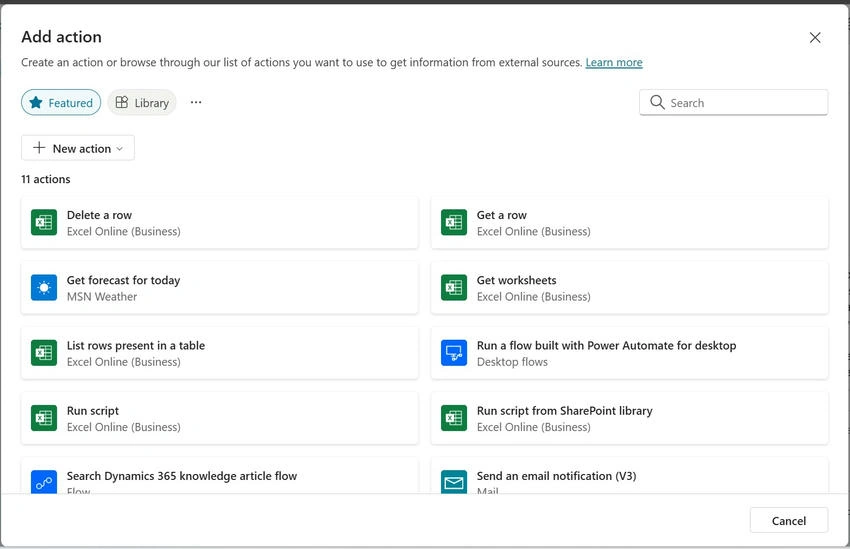
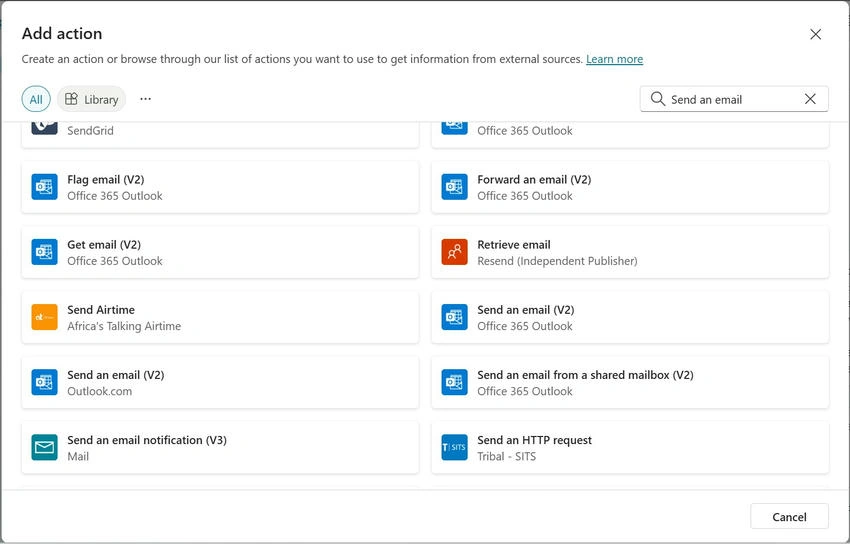
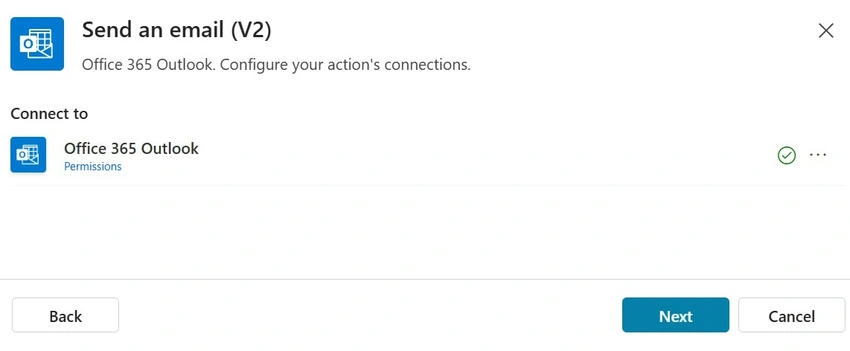
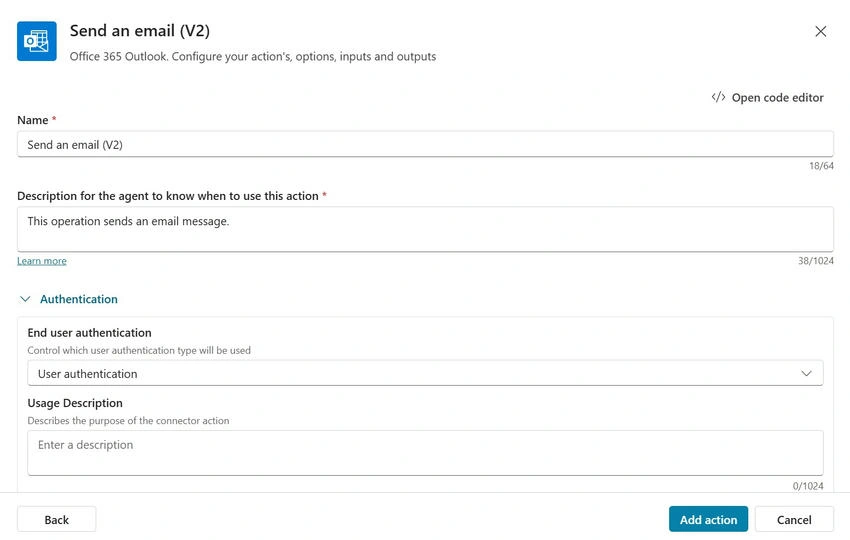
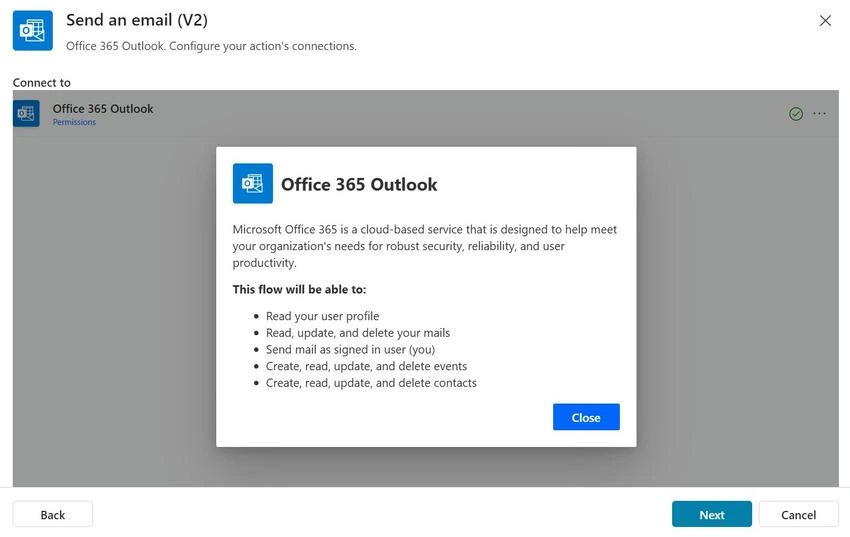
- Now you can define what actions your agent will perform. For example, to have the agent send an email, select the "Send Email V2" action.
- Adding Actions: Actions allow you to empower your agent to complete specific tasks. You can set up actions like sending emails, deleting rows in Excel, or updating databases.
- Configuring Actions: Actions can be customized with specific names, descriptions, and permissions. For instance, you could configure the action to send a summary email of user interactions.
- Dynamic Inputs: The agent can dynamically fill out fields such as email addresses, subjects, and bodies based on the data it processes, making it more efficient.
Step 11. Test Your Agent.
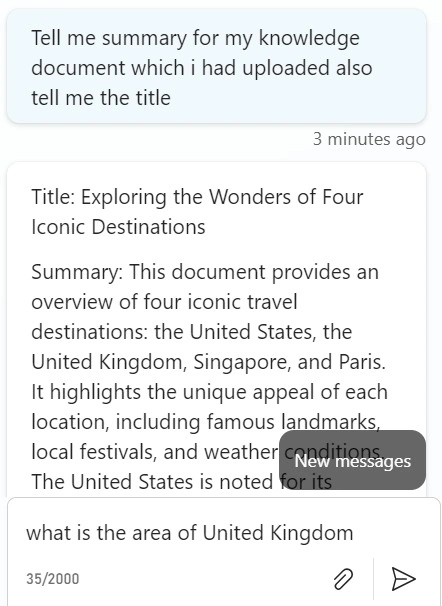
- After configuring your agent, it’s time to test its functionality. Ask some questions based on the knowledge you’ve uploaded. For example, ask, "What is the area of the United Kingdom?" The agent should provide a relevant answer if it has the right knowledge base.
- If everything works well, you’re ready to proceed.
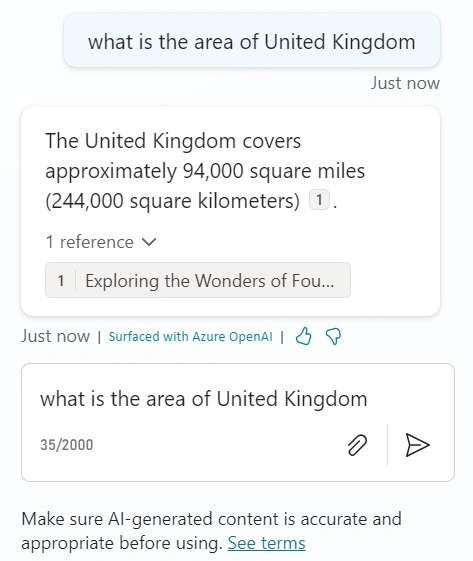
Step 12. Add More Knowledge (If Needed).
If you realize that additional knowledge is required, you can always add more data, such as documents or other resources. These can be uploaded directly or linked from external sources.
Step 13. Check Knowledge Status.
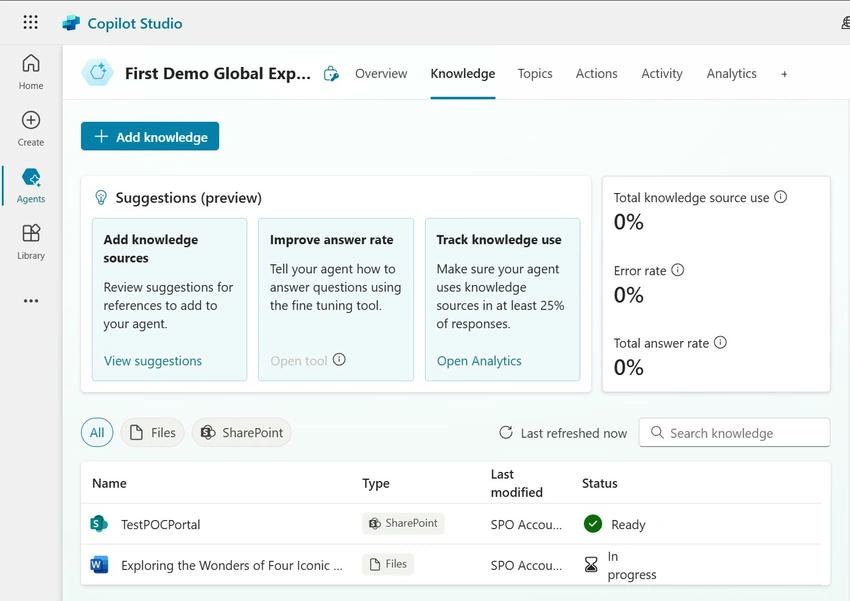
You can track the status of your knowledge under the "Knowledge" tab. Each file you upload will display its status, such as "In Progress" or "Ready". Large files may take longer to process, so be patient.
Step 14. Testing and Validation.
It's important to ensure that your agent is providing the right answers based on the knowledge you've uploaded. You can test the agent by asking questions and verifying the accuracy of its responses.
Step 15. Publishing Your Agent.
- Once you’ve finished configuring your agent and testing it, the final step is publishing it. When your agent is published, it becomes available for use by your team or intended audience.
- After publishing, you can continue to refine it based on feedback and interactions.
Step 16. Test the Agent After Publishing.
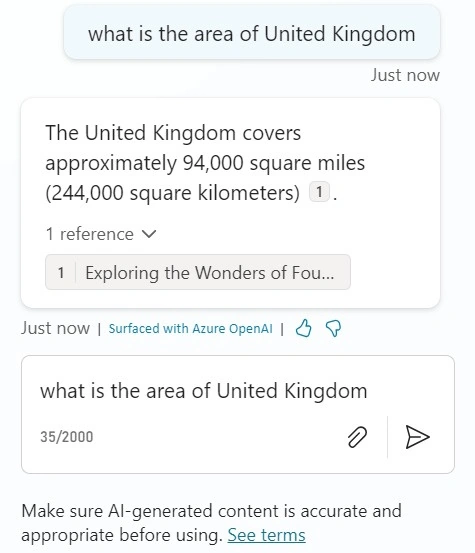
Ask your agent a few more questions to ensure it’s providing accurate answers and functioning as expected. For example, ask, “What is the area of the United Kingdom?” to see if the agent pulls up the correct data from your knowledge base.
Conclusion
Creating an autonomous agent in Copilot Studio can greatly simplify tasks and enhance efficiency. By following the simple steps outlined in this guide, you can quickly build your own agent to perform a variety of tasks—from answering questions to sending emails, all based on the knowledge you upload. Whether you’re using it for business processes or personal automation, Copilot Studio offers an easy-to-use platform for creating intelligent agents that can learn and evolve over time.
With a strong understanding of how to create and configure your agent, you're now ready to harness the full potential of autonomous agents in your workflow.
Tuhin PaulPosted Jan 26, 2025, 6:08 PM
Is there a process for retraining the agent or updating its knowledge base to check it remains accurate and effective?
Tuhin PaulPosted Jan 26, 2025, 6:08 PM
You mentioned that the knowledge base consists of files, documents, and data that the agent uses to answer queries and perform tasks. How does Copilot Studio handle updates to the knowledge base, such as changes to documents or new information being added?
Tuhin PaulPosted Jan 26, 2025, 6:08 PM
Thank you, Shiv Sharma, for this detailed and informative article on creating an autonomous agent in Copilot Studio. Your step-by-step guide is extremely helpful, and the features and benefits of autonomous agents are well-explained.