

Introduction
Before creating a new project in Android we will see the steps to get Google Maps' API Key, which is used in the app to implement the Google Maps.
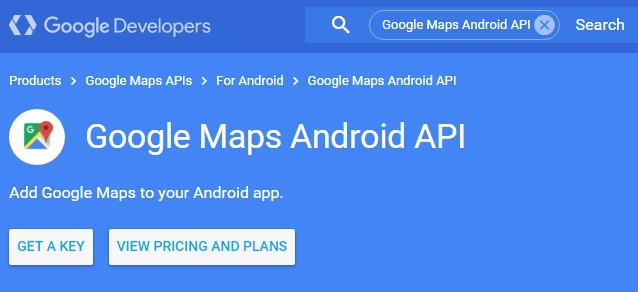
Login in to your Gmail account. Google the word “Google map console in Android.”
Open the URL.
And click on GET A KEY button.
A pop up will open
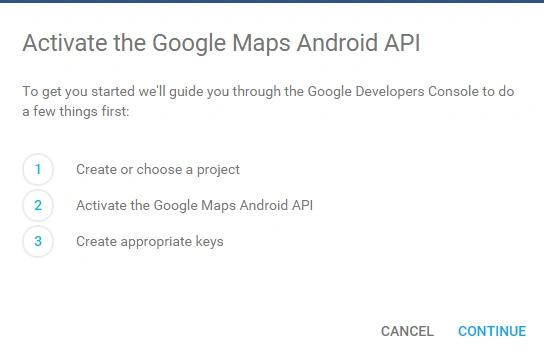
Click on CONTINUE and create a new project.
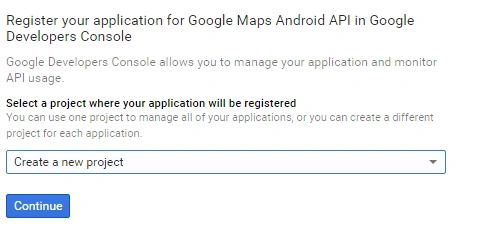
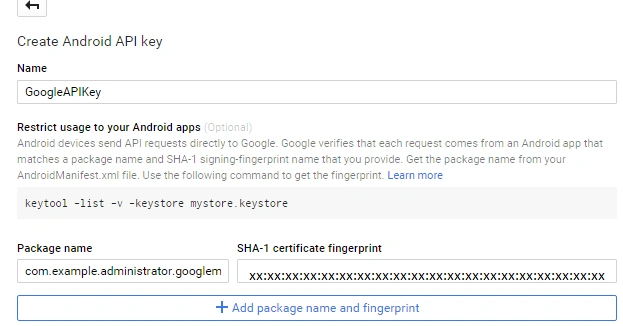
API Manager page will display with two options: Overview and Credentials. In credentials, enter the Android API Key name, package name and SHA-1 certificate fingerprint.
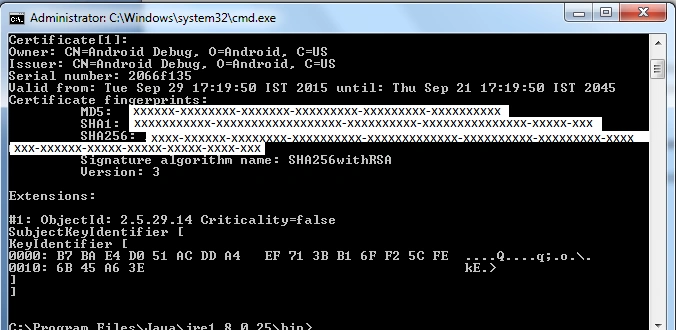
Now we will get SHA-1 certificate fingerprint because it is important. For this, first go to the Java folder of C: drive
C:\Program Files\Java\jre1.8.0_25\bin
Then run the command,
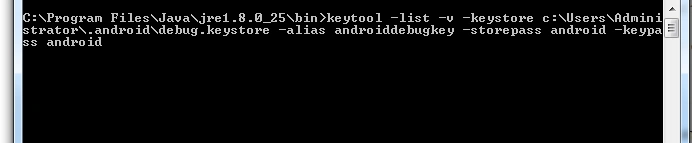
SHA-1 certificate fingerprint will be created.
Enter the SHA-1 certificate fingerprint in the "Create Android API Key" option.
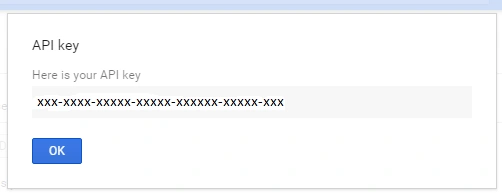
And the API key will be created finally.
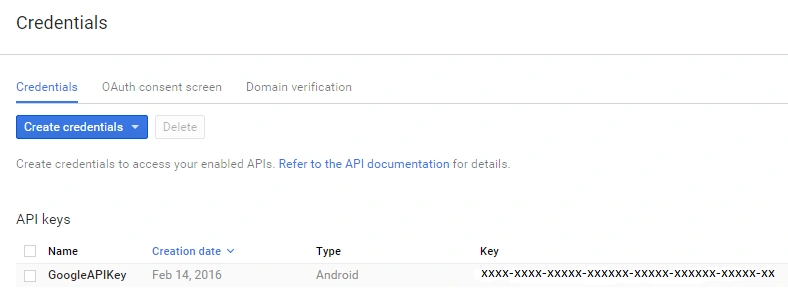
Created credentials will look like the following,
Now create a new project in Android Studio. Click File, New, then New Project.
Enter GoogleMapExample as the application name and create a blank activity.
Google maps need some permissions and features.
Added some tags related to user permission in the Android-Manifest.xml file.
- <uses-permission android:name="android.permission.ACCESS_FINE_LOCATION" />
- <uses-permission android:name="android.permission.INTERNET" />
- <uses-permission android:name="android.permission.ACCESS_NETWORK_STATE" />
- <uses-permission android:name="android.permission.WRITE_EXTERNAL_STORAGE" />
- ACCESS_FINE_LOCATION – It determines user’s location using GPS.
- INTERNET – It checks the internet connection status of the mobile phone.
- ACCESS_NETWORK_STATE – It checks network state whether data can be downloaded or not.
- WRITE_EXTERNAL_STORAGE – It writes to external storage as Google maps store map data in external storage.
Add a meta-data tag just before the activity tag.
- <meta-data
- android:name="com.google.android.geo.API_KEY"
- android:value="@string/google_maps_key" />
- <?xml version="1.0" encoding="utf-8"?>
- <manifest xmlns:android="http://schemas.android.com/apk/res/android"
- package="com.example.administrator.googlemapexample" >
- <uses-permission android:name="android.permission.ACCESS_FINE_LOCATION" />
- <uses-permission android:name="android.permission.INTERNET" />
- <uses-permission android:name="android.permission.ACCESS_NETWORK_STATE" />
- <uses-permission android:name="android.permission.WRITE_EXTERNAL_STORAGE"></uses-permission>
- <application
- android:allowBackup="true"
- android:icon="@mipmap/ic_launcher"
- android:label="@string/app_name"
- android:theme="@style/AppTheme" >
- <uses-library android:name="com.google.android.maps"></uses-library>
- <meta-data
- android:name="com.google.android.geo.API_KEY"
- android:value="@string/google_maps_key" />
- <activity
- android:name=".MainActivity"
- android:label="@string/app_name" >
- <intent-filter>
- <action android:name="android.intent.action.MAIN" />
- <category android:name="android.intent.category.LAUNCHER" />
- </intent-filter>
- </activity>
- </application>
- </manifest>
Add google_map_key defined in above tag in strings.xml file under src, main, then res-values folder as:
- <string name="google_maps_key">xxxxx-xxxxx-xxxx-xxxx-xxxxx-xxxx-xxxxx-xxx</string>
- <fragment
- android:id="@+id/map"
- android:name="com.google.android.gms.maps.SupportMapFragment"
- android:layout_width="match_parent"
- android:layout_height="match_parent"
- tools:context=".MapsActivity" />
- package com.example.administrator.googlemapexample;
- import android.support.v4.app.FragmentActivity;
- import android.os.Bundle;
- import com.google.android.gms.maps.CameraUpdateFactory;
- import com.google.android.gms.maps.GoogleMap;
- import com.google.android.gms.maps.OnMapReadyCallback;
- import com.google.android.gms.maps.SupportMapFragment;
- import com.google.android.gms.maps.model.LatLng;
- import com.google.android.gms.maps.model.MarkerOptions;
- public class MainActivity extends FragmentActivity implements OnMapReadyCallback
- {
- private GoogleMap mMap;
- @Override
- protected void onCreate(Bundle savedInstanceState){
- super.onCreate(savedInstanceState);
- setContentView(R.layout.activity_main);
- /*Obtain the SupportMapFragment and get notified when the map is ready to be used. */
- SupportMapFragment mapFragment = (SupportMapFragment)
- getSupportFragmentManager().findFragmentById(R.id.map);
- mapFragment.getMapAsync(this);
- }
- @Override
- public void onMapReady(GoogleMap googleMap){
- mMap = googleMap;
- /* Show type of Google Map.*/
- mMap.setMapType(GoogleMap.MAP_TYPE_HYBRID);
- /* Show your current location.*/
- mMap.setMyLocationEnabled(true);
- /* Enable zooming controls.*/
- mMap.getUiSettings().setZoomControlsEnabled(false);
- /* Enable my location button.*/
- mMap.getUiSettings().setMyLocationButtonEnabled(true);
- /* Enable Compass icon.*/
- mMap.getUiSettings().setCompassEnabled(true);
- /* Enable Rotate gesture.*/
- mMap.getUiSettings().setRotateGesturesEnabled(true);
- /* Enable zooming functionality.*/
- mMap.getUiSettings().setZoomGesturesEnabled(true);
- /* Add a marker.*/
- LatLng delhi = new LatLng(28.7373, 77.091);
- mMap.addMarker(new MarkerOptions().position(delhi).title("Delhi"));
- mMap.moveCamera(CameraUpdateFactory.newLatLng(delhi));
- mMap.animateCamera(CameraUpdateFactory.newLatLng(delhi));
- }
- }
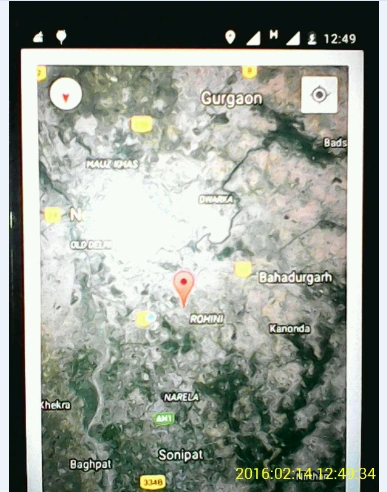
Run the app in emulator or device:
Read more articles on Android
Kashif SohailPosted Mar 26, 2016, 11:22 PM
Very Nic
kalu singh raoPosted Mar 16, 2016, 12:12 PM
Nice...
Gaurav KumarPosted Feb 24, 2016, 3:09 AM
very nice explanation Pradip Pandey sir
Nimit JoshiPosted Feb 18, 2016, 11:27 PM
Nice one sir...
Ehsan SajjadPosted Feb 18, 2016, 1:14 PM
Nice work
Atul RawatPosted Feb 18, 2016, 7:49 AM
nice article sir
Sibeesh VenuPosted Feb 18, 2016, 12:10 AM
Nice Share
Humayun Kabir MamunPosted Feb 16, 2016, 10:58 PM
Nice...
Santhakumar MunuswamyPosted Feb 16, 2016, 2:37 PM
Thanks for nice article. keep it up
Kumaresh RajalingamPosted Feb 16, 2016, 10:02 AM
Nice share
Shubham KumarPosted Feb 16, 2016, 6:45 AM
nice