

GridViews are useful for displaying data from a database. A GridView allows us to display items in the two-dimensional grid. It is mostly used to build video, image, audio galleries and so on and it provides us more flexibility for displaying and working with data from the database compared to other controls. The GridView Control enables us to connect to a Data Source and display the data in tabular format. The GridView control displays the values of a data source in a table. The GridView control supports the following features:
- Multiple fields for the hyperlink columns.
- Multiple key fields.
- Built-in sort capabilities.
- Built-in paging capabilities.
- Customizable appearance through themes and styles.
This article shows how to use a GridView control in ASP.NET using C# code. So in this we will perform the following operations on GridView.
- Edit Data in GridView.
- Update Data in GridView.
- Delete rows in GridView.
- Bind data in GridView column.
Step 1
Start Visual Studio.
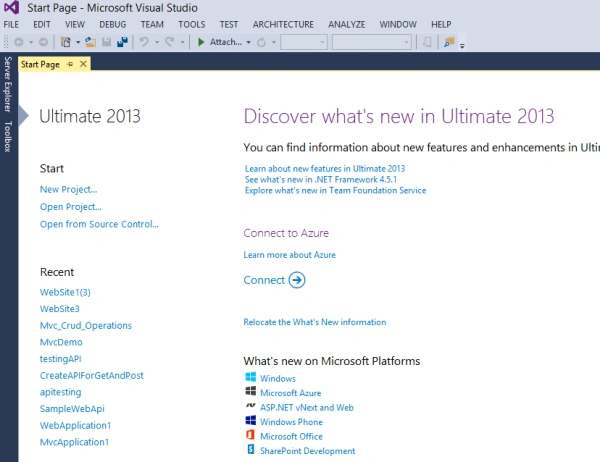
Figure 1: Start Visual Studio
Now for creating a website, click on File, go to New and click on Website.
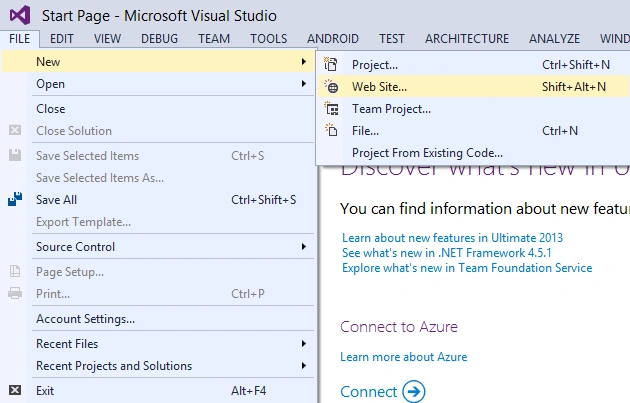
Figure 2: Create Website
Now add the Web Form by right-clicking on the website and then provide the name for the Web Form just added.
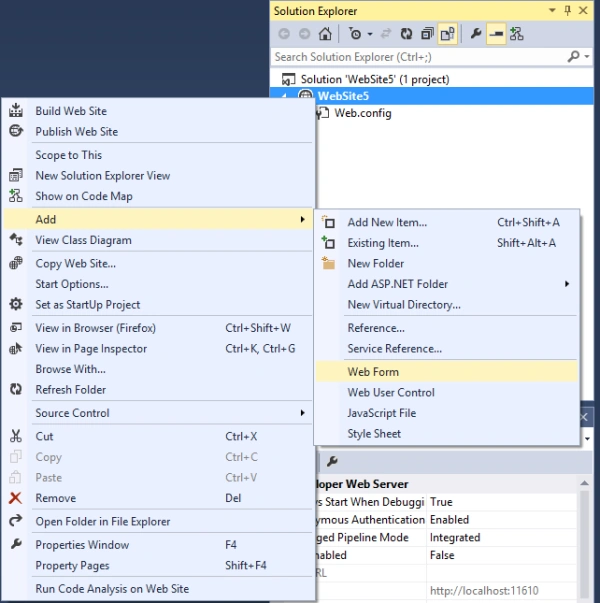
Figure 3: Add the Web Form
After adding the Web Form we will take the GridView control and design the Web Form as in the following:
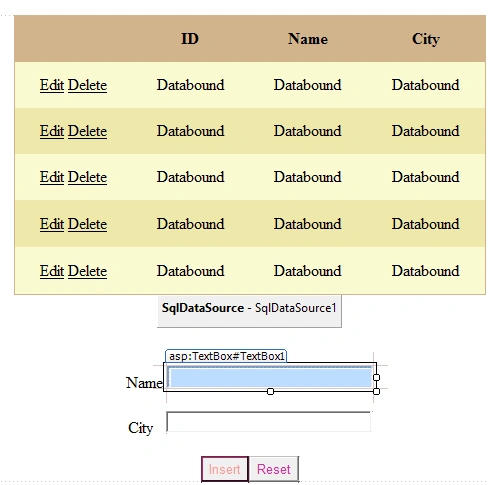
Figure 4: Design Form
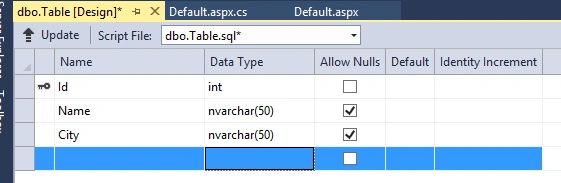
Figure 5: Create Table
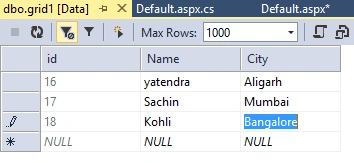
Figure 6: Insert Data
After creating the table, we need to write the following code in the Default.aspx page.
- <%@ Page Language="C#" AutoEventWireup="true" CodeFile="Default.aspx.cs" Inherits="_Default" %>
- <!DOCTYPE html>
- <html xmlns="http://www.w3.org/1999/xhtml">
- <head runat="server">
- <title></title>
- <style type="text/css">
- .auto-style1
{ - text-align: center;
- }
- </style>
- </head>
- <body>
- <form id="form1" runat="server">
- <center>
- <div>
- <asp:GridView ID="GridView1" runat="server" AutoGenerateColumns="False" AutoGenerateDeleteButton="True" AutoGenerateEditButton="True" BackColor="LightGoldenrodYellow" BorderColor="Tan" BorderWidth="1px" CellPadding="2" DataSourceID="SqlDataSource1" ForeColor="Black" GridLines="None" Height="280px" Width="472px">
- <AlternatingRowStyle BackColor="PaleGoldenrod" />
- <Columns>
- <asp:BoundField DataField="ID" HeaderText="ID" SortExpression="ID" />
- <asp:BoundField DataField="Name" HeaderText="Name" SortExpression="Name" />
- <asp:BoundField DataField="City" HeaderText="City" SortExpression="City" />
- </Columns>
- <FooterStyle BackColor="Tan" />
- <HeaderStyle BackColor="Tan" Font-Bold="True" />
- <PagerStyle BackColor="PaleGoldenrod" ForeColor="DarkSlateBlue" HorizontalAlign="Center" />
- <SelectedRowStyle BackColor="DarkSlateBlue" ForeColor="GhostWhite" />
- <SortedAscendingCellStyle BackColor="#FAFAE7" />
- <SortedAscendingHeaderStyle BackColor="#DAC09E" />
- <SortedDescendingCellStyle BackColor="#E1DB9C" />
- <SortedDescendingHeaderStyle BackColor="#C2A47B" />
- </asp:GridView>
- <asp:SqlDataSource ID="SqlDataSource1" runat="server" ConnectionString="<%$ ConnectionStrings:yatendraConnectionString %>" SelectCommand="SELECT * FROM [grid1]" UpdateCommand="update [grid1] set [name]=@name,city=@city where [ID] = @ID " DeleteCommand="DELETE FROM [grid1] WHERE [ID] = @ID ">
- </asp:SqlDataSource>
- <br />
- <br />
- <div class="auto-style1">
- <label>
- Name
- </label>
- <asp:TextBox ID="TextBox1" runat="server" Width="198px"></asp:TextBox>
- <br />
- <br />
- <label>
- City
- </label>
- <asp:TextBox ID="TextBox2" runat="server" Width="198px" style="margin-left: 9px"></asp:TextBox>
- <br />
- <br />
- <asp:Button ID="Button1" runat="server" Text="Insert" OnClick="Button1_Click" BorderColor="#993366" ForeColor="#FF9999" />
- <asp:Button ID="Button2" runat="server" Text="Reset" OnClick="Button2_Click" ForeColor="#CC3399" />
- </center>
- </div>
- </div>
- </form>
- </body>
- </html>
In the Default.aspx page we will add the following two namespaces.
using System.Data;
using System.Data.SqlClient;
After writing the code on default.aspx page we will write the following code on Button1_Click.
- protected void Button1_Click(object sender, EventArgs e)
- {
- SqlConnection con = new SqlConnection("Data Source=MCNDESKTOP34;Initial Catalog=yatendra;Persist Security Info=True;User ID=sa;Pa ssword=Password$2");
- con.Open();
- SqlCommand cmd = con.CreateCommand();
- cmd.CommandType = CommandType.Text;
- cmd.CommandText = "insert into grid1 values ('" + TextBox1.Text + "','" + TextBox2.Text + "')";
- cmd.ExecuteNonQuery();
- Response.Write("Data Inserted Sucessfully");
- con.Close();
- Response.Redirect("default.aspx");
- }
Step 7
Now we will execute the website by using the F5 key. After execution, the following window appears on the screen.
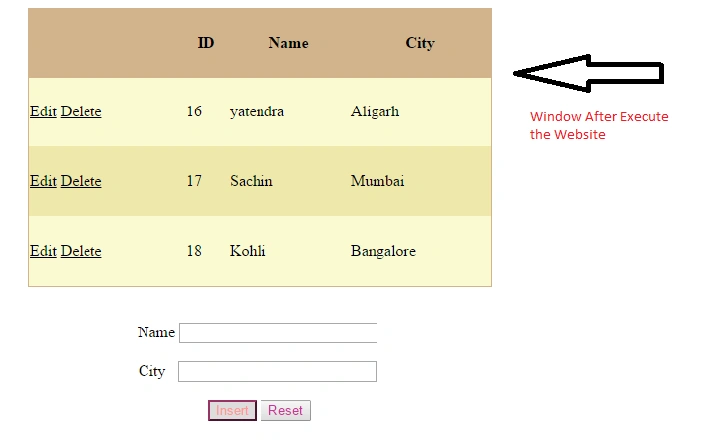
Figure 7: Execute Form
Now we need to ensure that GridView edit, update and delete operations are working. When we provide the values in the Name and City textboxes and click on the insert button, we will get the following window:
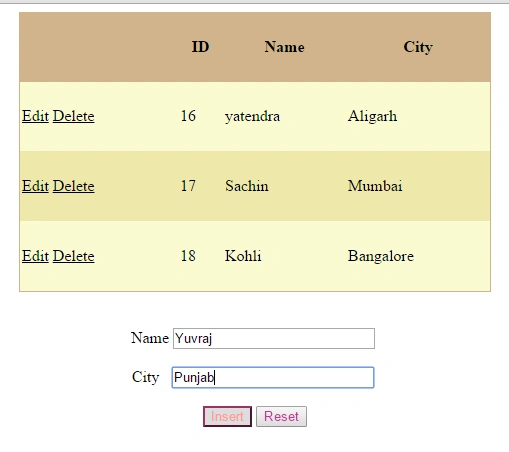
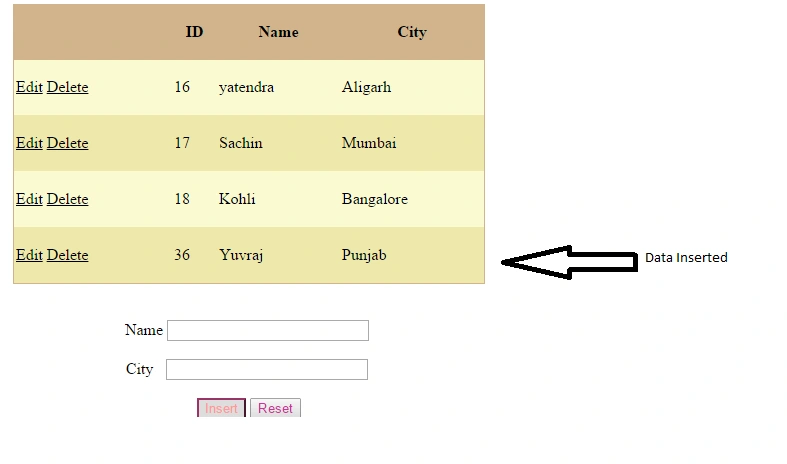
So the data is inserted successfully into the GridView as well as in the database.
Step 9
Now we need to perform another operation of deletion. For this, clicking on the delete button will delete the data successfully as in the following screenshot.
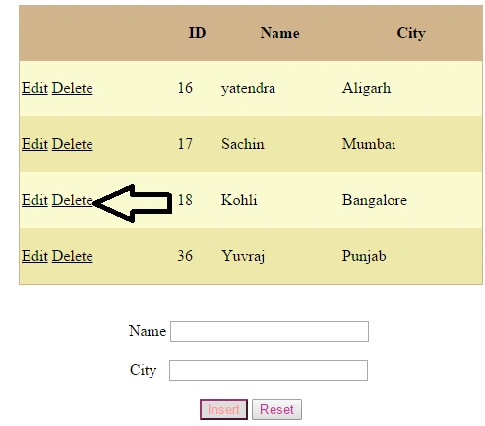
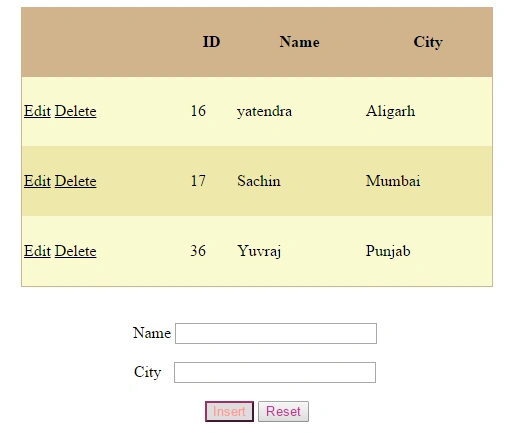
Step 10
Now we will perform the edit operation in the GridView.
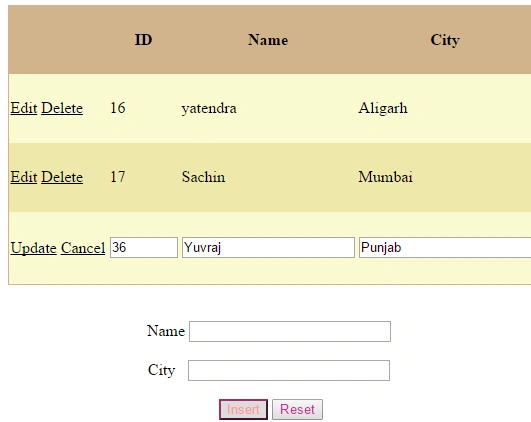
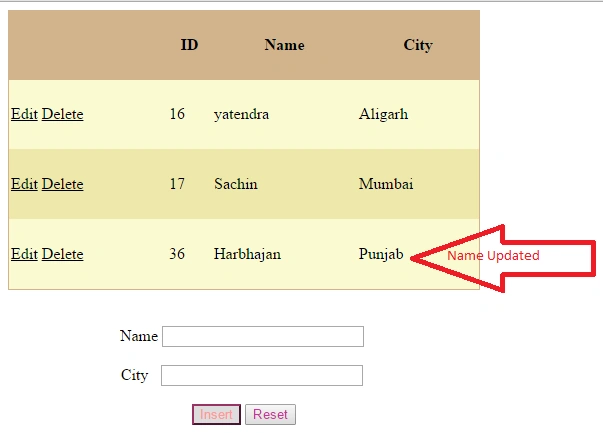
Figure 13: Data Updated
Summary
In this article, I explained how to perform the insert, update and delete operations in GridView. Now, you can easily perform these operations in your projects.
I hope this article will be helpful for beginners if they want to perform insert, update and delete operations in their project to make it more effective.
Yatendra SharmaPosted Jun 6, 2015, 11:03 AM
Thanks
Santhakumar MunuswamyPosted Jun 6, 2015, 2:44 AM
Thanks for nice article
Yatendra SharmaPosted Jun 5, 2015, 4:02 AM
Sibeesh Venu thanx
Sibeesh VenuPosted Jun 5, 2015, 1:44 AM
Good one.