

Introduction
The Azure Data Studio extension provides a simple way to add additional features to Azure Data Studio to work more efficiently. Each extension in Azure Data Studio will improve your experience in a different way. But, the entry points for each extension can be different.
If you are a beginner and want to know about Azure Data Studio? Then, read my previous detailed articles on the topic:
This tutorial will show the various steps on, how to add extensions to Azure Data Studio.
Step 1
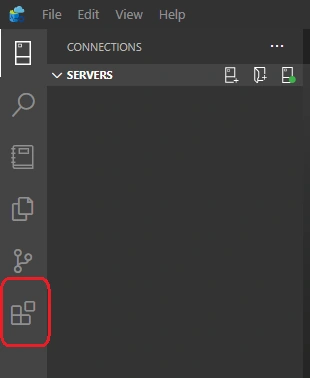
Open the "Extensions Manager" by clicking on the "Extensions" icon. (Alternatively, you can access the available extensions by pressing the "Ctrl + Shift + X" key).
Note
You can also access the available extension by navigating, View > Extensions.
Step 2
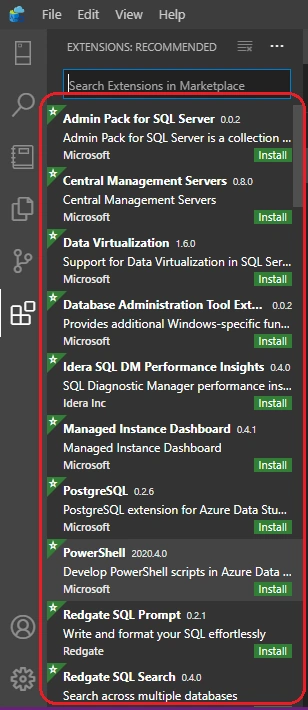
Now, a list of available extensions will appear and select an extension to view its details.
Step 3
Click on the "Install" button to install it.
Step 4
Restart/Reload your Azure Data Studio to enable the extension. (It is required to install the extension for the first time).
Now, I will show you the installation and uses of some extensions which are recommended by Azure Data Studio (Microsoft).
SQL Server Import
The SQL Server Import extension is used by data professionals to convert .txt and.csv files to a SQL database. The Import Flat File Wizard is often used to make the task easier to copy data from a flat .csv file or .txt file to a new table of your targeted database in Azure Data Studio.
Install the SQL Server Import Extension
Step 1
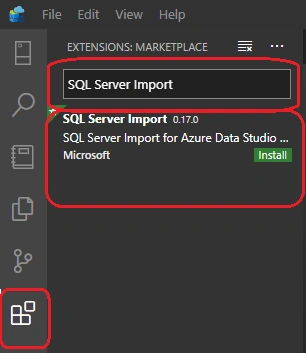
Press the "Ctrl + Shift + X" key to open the "Extensions Manager" and select the "SQL Server Import" by searching it.
Step 2
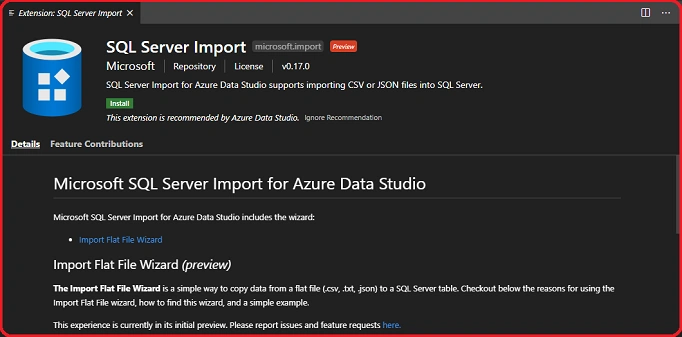
Select it and click on the "Install" button to install it. (Reload of the application must be required to work it properly).
Start Import Wizard
Follow the below instructions to import the data from any file to the SQL table.
Step 1
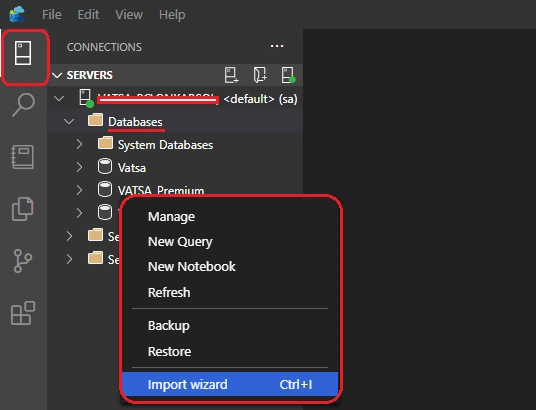
Navigate to the database that you want to import a file into a SQL table.
Step 2
Right-click on the database and select "Import Wizard".
Step 3
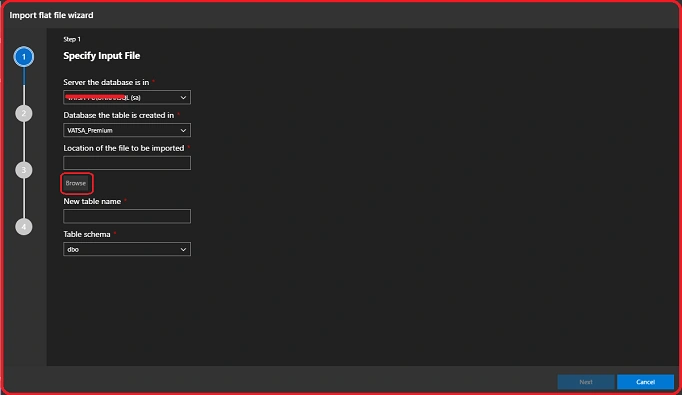
"Import file flat wizard" window will appear on the screen and the server and database names are filled automatically. Also, you can change them manually.
Step 4
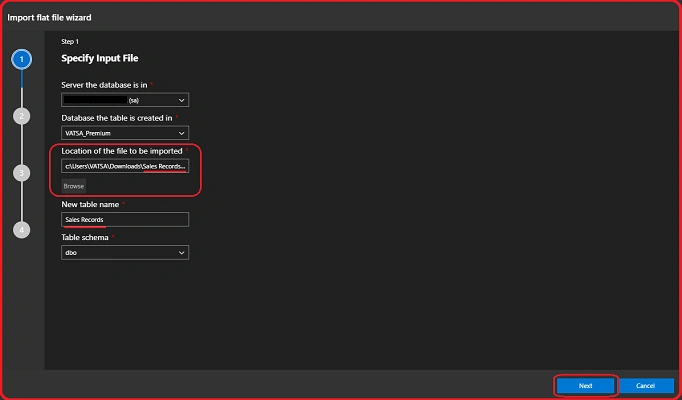
Now, select the file (.csv) by clicking on the "Browse" button. (Here, I am showing you the import of data via a dummy sales record file (.csv), which I have attached here).
Note
Based on the name of your file that you have selected, the "New table name" will fill automatically. Also, you can set the "New Table name" manually.
Step 5
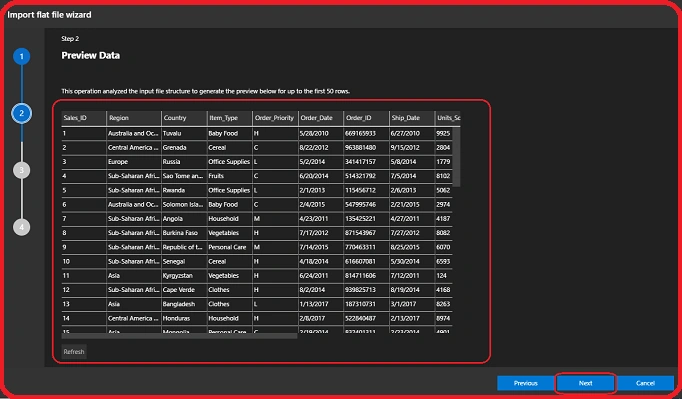
Now, based on the analysis of your input file structure, it will generate a preview for the first 50 rows. Click on the "Next" button to continue.
Step 6
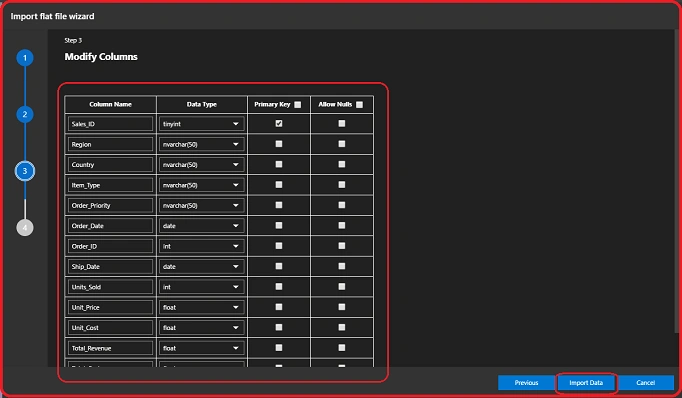
Here, you can modify the column name and its data type as per your need. Click on the "Import Data" button to proceed.
Step 7
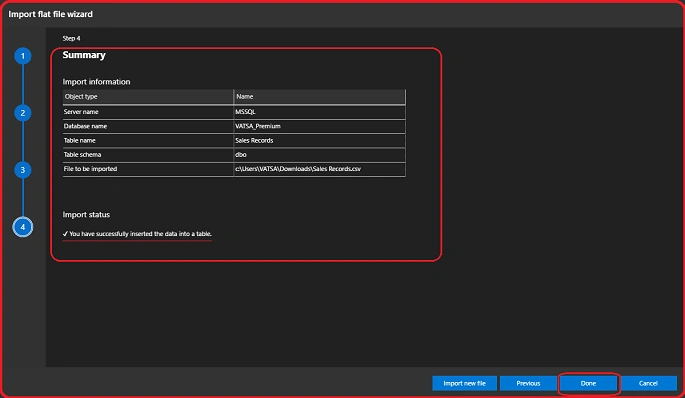
A summary of your actions will display in front of you. Click on the "Done" button to finish your data importation from .csv file to SQL Table.
Now, it's time to verify the table whether it has been successfully imported or not, by running a SELECT query or refreshing the database.
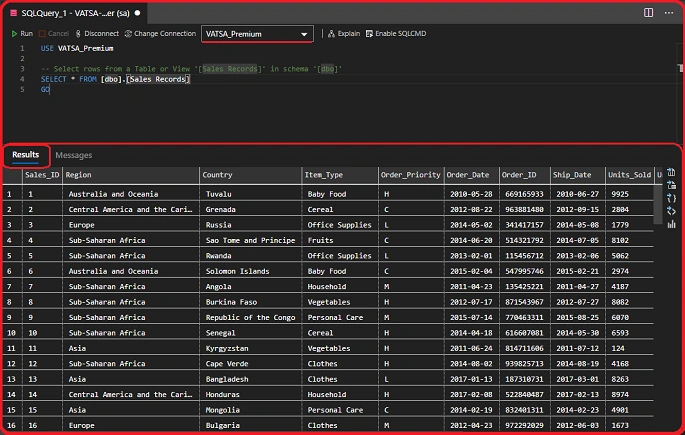
Congratulations! you have successfully imported the .csv file to SQL Table in Azure Data Studio.
SQL Server Profiler
SQL Server Profiler provides a basic SQL Server tracking method that is similar to SQL Server Management Studio (SSMS) Profiler. SQL Server Profiler is simple to use and has strong default values for the most common settings for tracing. The UX is designed for accessing the related Transact-SQL (T-SQL) text and browsing through events. Azure Data Studio's SQL Server Profiler often assumes reasonable default values to collect T-SQL execution events with an easy-to-use UX.
Popular use-cases for the SQL Server profiler,
- Move via debugging queries to identify the source.
- Slow-running queries can be find-out and diagnose.
- Capturing the Transact-SQL series of statements leading to a problem.
- Correlating the counters for performance to diagnose issues.
Install the SQL Server Profiler Extension
Step 1
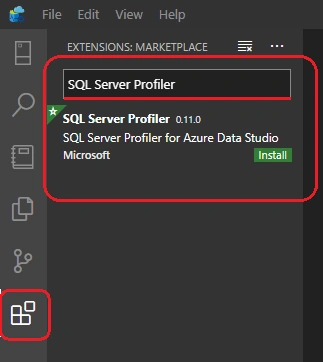
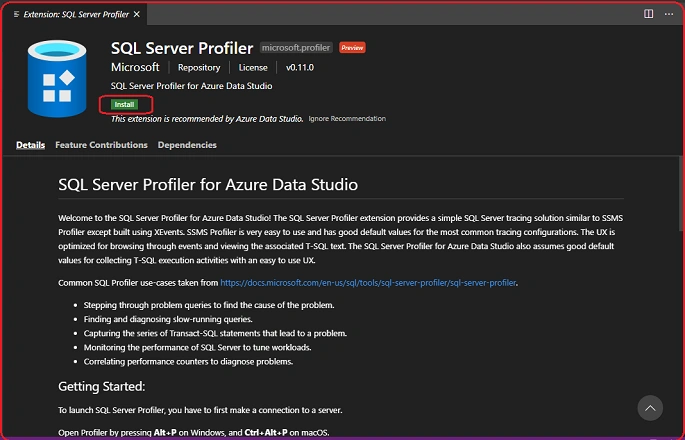
Press the "Ctrl + Shift + X" key to open the "Extensions Manager" and select the "SQL Server Profiler" by searching it.
Step 2
Select it and click on the "Install" button to install it. (Reload of the application must be required to work it properly).
Start Profiler
Follow the below instructions to launch the profiler.
Step 1
To launch the SQL Server Profiler, first, you have to make a connection to the server.
Step 2
Open the Profiler by pressing the "Alt + P" key.
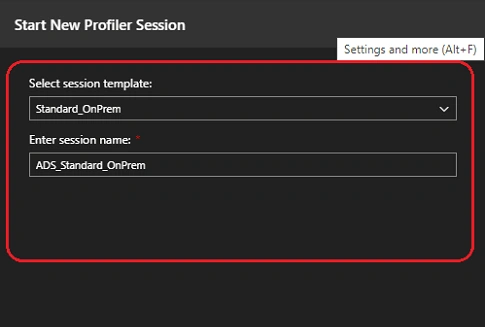
Now, from the drop-down menu, select the session template as per your need.
- Choose the "Standard_OnPrem" option to track the SQL Server.
- Choose the "Standard_Azure" option to track Azure SQL DB.
- Choose the "TSQL_OnPrem" option to track the T-SQL statements.
Step 3
Start the Profiler by pressing the "Alt + S" key.
Step 4
After, completion of the work with SQL Profiler, stop it by using the "Alt + S" key.
Reference
https://docs.microsoft.com/en-us/sql/azure-data-studio/?view=sql-server-ver15
Conclusion
In this article, we discussed how to add extensions to Azure Data Studio by adding the popular two extensions.
I hope you enjoyed this article. Follow C# Corner to learn more new and amazing things about Microsoft Azure.
Thanks for reading!
Roshan RathodPosted Jul 22, 2020, 2:05 AM
Good keep it up..going good