Have you ever built a Power Pages site and wanted different users to see different pages? Our goal is to restrict web pages based on roles. For example, we want our basic local users to only see normal documents, but we want our team members using MS Entra ID to see a hidden admin page.
Assigning these roles by hand takes way too much time. Let us look at how to build custom roles from scratch and automate the whole process using Power Automate!
Step 1: Create Custom Roles from Scratch
First, we need to build the actual roles. We will do this in the backend engine room.
- Open the Power Pages Management app.
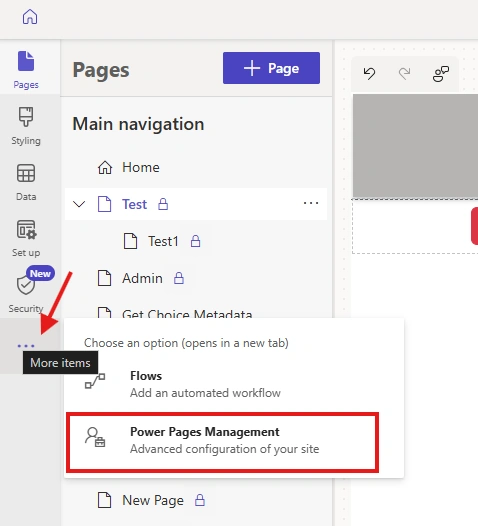
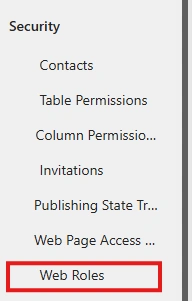
- On the left menu, click on Security -> Web Roles.
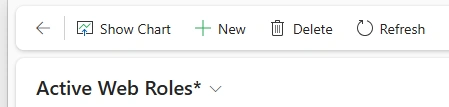
- Click New at the top to make your first role.
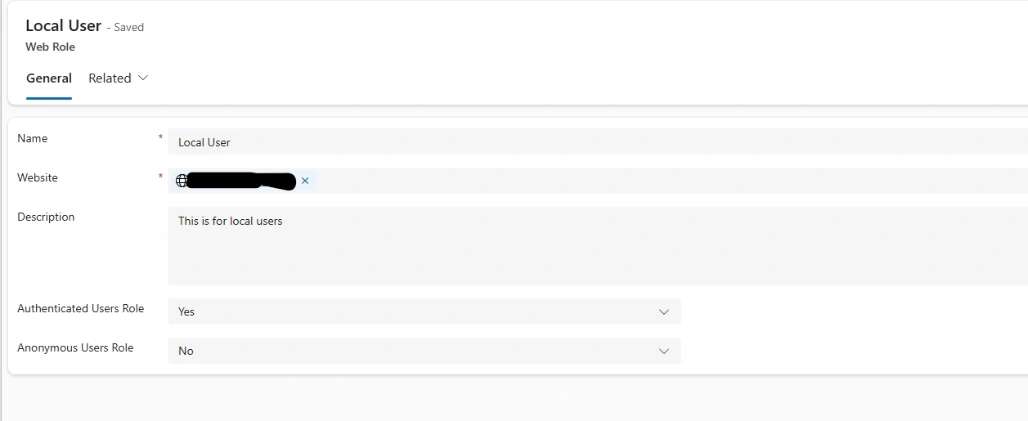
- Name it Local User, pick your website, and click Save.
- Click New again to make your second role.
- Name it Admin, pick your website, and click Save.
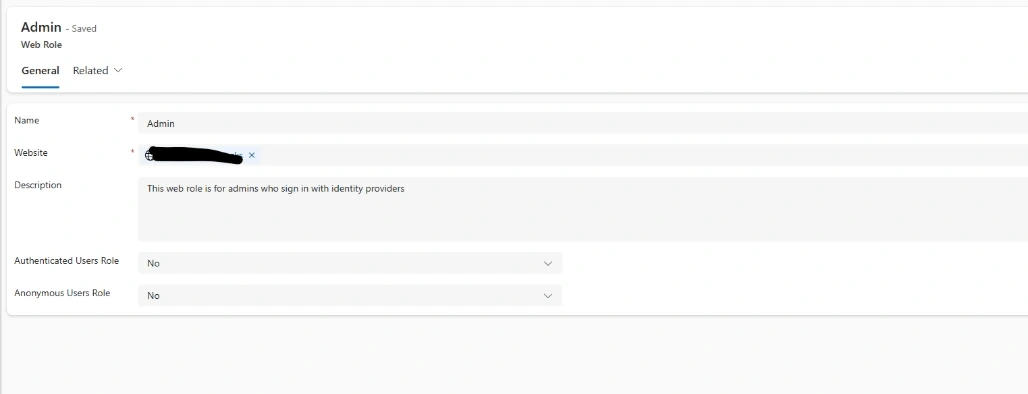
Step 2: Set up the Automatic Ticket Dispenser
In Power Pages, there is a setting called Authenticated Users Role. This acts like an automatic ticket dispenser at the front door. If it is turned on, the system hands that role to every single person who logs in.
This is where we can save a lot of time.
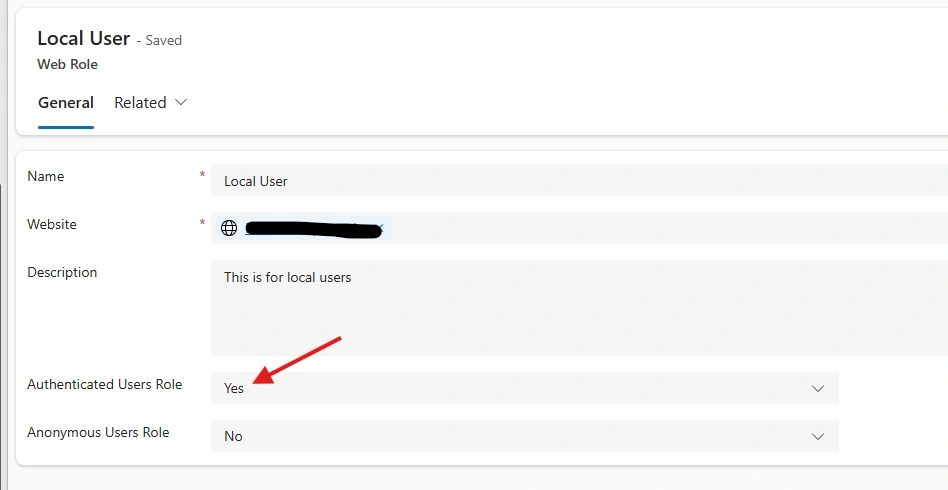
- Open your Local User web role. Change the Authenticated Users Role setting to Yes. Now, anyone who signs in gets this basic access ticket automatically.
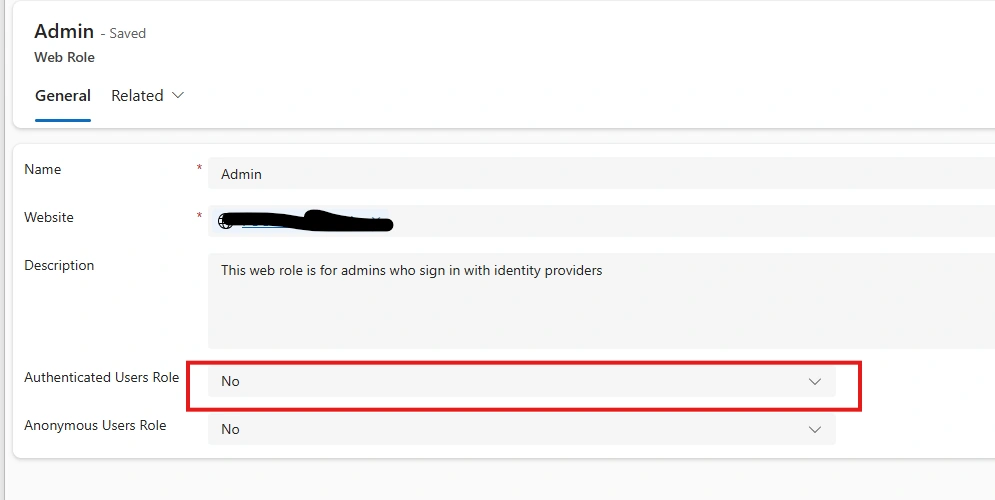
- Open your Admin web role. Change the Authenticated Users Role setting to No. This keeps the VIP pass hidden behind the counter so normal users cannot get it.
Step 3: Lock down your Secret Pages
Now we need to tell Power Pages that the Admin page belongs strictly to the Admin role. The easiest way to do this is right inside the design studio.
- Go to your Power Pages design studio.
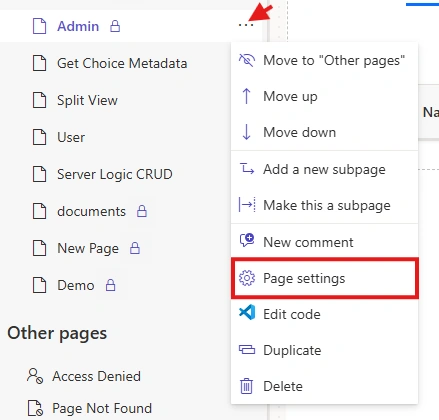
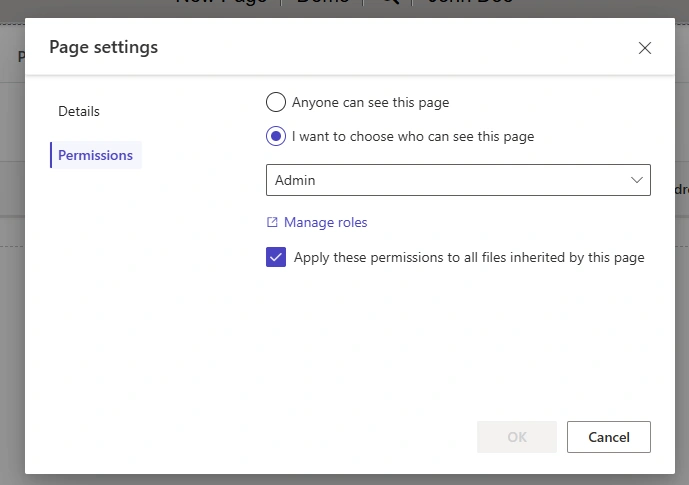
- Click the three dots next to your Admin page and select Page settings.
- Click the Permissions tab.
- Choose I want to choose who can see this page.
- Select your Admin role from the drop-down list.
Step 4: Automate Roles for Local Users
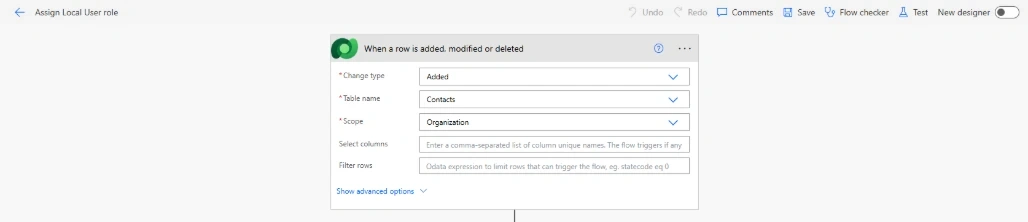
Now let us build a flow to give the Local User role to people who sign up directly on your website. When a local user registers, Power Pages creates a new Contact record for them.
- Open Power Automate and create a new Automated cloud flow.
- The Trigger: Choose the Dataverse trigger called When a row is added, modified or deleted.
- Set the Change type to Added.
- Set the Table name to Contacts.
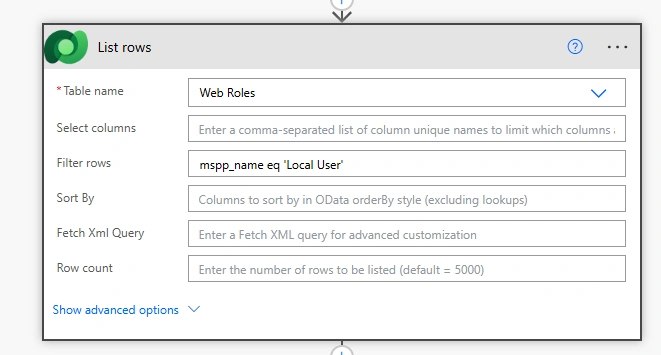
- Get created 'Local User' web role from Web roles table.
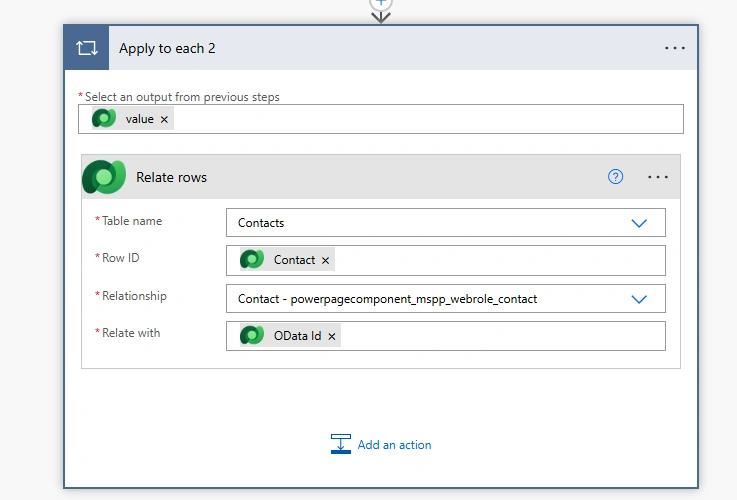
- Add the Dataverse action called Relate rows. We use this to attach the Local User web role to the new contact. here contact table have many-to-many relationship with Web roles table that's why we are using Relate rows action in it.
Step 5: Automate Roles for External MS Entra ID Users
Finally, we need a flow to hand the Admin role specifically to team members who sign in using MS Entra ID. When an external user signs up, Power Pages logs them in a special table called External Identities.
- Open Power Automate and create a new Automated cloud flow.
- The Trigger: Choose the Dataverse trigger called When a row is added, modified or deleted.
- Set the Change type to Added.
- Set the Table name to External Identities.
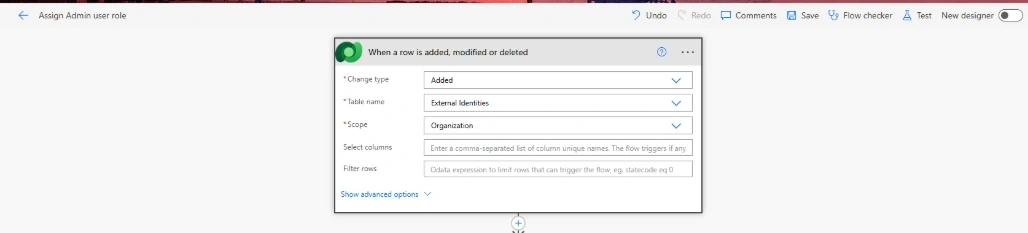
- Add this actions - Get row by Id for retrieve created contact user details , List rows for retrieving web role of Admin.
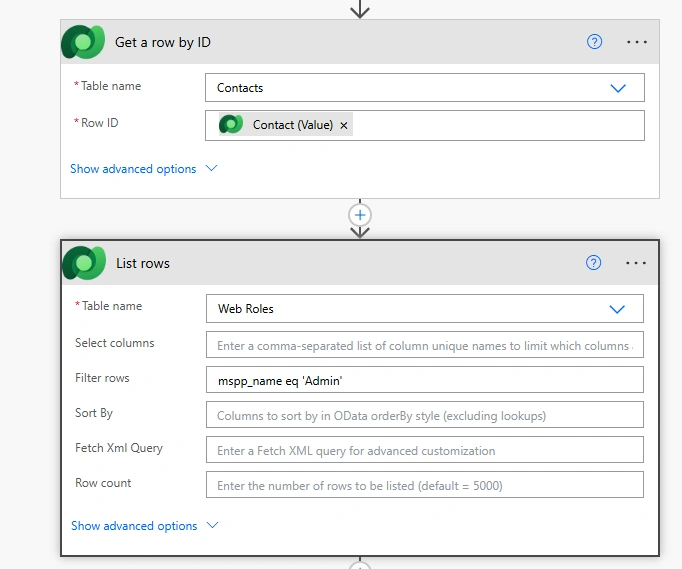
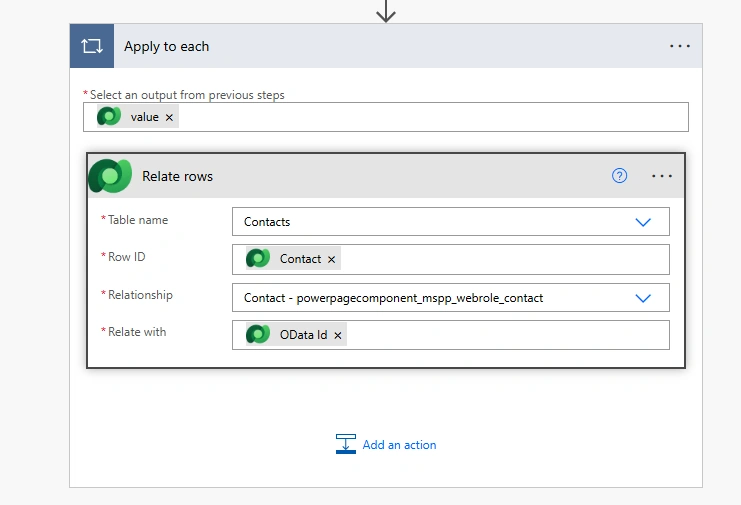
- Now do same for assign admin role like add the Dataverse action called Relate rows. We use this to attach the Local User web role to the new contact. here contact table have many-to-many relationship with Web roles table that's why we are using Relate rows action in it.
Turn the flow on, and your work is done. When a new person registers, they automatically get the Local User role. If they came from Entra ID, Power Automate steps in and hands them the Admin VIP pass.
Note: If you test this, just remember to sign out of your portal completely and sign back in so the system can refresh and see your brand-new permissions!
Final Result
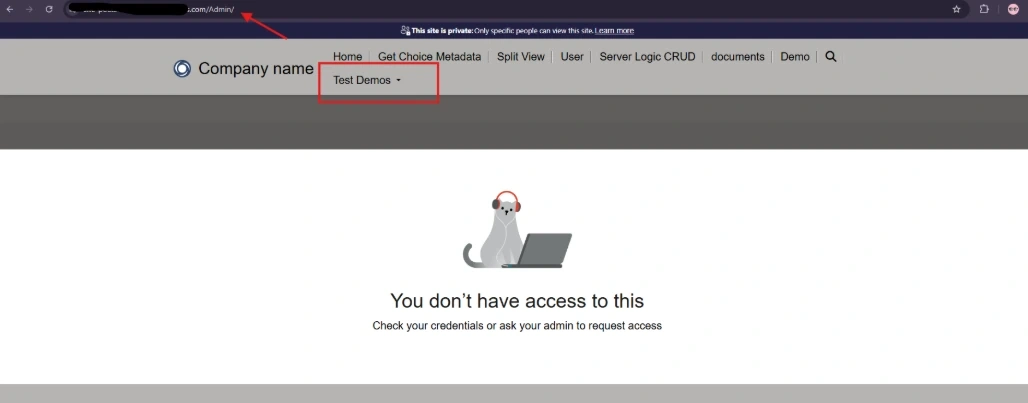
As i signed with local user account and tried to access Admin page, as you can see i am getting this page.


Join the conversation! Your thoughts help the community grow.