

Building Power Apps Canvas Apps traditionally involves working directly in Power Apps Studio to create screens, controls, formulas, data connections, and business logic.
With the introduction of Model Context Protocol (MCP) and its integration with development tools such as GitHub Copilot, developers can explore a different way of working with Power Platform projects.
Instead of manually performing every development task through the Power Apps interface, GitHub Copilot can use an MCP server to interact with Power Platform development resources and assist with creating and modifying an application.
In this article, we will walk through the overall approach of building a Power Apps Canvas App using an MCP server and GitHub Copilot.
What is MCP?
Model Context Protocol (MCP) is a protocol that allows AI assistants to interact with external tools and systems in a structured way.
In simple terms, MCP acts as a bridge between an AI assistant and external development tools.
For example:
Developer
↓
GitHub Copilot
↓
MCP Server
↓
Power Platform
↓
Canvas App / Dataverse / Other Resources
Instead of the AI only generating text or code, an MCP server can provide tools that allow the AI assistant to interact with the development environment.
This makes AI-assisted development more useful for tasks that require actual interaction with a platform.
Why use MCP with GitHub Copilot?
GitHub Copilot is already useful for generating code, explaining errors, and helping developers complete development tasks.
MCP can extend this capability by providing Copilot with access to external tools.
For Power Apps development, this can potentially help with tasks such as:
Understanding the application structure
Working with Canvas App source files
Creating or modifying application components
Working with Power Fx formulas
Interacting with Dataverse
Inspecting configuration
Automating repetitive development tasks
The important difference is that Copilot is not working in isolation.
It can use the tools exposed by the MCP server to work with the Power Platform development environment.
Prerequisites
Before starting, make sure you have the required development environment.
.NET 10 SDK (or later)
Node.js and Git
PowerShell 7+
Visual Studio Code with a paid GitHub Copilot license
Stepwise Implementation Guide
Step 1: Initialize GitHub Copilot CLI & Power Platform Plugins
Open a new terminal inside VS Code and install the canvas app capabilities:
copilot
/login
Register the Power Platform Skills Marketplace:
/plugin marketplace add microsoft/power-platform-skills
Once the marketplace is added, you need to install the specific plugin for Canvas Apps (which includes the Canvas Authoring MCP server).
3, Run this command next for installing Canvas Apps plugin
/plugin install canvas-apps@power-platform-skills
Solution regarding error - Access denied
The error Access is denied. (os error 5) is a Windows permission error. It means your terminal does not have the necessary administrator rights to save the plugin files to your system folder, or the destination folder is currently locked by another program.
Well i have use this approach found from ai which works well for me - Use the Node Installer Script
If the /plugin install command still gives you an access denied error even as an administrator, use the direct installation script instead.
In your Administrator PowerShell, run:
iwr https://raw.githubusercontent.com/microsoft/power-platform-skills/main/scripts/install.js -OutFile install.js; node install.js; del install.js
Once installation is complete, you need to connect your GitHub Copilot to a live Power Apps Studio session.
Connect Github Copilot to live Power Apps
The Canvas Apps MCP server works by "co-authoring" with you in real-time.
Step 1: Open Your App and Enable Coauthoring
Go to your browser and open make.powerapps.com.
Create a new Canvas App or edit an existing one.
In the Power Apps Studio, click on Settings (the gear icon at the top).
Go to Updates → New features → Experimental (or Preview).
Search for Coauthoring and turn it ON. (You may need to save and refresh your app for this to take effect).
Leave this browser tab open. The MCP server needs it open to sync code back and forth.
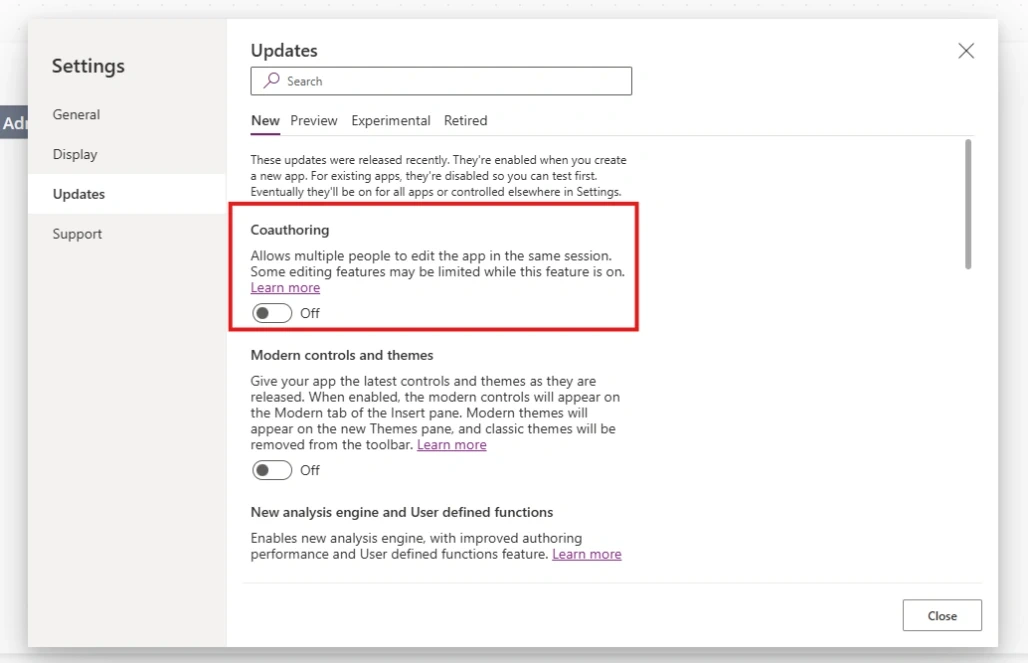
Step 2: Link Copilot to Your App Session via MCP
Return to your VS Code terminal to handshake the local environment with your browser cloud session:
Initialize the MCP connection:
/configure-canvas-mcp
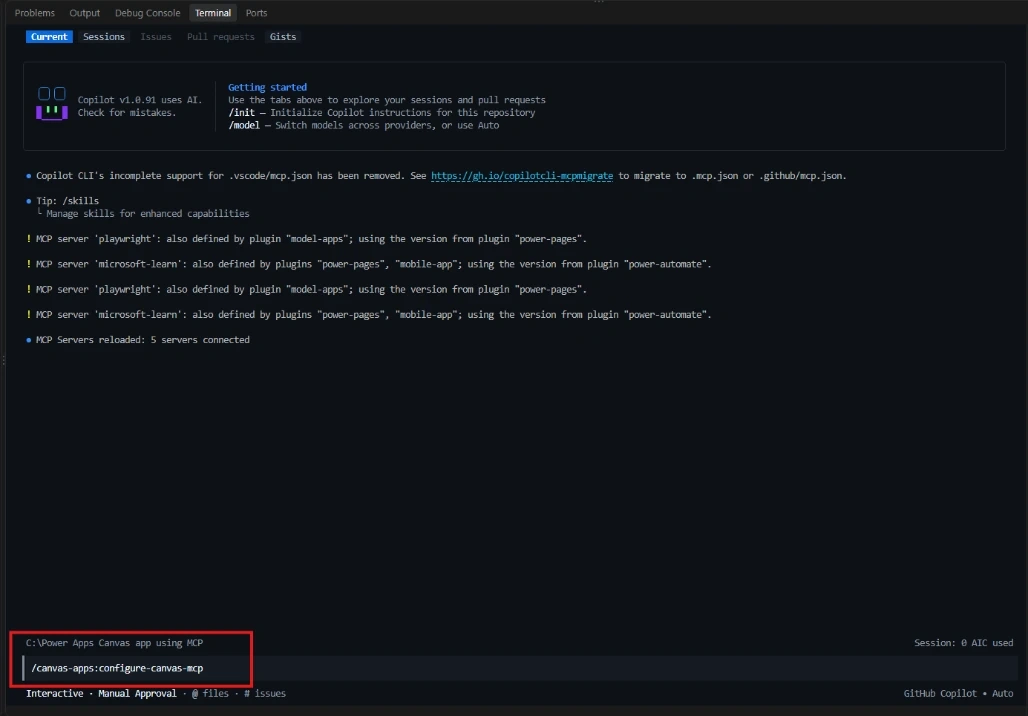
Paste the Studio URL when prompted. The MCP server will automatically pull your unique Environment ID, App ID, and active data source schemas
Verify that the agent successfully registers your studio session elements by prompting: "List the available Canvas App controls."
Step 3: Describe and Generate Your App
Once connected, you can describe requirements in plain natural language. Copilot will build local .pa.yaml files, validate them through the compilation tool, and synchronize them to your live web browser interface
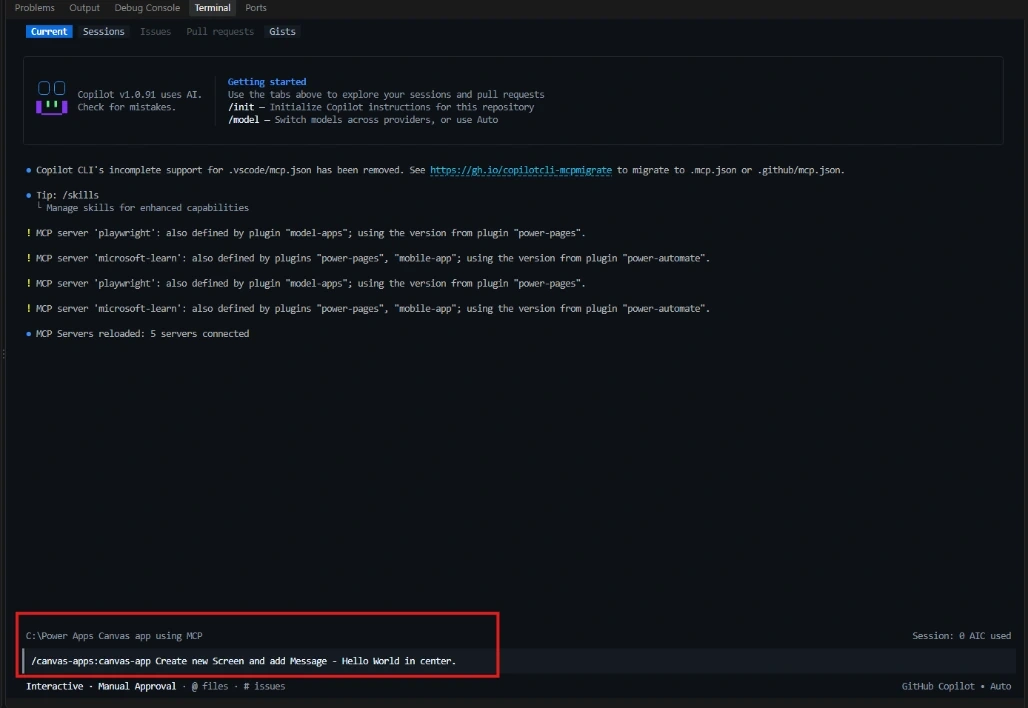
You should always check the execution plan presented in the terminal and grant permissions for the MCP tools to compile and sync structural changes into your open cloud session.
Conclusion
We learnt how we can use MCP combined with GitHub Copilot introduces an interesting approach to Power Apps Canvas App development.
Join the conversation! Your thoughts help the community grow.