

Azure Functions is a serverless compute service that allows us to run event-driven code without having to manage infrastructure. It enables developers to focus on business logic while Azure handles scaling, maintenance, and security. This article walks you through creating and deploying a serverless API using Azure Functions in the Azure Portal.
Why Use Azure Functions for APIs?
- Scalability: Automatically scales based on demand.
- Cost-Effective: Pay only for execution time.
- Easy Integration: It works seamlessly with other Azure services.
- Event-Driven: Trigger functions from HTTP requests, messages, or database changes.
Prerequisites
Before you begin, ensure you have,
- An Azure Subscription
- Azure Portal access to create and manage resources.
- Basic knowledge of C# or JavaScript (optional but helpful).
Step 1. Create an Azure Function App.
- Sign in to the Azure Portal.
- Click Create a resource and search for Function App.
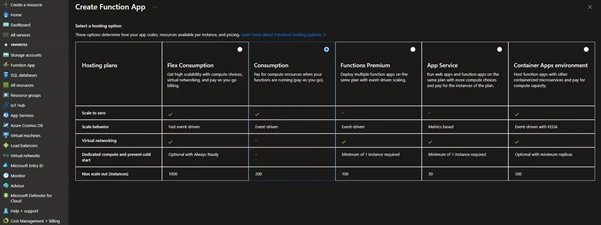
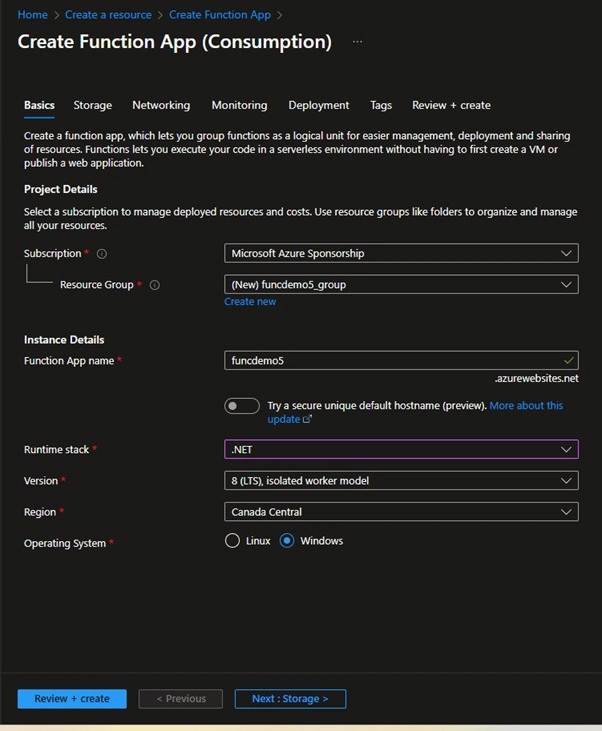
- Click Create and fill in the required details.
- Subscription: Select your Azure subscription.
- Resource Group: Create a new one or use an existing one.
- Function App name: Enter a unique name.
- Runtime Stack: Choose .NET, Node.js, Python, or Java.
- Region: Select a region close to your users.
- Click Review + Create, then Create.
Step 2. Create a Serverless API with HTTP Trigger.
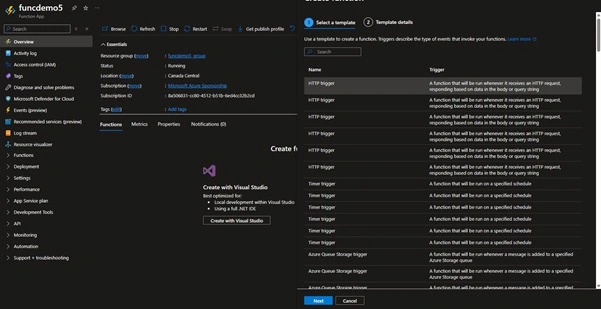
- Navigate to your Function App in the Azure Portal.
- Click Functions in the left menu and then + Create.
- Select HTTP trigger as the function template.
- Provide a function name and choose the Authorization level:
- Anonymous: No authentication required.
- Function: Requires a function key.
- Admin: Requires an admin key.
- Click Create.
Step 3. Write and Test the Function.
- Open your newly created function and click Code + Test.
- Modify the default code (C# example)
using System.IO; using Microsoft.AspNetCore.Mvc; using Microsoft.Azure.WebJobs; using Microsoft.Azure.WebJobs.Extensions.Http; using Microsoft.AspNetCore.Http; using Newtonsoft.Json; using System.Threading.Tasks; public static class MyFunction { [FunctionName("MyFunction")] public static async Task<IActionResult> Run( [HttpTrigger(AuthorizationLevel.Function, "get", "post", Route = null)] HttpRequest req) { string name = req.Query["name"]; string requestBody = await new StreamReader(req.Body).ReadToEndAsync(); dynamic data = JsonConvert.DeserializeObject(requestBody); name = name ?? data?.name; return name != null ? new OkObjectResult($"Hello, {name}!") : new BadRequestObjectResult("Please pass a name in the query string or in the request body."); } } - Click Test/Run, enter a query parameter (?name=Azure), and check the response.
Step 4. Deploy and Expose the API.
- Click Get Function URL and copy the generated URL.
- Test the API using Postman or a browser.
- https://<function-app-name>.azurewebsites.net/api/MyFunction?name=Azure
- (Optional) Secure the API using Azure API Management or Azure Active Directory (AAD).
Step 5. Monitor and Scale.
- Navigate to Monitor in the function app to check logs and analytics.
- Enable Application Insights for detailed telemetry.
- Set scaling options based on usage patterns.
Conclusion
Azure Functions provide a fast, scalable, and cost-efficient way to build APIs without managing servers. By following this guide, you have successfully created and deployed a serverless API using Azure Functions. Explore additional triggers like Azure Storage, Service Bus, and Event Grid to expand your API capabilities.
Join the conversation! Your thoughts help the community grow.