

Introduction
While working with PowerApps, many times we require a response from Power Automate. In this article, we will learn
- how to call a Power Automate flow from PowerApps
- send parameters to Power Automate from PowerApps
- get response from Power Automate to PowerApps
To call a Power Automate from PowerApps, we will need to create an instant flow. Only instant flows (with trigger as PowerApps) can be called from PowerApps. Let’s first create an instant flow that we will call from PowerApps.
Step 1 - Create an Instant cloud flow
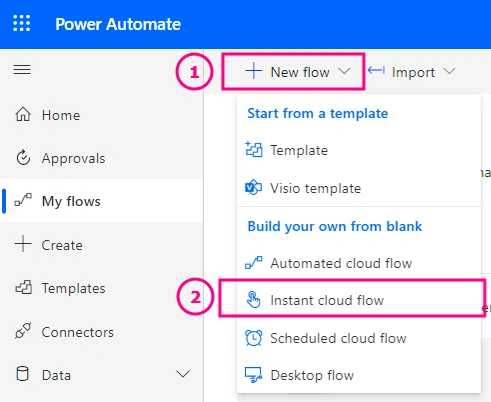
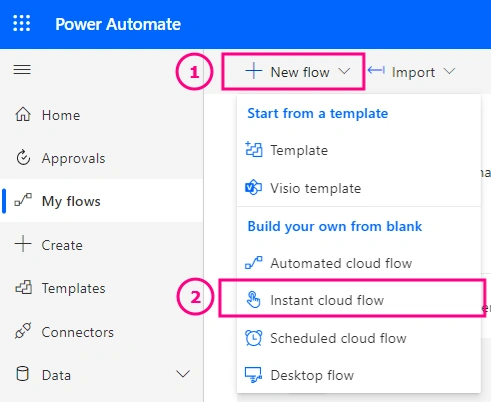
- Navigate to power atomate portal and click on New Flow > Select Instant cloud flow.
- Enter the flow name
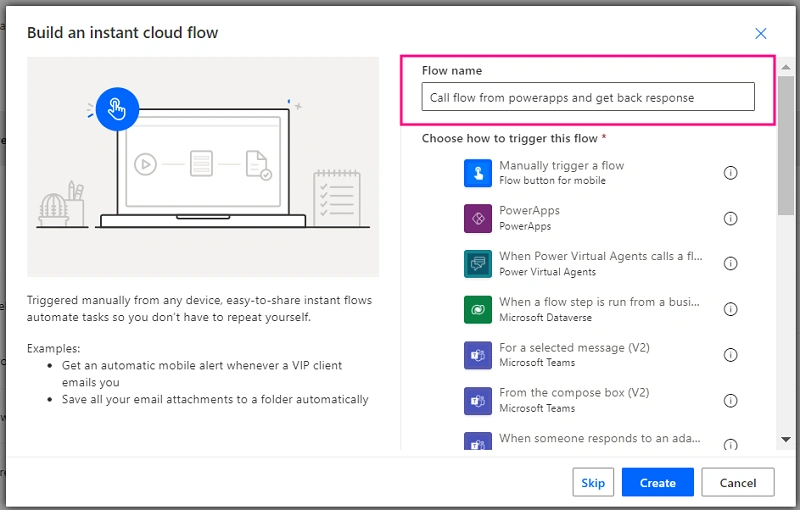
- Select the trigger as PowerApps(V2)
- Click on create button

In this example, we will try to calculate the difference between two dates. We will pass the dates from PowerApps to Power Automate as parameters.
Step 2 - How to pass parameters or input to flow from PowerApps
- Click on Add an input from the PowerApps trigger as shown below:

- Choose the type of user input:
Here we can see that we have 6 types of inputs or parameters that can be passed to power automate. In our case, we are going to calculate the date difference, so we will use the date parameters.

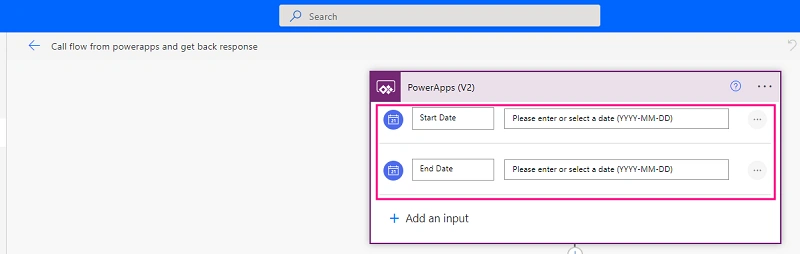
- Let’s add two date parameters for calculating the date difference as shown below
- Now we will initialize a variable named as varDateDifference and type as integer.
- Then to calculate the date difference, we will set the same variable will below formula
div(sub(ticks(EndDate),ticks(StartDate)),864000000000)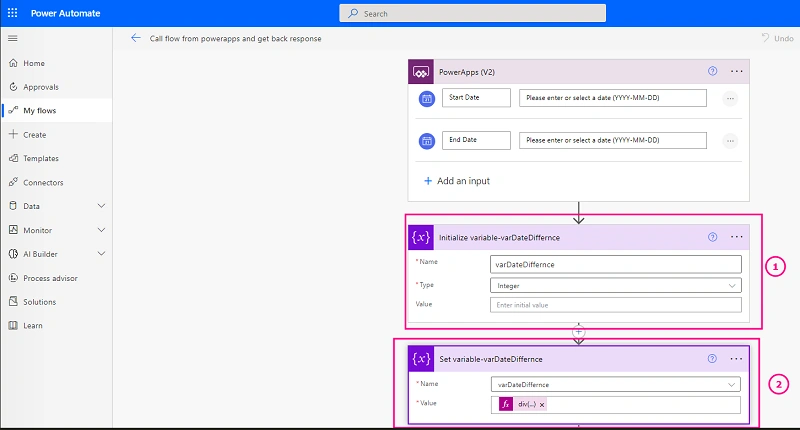
Now our flow is ready to be triggered from PowerApps with parameters.
Step 3 - How to call a Power Automate flow from PowerApps
- From your PowerApps application, click on Add flow option and select the flow from the list of available instant flows. Please find below screenshot:
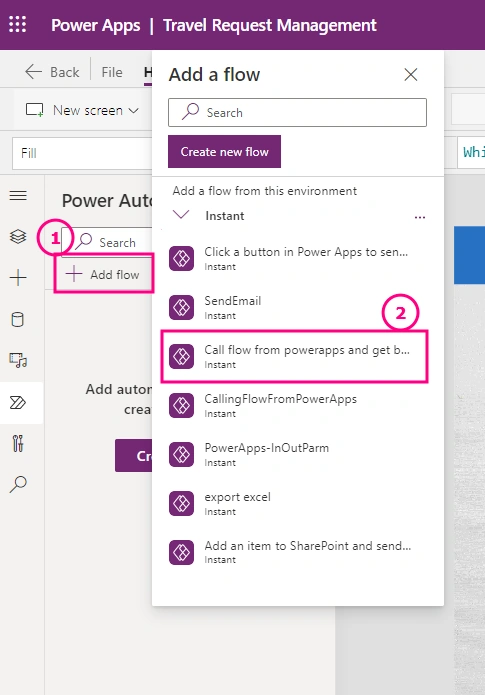
- Now once the flow is added to your PowerApps, you can call it on different events like OnVisible,OnStart, OnSelect, etc. Let’s call the flow on click of a button. Here I have used two date picker controls for which I need to find the date difference.
- So write a formula on OnSelect property of the button and pass the value of parameters to the flow.
Callflowfrompowerappsandgetbackresponse.Run(DatePicker1.SelectedDate,DatePicker1_1.SelectedDate)
In this way, we can call a power automate from PowerApps. Now let’s see how to get the response back from the power automate.
Step 4 - Get a response from Power Automate to PowerApps
To response back to PowerApps, we need to use the action called as “Respond to a PowerApps or flow”.
- At the end of the flow, add an action as “Respond to a PowerApps or flow” and click on Add an output
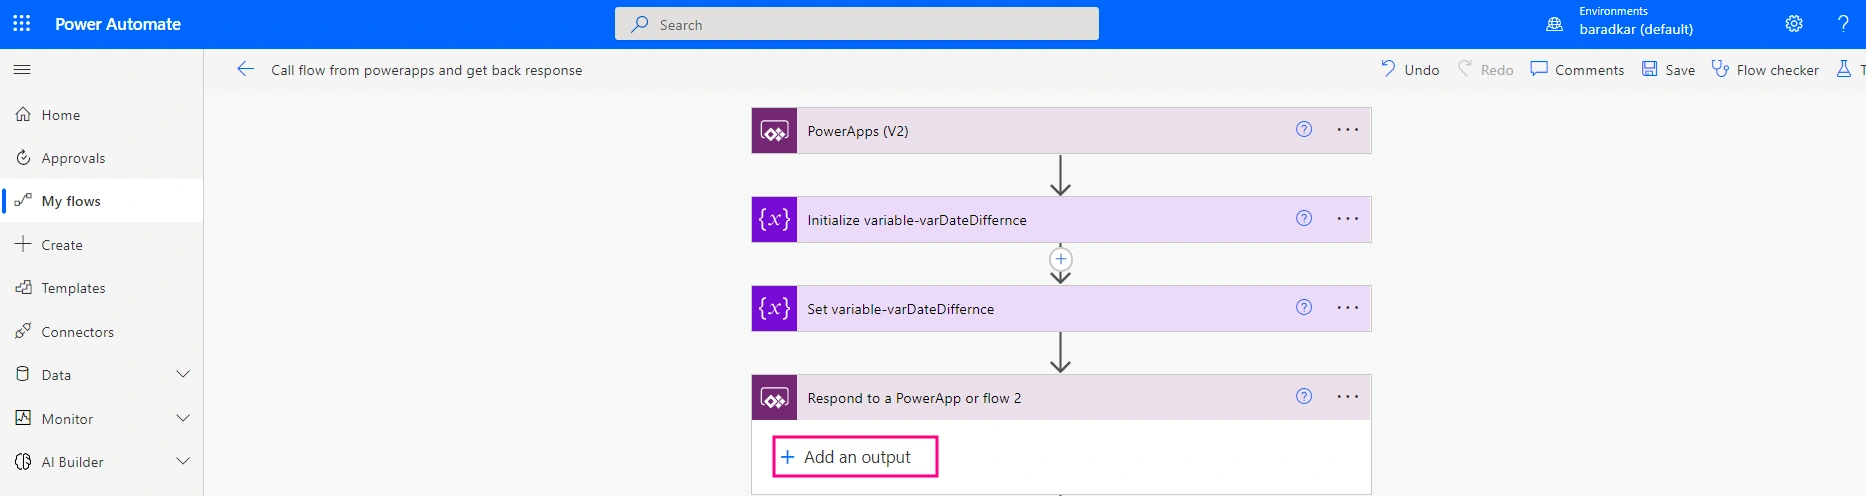
- Choose the type of output
In this case, as we want to pass the days difference, we will use the number as the output type:
- Enter the title for output
This is just the output property name that we will use in PowerApps to read the value

- Get the response of flow in one variable
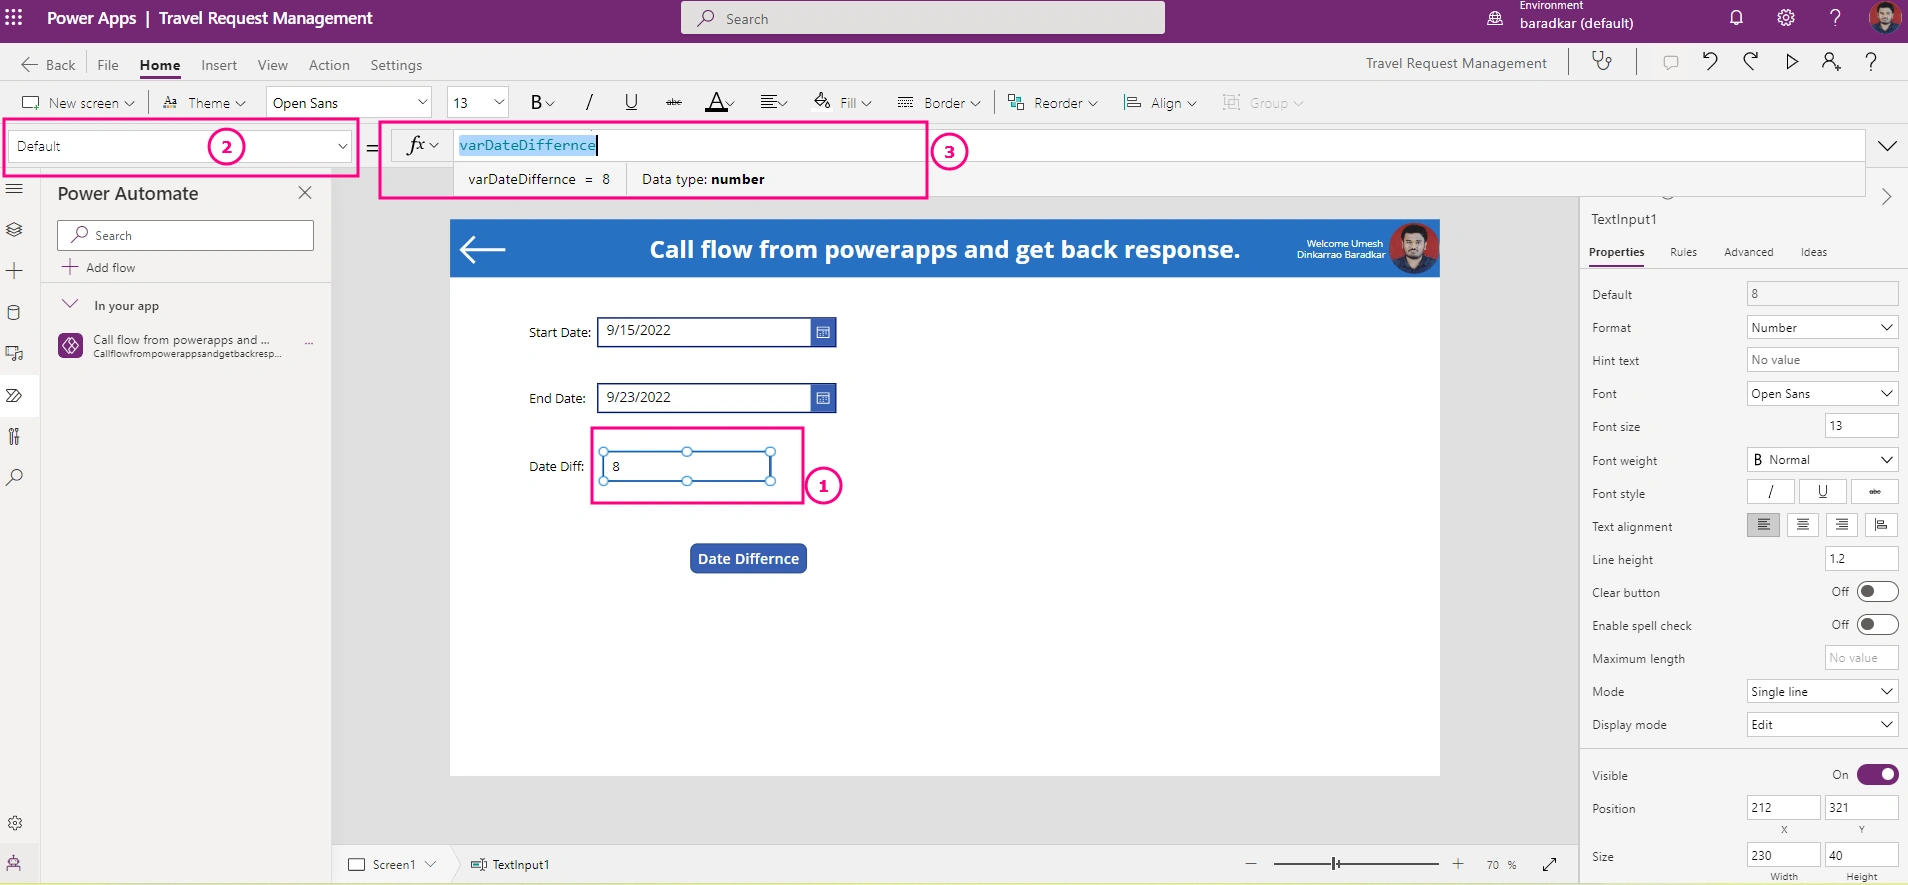
Now when the flow returns the value, we will need to store that value in one of the variable. In this case, I have used a variable named, varDateDifference which will store the response value that we have configured in above step.Set(varDateDiffernce,Callflowfrompowerappsandgetbackresponse.Run(DatePicker1.SelectedDate,DatePicker1_1.SelectedDate).datediffernce)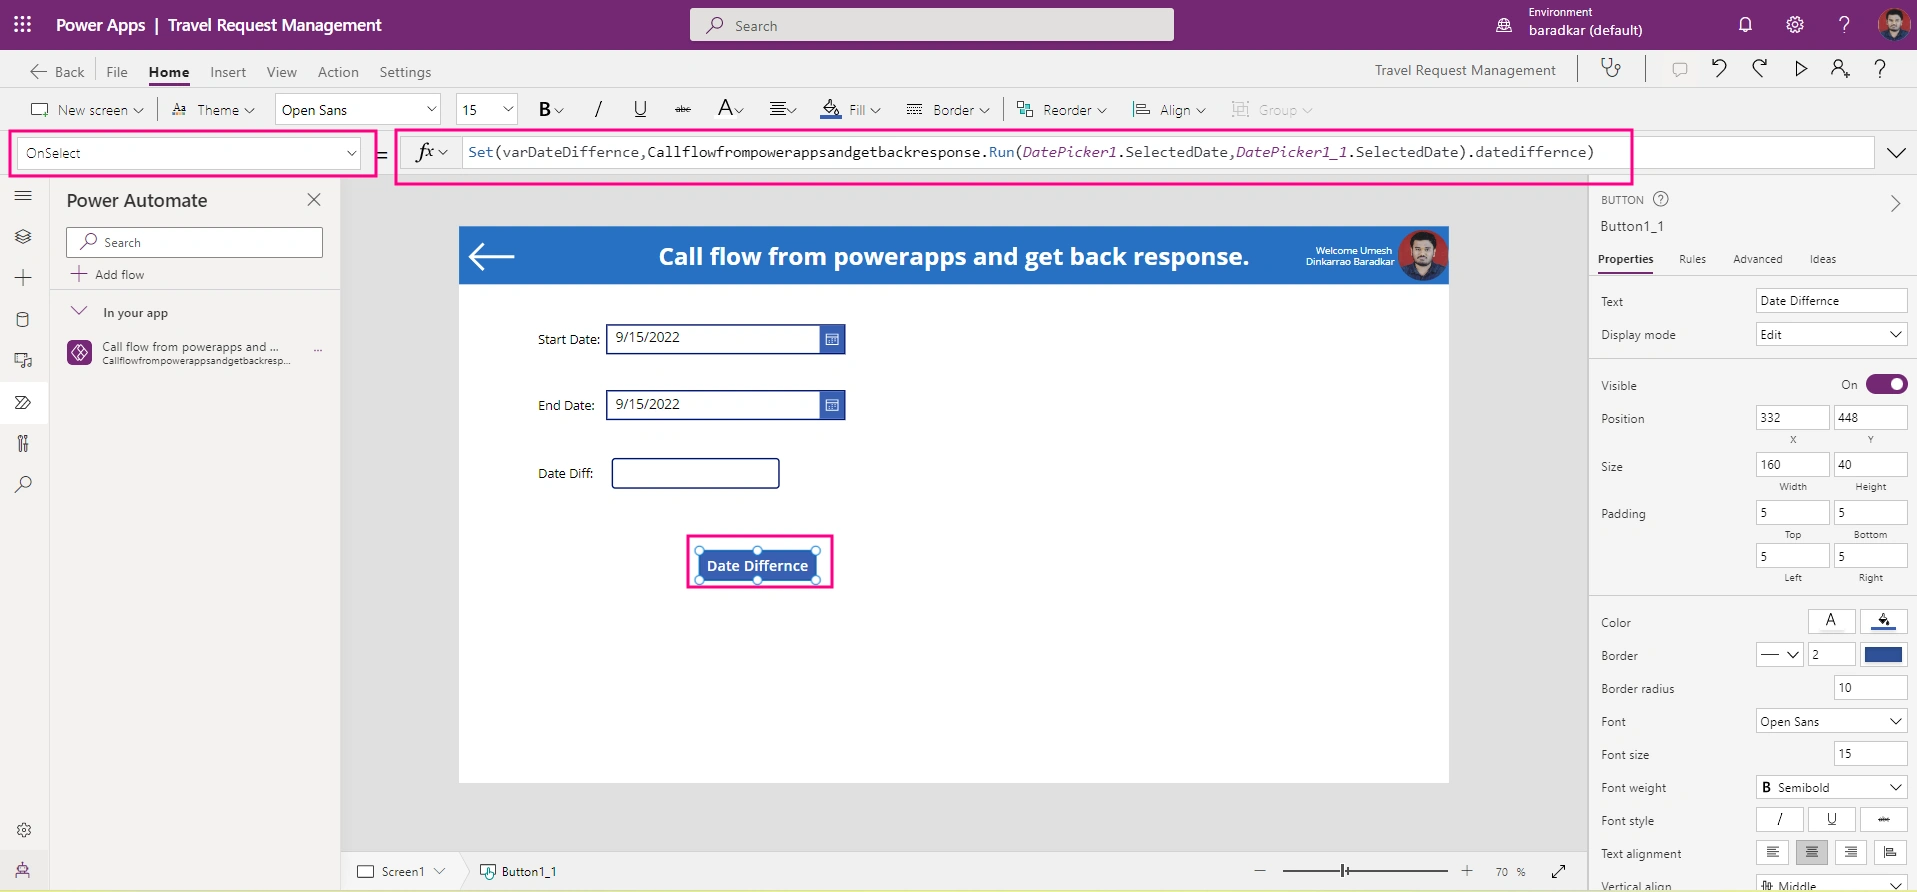
- To show the response value, we can use labels, or text inputs, etc. Here I am using the text input to show the date difference.
Conclusion
In this way, we have learned how to call a Power Automate flow from PowerAppss, Send parameters to Power Automate from PowerApps, get response from Power Automate to PowerApps and how to calculate date differences.
Join the conversation! Your thoughts help the community grow.