

Introduction
In Microsoft Windows 10 login screen, you can see a list of user accounts with a small picture next to each one. Your profile image is of Microsoft account and your account picture is only for your computer.
Step 1
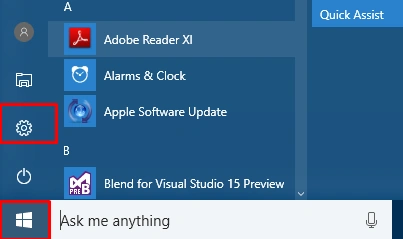
First, you will click on “Start” button and click “Settings.
Step 2
Step 2
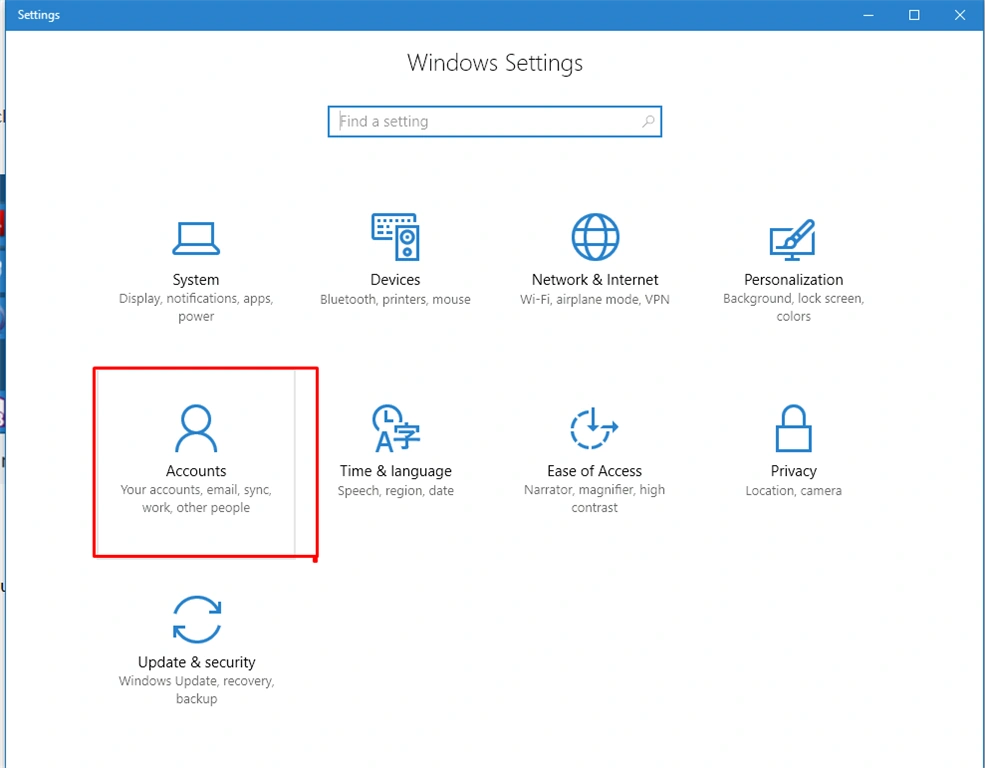
In this step, you will select “Accounts” icon.
Step 3
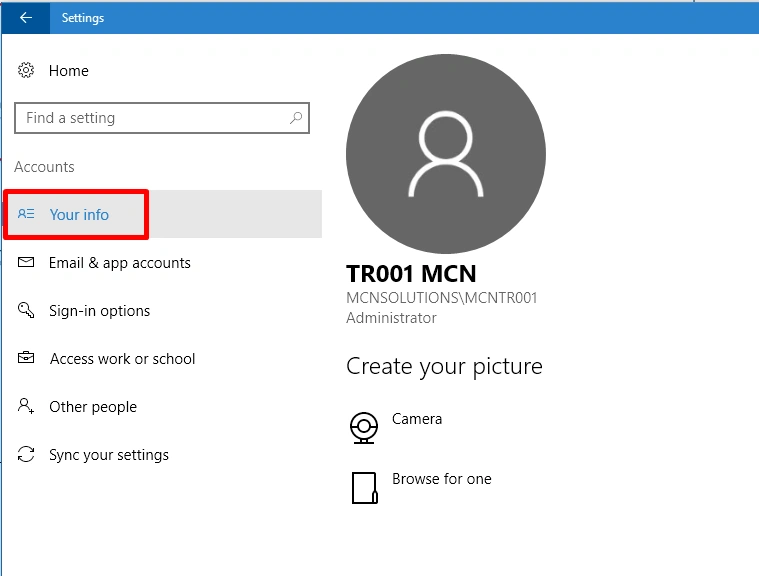
In this step, you will select “Your info” icon. You can use one of your own favorite photos for an account picture or use an app to create or edit one.
Step 4
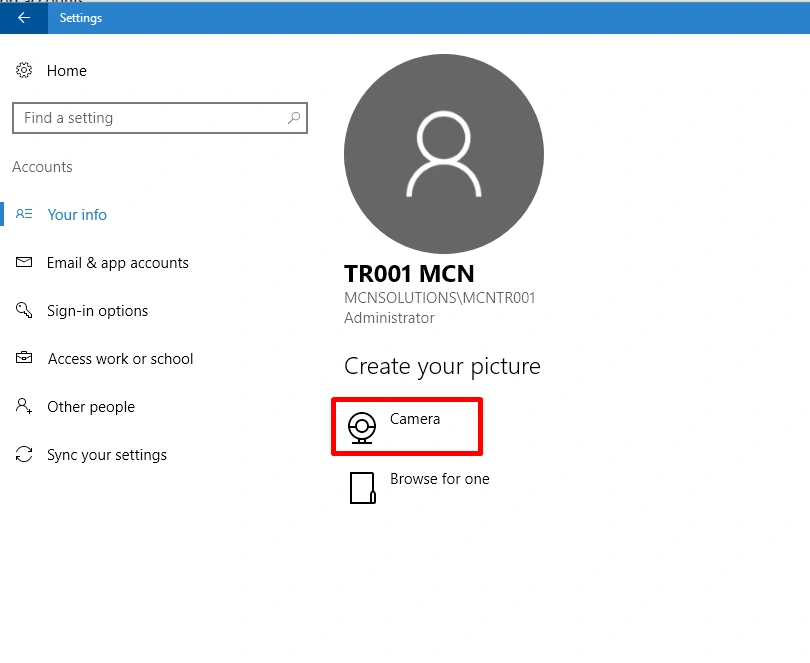
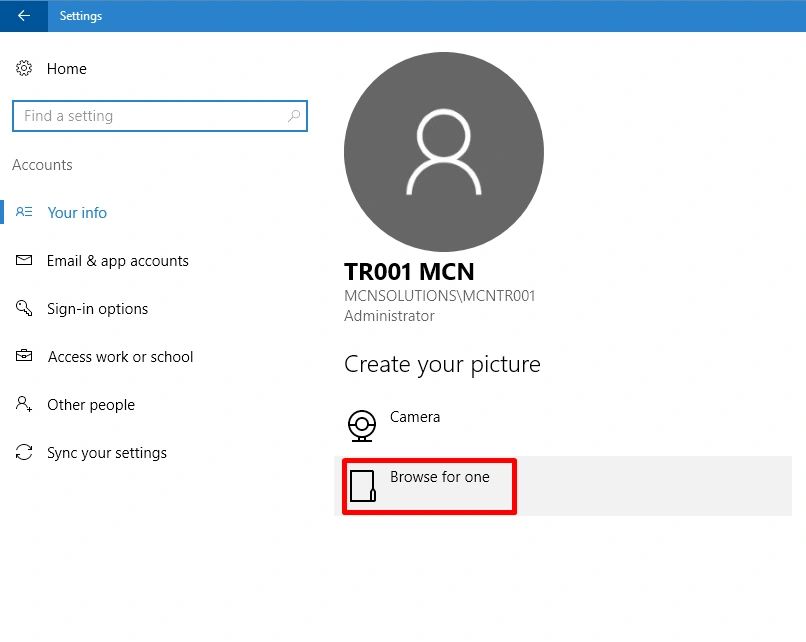
In this step, you can select Camera option, if you have a Webcam, then you can take a picture or create a video clip to use for your account picture.
In this step, you will select “Browse for one” icon and select your favorite picture to set as new account picture.
After selecting Browse icon, you can select the image which you want in Camera Roll or Saved Picture and click Choose picture.
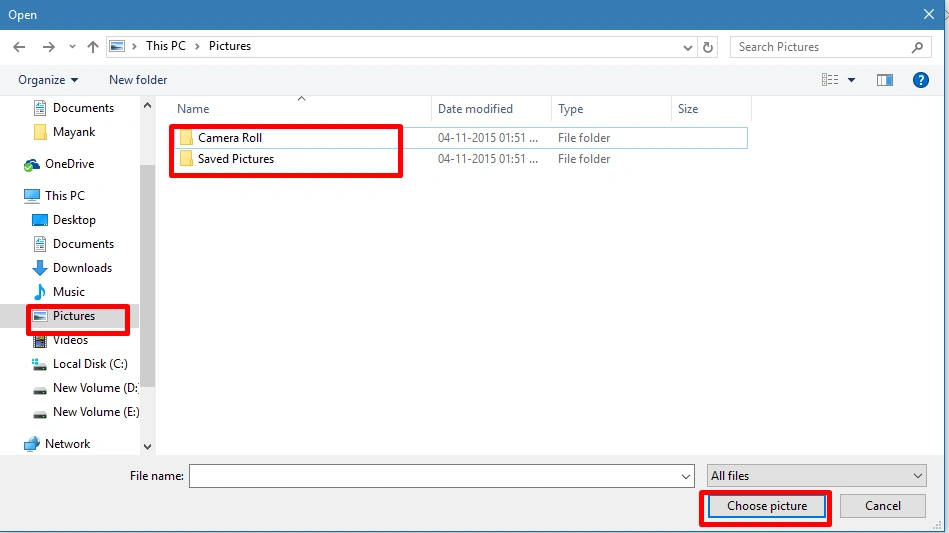
After this, your picture will be saved on your Windows account.
Summary
I hope, you enjoyed this article. Follow C# Corner to learn more new and amazing things about Windows 10. Thanks for reading this article.
Jûlian Sepúlveda MajorPosted Dec 30, 2020, 9:11 PM
It would be great if it explained how to do it with C#
Joe WilsonPosted Oct 29, 2016, 8:09 AM
Thank you.