

Introduction
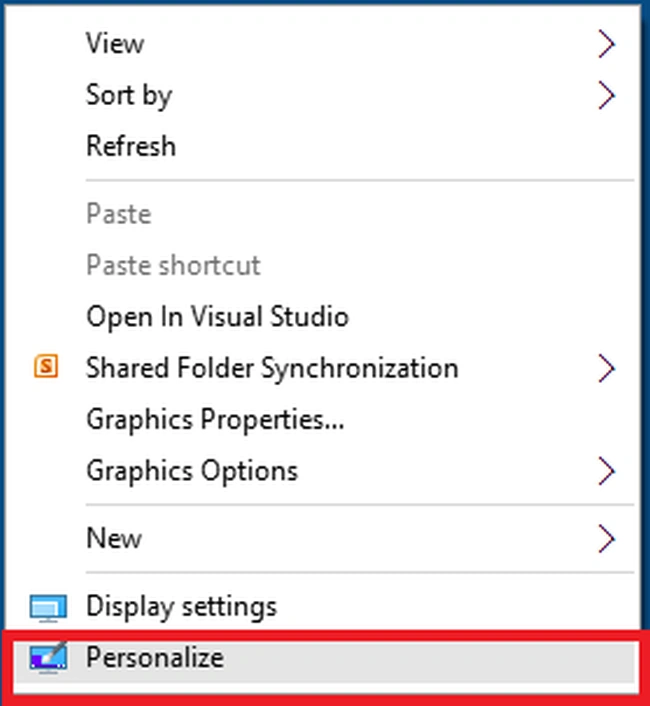
First, right-click on the desktop. Then, click on the Personalize.
 Step 2
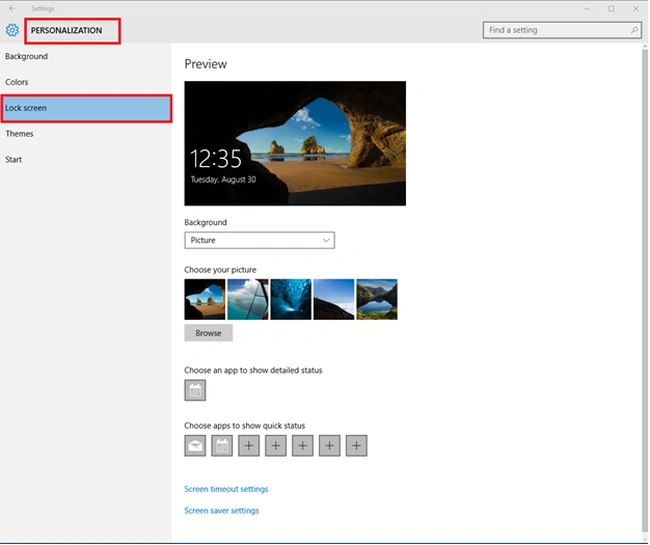
When you select it, the Personalization settings get opened. Select the Lock screen.
 Step 3
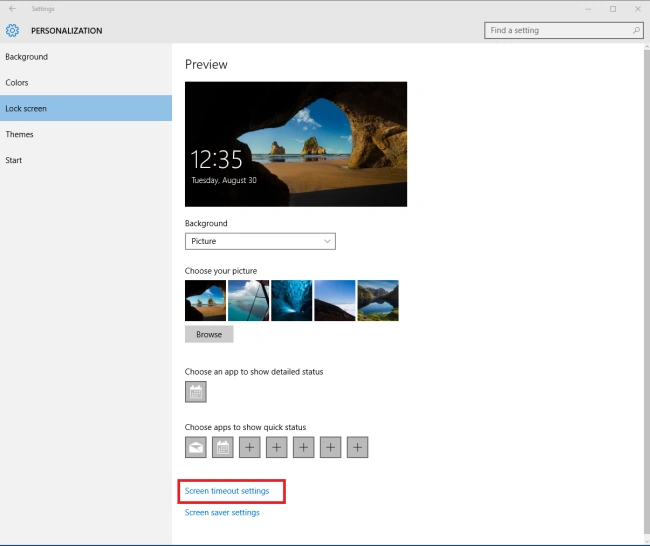
Click on the screen timeout settings.
 Step 4
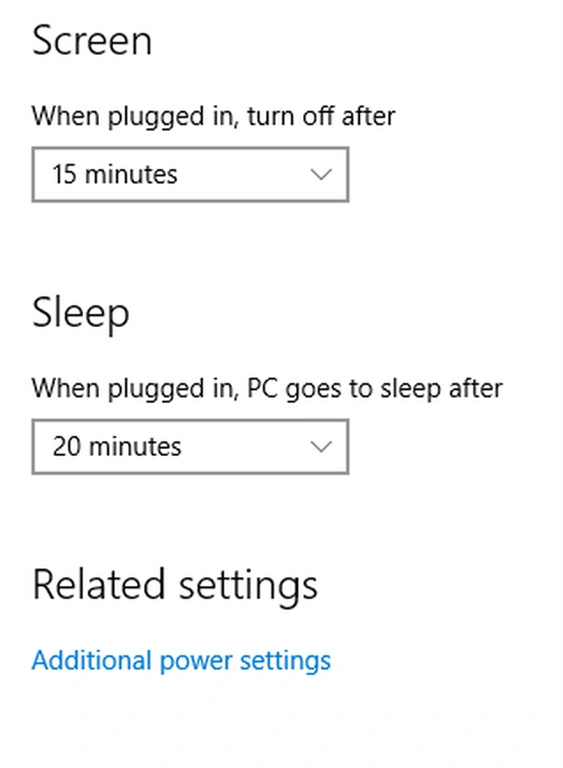
A new window will open. Change the default settings to your desired ones.
 Step 1
Alternate Method
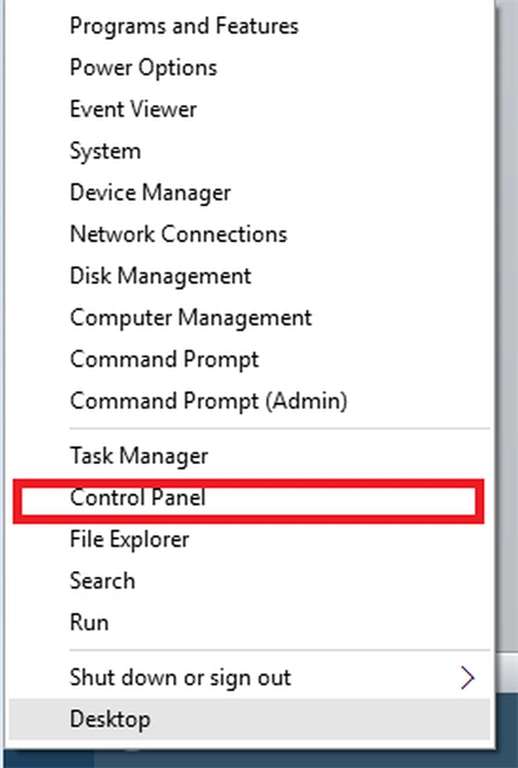
Right-click on the Window button at the bottom-left corner of your desktop and select Control Panel.
 Step 2
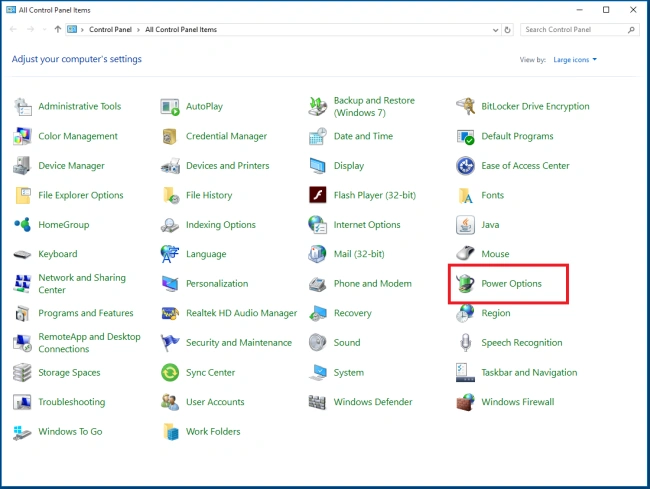
On the next window, select the Power Options.
 Step 3
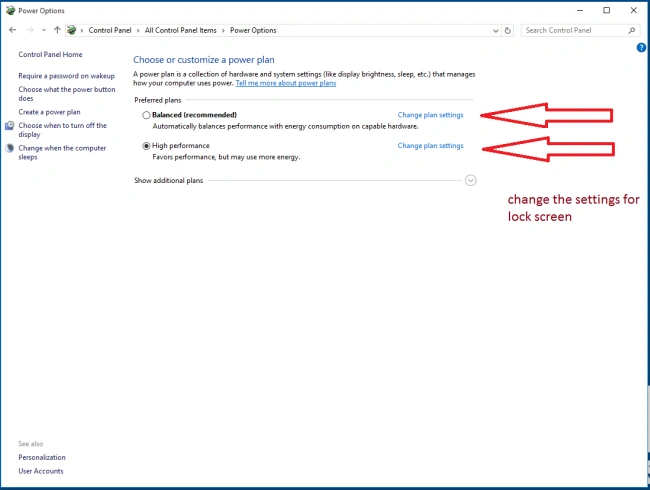
Now, click on Change plan settings.
 Step 4
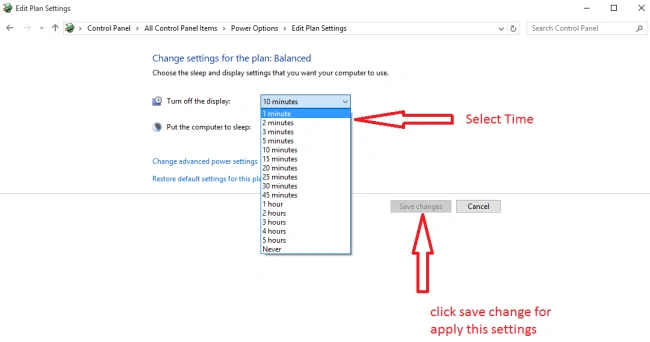
In the drop-down, select the desired value and click on Save Changes.
 I hope you enjoyed this to change the lock screen timings. Follow C# Corner to learn more new and amazing things about Windows 10.
Thanks for reading this article.
I hope you enjoyed this to change the lock screen timings. Follow C# Corner to learn more new and amazing things about Windows 10.
Thanks for reading this article.
SubashPosted Sep 7, 2016, 3:41 AM
Great one
Prasanna MuraliPosted Sep 5, 2016, 11:08 AM
Nice post......