

Introduction
Azure NAT Gateway is a fully managed Network Address Translation (NAT) service that provides secure and scalable outbound connectivity for resources in Azure virtual networks.
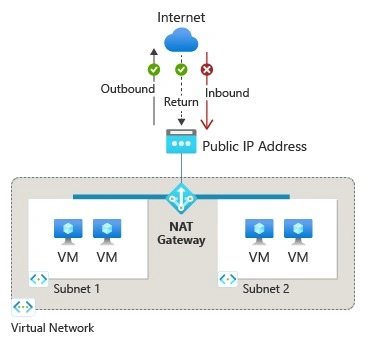
Key Benefits
- Static Outbound IP: Ensures consistent, static IPs for outbound traffic.
- Scalability: Handles large volumes of traffic efficiently.
- Prevent SNAT Exhaustion: Provides more SNAT ports to avoid connection issues.
- Enhanced Security: Blocks inbound traffic while allowing outbound access.
- Centralized Management: Simplifies outbound traffic management for multiple services.
- Seamless Integration: Easily integrates with VNets for services like VMs, AKS, and App Services.
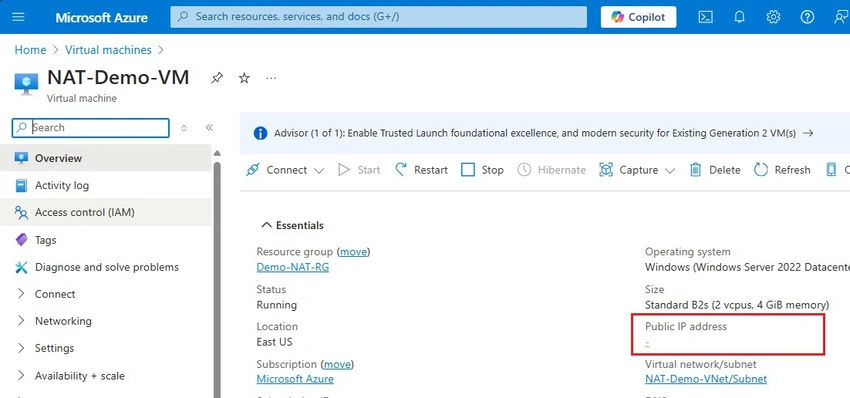
Step 1. I have an Azure VM without an attached Public IP, which means it’s in an isolated network.
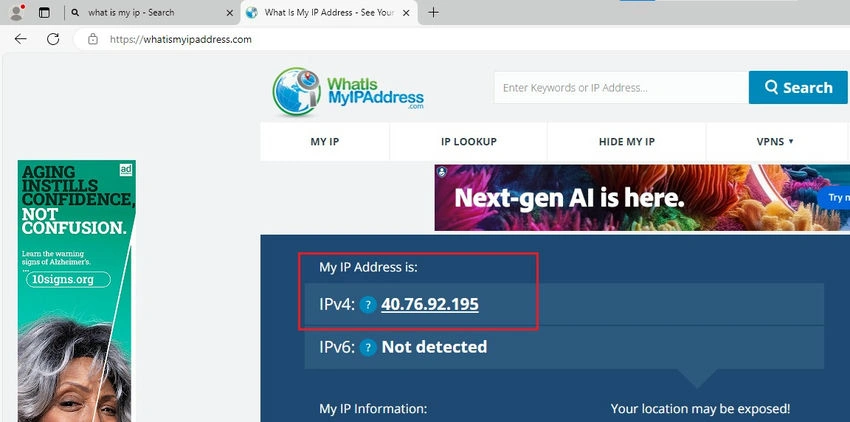
Step 2. Currently, my outbound is happening via this public IP when I did “What is my IP”.
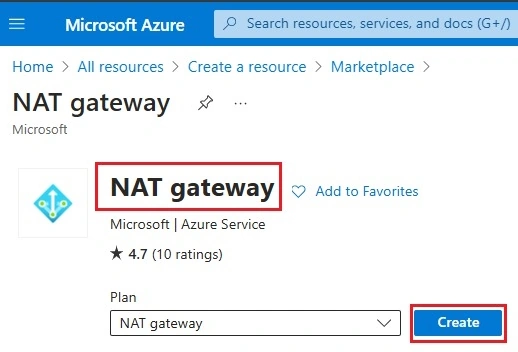
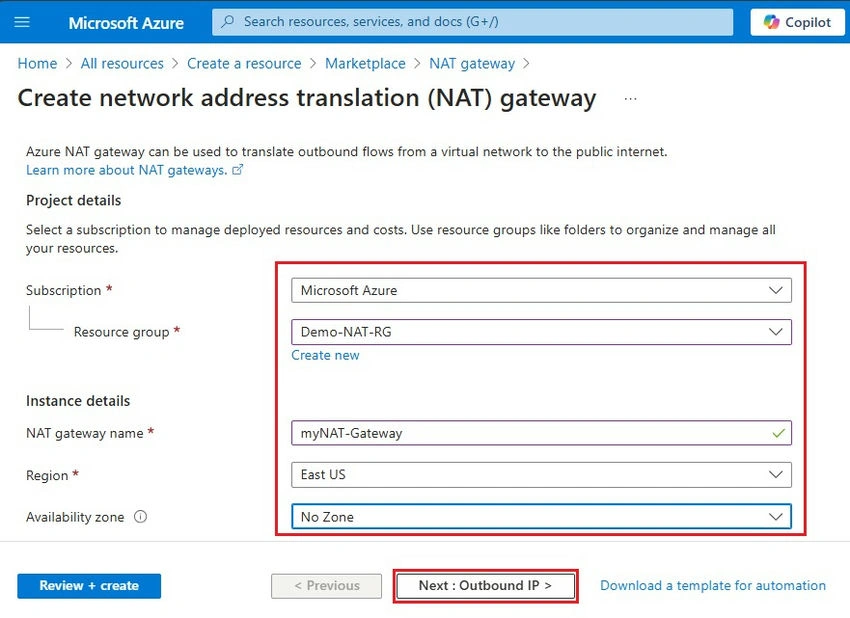
Step 3. Search for the NAT Gateway on the Global marketplace and hit create.
- Subscription: <Select your subscription>
- Resource group: <Select Resource group>
- NAT gateway name: <Name>
- Region: <Select appropriate region>
- Availability zone: <If you want AV, you can choose accordingly>
Hit Next. Outbound IP
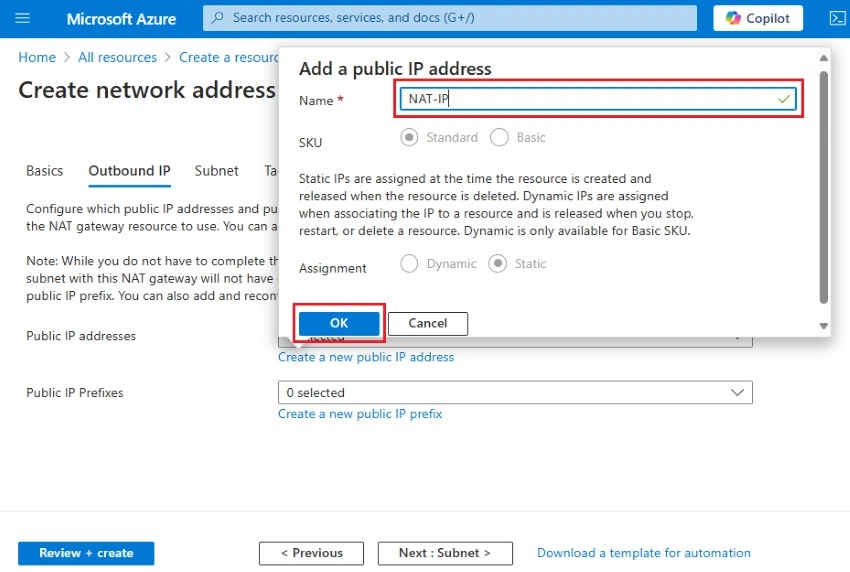
Step 4. In Outbound hit Create a new public IP address and type the name for it, In my case NAT-IP, and click Next: Subnet.
Step 5. Select your appropriate Virtual Network, In my case, “NAT-Demo-VNet” and tick on your subnet. Hit Review + create

Step 6. Successfully created my NAT Gateway.
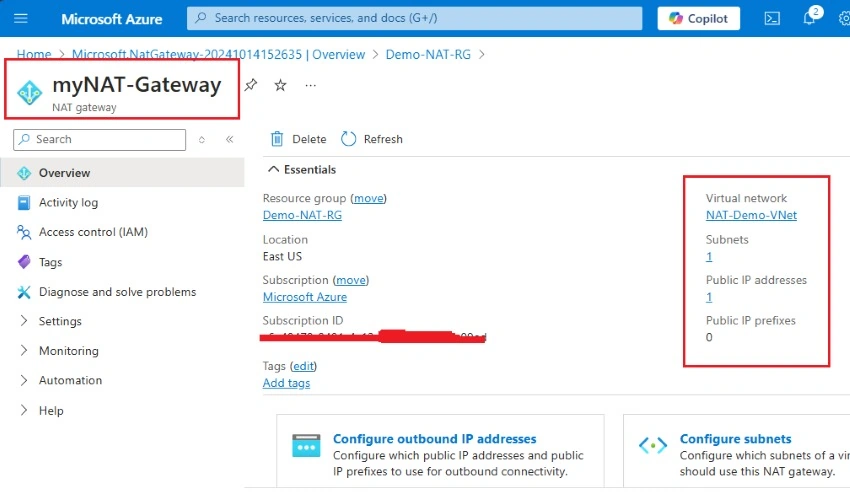
Step 7. Please note that there is a public IP for the NAT gateway.
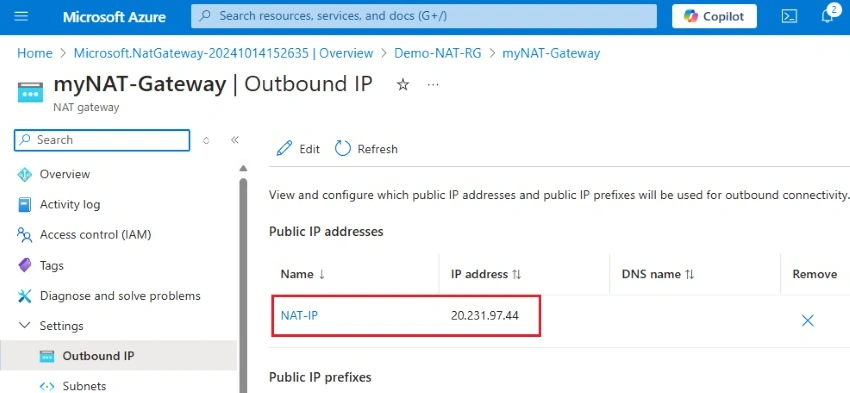
Step 8. Now, the public IP reflected here is the same as the one mentioned above.

Conclusion
This article covered the creation of an Azure NAT Gateway and its importance in providing reliable outbound internet access. With features like static IPs, improved scalability, and enhanced security, NAT Gateway is essential for managing outbound traffic efficiently across Azure services.
Join the conversation! Your thoughts help the community grow.