

In this article I’ll show you how to connect MySQL to Visual Studio 2010, where we download a connector that connects your IDE to MySQL.
Requirements:
- DotConnect for MySQL
- Wamp or Xamp Server
- Visual Studio
Step 1: Open Visual Studio, go to Tools, Extension Manager and search for Dot. Connect for MySQL, download and install it on your PC.
Step 2: Download Wamp server from here:

Step 3: Install it on your PC and run wamp server from the notification bar. Once your wamp server goes green, Open your browser and type http://localhost/phpmyadmin/. You will see a login panel open up, now type Username as root and leave the Password blank.

- Once you complete that, you will enter into the phpMyAdmin, where we create our database and a table.
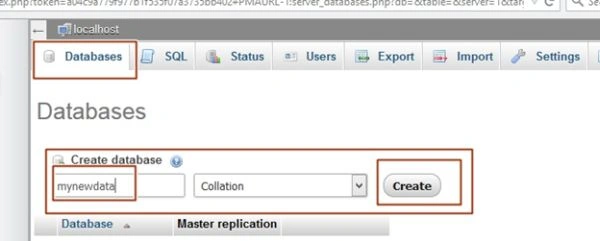
- Under Database you will see you database. Click on your database and you will enter into the Create table panel.
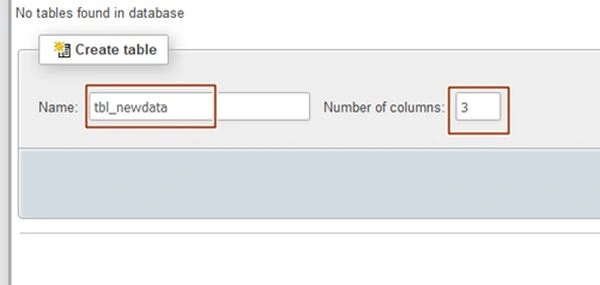
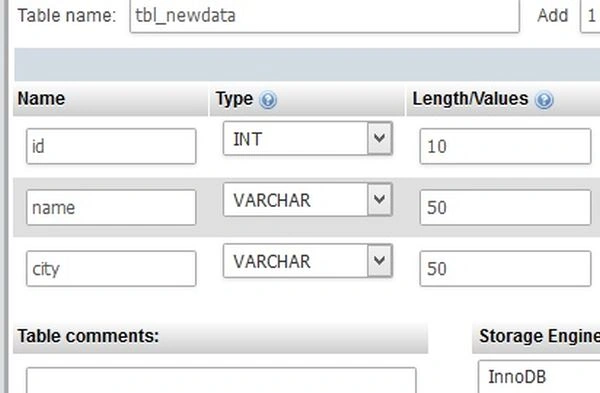
- Fill you table with columns:
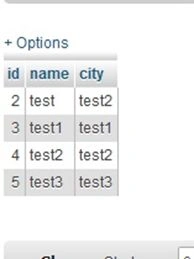
- Fill Data into your table
To insert data into table you have to click on Insert tab on the top part of phpMyAdmin.

Step 4: Open Visual Studio and in the Server Explorer Open Add New Connection.
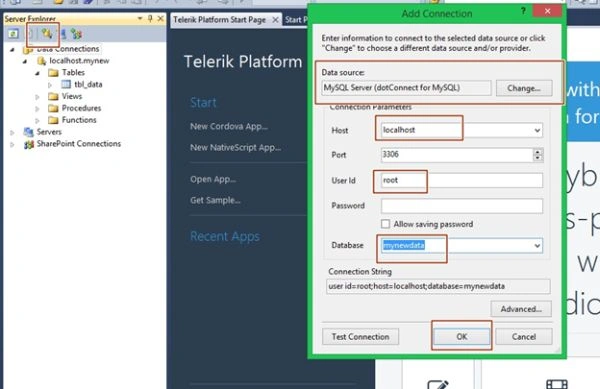
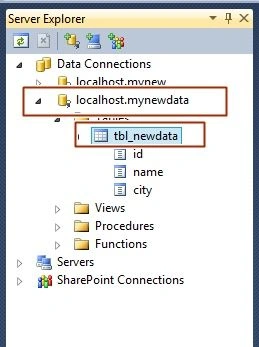
After pressing OK, you will see your MySQL database in the Server Explorer.
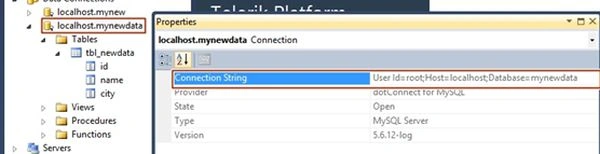
You can use its connection string to bind data to any control.
Hope you liked it. Thank you for reading. Have a good day.
Ravi KandelPosted Mar 8, 2017, 9:00 AM
Awesome Thanks for sharing
Harshad PansuriyaPosted Nov 1, 2015, 10:59 PM
Nice one Nilesh
Ali AhmedPosted Nov 1, 2015, 2:47 PM
This article is too useful for beginner.