

Introduction
Microsoft Power Automate helps us automate business processes by connecting different applications and services. While creating a flow, we often use multiple actions such as Get Items, Create Item, Send an Email, Update Item, and more.
But what happens when an action fails, times out, or is skipped?
Normally, Power Automate executes the next action based on the previous action's result. However, sometimes we need to execute an action even when the previous action fails.
This is where Configure Run After becomes useful.
What is Configure Run After?
Configure Run After is a feature in Power Automate that allows us to control when the next action should execute based on the status of the previous action.
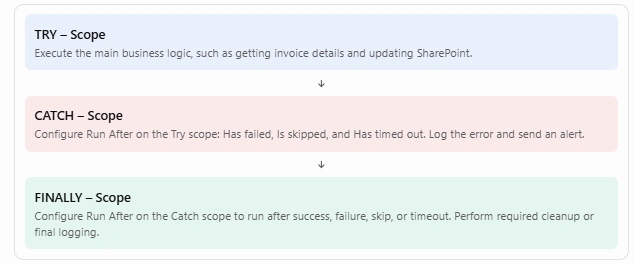
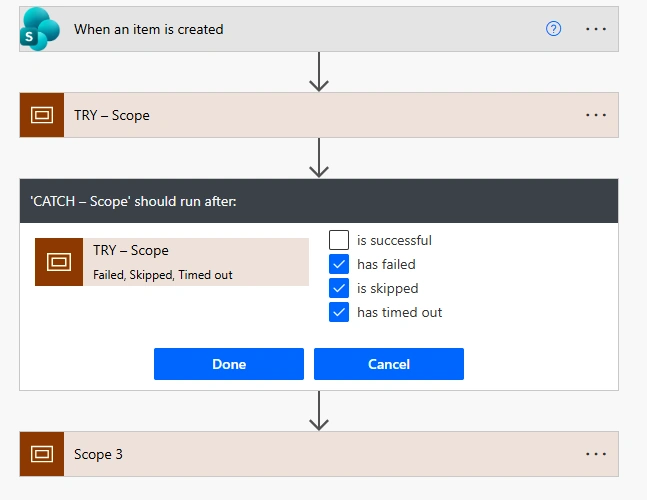
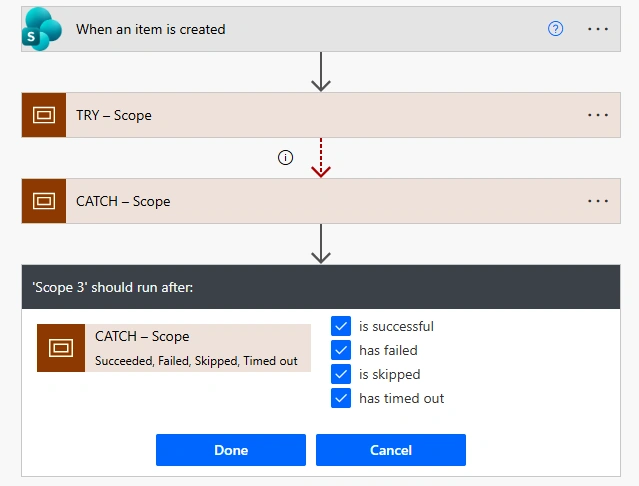
Instead of executing an action only when the previous step succeeds, we can configure it to run when the previous action:
Is successful – The previous action completed successfully.
Has failed – The previous action encountered an error.
Is skipped – The previous action was not executed.
Has timed out – The previous action exceeded its allowed execution time.
This feature is especially useful for error handling, notifications, logging, and managing flow execution.
Real-Time Example: Invoice Approval Process
Let's understand Configure Run After using an Invoice Approval application.
Imagine we have created a Power Automate flow to update an invoice status in SharePoint and send an email notification.
Flow scenario:
When an invoice is approved, the flow updates the invoice status to Approved. If the SharePoint update fails, we want to send an error notification to the administrator.
Flow structure
1. Trigger
When an invoice approval is completed
2. Update Item
Update SharePoint invoice status to Approved
Successful
3A. Send Email
Invoice approved successfully
Failed
3B. Error Notification
Notify administrator about failure
Step-by-step implementation
Step 1: Create a flow
Create an automated cloud flow with the SharePoint trigger or your invoice approval trigger.
Step 2: Add Update Item
Add the SharePoint Update Item action and update the invoice status to Approved.
Step 3: Add an error notification action
Add a Send an Email (V2) action after Update Item.
Configure the email with:
To: Administrator email address
Subject: Invoice Approval Flow Failed
Body: Invoice status update failed. Please check the flow run history.
Arun PottiPosted Nov 22, 2026, 12:36 PM
Good Article.