

Introduction
APIs are a crucial part of modern software development, enabling applications to communicate and share data over the Internet. Rust is a programming language known for its high performance, memory safety, and concurrency features, making it an excellent choice for building APIs that require speed, security, and scalability. This article will cover how to create a simple API in Rust using the Actix web framework. We will guide you through the steps of setting up a new Rust project, defining API routes, and running the API. Whether you are experienced with Rust or new to the language, this article will help you get started with building strong and efficient APIs.
Popular Rust Web Frameworks for API Development
There are several web frameworks available for creating APIs in Rust. Some of the popular frameworks are
- Actix Web
- Rocket
What is the Rocket framework in Rust?
Rocket is a web framework for Rust language that provides a fast and secure way to build web applications. It is known for its intuitive and easy-to-use API, and it offers many features out of the box, such as request routing, request guarding, and response handling. Rocket provides a set of macros and tools for defining routes, handling requests and responses, and managing application state. It also integrates with Rust's type system and borrows a checker to enforce safety and prevent common programming errors.
How to create an API in Rust?
Here we are using the Rocket framework to create a Rust API.
Prerequisites
Before we get started, we will need to have the following installed on our system.
- To use the Rocket framework, you need to have Rust installed on your machine. You can install Rust by following the instructions on the official Rust website.
- A text editor (Visual Studio Code).
- Postman (or any other API testing tool).
Steps to create an API in Rust using the Rocket framework
Step 1. Create a cargo new Rust project
To create a new Rust project, open your terminal or command prompt on a folder and run the following command
cargo new project_name

In this example, I create a project whose name is API.
cd project_name

cargo build
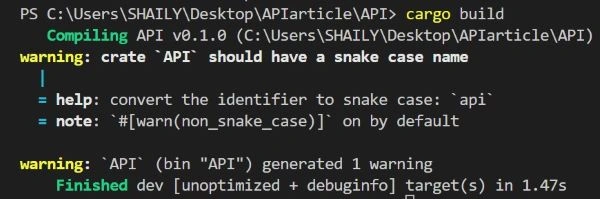
After that, we give that type of project structure in the visual studio code.
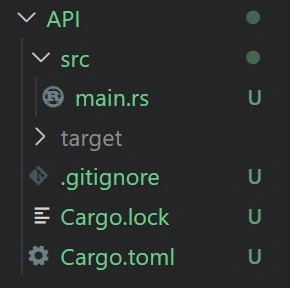
In Rust, when we create a new project using the Cargo build tool, it automatically generates an 'src' directory for us. This directory contains the main.rs file, where we can write the Rust code we want to execute. Here our project name is 'API'; we can find the main.rs file inside the 'src' directory under the project's root folder. From there, we can start building our Rust code and leverage the powerful features of the language to create robust and efficient applications.
Step 2. Installing Rust Nightly
Because Rocket makes abundant use of Rust’s syntax extensions and other advanced, unstable features, we have to install nightly.
rustup default nightly
If you prefer to install nightly only in your project directory, you can use the following.
rustup override set nightly

Step 3. Add dependencies in cargo. toml file.
[dependencies]
mysql ="*"
rocket = "0.4.5"
dotenv = "0.15.0"
chrono="0.4.24"
serde = { version = "1.0.0", features = ["derive"] }

[dependencies.rocket_contrib]
version = "0.4.11"
features = ["handlebars_templates", "tera_templates"]
Step 4. Create MySQL database tables according to your project.
Here we are using MySQL workbench to create tables on MySQL. If you want to learn more about How to create tables in MySQL database, you can follow this link- How to create tables in MySQL.
Step 5. Create API calls and do connections with the MySQL database.
Note. You can also set up diesel to interact with the database. This is an optional step that you can follow if you want.
Setting Up Diesel
So, the next thing we want to do is set up Diesel. Diesel provides its own CLI, so we have to install it first. (Assuming you are using PostgreSQL.)
cargo install diesel_cli — no-default-features — features mysql
To configure Diesel for your database, you need to provide it with your database credentials. Running a specific command will generate a ".env" file containing this information.
echo DATABASE_URL=mysql://username:password@localhost:port/diesel_demo > .env
You can use your database name in place of Mysql. After that, run this command.
diesel setup
This will create our database (if it didn’t already exist), and create an empty migrations directory that we can use to manage our schema (more on that later).
Note. Most people use Diesel to interact with relational databases, including PostgreSQL, MySQL, and SQLite. However, in my case, I encountered an error when trying to use Diesel for this purpose. If you are comfortable with Diesel, you can try to troubleshoot and fix the error. But if you're not, there are other solutions available to solve the problem. In my case, I get that type of interface after running this command.

Or if I try this command without no-default-features.
cargo install diesel_cli mysql
I have encountered an error during the execution of this command.

When searching for a solution to an error message on Google, it is common to come across various suggestions from other users. One popular recommendation is to configure environment variables, which you have already attempted.
Here, I have skipped this step and found an alternative to this step. Below is the alternative for this.
How to create API calls and establish a connection with MySQL database?
Before learning all API calls, you need to know- How to use MySQL DML commands in Rust.
Get call in Rust
#![feature(proc_macro_hygiene, decl_macro)]
#[macro_use]
extern crate rocket;
use mysql::prelude::*;
use mysql::*;
use rocket::Request;
use serde::{Deserialize, Serialize};
#[derive(Debug, PartialEq, Eq)]
struct Employee {
    employee_id: i64,
    employee_fname: String,
    employee_lname: String,
    employee_mail: String,
    password: String,
    user_type: i64,
}
//signin function
fn signin(cn: &mut PooledConn, mail: String) -> Vec<String> {
    let mut result: Vec<String> = Vec::new();
    let y=format!("select EmployeeID, EmployeeFirstName, EmployeeLastName, EmployeeEmail, password, UserTypeId from employee where EmployeeEmail= \"{}\"",mail);
    let res = cn
        .query_map(
            y,
            |(employee_id, employee_fname, employee_lname, employee_mail, password, user_type)| {
                Employee {
                    employee_id: employee_id,
                    employee_fname: employee_fname,
                    employee_lname: employee_lname,
                    employee_mail: employee_mail,
                    password: password,
                    user_type: user_type,
                }
            },
        )
        .expect("Query failed.");
    let mut pass: String = String::new();
    let mut mail: String = String::new();
    let mut esid: String = String::new();
    let mut name: String = String::new();
    let mut utid: String = String::new();
    for r in res {
        pass = r.password;
        mail = r.employee_mail;
        esid = r.employee_id.to_string();
        name = r.employee_fname;
        utid = r.user_type.to_string();
        result.push(pass);
        result.push(mail);
        result.push(esid);
        result.push(name);
        result.push(utid);
    }
    result
}
//get call
#[get("/")]
fn index() -> String {
    let url = "mysql://root:root@localhost:3306/mcn";
    let pool = Pool::new(url).unwrap();
    let mut conn = pool.get_conn().unwrap();
    let v: Vec<String> = signin(&mut conn, "[email protected]".to_string());
    let pass: String = v[0].clone();
    let fname: String = v[3].clone();
    let uid: String = v[4].clone();
    format!("first name: {} uid:{} password: {}", fname, uid, pass)
}
//route for 404 rsponse
#[catch(404)]
fn not_found(req: &Request) -> String {
    format!("Oh no! We couldn't find the requested path '{}'", req.uri())
}
//Main function
fn main() {
    rocket::ignite()
        .register(catchers![not_found])
        .mount("/", routes![index])
        .launch();
}
- The code starts by enabling two Rust language features using the #![feature()] attribute macro proc_macro_hygiene and decl_macro.
- Next, the code imports several external libraries using the use keyword, including MySQL, rocket, serde, and serde_derive.
- The program defines a custom Employee struct that contains several fields, including employee_id, employee_fname, employee_lname, employee_mail, password, and user_type.
- The program also defines a function called signin, which takes a reference to a MySQL database connection and a String representing an employee email address. The function queries the database to retrieve employee data based on the email address provided and returns a vector of String objects containing various employee details.
- The program defines a get route for the root endpoint ("/") using the #[get("/")] attribute macro. This route calls the signin function to retrieve employee data and then formats a string to display the employee's first name, user ID, and password in the browser.
- Finally, the program defines a catch function to handle any 404 errors that occur during the program's execution.
- The program's main function calls the rocket::ignite() function to create a new instance of the Rocket web framework. It then registers the 404 catch function using the register() method, mounts the get route defined earlier using the mount() method, and launches the web application using the launch() method.
Then execute this cargo command in your terminal.
cargo run
Output
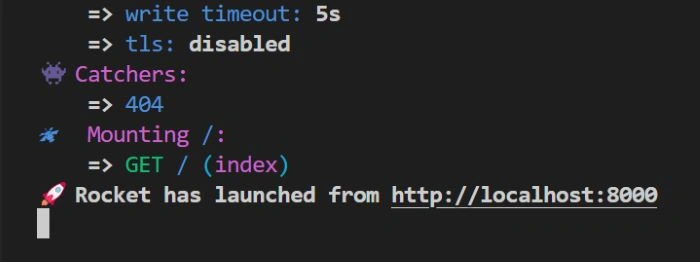
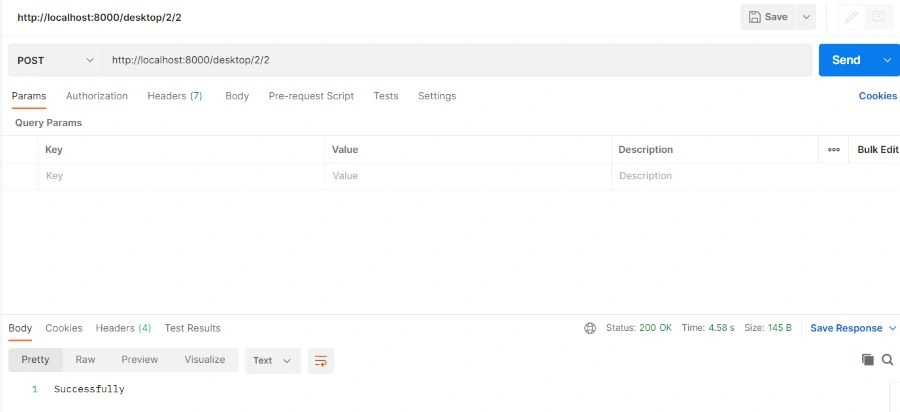
Hit this URL with ctrl+click and search in any browser localhost:8000 post number.
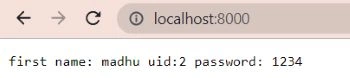
You can also use Postman or any other API testing tool
Post call in Rust
#![feature(proc_macro_hygiene, decl_macro)]
#[macro_use]
extern crate rocket;
use mysql::prelude::*;
use mysql::*;
use rocket::Request;
fn addstock(cn: &mut PooledConn, itemname: String, quantity: i64, cid: i64) {
    let query="INSERT INTO stock (ItemName,quantity,categoryId) values (:itemname, :quantity, :categoryid)";
    let params = params! {"itemname"=>itemname, "quantity"=>quantity,"categoryid"=>cid,};
    cn.exec_drop(query, params).unwrap();
}
//post call
#[post("/<itemname>/<quantity>/<cid>")]
fn stock(itemname: String, quantity: i64, cid: i64) -> String {
    let url = "mysql://root:root@localhost:3306/mcn";
    let pool = Pool::new(url).unwrap();
    let mut conn = pool.get_conn().unwrap();
    addstock(&mut conn, itemname, quantity, cid);
    format!("Successfully")
}
//route for 404 rsponse
#[catch(404)]
fn not_found(req: &Request) -> String {
    format!("Oh no! We couldn't find the requested path '{}'", req.uri())
}
//Main function
fn main() {
    rocket::ignite()
        .register(catchers![not_found])
        .mount("/", routes![stock])
        .launch();
}
This Rust code defines a Rocket web server that exposes an endpoint for adding stock items to a database.
- The code starts by enabling two Rust features, proc_macro_hygiene, and decl_macro, and importing the Rocket and MySQL libraries.
- The addstock function takes a mutable MySQL connection and three parameters: itemname (a String representing the name of the item), quantity (an i64 representing the quantity of the item), and cid (an i64 representing the category ID of the item). The function constructs an SQL query to insert the given values into the stock table of the database using a prepared statement and then executes the query. If the execution is successful, the function does nothing; otherwise, it panics with the error message.
- The /stock endpoint is defined as a POST route with three path parameters: itemname, quantity, and cid. When this endpoint is called, it creates a new MySQL connection, calls the addstock function with the given parameters to insert a new row into the stock table, and returns the "Successfully" message as a response.
- The not_found function defines a custom 404 error handler for the Rocket web server, which returns a formatted error message with the URI of the requested path.
- Finally, the main function launches the Rocket web server by initializing it with the ignite method, registering the not_found error handler, mounting the /stock endpoint with the stock route, and calling the launch method to start the server.
- Overall, this Rust code demonstrates how to use the Rocket and MySQL libraries to create a simple web API for adding stock items to a database.
Then execute this cargo command in your terminal.
cargo run
Output
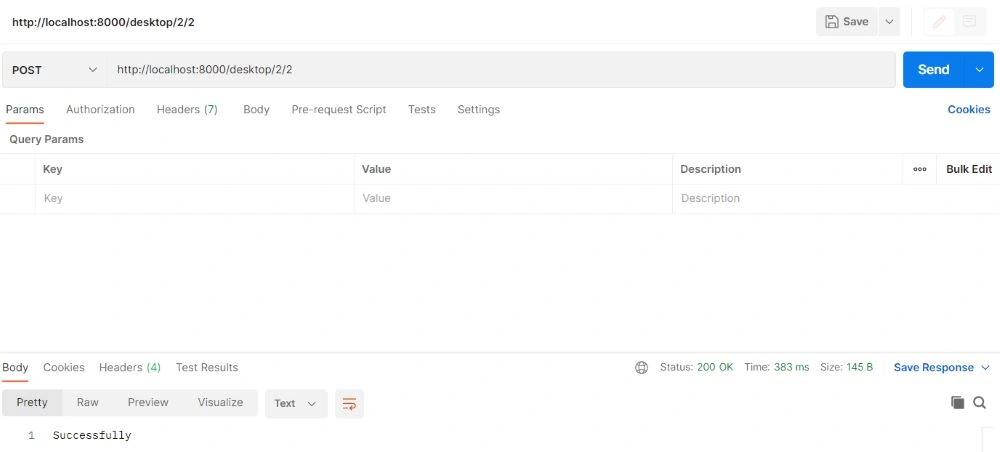
Then open Postman and select post call and give the URL with endpoints

You will get a message "Successfully" and after that, you can check the MySQL stock table using this query.
select * from stock;
Output
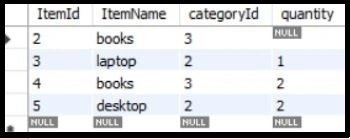
In this table, as you can see after hitting post call here, add one more row with ItemName desktop, categoryId 2, quantity 2, and ItemId is auto-generated.
Delete call in Rust
#![feature(proc_macro_hygiene, decl_macro)]
#[macro_use]
extern crate rocket;
use mysql::prelude::*;
use mysql::*;
use rocket::Request;
fn deleteemp(cn: &mut PooledConn, empid: i64) {
    let x = cn.exec_drop("delete from employee where employeeId=?", (empid,));
    println!("hello{:?}", x);
}
//delete call
#[delete("/<empid>")]
fn delete(empid: i64) -> String {
    let id = empid;
    let url = "mysql://root:root@localhost:3306/mcn";
    let pool = Pool::new(url).unwrap();
    let mut conn = pool.get_conn().unwrap();
    deleteemp(&mut conn, id);
    format!("Successfully")
}
//route for 404 rsponse
#[catch(404)]
fn not_found(req: &Request) -> String {
    format!("Oh no! We couldn't find the requested path '{}'", req.uri())
}
//Main function
fn main() {
    rocket::ignite()
        .register(catchers![not_found])
        .mount("/", routes![delete])
        .launch();
}
This code is a Rust program that uses the Rocket web framework and the MySQL database driver to implement a web API that allows users to delete employees from a MySQL database.
- The code defines a function deleteemp that takes a mutable reference to a PooledConn (which represents a connection to the database) and an empid parameter representing the employee's ID to delete. The function executes a SQL query that deletes the employee with the specified ID from the employee table.
- The delete function is defined as a Rocket route handler that takes an empid parameter from the URL path and calls deleteemp to delete the employee from the database. The function returns a string indicating that the operation was successful.
- The not_found function is a Rocket catcher that handles 404 Not Found errors by returning a string indicating that the requested path was not found.
- Finally, the main function creates a new Rocket instance, registers the not_found catcher, mounts the delete route, and launches the Rocket instance. When the program is run, it will start the Rocket server and listen for incoming requests on the specified port. When a request is received, Rocket will match the request to the appropriate route handler and execute it.
Then execute this cargo command in your terminal.
cargo run
Output
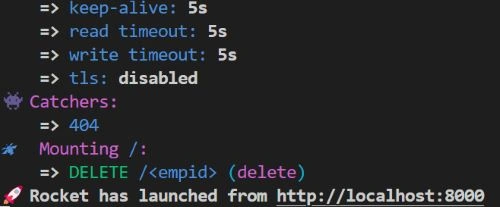
Before hitting the delete call, you can check the employee table in the MySQL database using this command.
select * from employee;

Then open Postman and select Delete call and give the URL with endpoints.
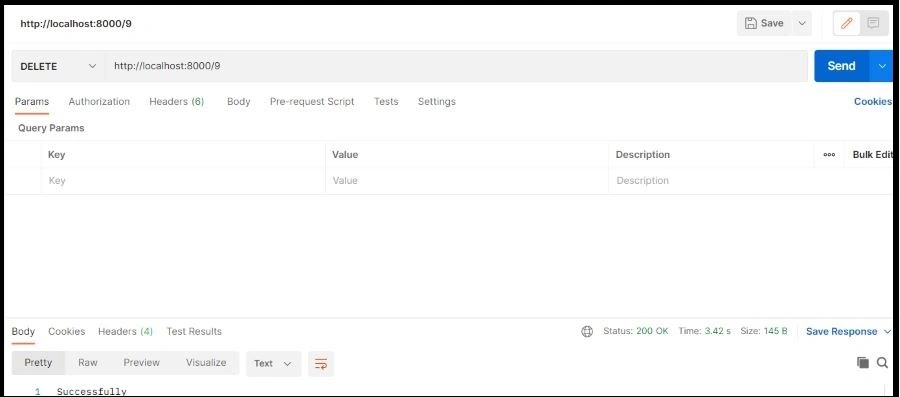
You will get a message "Successfully" and after that, you can check the MySQL stock table using this query.
select * from employee;
Output

Put call in Rust
#![feature(proc_macro_hygiene, decl_macro)]
#[macro_use]
extern crate rocket;
use mysql::prelude::*;
use mysql::*;
use rocket::Request;

fn updateemp(cn: &mut PooledConn, empid: i64) {
    let x = cn.exec_drop(
        "UPDATE employee
        SET EmployeeFirstName = 'shaily'
        WHERE employeeId = ?",
        (empid,),
    );
    println!("hello{:?}", x);
}
//put call
#[put("/<empid>")]
fn update(empid: i64) -> String {
    let url = "mysql://root:root@localhost:3306/mcn";
    let pool = Pool::new(url).unwrap();
    let mut conn = pool.get_conn().unwrap();
    updateemp(&mut conn, empid);
    format!("Successfully")
}
//route for 404 rsponse
#[catch(404)]
fn not_found(req: &Request) -> String {
    format!("Oh no! We couldn't find the requested path '{}'", req.uri())
}
//Main function
fn main() {
    rocket::ignite()
        .register(catchers![not_found])
        .mount("/", routes![update])
        .launch();
}
- The code defines a function updateemp that takes a mutable reference to a PooledConn object and an empid of type i64 as arguments. This function executes an SQL query that updates the EmployeeFirstName field of an employee in the employee table with the specified empid to 'madhu'.
- The code also defines a Rocket route update that maps to an HTTP PUT request and takes an empid parameter of type i64. This route initializes a new MySQL connection pool, gets a connection from the pool, and passes it along with the empid to the updateemp function. Finally, the route returns a String response of 'Successfully'.
- The code also defines a Rocket catcher function not_found, that handles HTTP 404 errors and returns a user-friendly error message.
- The main function sets up the Rocket web server by registering the not_found catcher and mounting the update route at the root path. Finally, the server is launched and begins listening for incoming HTTP requests.
Then execute this cargo command in your terminal.
cargo run
Output
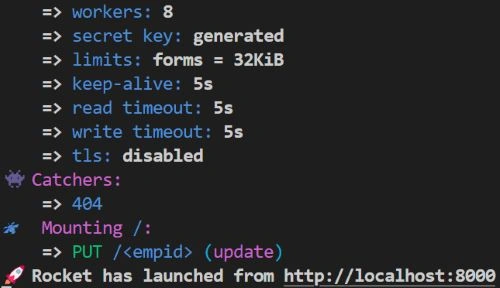
Before hitting the delete call, you can check the employee table in the MySQL database using this command.
select * from employee;
Then open Postman and select Put call and give the URL with endpoints.
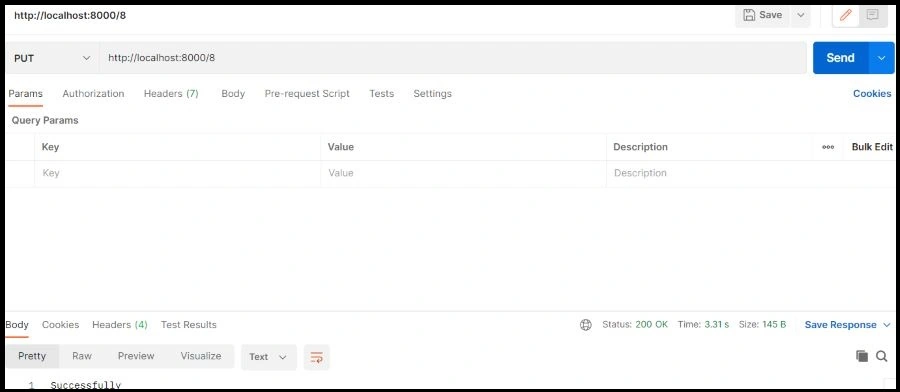
Then you can check your MySQL employee table.

Conclusion
Rust is a great choice for building high-performance and reliable APIs, and it also offers excellent support for interacting with databases like MySQL. Using the Rocket web framework and the MySQL driver, we can quickly and easily create RESTful APIs that perform basic CRUD operations on a MySQL database. In this article, we learned how to create API endpoints for adding, updating, and deleting data in a MySQL database using Rust and Rocket. We also explored how to handle HTTP errors and exceptions using the Rocket web framework's built-in functionality.
Overall, Rust provides a modern and efficient approach to building APIs that can interact with databases like MySQL. By leveraging the power of the Rust programming language and the excellent ecosystem of libraries and tools available, we can create high-performance and robust APIs that can scale to meet the demands of modern web applications.
Join the conversation! Your thoughts help the community grow.