

Introduction
Microsoft Bookings makes it easy to create a booking form where users can schedule appointments or meetings online. In this article, we will see how to create a Microsoft Bookings form step by step simply.
Before implementing this, if you want to know the overview of Microsoft Bookings, then you can check out this article: Overview of Microsoft Bookings
Steps
Step 1: Search for Microsoft Bookings
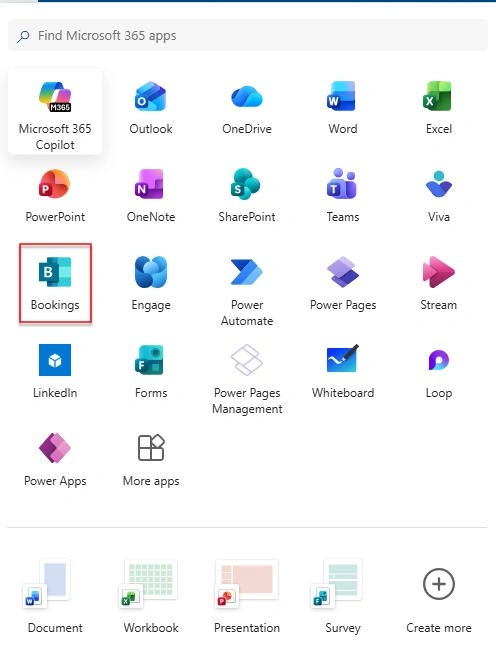
First, open your Microsoft 365 apps panel (the app launcher).
In the search bar at the top, type Bookings.
Once you see the Bookings app in the results (as shown in the image), click on it to open.
This will take you to the Microsoft Bookings page where you can start creating your booking form.
Step 2: Create a New Booking Page
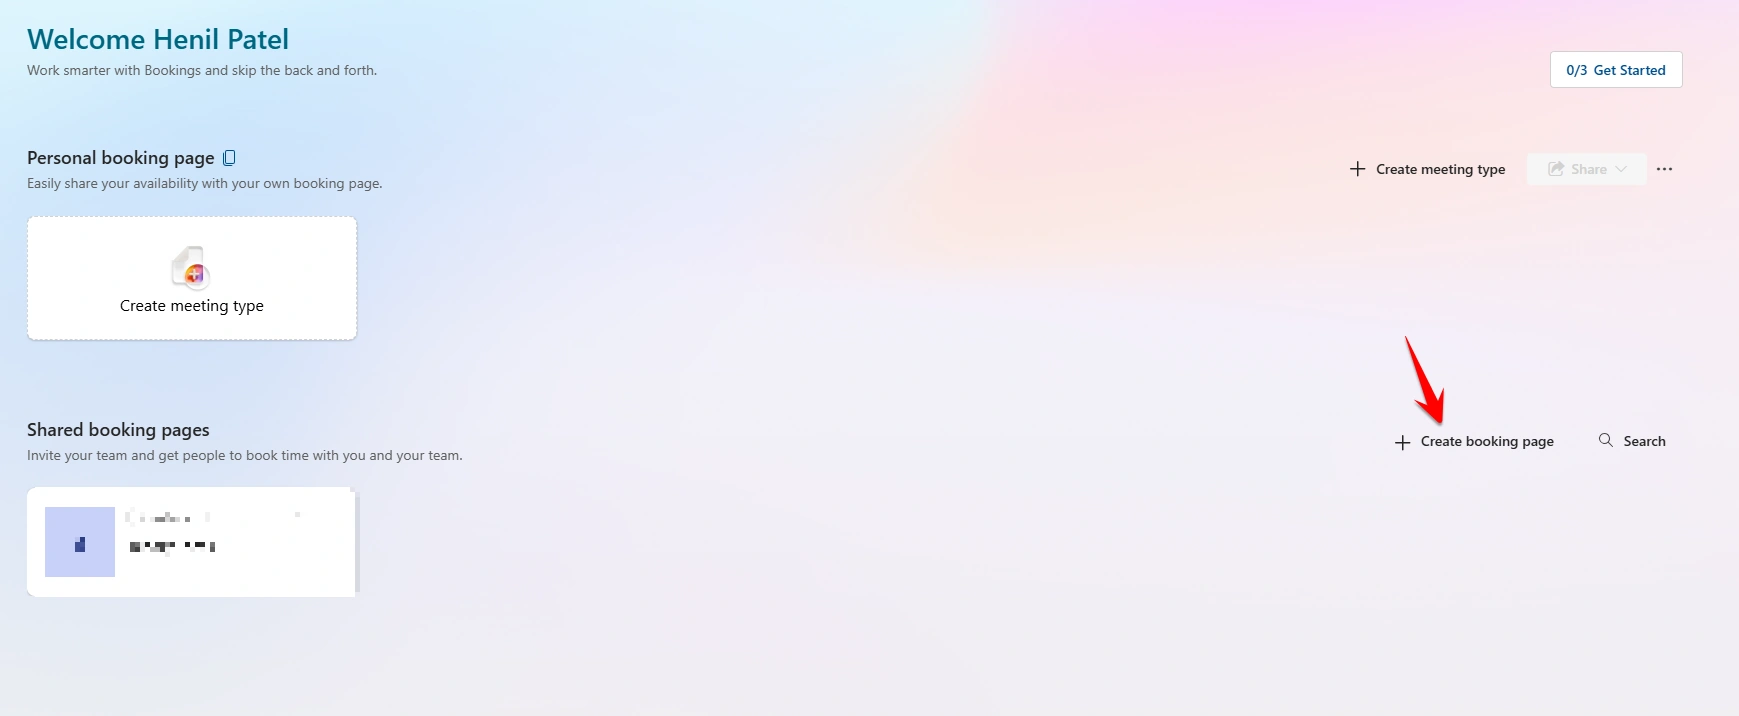
In this step, after opening Microsoft Bookings, create a new booking page where users can schedule appointments.
As shown in the below image, on the right side there is an option called Create booking page. So simply clicked on that option to proceed.
This is basically where we start setting up a new booking page from scratch.
Step 3: Configure Booking Details and Invite Team
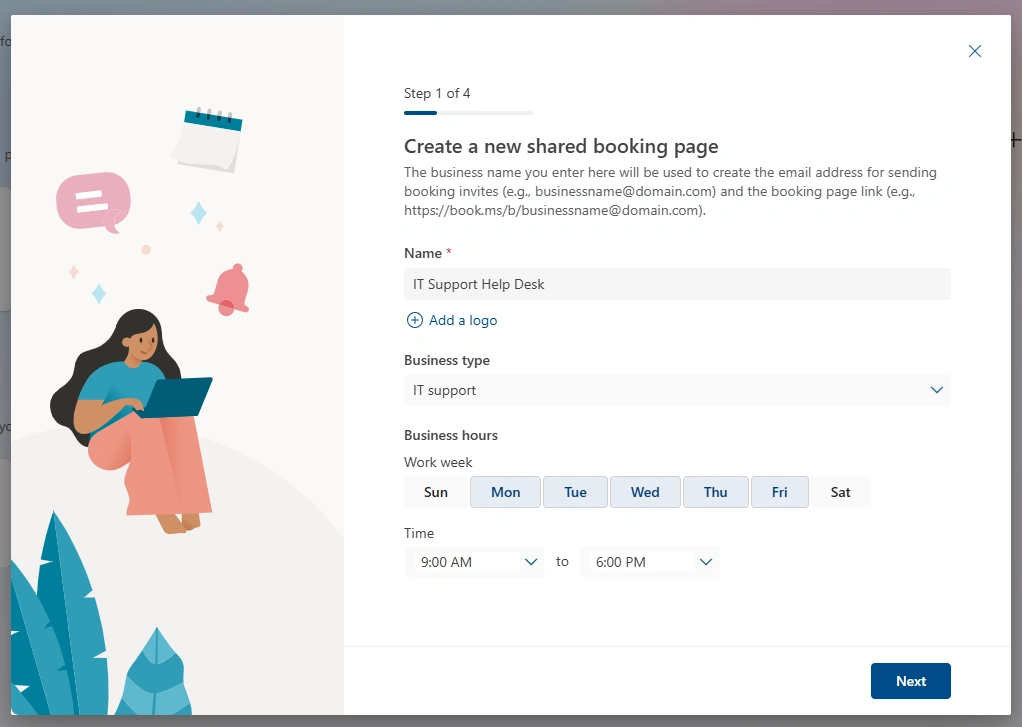
First, give your booking page a name. This name will be used for both the email address and the booking link, so keep it simple and relevant. You can also choose the business type and set your working days and timings based on your availability.
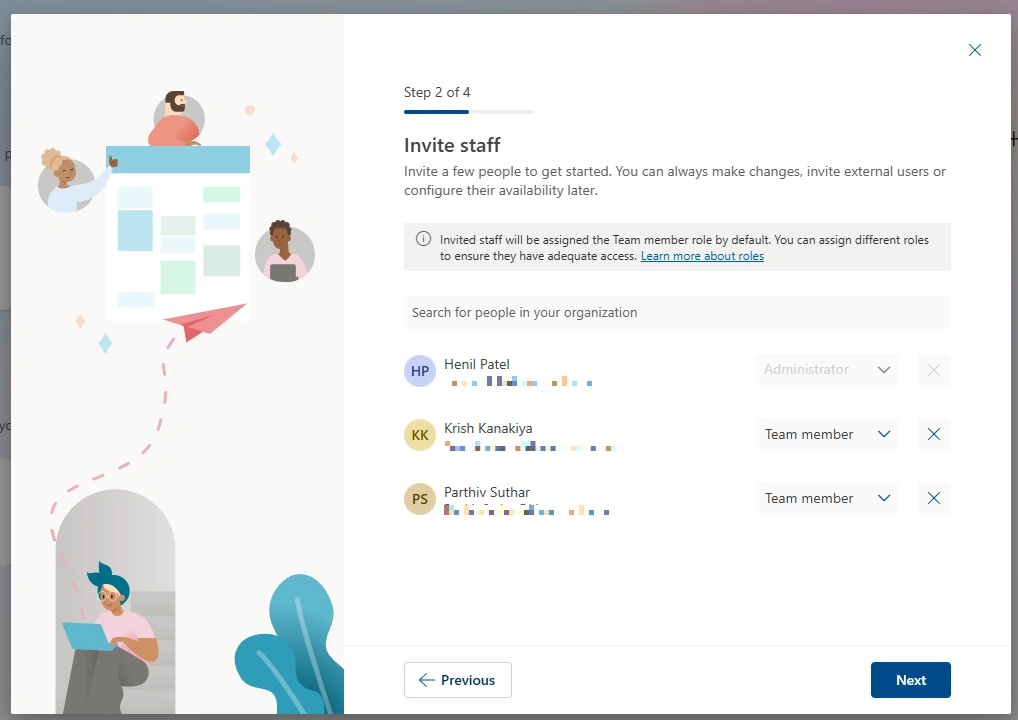
Next, you need to invite your team members. Just search and add people from your organization, and assign roles like Admin or Team member depending on what access they need. You can always update this later.
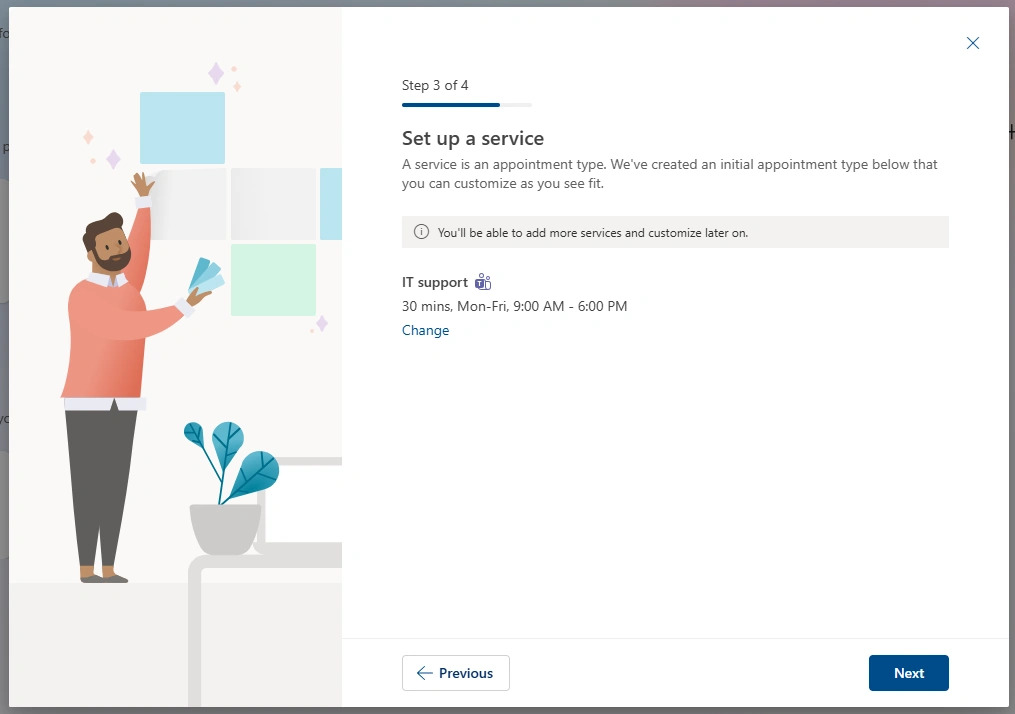
Then, you’ll set up a service. By default, one service is created for you with a basic duration and timing. You can modify it if needed, but for now, it’s fine to proceed with the default setup.
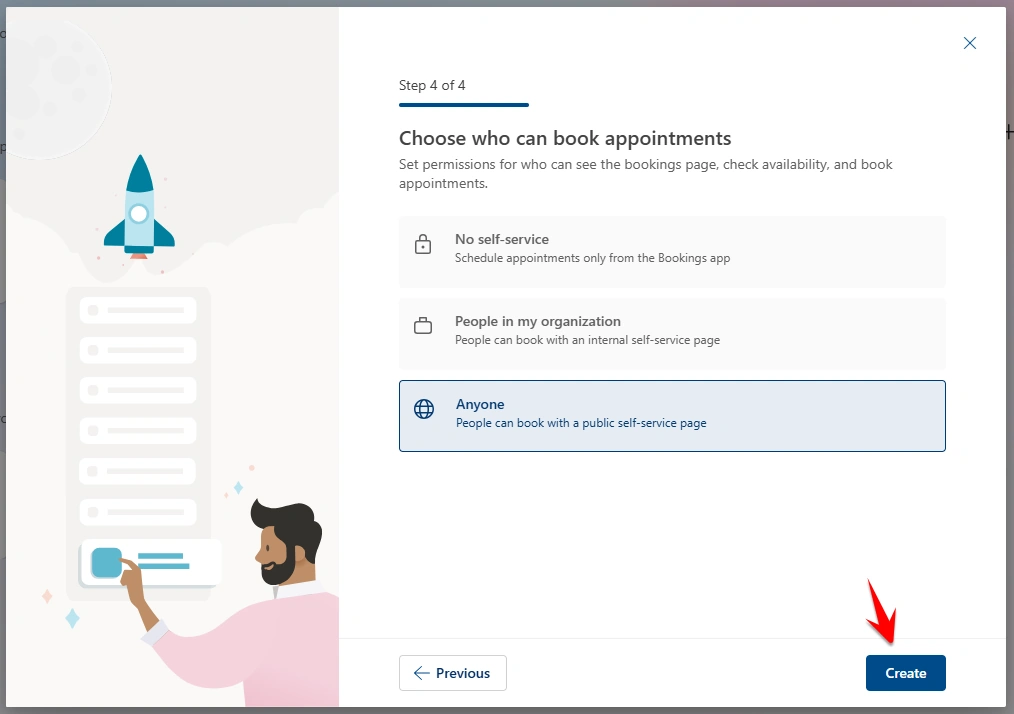
At end, choose who can book appointments. If you want this to be accessible publicly, select “Anyone.” Otherwise, you can restrict it to people inside your organization.
Step 4: Complete Setup and Open Booking Calendar
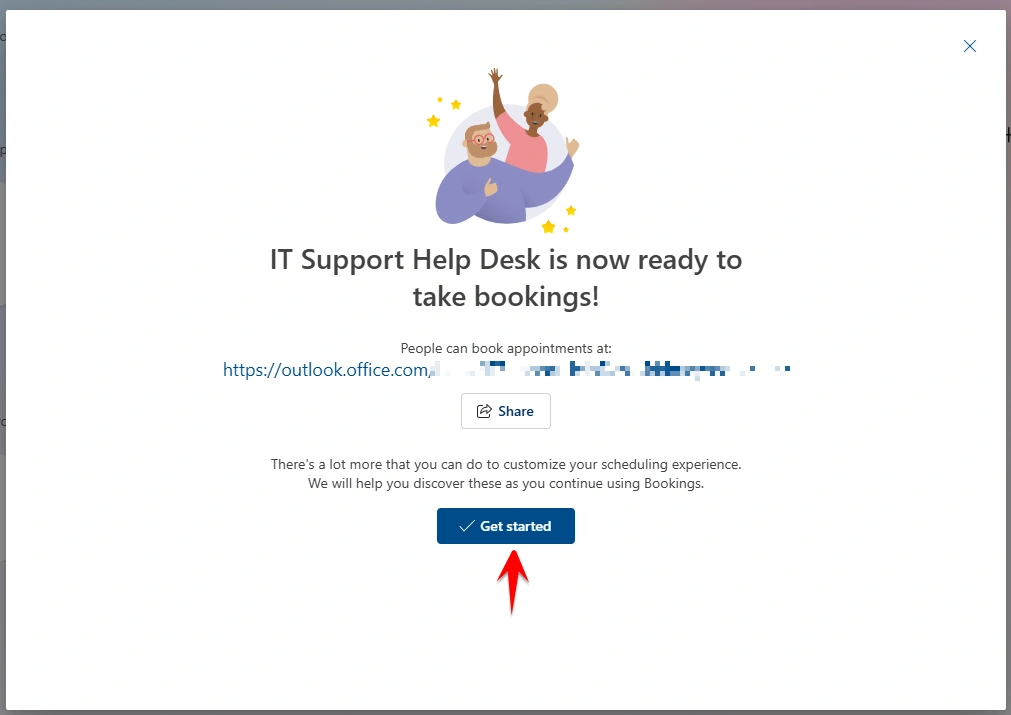
Once everything is configured, you’ll see a confirmation screen showing that your booking page is ready to take appointments. It will also give you the booking link, which you can share with others so they can start scheduling.
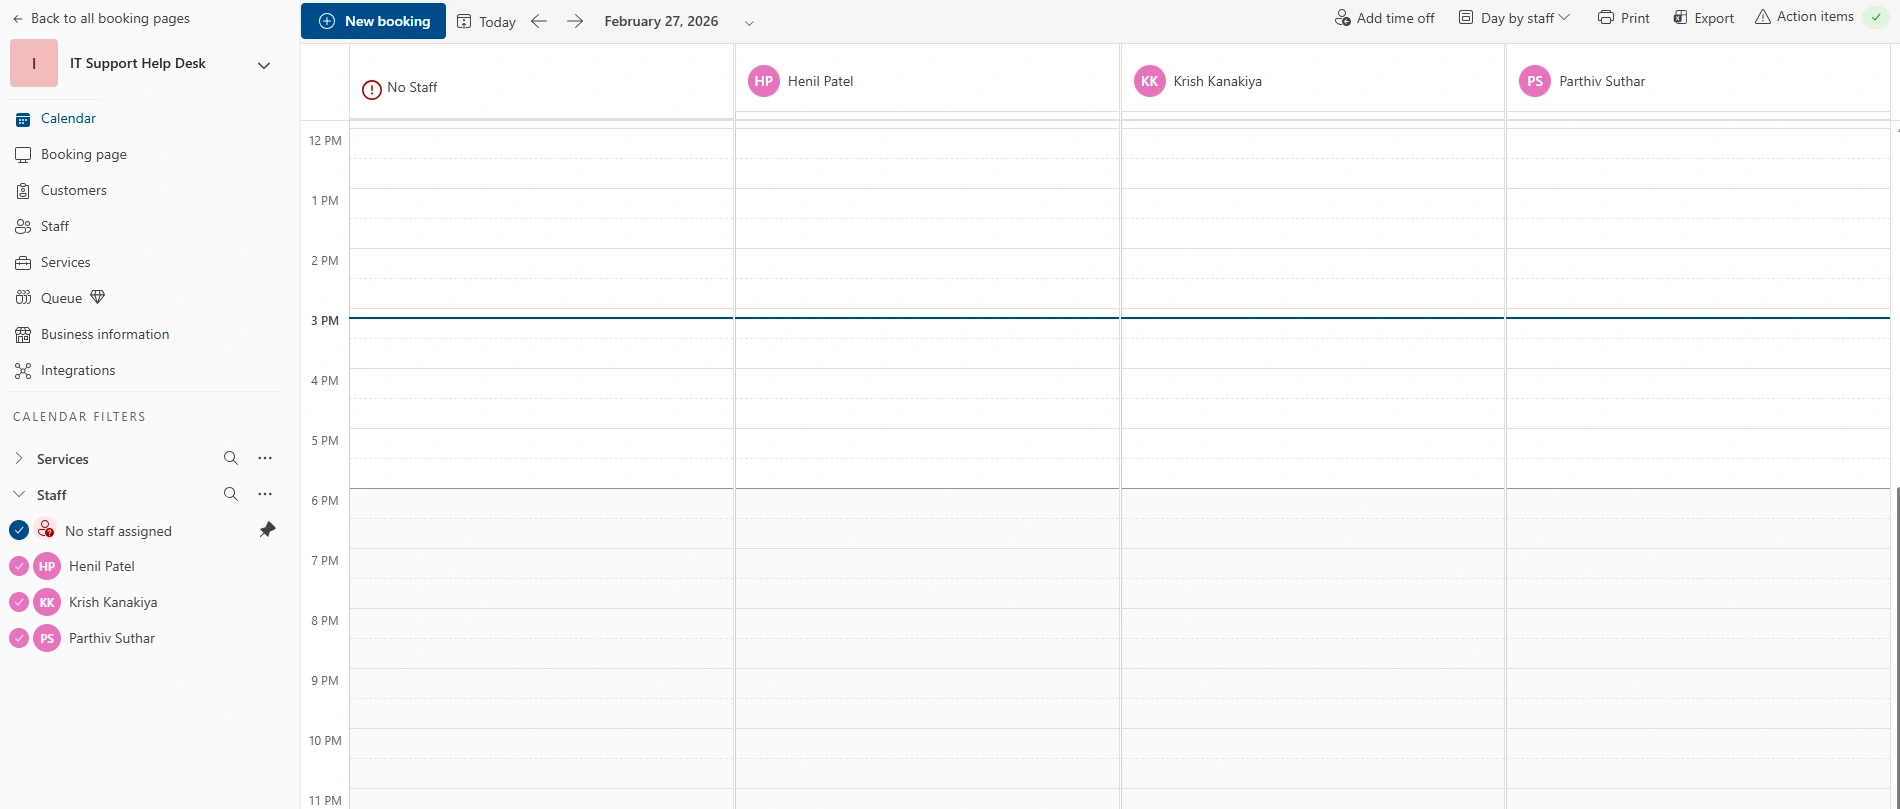
At this point, you can click on Get started to move forward. Once you click it, you’ll be redirected to the Booking Calendar, where you can manage all your appointments, view schedules, and make any further changes if needed.
Step 5: Edit Service and check Prebuilt fields
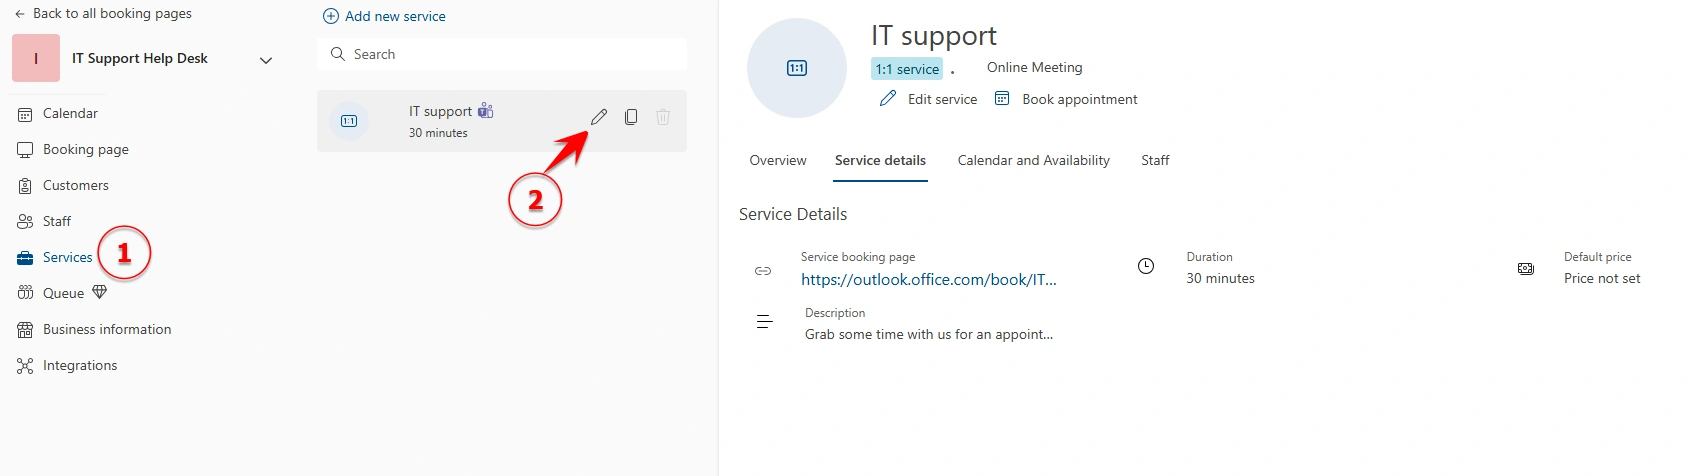
Next, open the Services section from the left menu and select the service you created. Click the Edit icon to open the service settings.
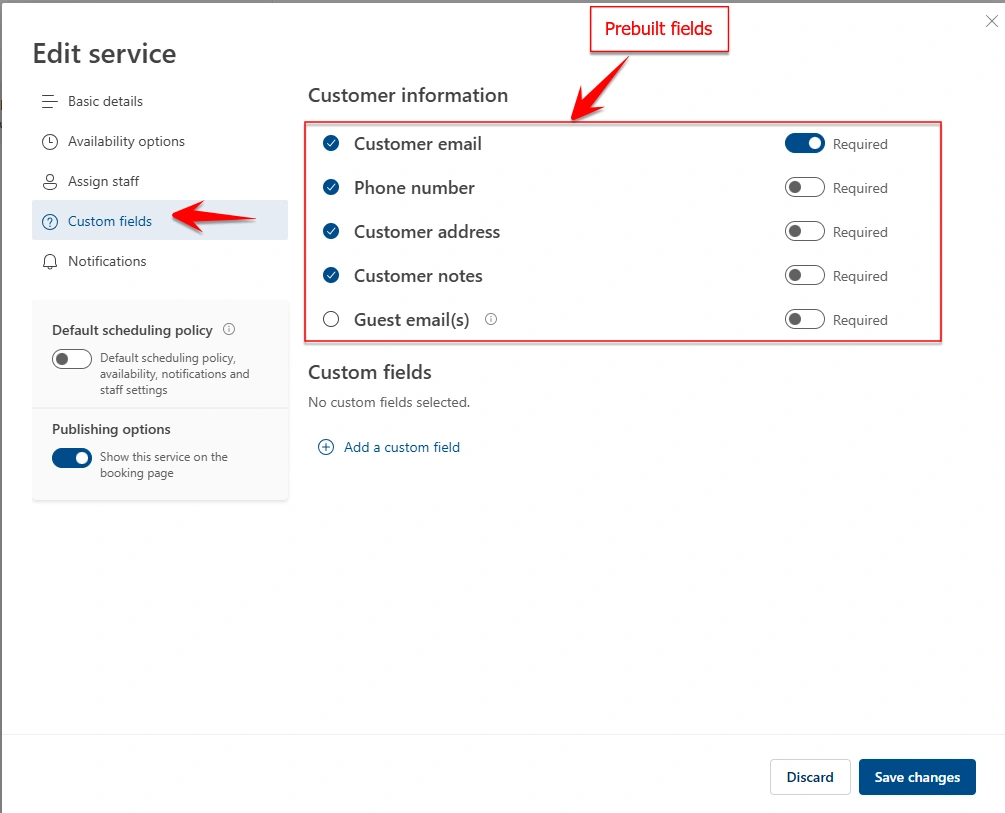
After that, go to the Custom fields tab. Here, you’ll see the prebuilt fields that Microsoft Bookings provides by default, such as Customer email, Phone number, Customer address, etc.
You can review these fields and decide which information you want to collect from users while they book an appointment. If needed, you can also mark specific fields as Required so users must fill them in before submitting their booking request. This helps ensure you collect all the necessary details for managing appointments effectively.
Step 6: Add and Configure Custom Fields
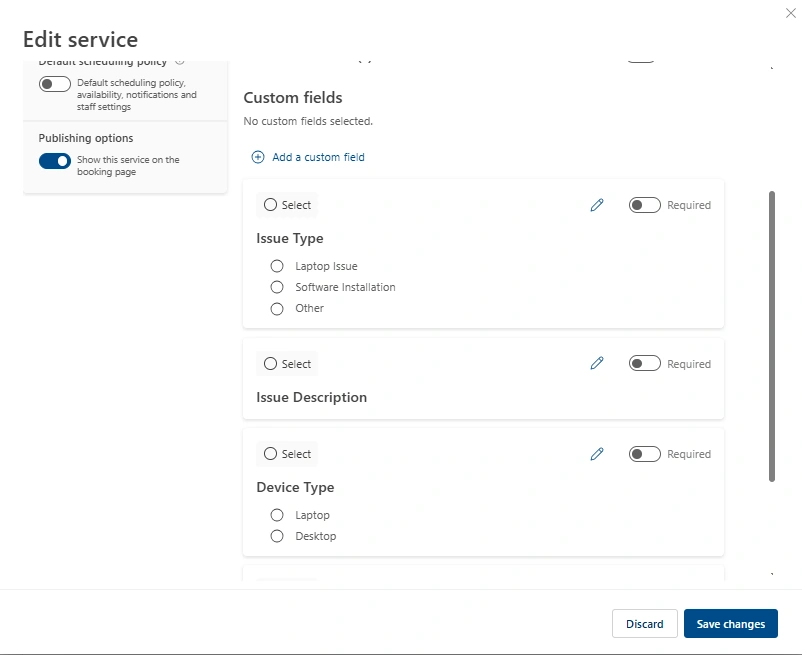
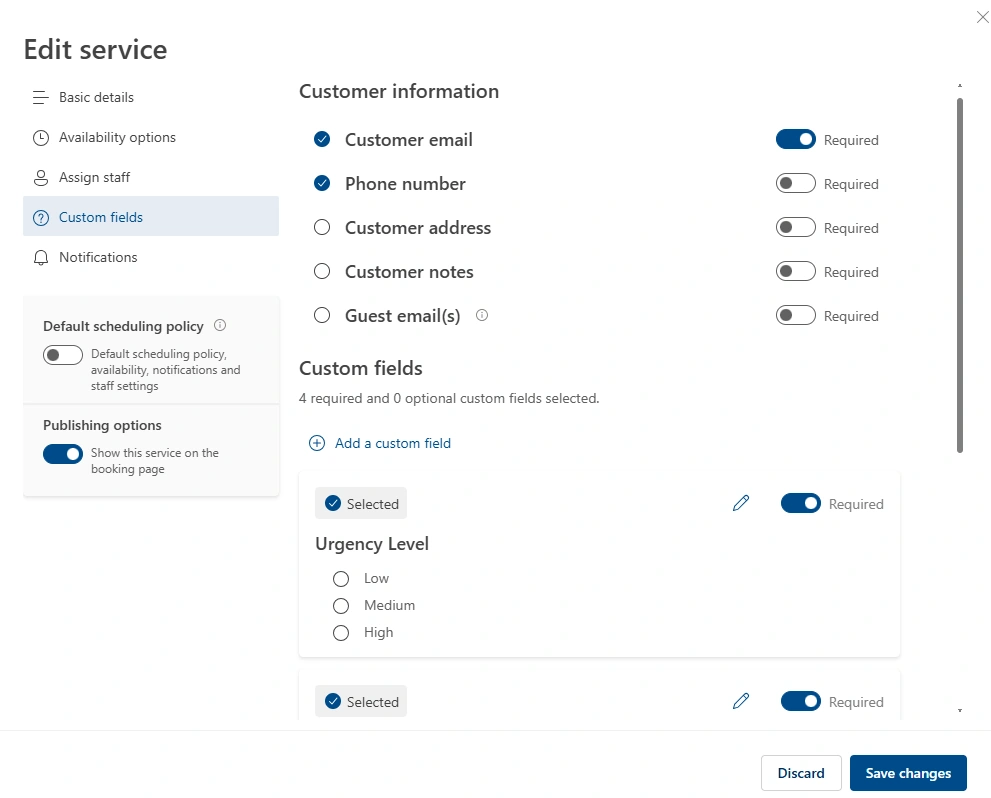
Add custom fields to collect the details you need from users during the booking process. You can make important fields required and choose the type of question like text, choice to create a simple and user-friendly booking form.
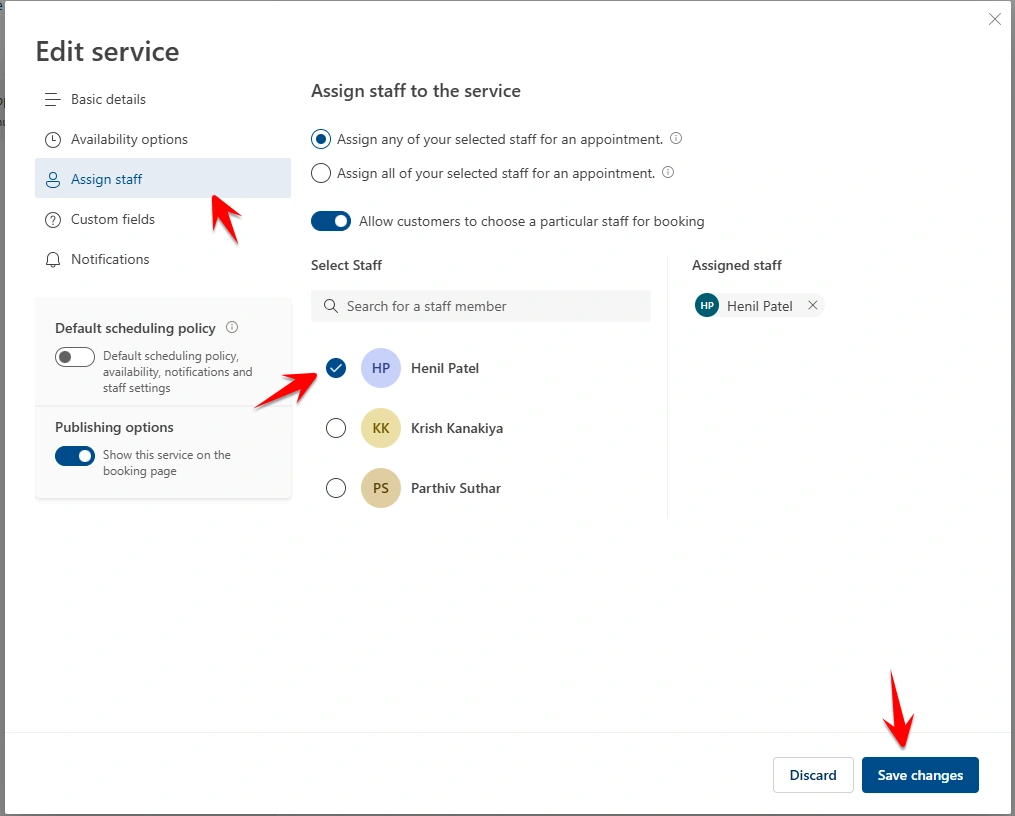
Step 7: Assign Staff to Service
Go to the Assign staff section and select the staff members who will provide the service. You can also allow users to choose a specific staff member during booking, then save the changes once the staff is assigned.
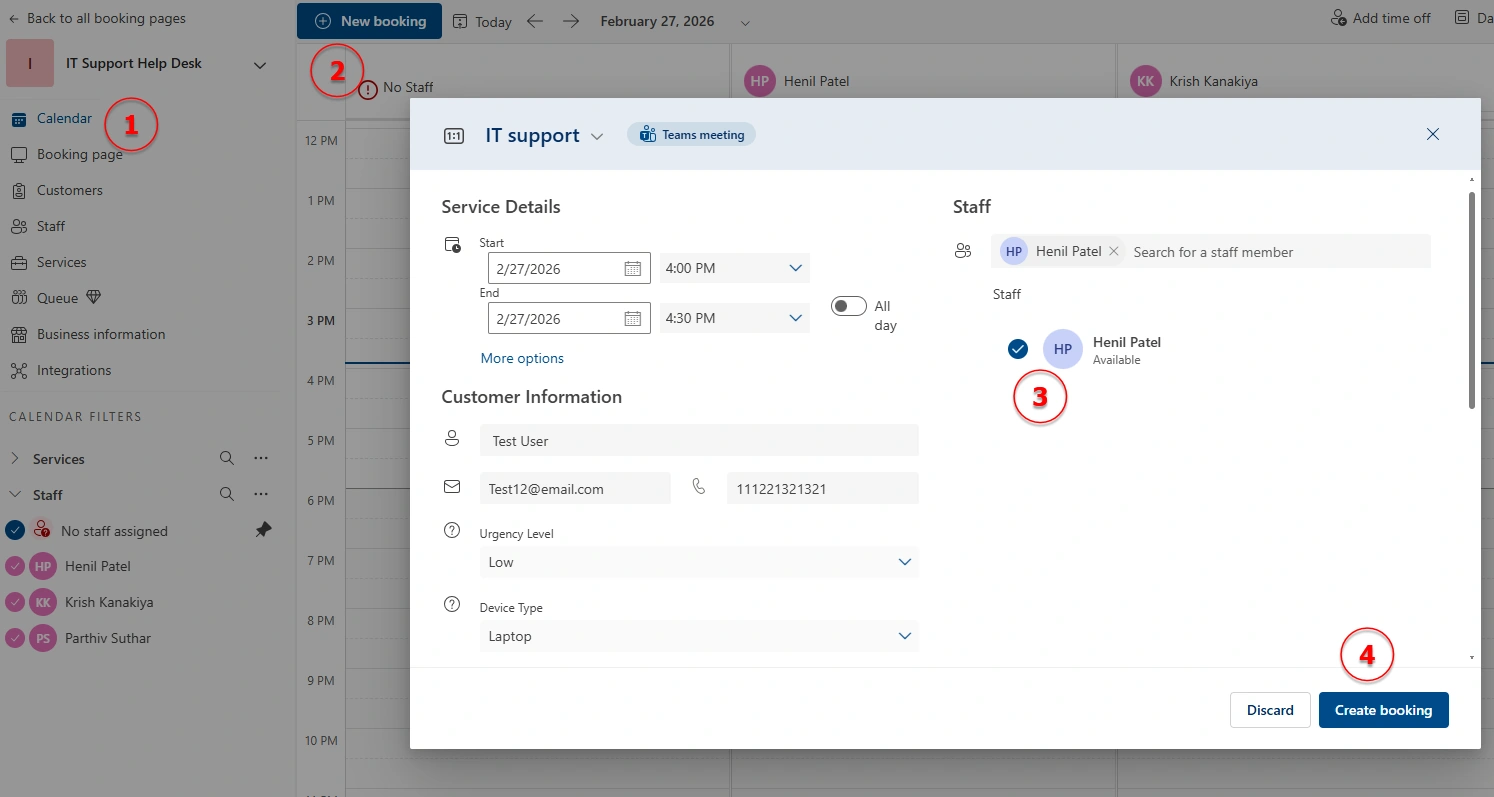
Step 8: Create a New booking
Go to the Calendar section and click on New booking. Enter the booking details, select the staff member, fill in the customer information, and then click Create booking to schedule the appointment.
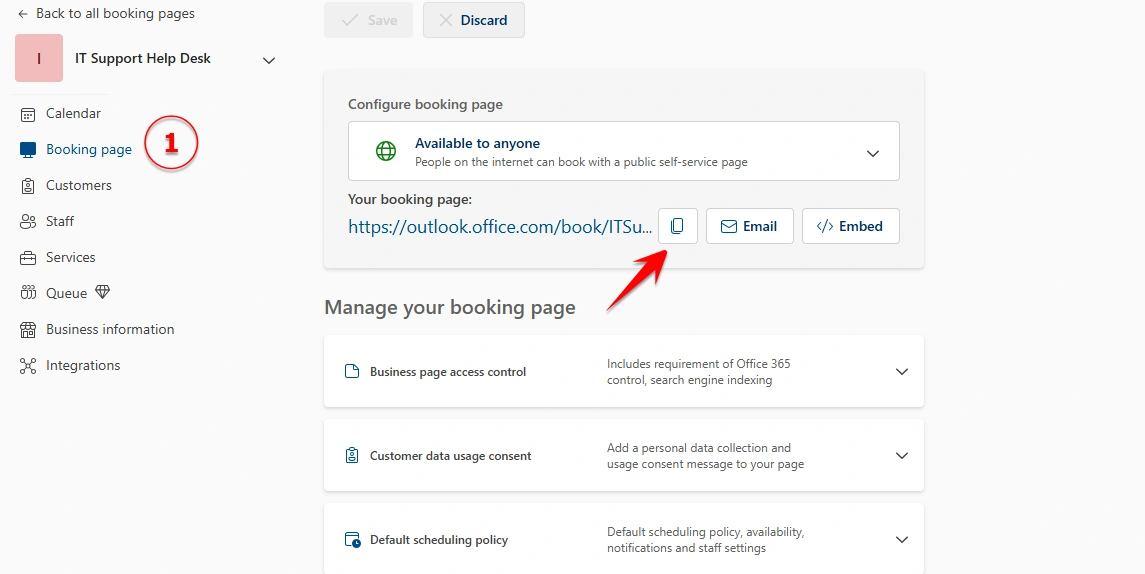
Step 9: Share Booking Page
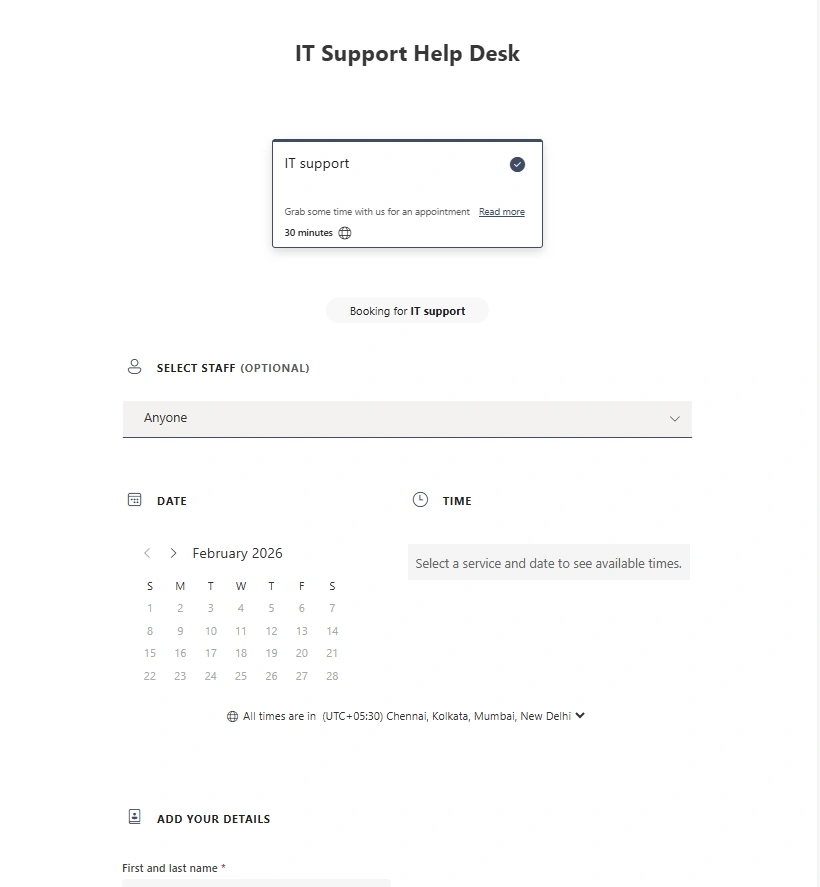
Go to the Booking page section to copy and share the booking link with users. You can also open the booking page to see how the form will appear to customers before sharing it.
Conclusion
By following these steps, you can easily create a Microsoft Bookings form and share it with users for scheduling appointments or services.
Join the conversation! Your thoughts help the community grow.