

The following procedure shows how to create a sub-site in SharePoint 2013.
Step 1
Log into your SharePoint 2013 site.
Step 2
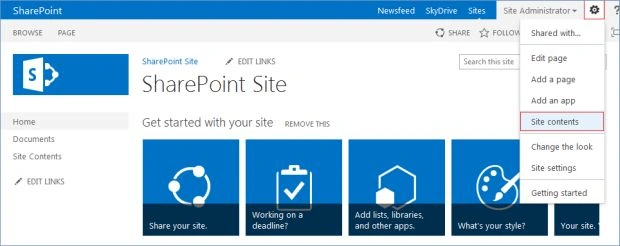
Click on the "Settings" icon and choose "Site Contents" from the drop-down menu.
Step 3
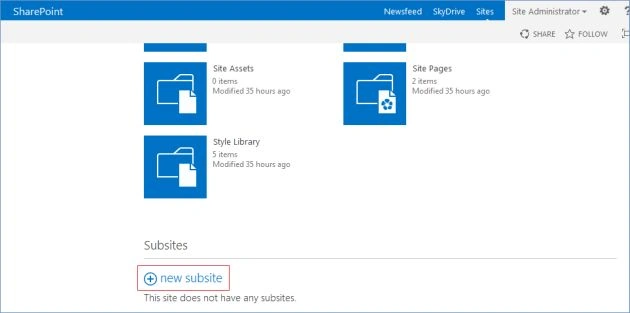
At the bottom of the page, click on "new subsite" under the "Subsites" header.
Step 4
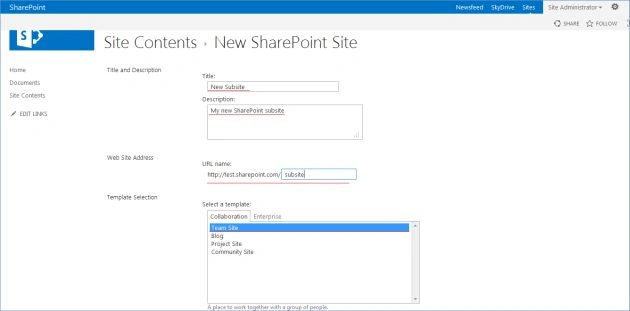
Enter the "Title" and "Description" of your new subsite, choose the URL for it and select a template for this subsite.
Step 5
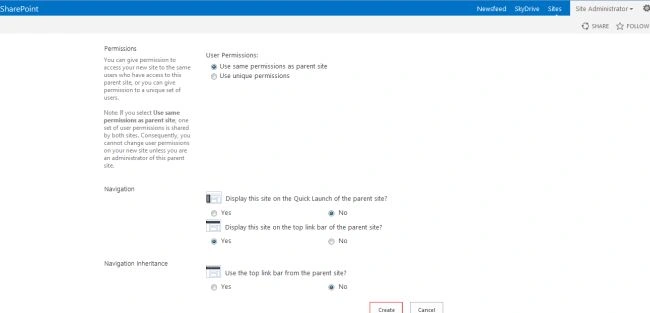
Select the necessary permission and navigation settings and click "Create."
Step 6
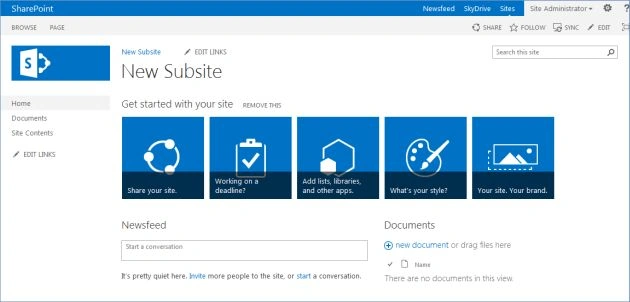
Now you can see your newly created sub site.
Join the conversation! Your thoughts help the community grow.