

Introduction
In the fast-paced world of modern business, providing efficient and responsive support is a cornerstone of success. Whether you're managing IT requests, customer inquiries, or service tickets, having a structured system in place to handle and track these issues is essential. But what if you could create a customized, automated, and user-friendly ticketing system without the need for complex coding or expensive third-party tools?
In this article, I'll explain how we can create a Ticketing System using Microsoft SharePoint Lists &Outlook by using Power Automate.
- Log in to Power Automate
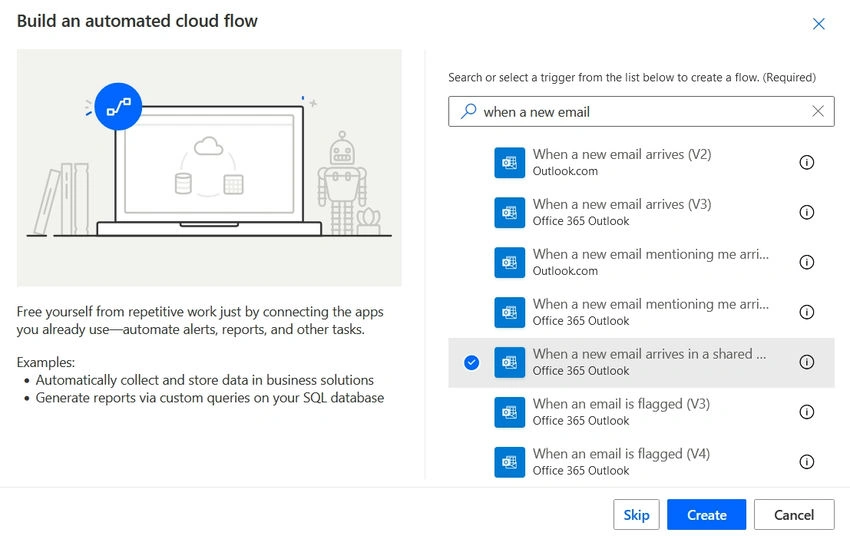
- Create “Automated cloud flow”
- Search as “When a new email arrives in a shared mailbox”
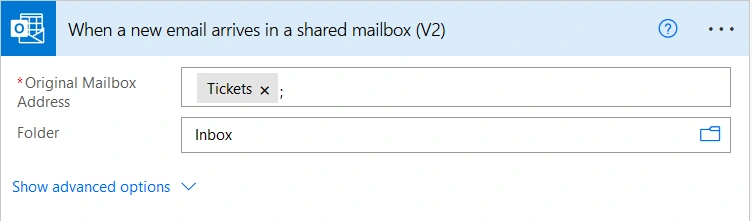
Here I’m using a Shared mailbox as a common mailbox to receive all the emails as tickets.
4. Fill with a relevant shared mailbox username.
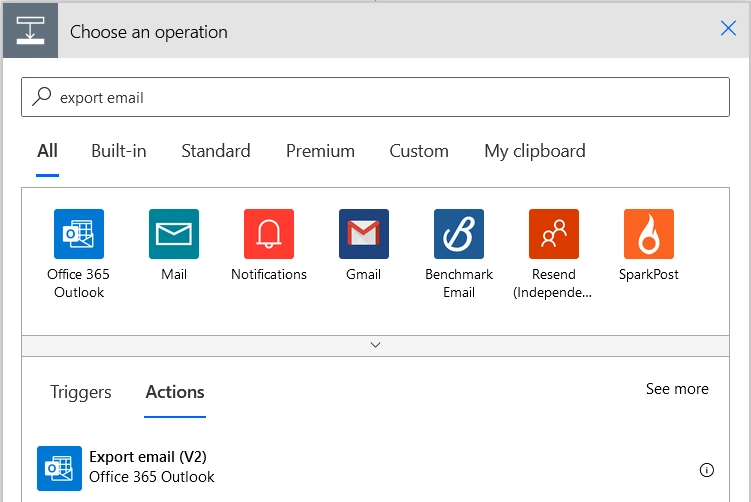
5. Choose an operation such as “Export email”
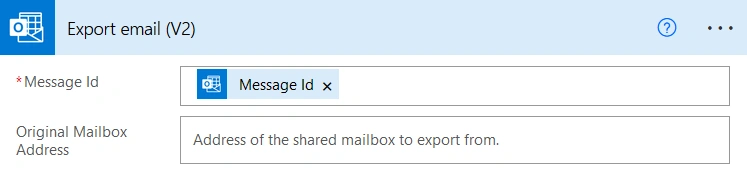
6. Message ID fill with “Message Id”
7. Then Choose an operation as “Create Item in SharePoint”
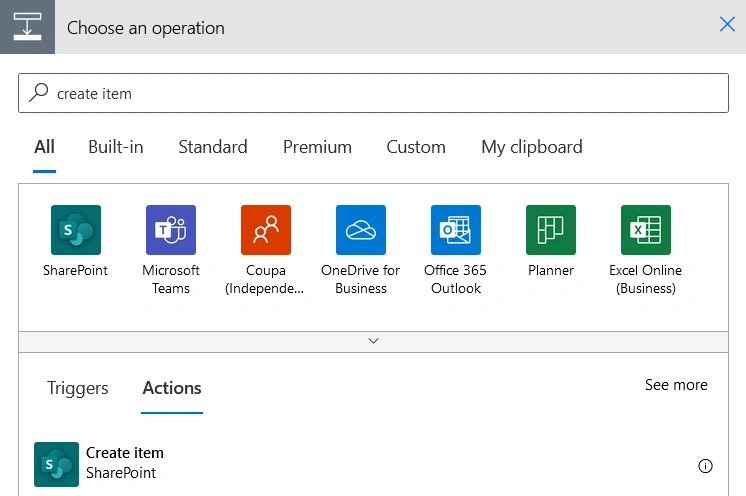
8. Create a SharePoint Site and create a SharePoint List (Ticketing System) accordingly. Add Columns as you wish. For example, "ID, Title, Status, Email Sender, Date Received, etc," in the relevant format.
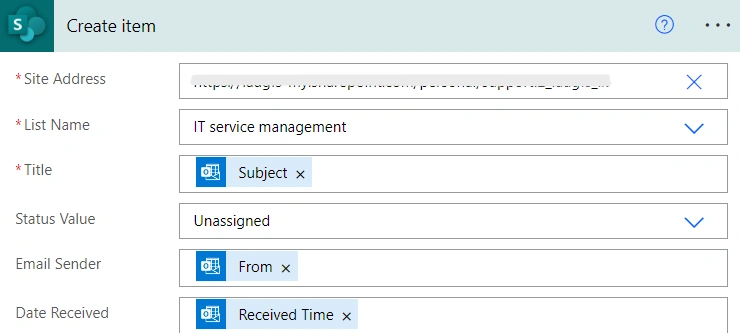
Enter your SharePoint site address and the List name you created.
- Site Address: Provide the URL of the SharePoint site where the list or library is located. This is the web address that takes you to the main page of your SharePoint site.
Example: https://yourdomain.sharepoint.com/sites/YourSiteName
- List Name: Select the specific SharePoint list or library where you want to create the item.
Example: My List Name is IT Service Management
9. Fill in the relevant data according to the columns of the list you need to fill automatically. Here it shows the Column names of your List to fill.
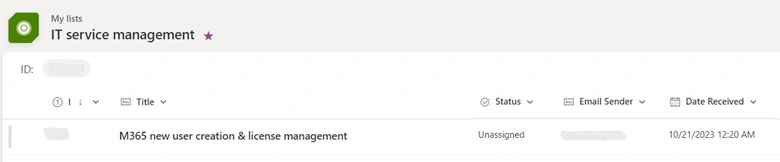
- I have included the Title, Status value, Email Sender, and Date Received to be filled automatically when an email comes to the Shared mailbox.
- I have used the Email subject as the Title of my List, which means a user needs to send the email to the given commonly shared mail mentioning his/her issue as the subject.
- Status value needs to be added by Choice in the List for 3 parts Assigned, Unassigned, and Completed. So When an email is received, it is automatically unassigned.
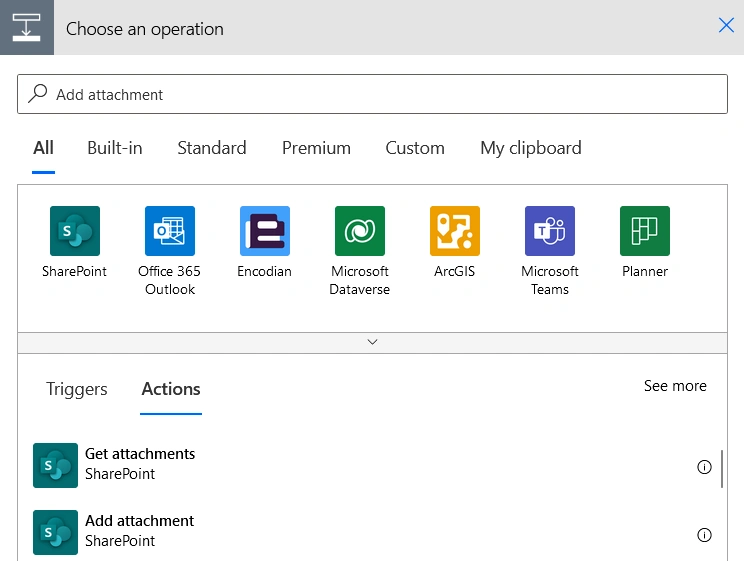
10. Choose an Operation as “Add attachments in SharePoint”
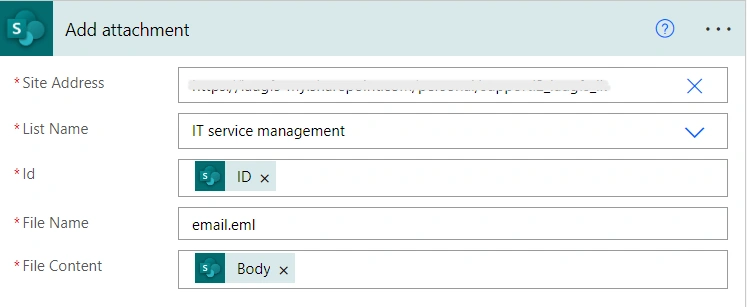
11. Again, fill Site Address and List Name.
- ID - Click ID
- File Name - type “email.eml”
- File Content – Click Body
12. Save your Flow and test it manually to ensure when you send an email to that given email, the List is automatically updating.
PS: Here is an example of a Ticketing System. (Updated Microsoft List)
Suggestions: You can create a List to get customized user emails (Specific Sender) that update every email he/she sends. All you need to do is change Step 03 to “When a new email arrives” and fill in accordingly.
Join the conversation! Your thoughts help the community grow.