


By reading this article, we will learn the below points.
- How to create a new workflow for the Library
- How to apply the created workflow to the libraries
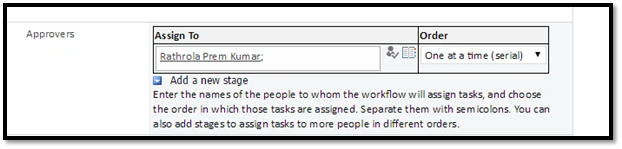
- How to assign the task to resource
- How to email a trigger sample
Firstly, let’s see how to create workflows in Office 365 / SharePoint 2013.
Before starting to talk about new workflows, it's also essential to know about workflow and the uses of it.
The main purpose of Workflows is given below.
- It allows us to automate our business process.
- This business process can be as simple as document approval process with a single approver.
Example
A bank account opening process requires manager to review and approve our documents. If it is accepted by manager, then document is ready for opening an account and notifies the team; otherwise it goes to initiator to update the document. This process is continued until the document is approved.
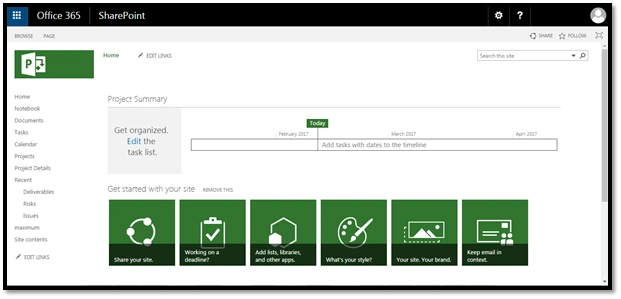
Now, let’s see how to create a new workflow in Office 365 online. Open the site collection from your site, as shown below.
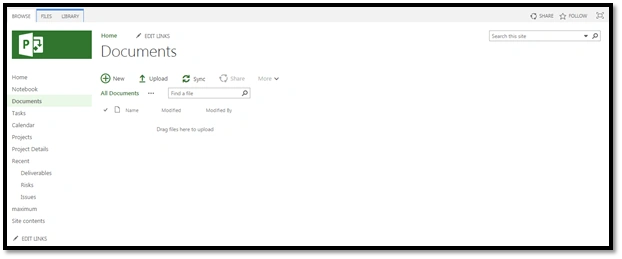
Now, in our demo, we shall consider document library to create a new workflow.
Click on "Documents" and then click on "Library" from the top ribbon, as shown below.

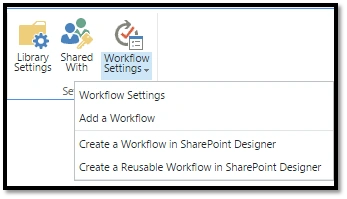
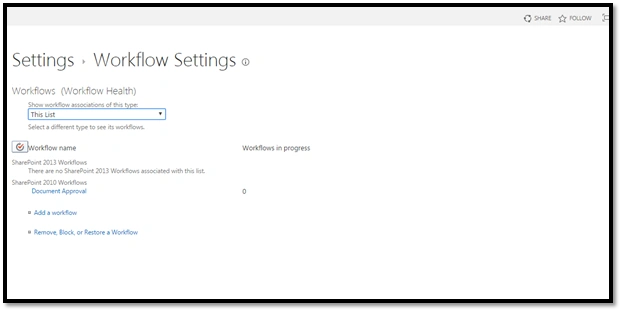
Now, click on "Workflow Settings" as shown below and select "Add a workflow" option.
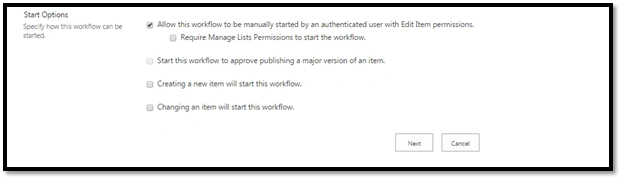
Upon selecting "Add workflow" option, the page navigates to the below screen to create a new workflow.
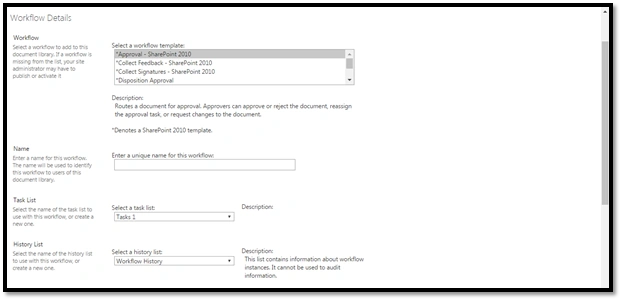
Select a desired workflow template as per your need. In our demo, let us select Approval-SharePoint2010.
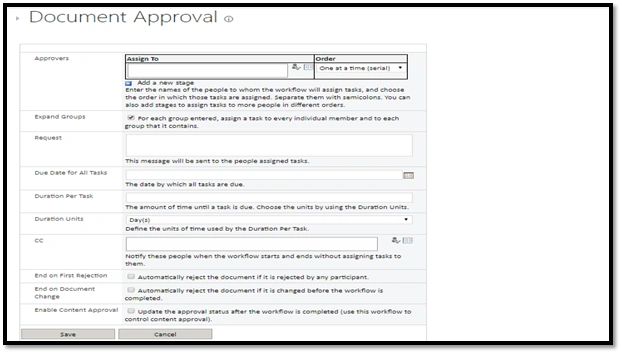
Give a proper SharePoint workflow name. In my case, it is “Document Approval”.

Now, select Tasks (news) in "Select a task" dropdown.



Join the conversation! Your thoughts help the community grow.