

Introduction
A modern application should have a cloud back-end to perform actions such as storing data into a database and being accessible from all the devices owned by the user.
If we want to give it this kind of function, we can use Microsoft Azure.
In this article, part one, we will see how to Work on Azure to create a back-end for a mobile application (built with Xamarin.Forms).
You can read the Part Two here.
Specifically, we will see how to create,
- Resource Group
- App Web
- Azure SQL Database
- Azure Server
In the next article, part two, we'll see how to create a basic Xamarin.Forms application and connect it to this back-end.
Prerequisites
- A Microsoft Azure Subscription (If you don't have one yet, see the Azure Portal for a free subscription).
- Microsoft Visual Studio 2019 (all versions).
Step 1
Login into the Azure Portal with your credentials,

Step 2 - Create a Resource Group
A Resorce Group is a container that holds all the resources for an Azure Solution (see Azure Resource Group).
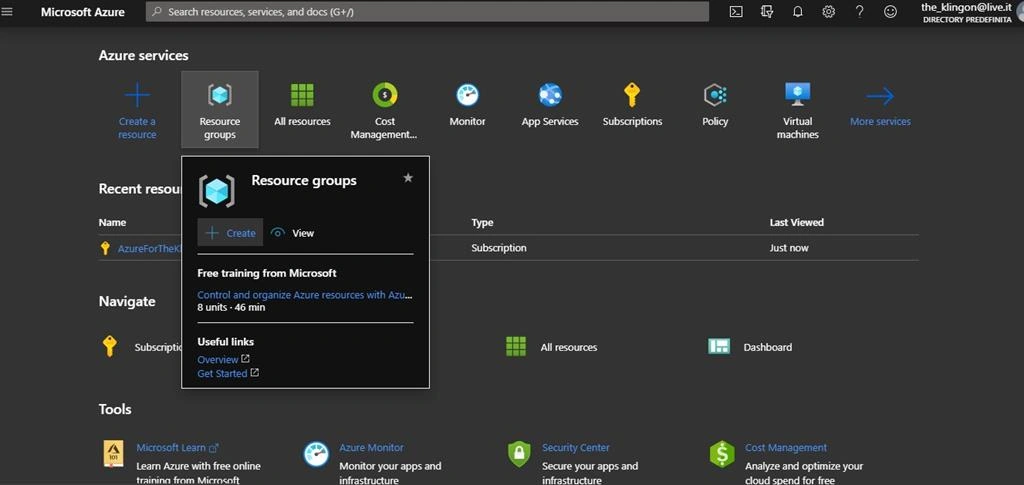
Mouse over Resource Group and then click on "Create":
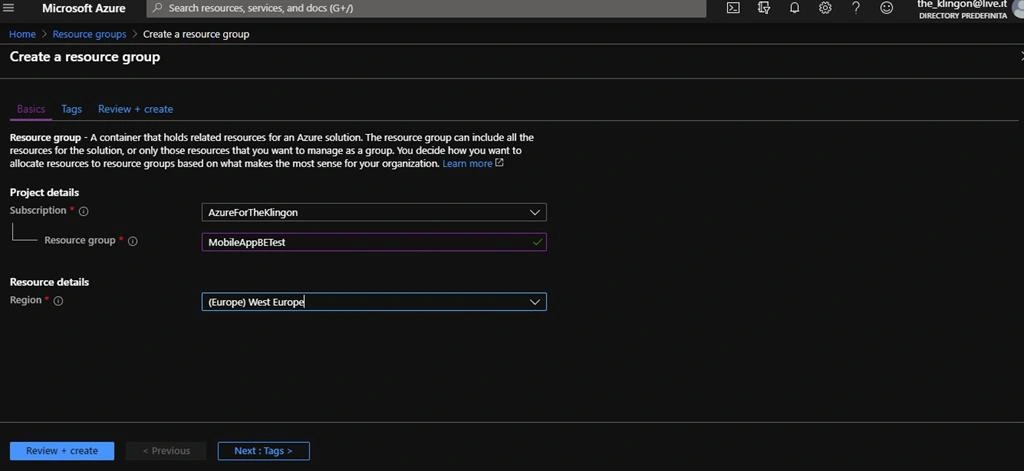
Now type the name of the Resource Group
Click on Review and Create and then Create,
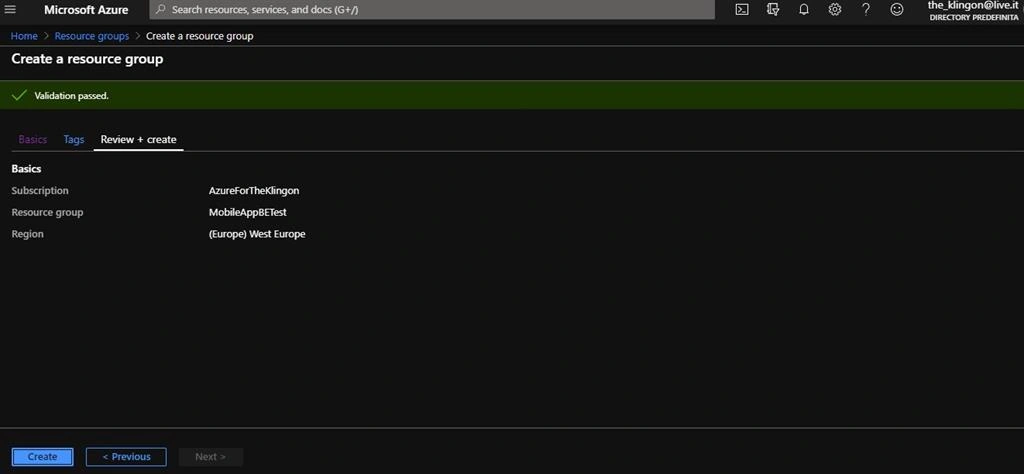
We've created our own Resource Group,

Step 3 - Create a Web App
This WebApp will be the back-end for our own Mobile Application.
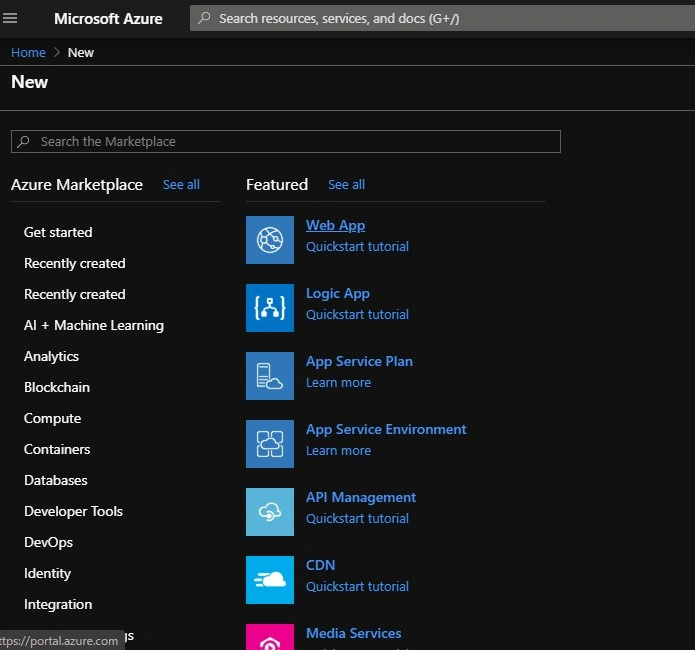
In the Azure Portal Home Page, click on "Create a resource", choose "Web" and then "Web App":
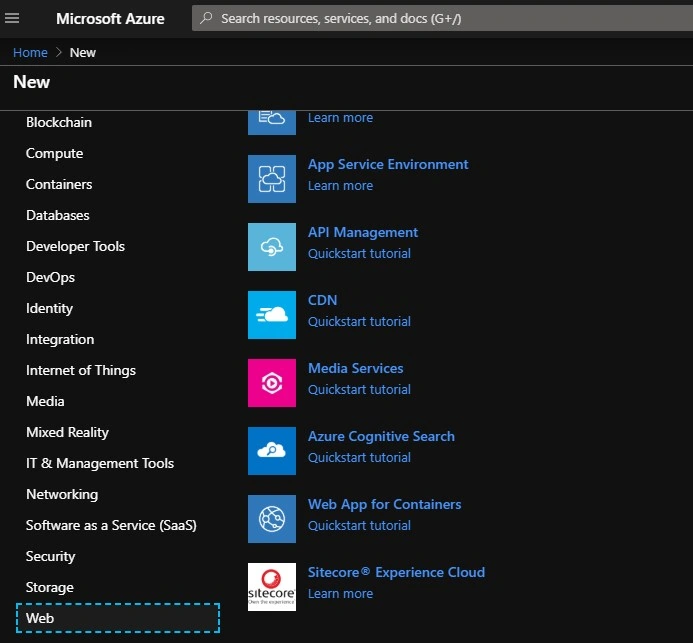
Compile the fields with the data shown in the images, choosing the correct resource geographic area, then click on "Review and Create" and "Create":
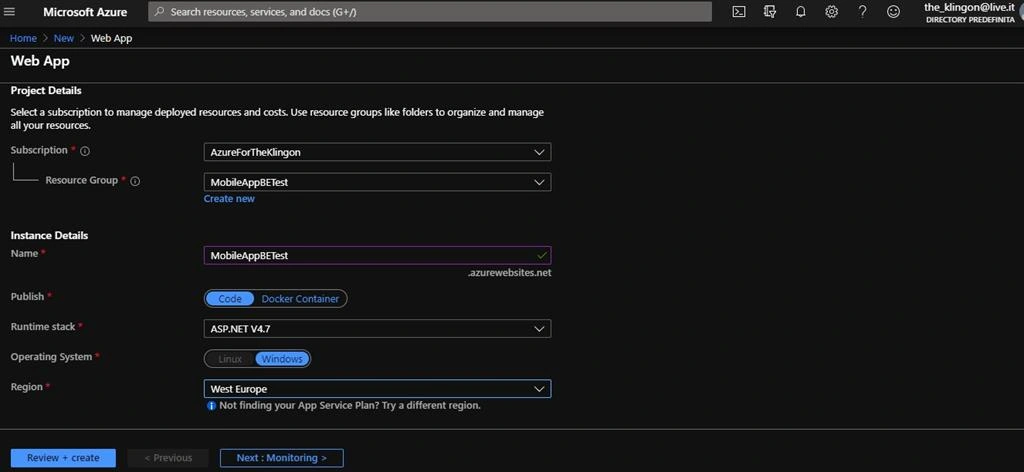
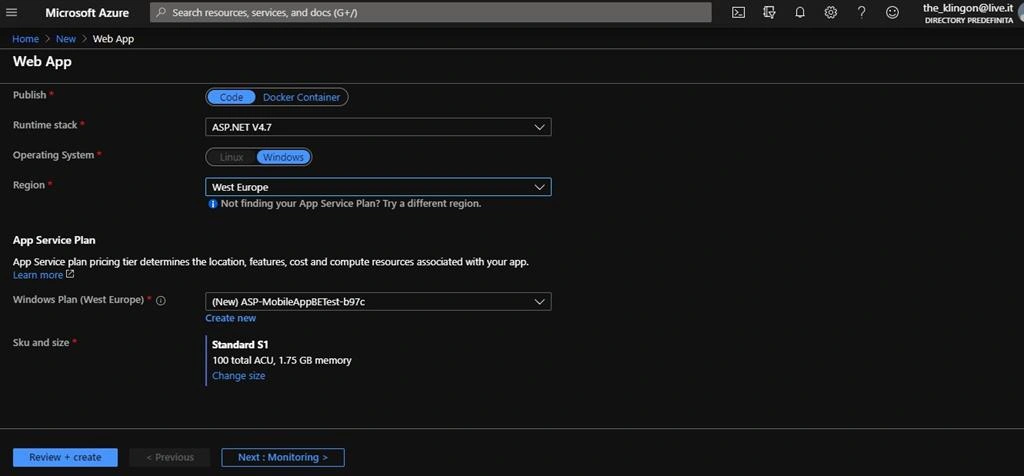

We've created a Web App,

Now we'll prepare it to be a Mobile Application back-end. Click on the Application Name beside the "Microsoft.Web/sites" label,
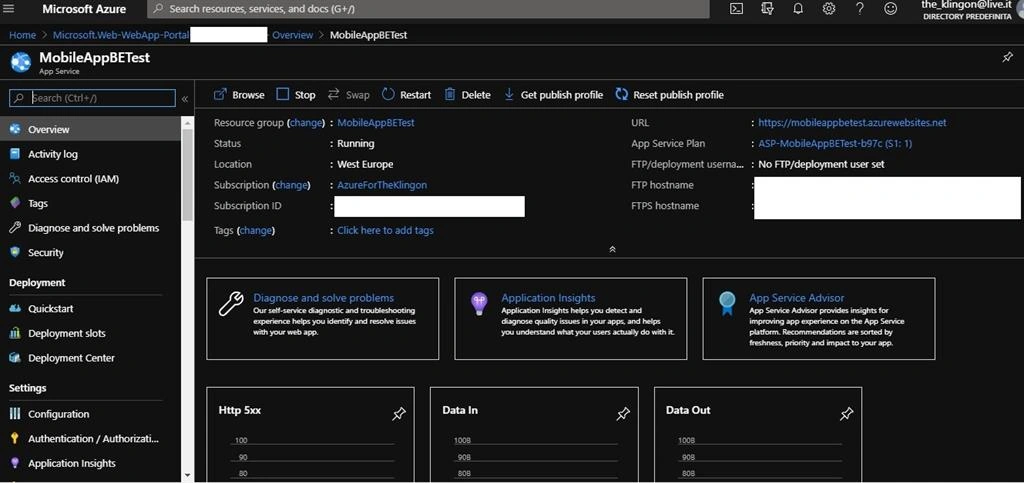
Click on "Configuration" and then on "New Application Setting",

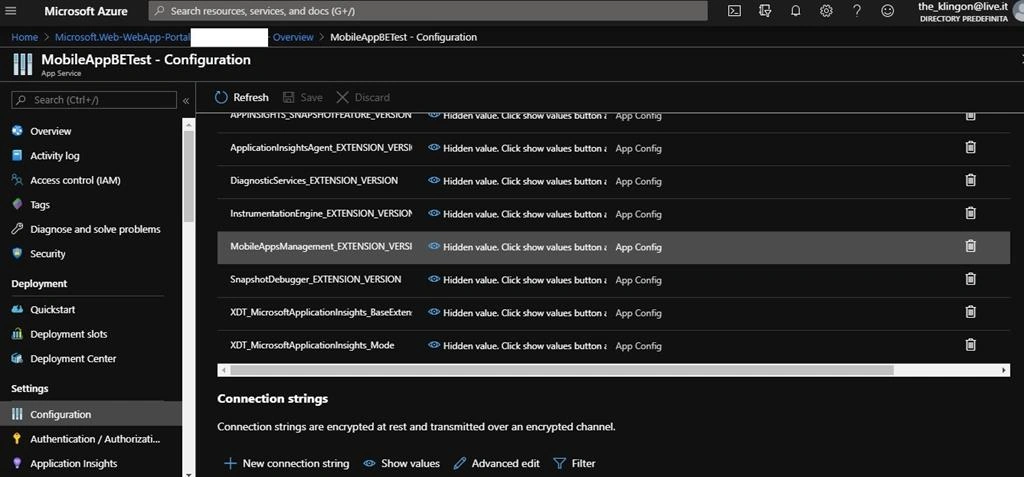
Now compile the fields with the data shown in the image below, confirm with "Ok" and then save the changes,

Step 4 - Create an Azure SQL Database with related Server
This database will save the data from our Mobile Application.
In the Azure Portal Home Page, click on "Create a resource", choose "Database", type into the search bar "Azure SQL" and confirm the choise,
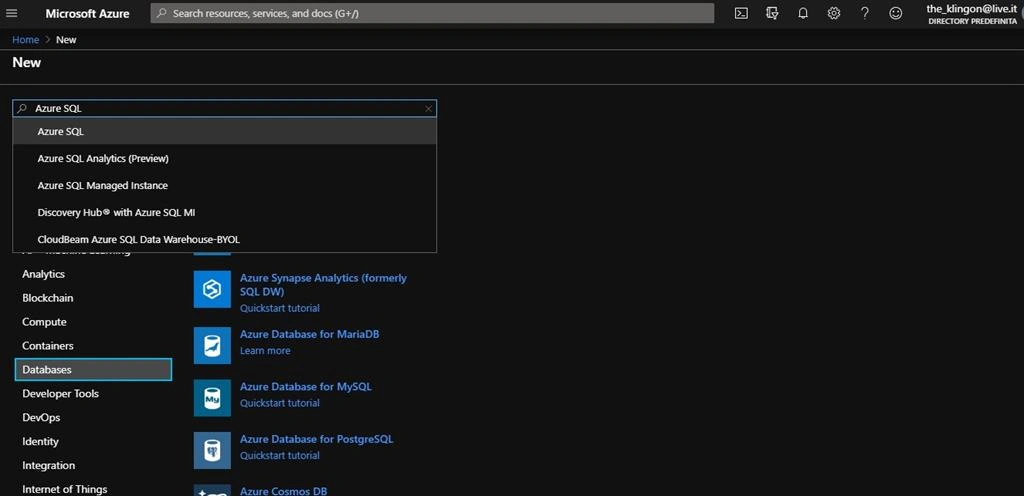

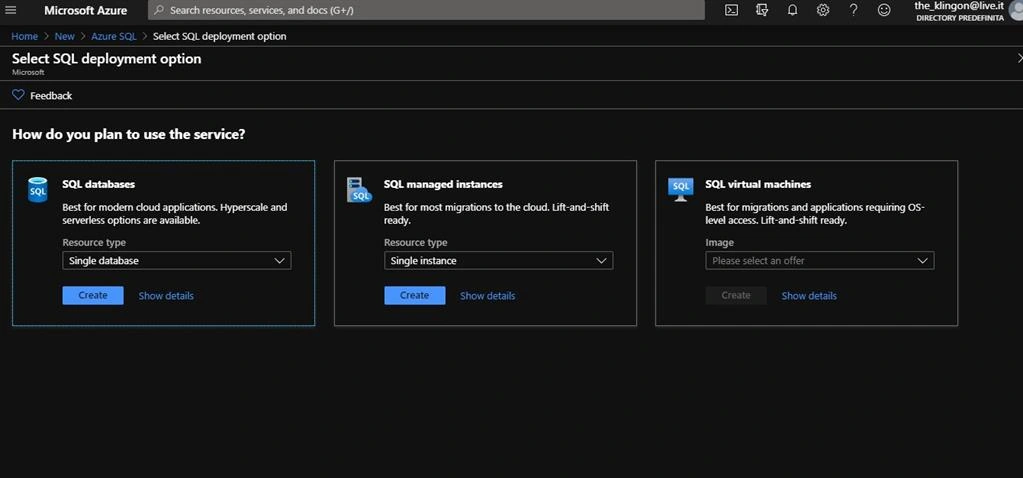
Click on "SQL Database",
Now, compile the fields with the data shown below, choosing the correct Resource Group,

Create a Server for the Database, choosing the correct resource geographic area,
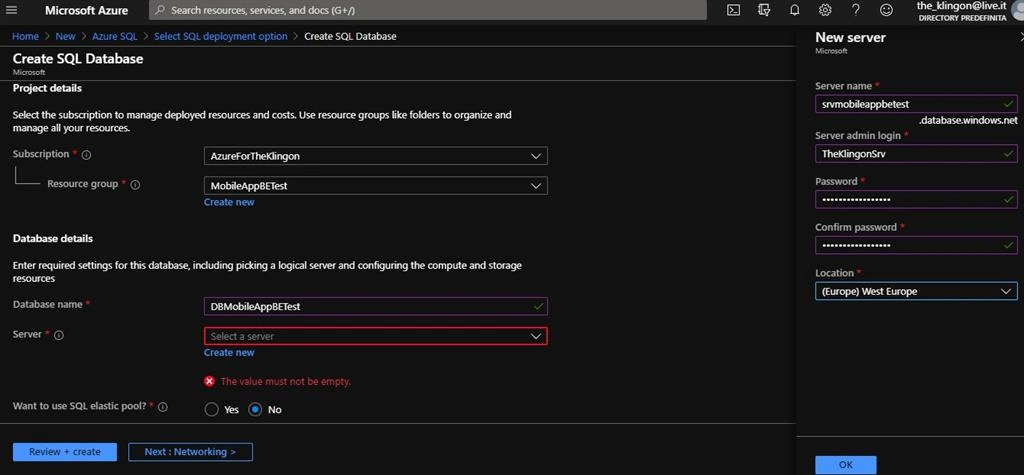
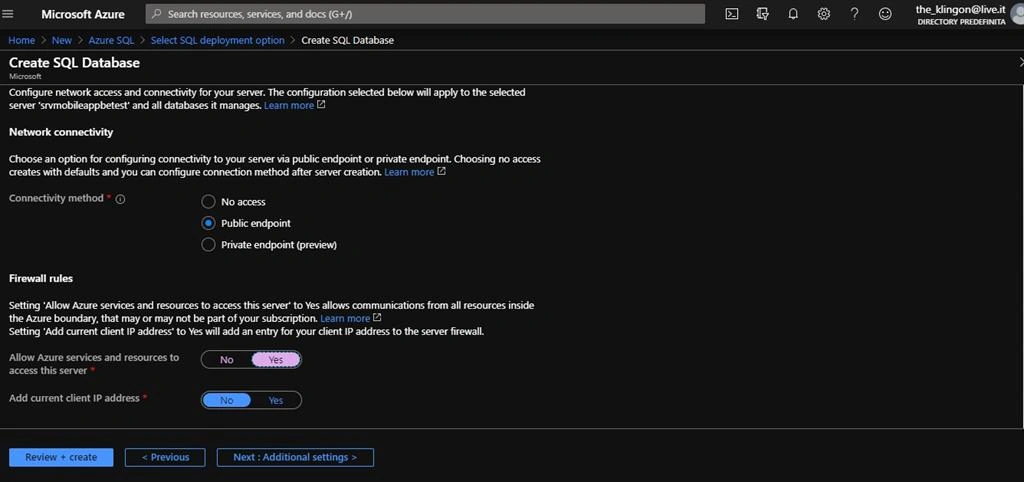
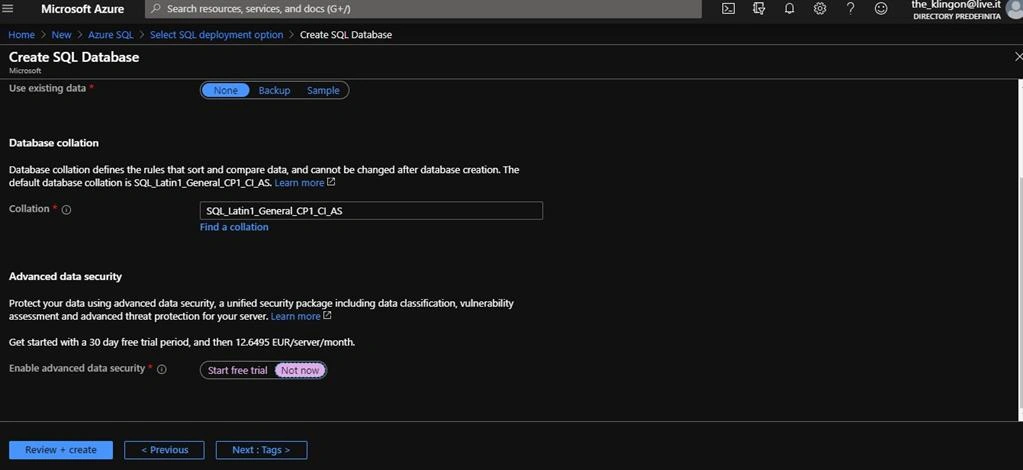
Click on "Review and Create" and "Create"; We've created the database and the related server.
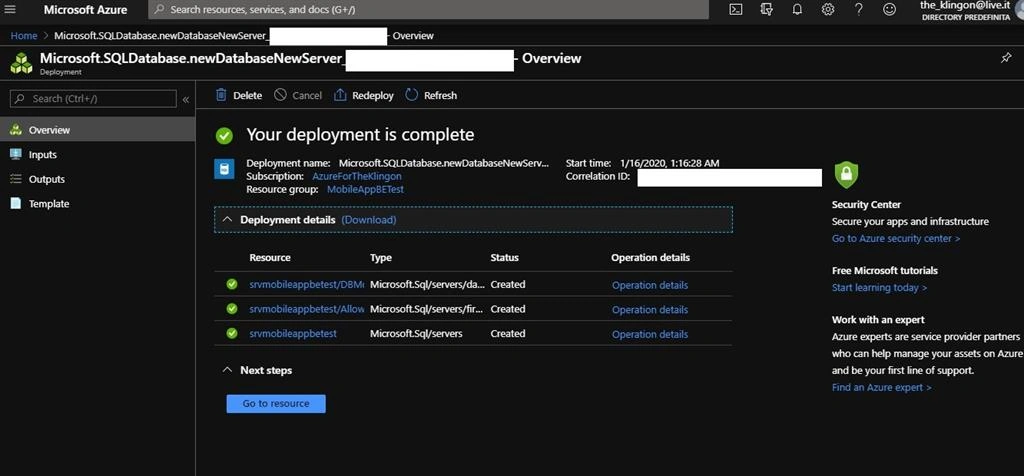
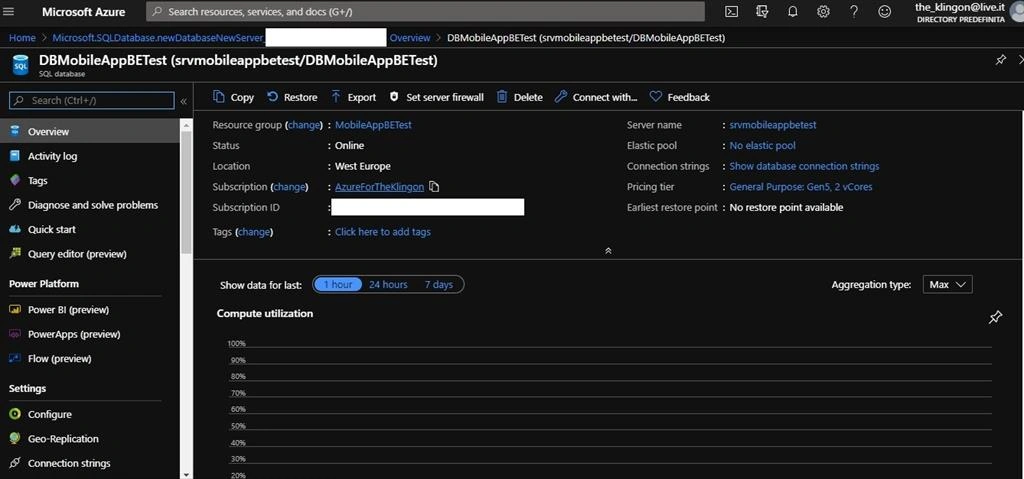
Step 5 - Verify if the Application Service works correctly
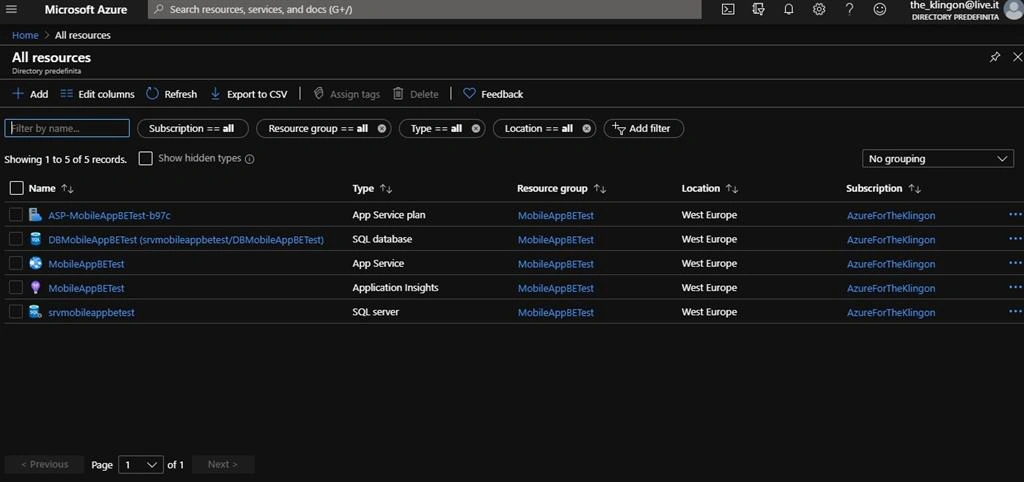
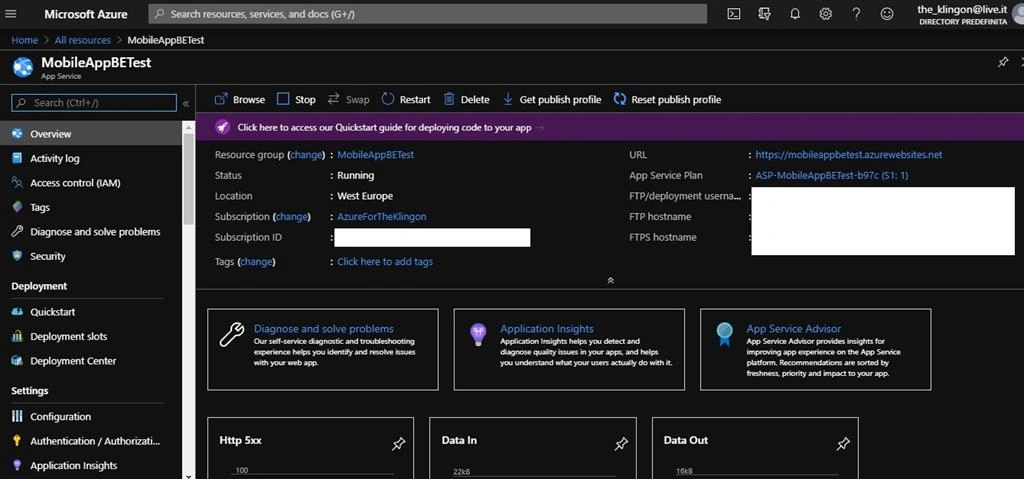
In the Azure Portal Home Page, click on " All resources", then on the name of the application beside the "App Service" label:
Click on the URL shown on the top right corner of the page:
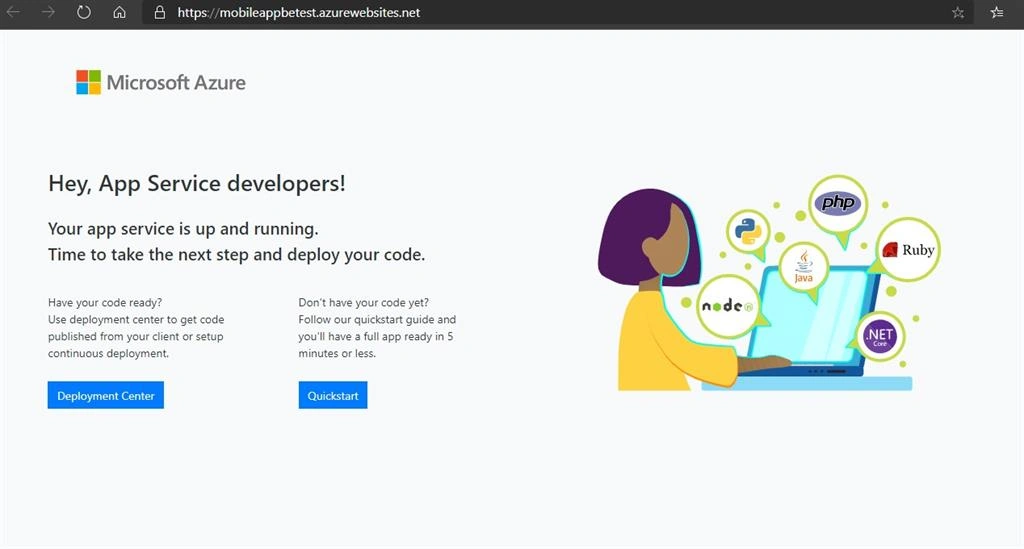
...and if we've worked well, we'll see this page,
Important Note
To avoid unintended costs, remember to delete the Resource Group after the end of the test, clicking on its name and following the procedure shown in the images below,
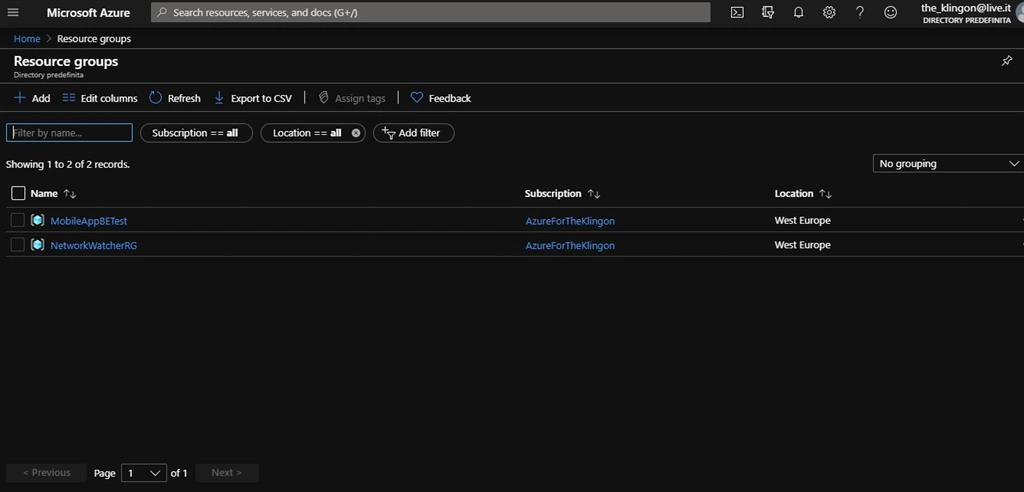
Click on "Delete Resource Group",

Confirm the action typing the name of the "Resource Group",
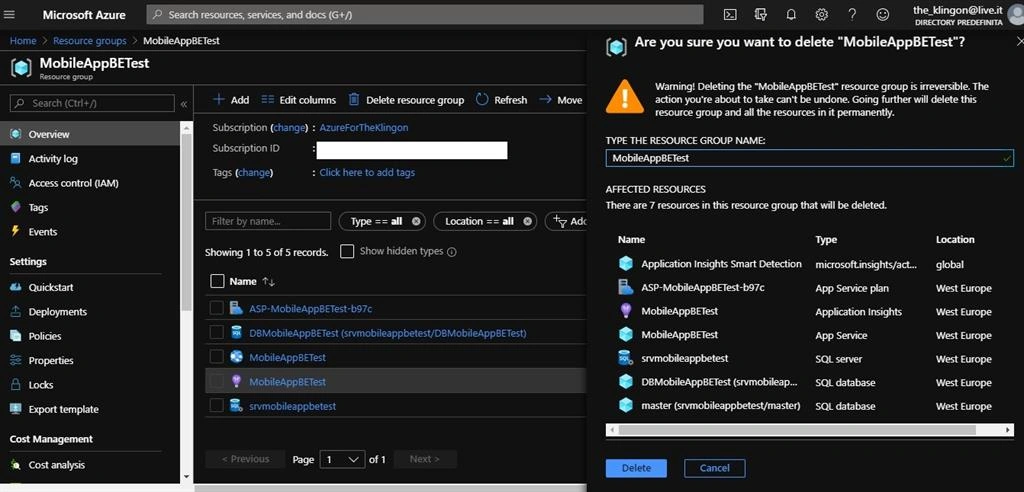
Success. We've deleted our own Resource Group (and all the related resources in it).
Conclusion
In this article, we've seen how to create, in Microsoft Azure,
- Resource Group
- App Web
- Azure SQL Database
- Azure Server
with the purpose of creating a back-end for the mobile application that we'll build in the second part of this tutorial.
Stay tuned for the next part and thank you so much for your attention.
Cary BaerPosted May 8, 2020, 2:46 PM
Thanks for posting this. Don't you have to create a table in the database? I followed Part 2, but since there is no ToDo table, it doesn't work.
Boni IvanePosted Apr 8, 2020, 8:04 AM
Thank you and very interesting I can't wait to see the second part
Farooq AkhtarPosted Feb 15, 2020, 9:30 PM
Thanks dear, you explained the whole process of Resource GroupApp Web Azure SQL Database Azure Server in a very comprehensive way, but where is second part ?