

What is Azure Storage?
- Azure Storage is the Azure platform's managed service for providing cloud storage. Azure Storage is composed of several core services and supporting features. It is highly available, secure, durable, scalable, and redundant.
- The word ‘Blob’ expands to a Binary Large Object. Blobs include images, text files, videos, and audio. Azure Blob Storage is Microsoft's object storage solution for the cloud, and it is optimized to store massive amounts of unstructured data. Unstructured data is data that doesn't adhere to a particular data model or definition, such as text or binary data.
- With Azure Blob Storage, the files (photos, videos, training documents, etc.), which are known as blobs, are put in containers that function similarly to directories. These are then linked to the storage account.
- Azure Files offers fully managed file shares in the cloud that are accessible via the industry standard Server Message Block (SMB) protocol or Network File System (NFS).
- Azure file storage can mainly be used if we want to have a shared drive between two servers or across users. In that case, we will go for Azure file storage.
- We can create an unlimited number of file shares within a storage account. Once we create a file share, then we can create directories, just like folders, and then we can upload files to it. Once we create a file share, we can mount it on any virtual machine, whether it is in Azure or outside.
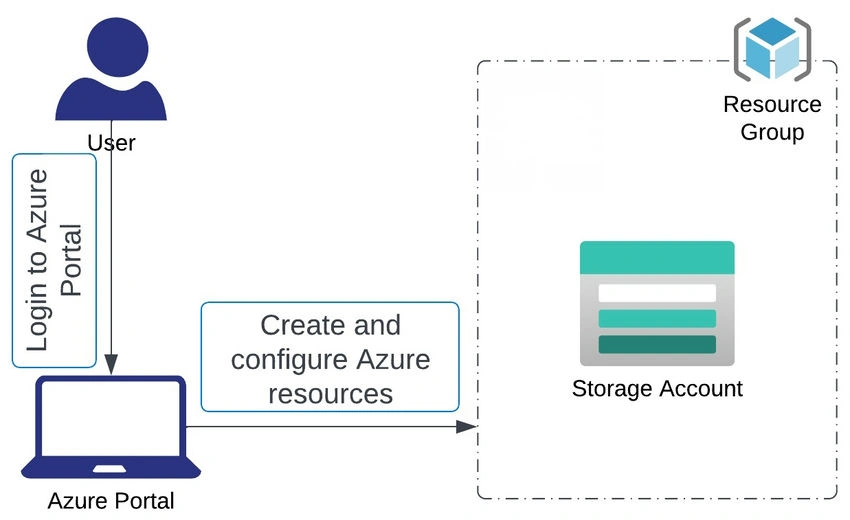
1. Performance
There are many kinds of storage accounts available in Azure Storage. Each type has its own set of features and pricing structure. Before you create a storage account, think about these distinctions to figure out which kind of account is ideal for your needs.
| S.No. | Type of storage account | Supported storage services | Redundancy options | Usage |
| 1 | Standard general-purpose v2 | Blob (including Data Lake Storage), Queue, and Table storage, Azure Files | LRS/GRS/RA-GRS ZRS/GZRS/RA-GZRS | Standard storage account type for blobs, file shares, queues, and tables. Recommended for most scenarios using Azure Storage. For NFS file shares in Azure Files, use premium file shares. |
| 2 | Premium block blobs | Blob storage (including Data Lake Storage) | LRS/ZRS | Premium storage account type for block blobs and append blobs. Recommended for scenarios with high transaction rates or low storage latency needs. |
| 3 | Premium file shares | Azure Files | LRS/ZRS | Premium storage account type for file shares only. Recommended for enterprise or high-performance scale applications, supports both SMB and NFS file shares. |
| 4 | Premium page blobs | Page blobs only | LRS | Premium storage account type for page blobs only. Recommended for premium scenarios for page blobs and high-performance needs. |
Note. Premium block blobs, Premium file shares, and premium page blobs will be available when you choose Premium Performance while creating the storage account.
2. Redundancy
| S.No. | scenario | LRS | ZRS | GRS/RA-GRS | GZRS/RA-GZRS |
| 1 | A node within a data center becomes unavailable | Yes | Yes | Yes | Yes |
| 2 | An entire data center (zonal or non-zonal) becomes unavailable | No | Yes | Yes | Yes |
| 3 | A region-wide outage occurs in the primary region | No | No | Yes | Yes |
| 4 | Read access to the secondary region is available if the primary region becomes unavailable. | No | No | Yes (with RA-GRS) | Yes (with RA-GZRS) |
3. Access Tiers
There are Three Access Levels in the Azure Storage Account. Pls, refer to Below.
- Hot: Designed to store data that is regularly accessed.
- Cool: Designed to store data that is viewed rarely and kept for at least 30 days.
- Cold: Designed to store data that is rarely accessed or modified but still requires fast retrieval. Data in the cold tier should be stored for a minimum of 90 days.
Now, we can see the step-by-step process of creating a Storage account and how to create a Container and upload files into the container.
- At the top of the Azure portal, You can see the Storage Account; select the Storage Account.
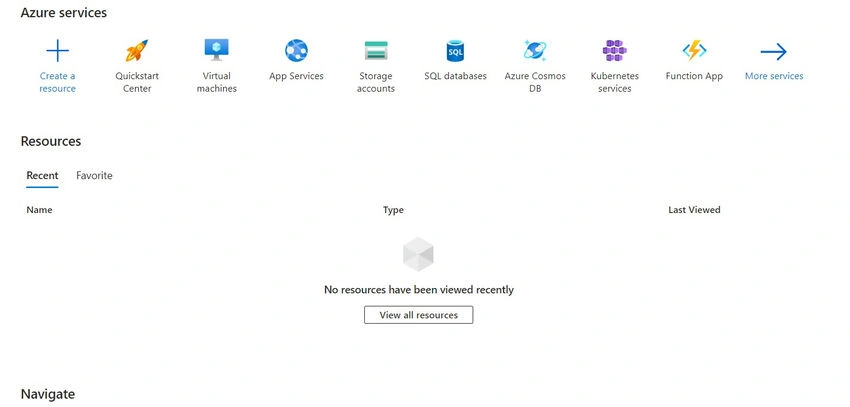
- Then click the Create option to create a storage account.
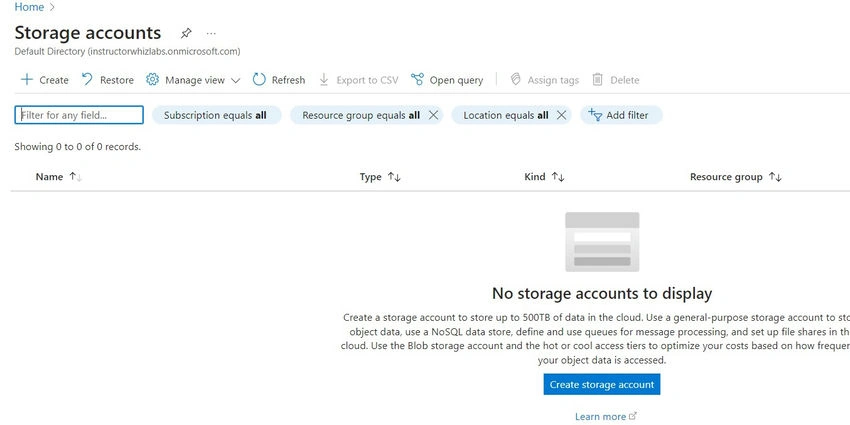
- Enter the resource group Name, Storage Account Name, and Region, and select the plan as Standard or Premium, then click Review + Create.

- Review all the Information and Click Create to start the Deployment Process.
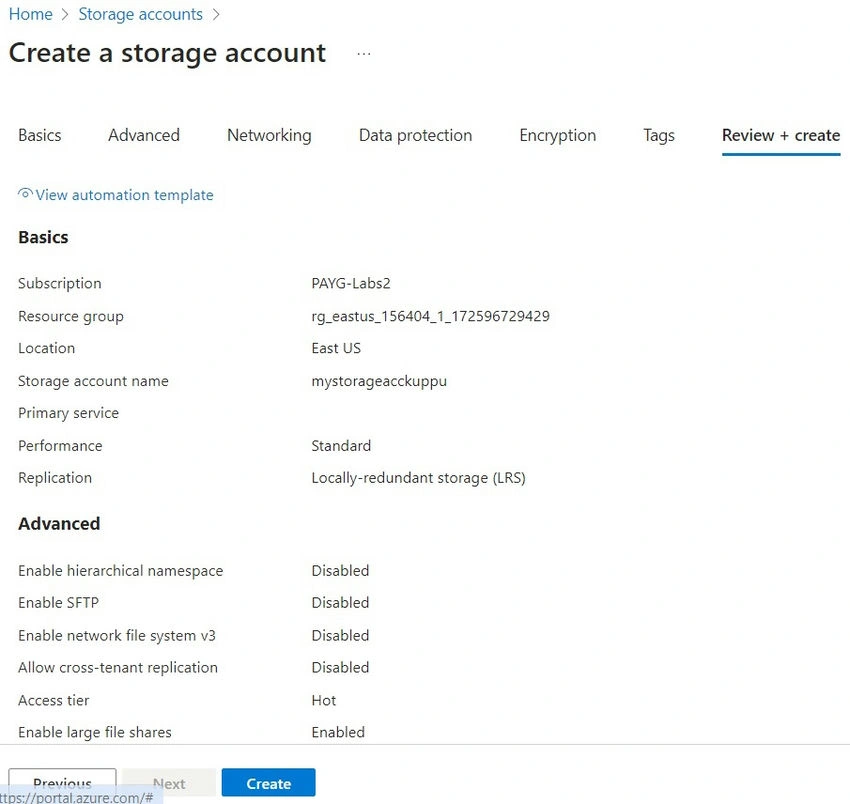
- After Clicking Create, the Deployment Details may show Wait until the Deployment Process is over.
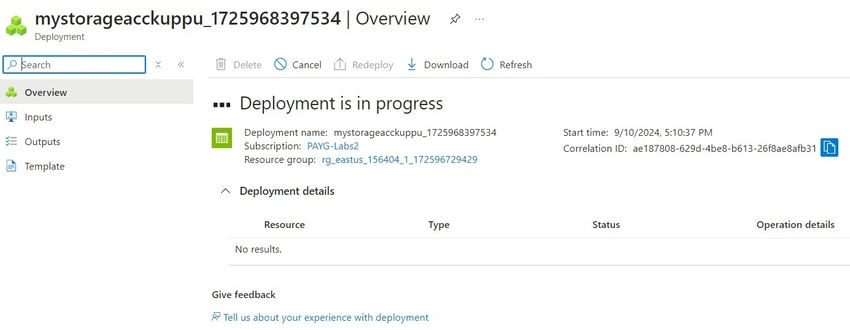
- Now, we have Successfully created the Storage Account.
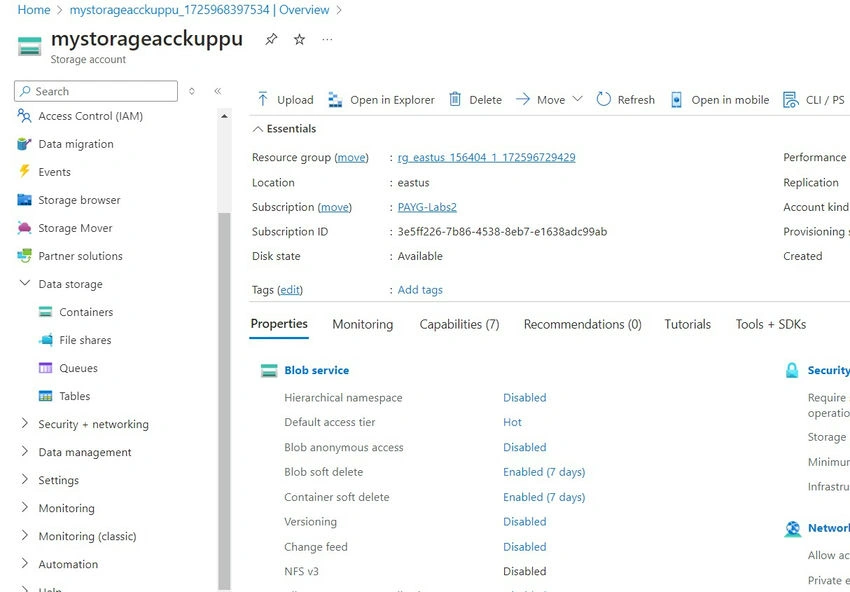
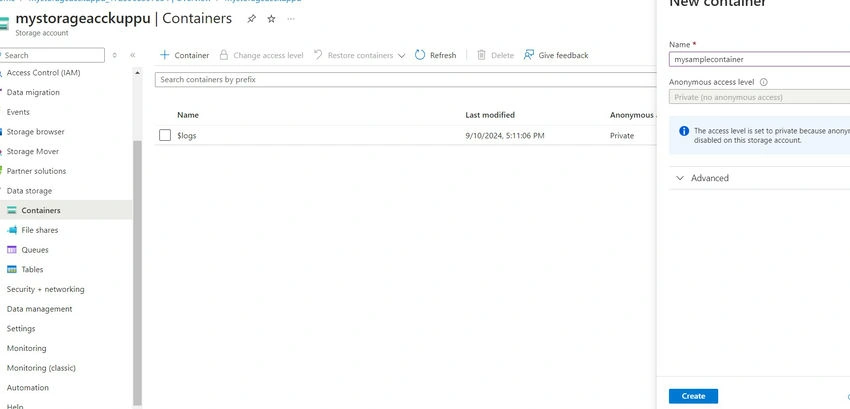
- Now, we are creating a Container inside the Storage account. On the left side of the menu under Storage, you can see the Container option to click and create a Container with a Name.
- Now, we have successfully created the Container inside the Storage Account.
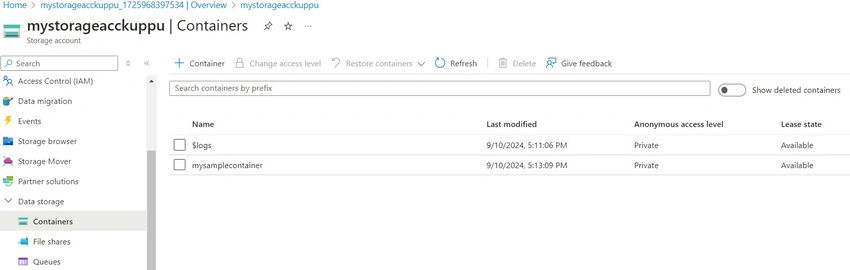
- Now we can see how to upload a file into the container. There must be an upload option inside the container click that the right-side menu will open for uploads.
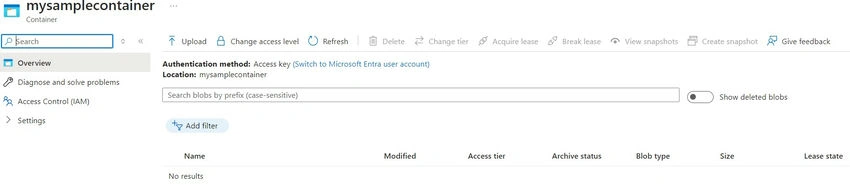
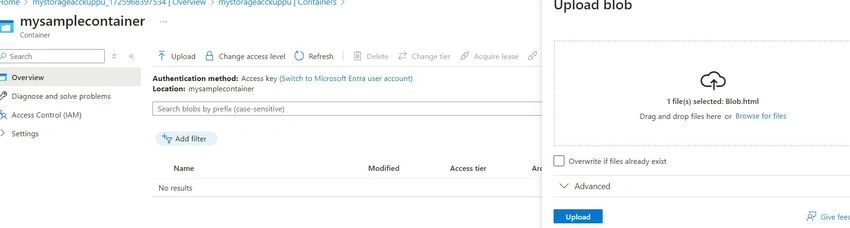
- Upload the file and click the Upload Button to push the File to Azure Blob.
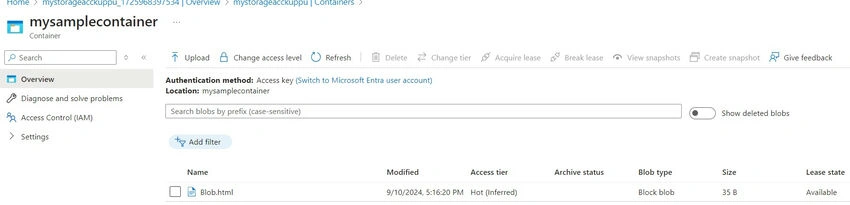
- Now we can see the Uploaded file under the container inside the Storage Account.
In the Next series, we can see how to push the file from the .Net core.
Join the conversation! Your thoughts help the community grow.