

In this article, we will learn how to create thumbnails of images while uploading the images in ASP.NET MVC. The concept is the same for ASP.NET too. It is very important to create thumbnails of images of different sizes, depending upon the scenario and type of application. If we create a thumbnail of an image, it reduces the image byte size along with its dimension, resulting in a fast processing of page.
If we create a thumbnail of a 1500 KB image file, the thumbnail’s size would be less than 50 KB. .NET provides image class and its one method can create a thumbnail too, but reducing the dimension of the image with its ratio is very important.
Create an MVC Project
Step 2 : Go to File => New Project.
- Select Visual C# => Web => ASP.NET Web Application.
- Name your solution (eg. EasyCRM) and Project (EasyCRM.UI); then, click OK.
- Select MVC.
- Change authentication to "Individual Accounts".

Now, you will see the following screen.

Creating Image Handler
Step 1: Create a new folder called ImageHandler.
Step 2: Add a new class called UploadImage.
Step 3: Add a function called "Crop" with parameters described below.
| S.No | Type | Description |
| Width | int | New width of Image |
| Height | int | New Height of Image |
| streamIMg | Stream | Image Stream |
| SaveFilePath | string | Path of server where file is saved. (Eg. "~/Upload/Images/thumb") |
Step 4
Add the following lines of code to the "Crop" method.
- public class UploadImage
- {
- public static void Crop(int Width, int Height, Stream streamImg, string saveFilePath)
- {
- Bitmap sourceImage = new Bitmap(streamImg);
- using(Bitmap objBitmap = new Bitmap(Width, Height))
- {
- objBitmap.SetResolution(sourceImage.HorizontalResolution, sourceImage.VerticalResolution);
- using(Graphics objGraphics = Graphics.FromImage(objBitmap))
- {
- // Set the graphic format for better result cropping
- objGraphics.SmoothingMode = System.Drawing.Drawing2D.SmoothingMode.AntiAlias;
- objGraphics.InterpolationMode = System.Drawing.Drawing2D.InterpolationMode.HighQualityBicubic;
- objGraphics.DrawImage(sourceImage, 0, 0, Width, Height);
- // Save the file path, note we use png format to support png file
- objBitmap.Save(saveFilePath);
- }
- }
- }
- }

So far, we have created a method to resize and save the image.
Now, let's build a Controller which will help to,
- display a form to upload images.
- upload selected images to the "Upload" folder.
Step 1
Step 2
- public ActionResult AddPhotoGallery() {
- return View();
- }
Step 3
Step 4
- @ {
- ViewBag.Title = "Add Photo Gallery";
- Layout = "~/Views/Shared/_LayoutAdminPanel.cshtml";
- }
- <h2> Add Photo Gallery </h2>
- @ * @using(Html.BeginForm("Method_Name", "Controller_Name", FormMethod(Post / GET), new {
- enctype = "multipart/form-data", area = "Area_Name"
- })) * @
- @using(Html.BeginForm("AddPhotoGallery", "Manage_Gallery", FormMethod.Post, new {
- enctype = "multipart/form-data", area = "SuperAdmin"
- }))
- {
- @Html.AntiForgeryToken() < div class = "form-orizontal" > <h4 > Create New Image Gallery </h4>
- <hr />
- @Html.ValidationSummary(true, "", new {@class = "text-danger"})
- <div class="form-group">
- <div class="col-md-2"> Select Images </div>
- <div class="col-md-10">
- <input type ="file" name="Images" value="Select Images" id="Images" multiple />
- </div>
- </div>
- <div class = "form-group">
- <div class = "col-md-offset-2 col-md-10" >
- <input type = "submit" value = "Save" class = "btn btn-success" />
- </div>
- </div>
- </div>
- }
- @section Scripts {
- @Scripts.Render("~/bundles/jqueryval")
- }
Step 5
- /// <summary>
- /// method to create thumbnail of the images uploaded
- /// </summary>
- /// <param name="Images">Uploaded Images (can be multiple or single)</param>
- /// <returns></returns>
- [HttpPost]
- public ActionResult AddPhotoGallery(IEnumerable <HttpPostedFileBase> Images)
- {
- try
- {
- foreach(var image in Images) {
- if (image != null)
- {
- string fileName = Guid.NewGuid().ToString() + Path.GetExtension(image.FileName);
- var path = Path.Combine(Server.MapPath("~/Upload/Images/"), fileName);
- image.SaveAs(path);
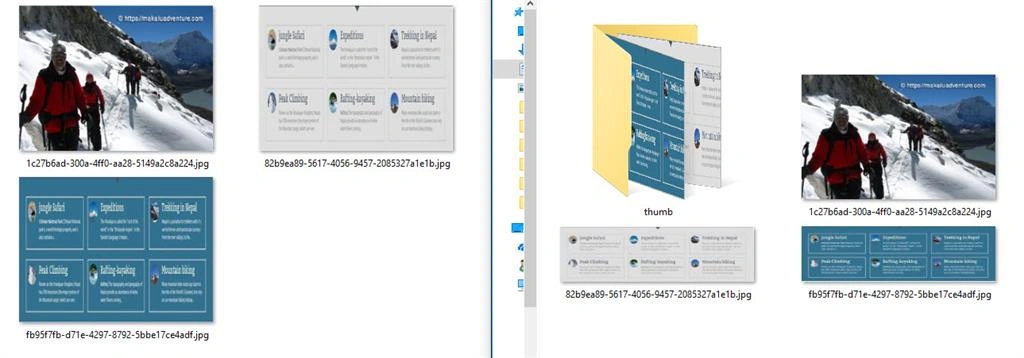
- UploadImage.Crop(320, 240, image.InputStream, Path.Combine(Server.MapPath("~/Upload/Images/thumb/") + fileName));
- }
- }
- TempData["MessageValue"] = "1";
- TempData["Message"] = "Image Gallery added successfully";
- }
- catch
- {
- TempData["MessageValue"] = "0";
- TempData["Message"] = "Error occured while adding Image Galley";
- }
- return RedirectToAction("Index", "Manage_Gallery", new {area = "SuperAdmin" });
- }
Step 6


Note

If you have any queries, please feel free to comment.
I hope now you will be able to write your own codes for creating thumbnails of images and upload images in C#.
You may also like
Tina C.Posted Jun 2, 2020, 9:10 AM
Hi: I was curious what the advantage of this is over the WebImage class? Setting an image as a WebImage object allows it to use the resize method.
Rathrola Prem KumarPosted Mar 6, 2017, 12:10 AM
Excellent, Thanks for sharing Nishan Aryal :)