

Introduction
This article demonstrates how to create a login page in an ASP.NET Web Application using C# connectivity by an SQL server. This article starts with an introduction to the creation of the database and table in SQL Server. Afterward, it demonstrates how to design an ASP.NET login page. In the end, the article discusses how to create a connection ASp.NET Web Application to SQL Server.
Prerequisites
VS2010/2012/2013/15/17, SQL Server 2005/08/2012
Project used version
VS2013, SQL SERVER 2012
Step 1. Creating a database and a table
To create a database, write the query in SQL Server
CREATE DATABASE abcd; -- Create database named 'abcd'
USE abcd; -- Select the 'abcd' database

CREATE TABLE Ulogin (
    UserId VARCHAR(50) PRIMARY KEY NOT NULL, -- Define UserId as primary key, not null
    Password VARCHAR(100) NOT NULL -- Define Password as not null
);

INSERT INTO Ulogin (UserId, Password) VALUES ('Krish', 'kk@321'); -- Insert values into Ulogin table
Proceed as shown below.
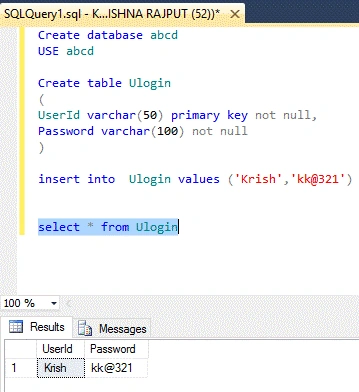
Figure 1
Step 2. Let’s start designing the login view in ASP.NET Web Application.
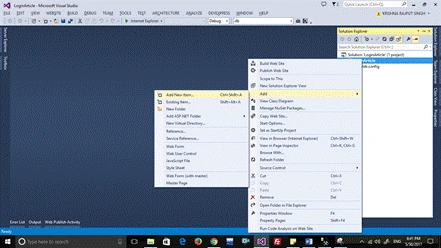
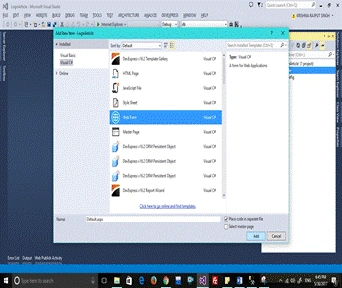
I am using a simple design since design is not the purpose of this article. So let’s start by opening VS (any version) and go to File, select New, and select Website. You can also use the shortcut key (Shift+Alt+N). When you are done with expanding Solution Explorer, right-click on your project name, select Add, and click Add New Item (for better help, refer to the screenshot given below). Select Web Form if you want to change the Web form name. You can save it as it is. Default.aspx is added to my project.
Now, let’s design by default.aspx page in <p >tag insert table, as per the required rows and columns, and set the layout style of the table. If you want all tools set in the center, go to Table Properties and click Style text-align.
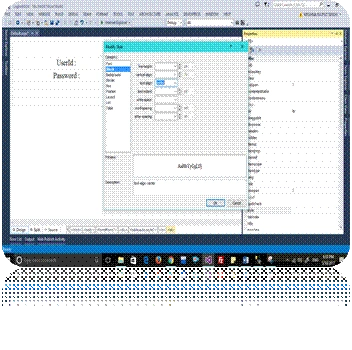
The source code is given below.
<%@ Page Language="C#" AutoEventWireup="true" CodeFile="Default.aspx.cs" Inherits="_Default" %>

<!DOCTYPE html>

<html xmlns="http://www.w3.org/1999/xhtml">
<head runat="server">
    <title></title>
    <style type="text/css">
        .auto-style1 {
            width: 100%;
        }
    </style>
</head>
<body>
    <form id="form1" runat="server">
        <p>
            <table class="auto-style1">
                <tr>
                    <td colspan="6" style="text-align: center; vertical-align: top">
                    </td>
                </tr>
            </table>
        </p>
    </form>
</body>
</html>
Afterward, drag and drop two labels, two textboxes, and one button. Set the password textbox properties to Text Mode as a password.
<asp:TextBox ID="TextBox2" runat="server" Font-Size="X-Large" TextMode="Password"></asp:TextBox>
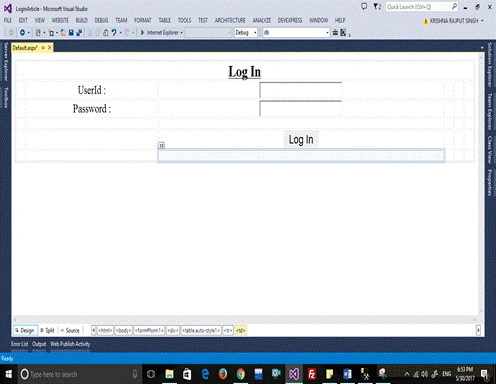
The complete source code is given below.
<%@ Page Language="C#" AutoEventWireup="true" CodeFile="Default.aspx.cs" Inherits="_Default" %>

<!DOCTYPE html>

<html xmlns="http://www.w3.org/1999/xhtml">
<head runat="server">
    <title></title>
    <style type="text/css">
        .auto-style1 {
            width: 100%;
        }
    </style>
</head>
<body>
    <form id="form1" runat="server">
        <p>
            <table class="auto-style1">
                <tr>
                    <td colspan="6" style="text-align: center; vertical-align: top">
                        <asp:Label ID="Label1" runat="server" Font-Bold="True" Font-Size="XX-Large" Font-Underline="True" Text="Log In"></asp:Label>
                    </td>
                </tr>
                <tr>
                    <td></td>
                    <td style="text-align: center">
                        <asp:Label ID="Label2" runat="server" Font-Size="X-Large" Text="UserId:"></asp:Label>
                    </td>
                    <td style="text-align: center">
                        <asp:TextBox ID="TextBox1" runat="server" Font-Size="X-Large"></asp:TextBox>
                    </td>
                    <td></td>
                    <td></td>
                    <td></td>
                </tr>
                <tr>
                    <td></td>
                    <td style="text-align: center">
                        <asp:Label ID="Label3" runat="server" Font-Size="X-Large" Text="Password:"></asp:Label>
                    </td>
                    <td style="text-align: center">
                        <asp:TextBox ID="TextBox2" runat="server" Font-Size="X-Large" TextMode="Password"></asp:TextBox>
                    </td>
                    <td></td>
                    <td></td>
                    <td></td>
                </tr>
                <tr>
                    <td></td>
                    <td></td>
                    <td></td>
                    <td></td>
                    <td></td>
                    <td></td>
                </tr>
                <tr>
                    <td></td>
                    <td></td>
                    <td style="text-align: center">
                        <asp:Button ID="Button1" runat="server" BorderStyle="None" Font-Size="X-Large" OnClick="Button1_Click" Text="Log In" />
                    </td>
                    <td></td>
                    <td></td>
                    <td></td>
                </tr>
                <tr>
                    <td></td>
                    <td></td>
                    <td>
                        <asp:Label ID="Label4" runat="server" Font-Size="X-Large"></asp:Label>
                    </td>
                    <td></td>
                    <td></td>
                    <td></td>
                </tr>
            </table>
        </p>
    </form>
</body>
</html>
Step 3. Let’s create a connection between the Web Application and SQL Server.
Double-click on the login button. Prior to doing this, open the web config file, and write add connection code as given below.
<connectionStrings>
  <add name="mycon" connectionString="server=KRISHNA\SQLEXPRESS;database=abcd;integrated security=true;" />
</connectionStrings>
Write the source code for the connection, and add a namespace for the SQL Server.
using System.Data.SqlClient; // This namespace is for SQL Server Client
using System.Configuration; // This namespace is for adding connection name in the web config file (config connection name)
Create a SQL connection object with the connection name and write the code given below.
SqlConnection con = new SqlConnection(ConfigurationManager.ConnectionStrings["mycon"].ToString());
Adding a Button Click Event Handler
The Click attribute of the button element adds the click event handler. The code given below adds the click event handler for a button.
<td style="text-align: center">
    <asp:Button ID="Button1" runat="server" BorderStyle="None" Font-Size="X-Large" OnClick="Button1_Click" Text="Log In" />
</td>
The code for the click event handler looks as shown below.
protected void Button1_Click(object sender, EventArgs e)
{
    // Your event handler code here
}
Now, whatever code you write in the click event handler, will be executed at the click of a button.
private void DrawCircleButton_Click(object sender, RoutedEventArgs e)
{
    try
    {
        string uid = TextBox1.Text;
        string pass = TextBox2.Text;
        con.Open();
        string qry = "SELECT * FROM Ulogin WHERE UserId='" + uid + "' AND Password='" + pass + "'";
        SqlCommand cmd = new SqlCommand(qry, con);
        SqlDataReader sdr = cmd.ExecuteReader();
        if (sdr.Read())
        {
            Label4.Text = "Login Success......!!";
        }
        else
        {
            Label4.Text = "UserId & Password Is not correct. Try again..!!";
        }
        con.Close();
    }
    catch (Exception ex)
    {
        Response.Write(ex.Message);
    }
}
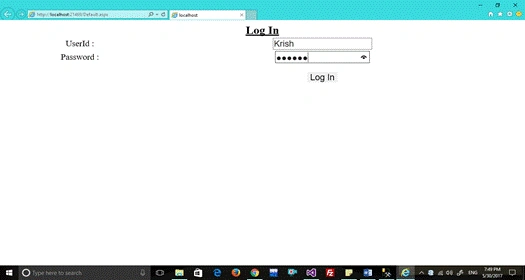
Output

Summary
In this article, I discussed how to create a login page in ASP.NET Web Application, using C# connectivity by SQL Server. We also saw how we create a database and a table. Afterward, we saw how to design the ASP.NET login view and its properties to insert the table. At the end of this article, we saw how to connect an ASP.NET Web Application to an SQL server. My next article will discuss how to validate the textbox, so stay tuned.
Halit OzdemirPosted Apr 7, 2023, 3:12 PM
Bad code. your password is "' or 1=1 --'
kimbo slicePosted Nov 25, 2022, 7:55 PM
Passwords stored in plaintext, nice... oh and the code source isnt entirely here, this guide is complete shiet
Deepak BhardwajPosted Oct 9, 2021, 8:44 PM
Please don't even dare to publish this sort of code. Its really very very unsafe. No parametrized queries, no session maintenance, no authentication modes... Please improve it. And also dont store password in plain text.
Mary O'BrienPosted Sep 18, 2021, 11:23 PM
Besides being unsafe because of lack of parameters, it is also very unsafe to store passwords as plain text. The database code is also bad. Commands and connections need to be disposed as soon as possible.
Rob BolterPosted Sep 6, 2020, 4:46 AM
This is VERY unsafe code. Its vulnerable to SQL injection attacks. Parameterised queries should ALWAYS be used whilst using SQL commands that take values from client side fields. If a user wrote SQL in the text box it would get executed. This should be modified or removed.
JyothiRmai vPosted Jul 4, 2020, 3:32 AM
Really super sir.... thank you so much
Nigel StanleyPosted Apr 2, 2019, 3:19 PM
Hi, firstly this was a great article. I have actually implemented the same thing using an online ms sql database. The login works. The problem I have is trying to figure out when the user logs in and has been accepted how do I carry that user log in information on to the next page?
Scott CallanPosted Oct 24, 2018, 4:10 AM
Please take this down it's extremely outdated, terrible practice and incredibly insecure. If anyone reads this, please do not use this. I dread to think how many of the current tutorial view count of 264,000 people have gone ahead and used this!
Deepak JerryPosted Feb 6, 2018, 5:32 AM
Thank you sir this is so useful for me
Aaron ThrockmortonPosted Jun 2, 2017, 10:04 AM
Are you kidding me? This looks like a tutorial from 10 years ago. You used a table for the layout? Storing passwords in a database in clear text? This whole article is a good example of everything you shouldn't do.