

Introduction
Managing user access is an important part of every Power Apps and SharePoint solution. Instead of giving permissions one by one, security groups make it easier to control who can view, edit, or manage data. In this article, we will walk through a simple and easy way to create security groups and share access in Power Apps and SharePoint.
Prerequisite
You should have admin or owner access in Power Apps, SharePoint, and Microsoft 365 to create security groups and manage permissions.
Below are the step-by-step details for creating a Security Group, adding users, and sharing access in Power Apps and SharePoint:
Step 1: Open Microsoft 365 Admin Center
Open browser and go to: https://admin.microsoft.com
Login with your Microsoft 365 Admin account.
Part 1 – Create Security Group
Step 2: Go to Active Teams & Groups
From the left side menu, click Teams & Groups.
Click on Active Teams & Groups.
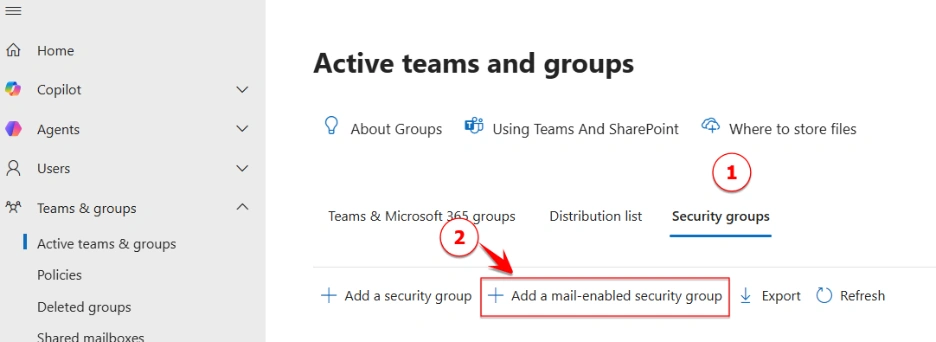
Step 3: Create New Group
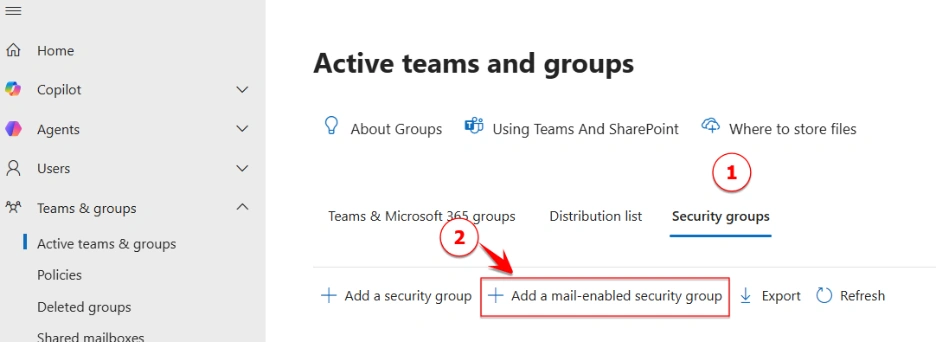
Go to Security groups tab and Click Add a mail-enabled security group.
Step 4: Enter Group Details
Enter below details:
Group name → Enter security group name
Description → Enter short description for group (not mandatory)
Click Next.
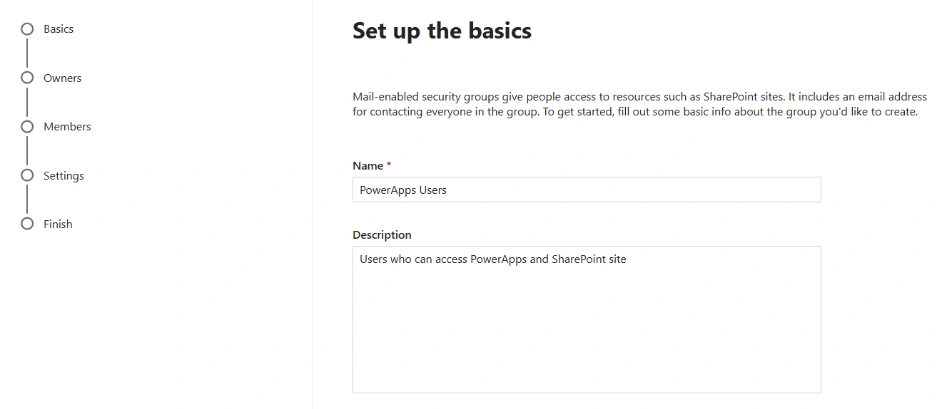
Example:
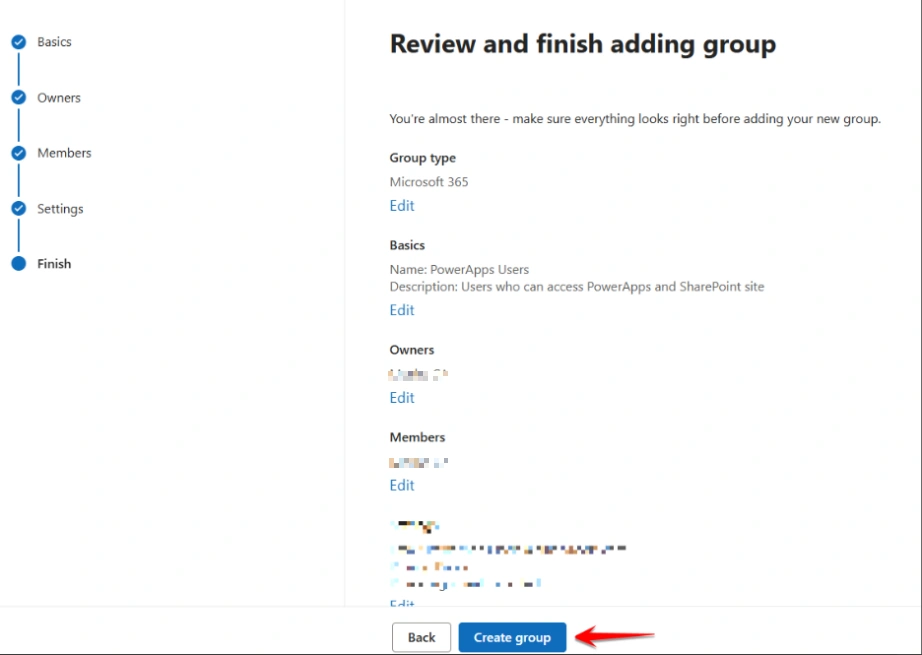
Group Name: PowerApps Users
Description: Users who can access PowerApps and SharePoint site
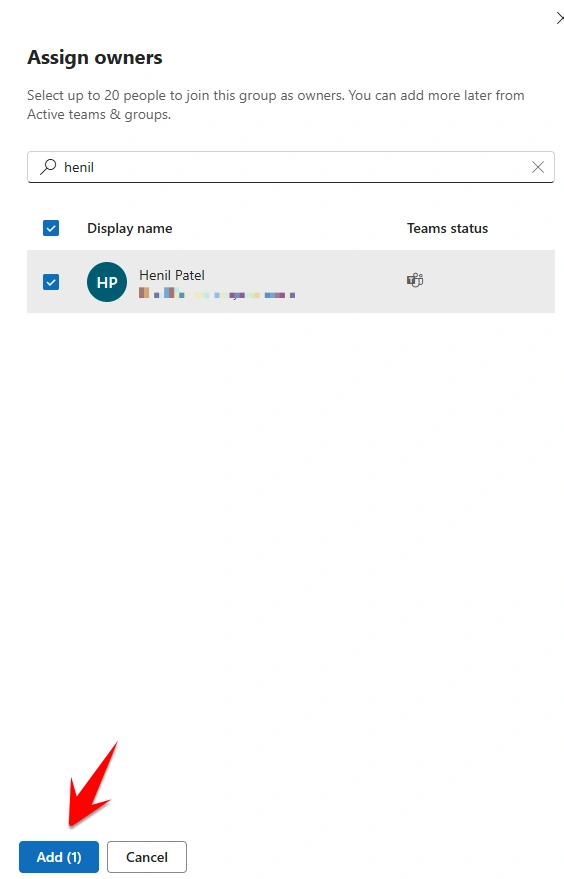
Step 5: Add Group Owner
Click Assign Owners.
Search and select owner name.
Click Next.
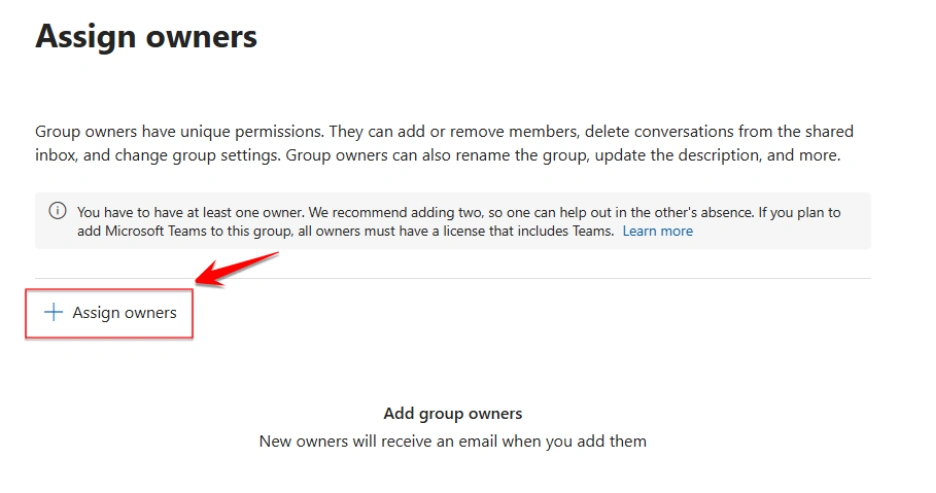
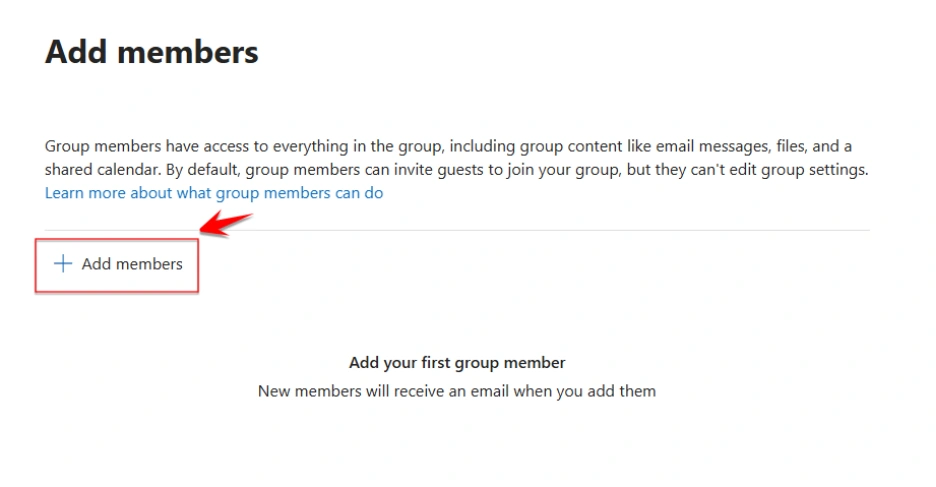
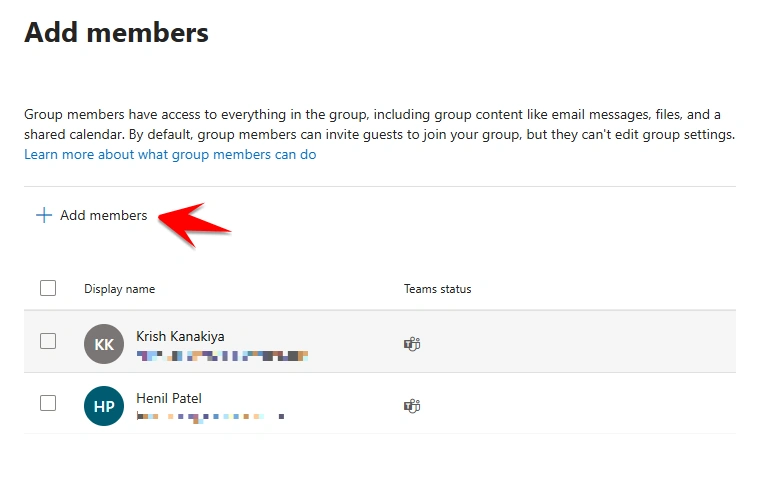
Step 6: Add Members
Click Add members.
Search and select users.
Click Save.
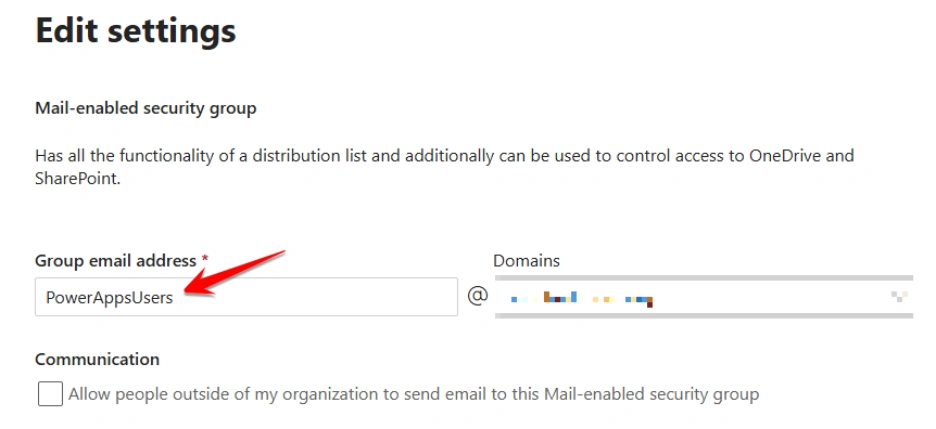
Step 7: Configure Mail-Enabled Security Group Settings
In the settings page, enter the Group email address.
Select the correct domain from dropdown if required.
(Optional) Enable checkbox:
Allow people outside of my organization to send email to this Mail-enabled security group
Click Next or Save.
Example:
Group email address: PowerAppsUsers
Domain: yourdomain.com
Step 8: Review and Finish Group Creation
Review all entered details:
Group Name, Description, etc.
Click Create Group.
Part 2 – Add Multiple Users to Security Group
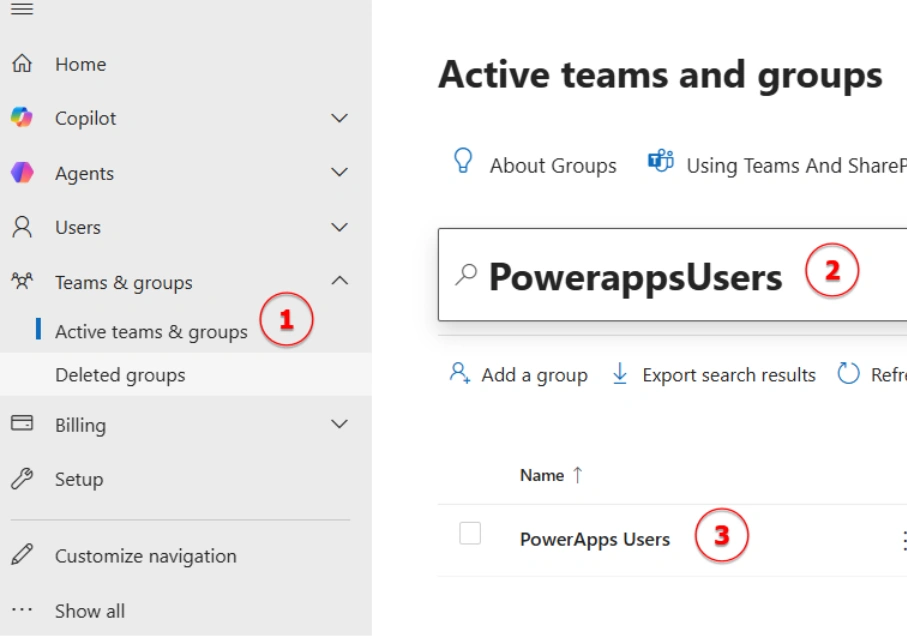
Step 9: Open Active Teams & Groups and Search Security Group
Click on Active Teams & Groups.
Search for the security group that you created.
Step 10: Add Multiple Users in Security Group
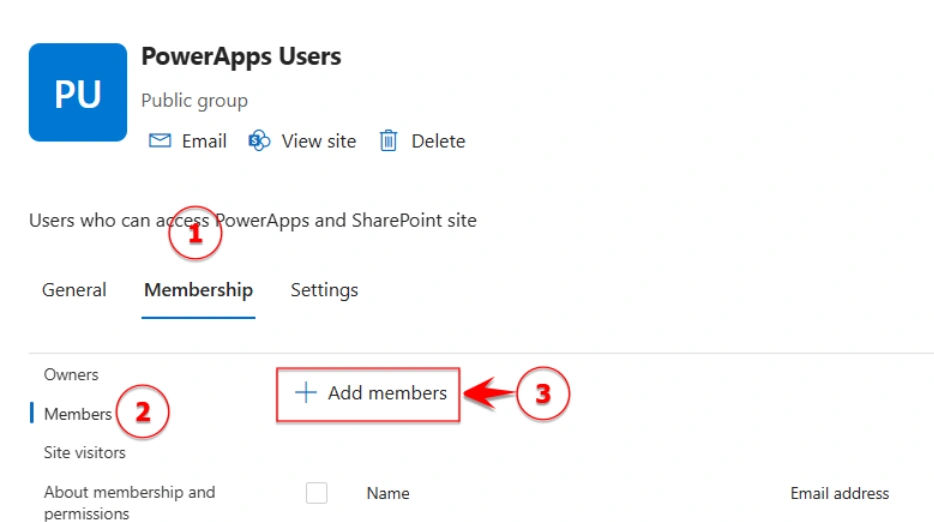
Open the created security group.
Go to the Membership tab. And Under the Members section, Add members.
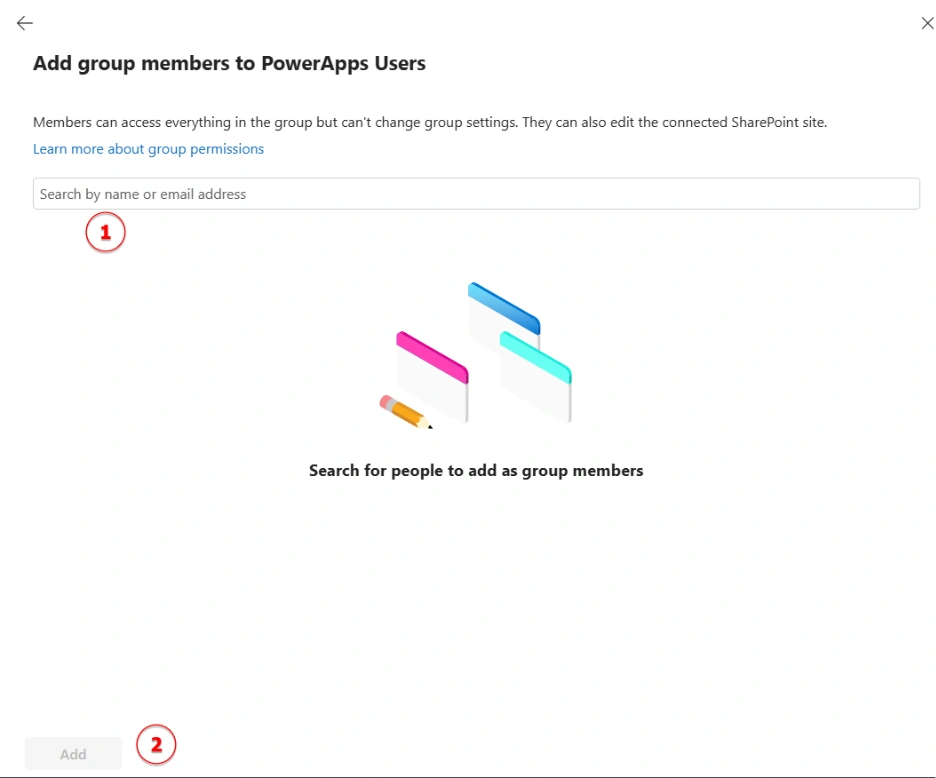
Search and select all required users.
Click Add to add users to the security group.
Part 3 – Share Security Group in Power Apps
Step 11: Share App with Security Group
Go to Apps and select the app.
Click Share option.
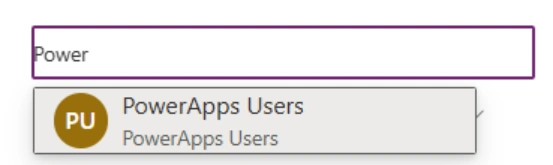
Search the security group that you created.
Select the security group and Keep User permission.
Click Share.
Part 4 – Share SharePoint Site with Security Group
Step 12: Open your SharePoint Site.
Step 13: Open Site Permissions
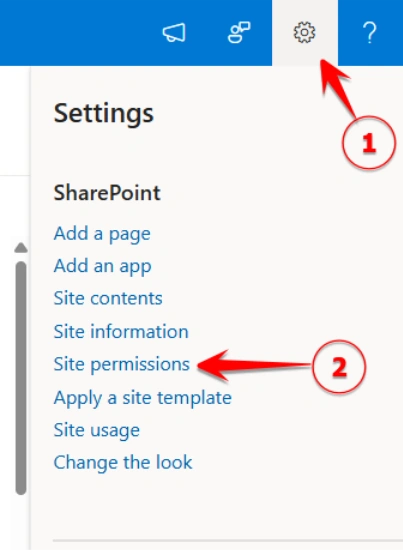
Click Settings from the top-right corner.
Click Site permissions.
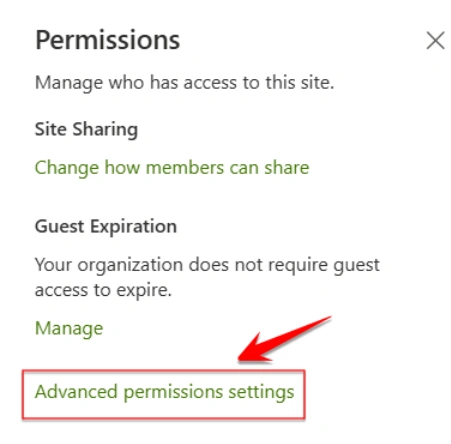
Click Advanced permissions settings.
Step 14: Add Security Group in SharePoint Members Group
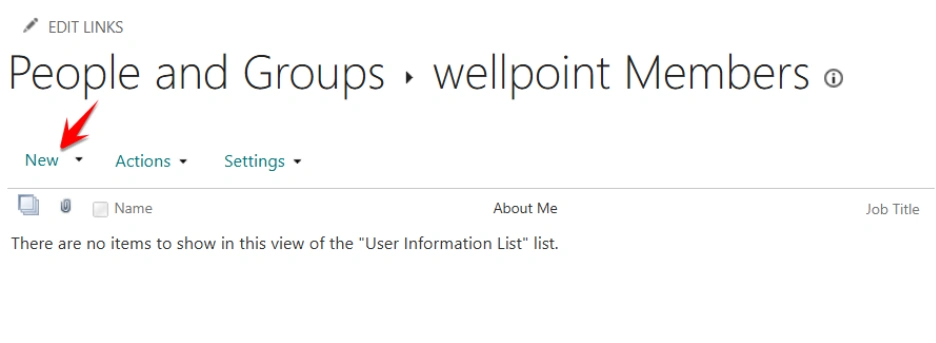
Select Members group with permission level Edit.
Click New.
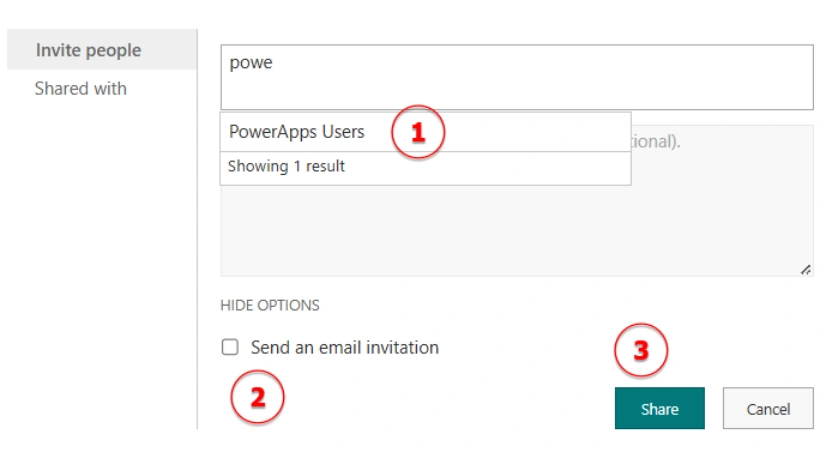
Search and select the security group that you created.
Click SHOW OPTIONS or Advanced options.
Uncheck Send an email invitation.
Click Share.

Conclusion
Creating security groups and managing access in Power Apps and SharePoint makes permission handling much easier and cleaner. It saves time, reduces manual work, and helps make sure the right users have the right access.
Join the conversation! Your thoughts help the community grow.