

Introduction
In my last article, I discussed the implementation of a Twitter Timeline in your website using Twitter Widgets. Twitter by default provides you with 2 types of themes. They are Light Theme and Dark Theme. However, very often you will encounter a situation where the default themes provided by Twitter does not match your website's theme. For this purpose, Twitter provides you with a set of customizable client-side options that you can use in your embedded code and alter the look of the timeline created using your widgets.
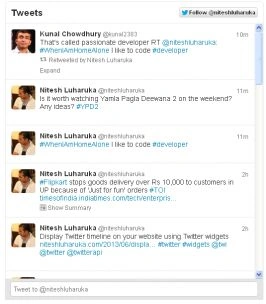
By default, the Twitter embedded timeline looks as in the following after creating a widget
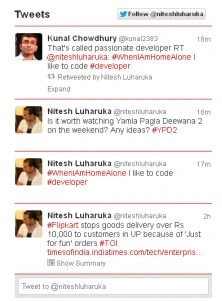
The final outcome of our changes will make the preceding screen look as in the following
Before customizing the source code, let us first know the various options provided by Twitter that we can use to configure our timeline. They are explained below:
- Height
While configuring your widget from Twitter, you can define the height of the timeline. However, you can also configure the height of the timeline at run time using the "height" option of the anchor tag. The minimum height of the timeline is defined as 200px. - Width
By default, the Twitter timeline has a width of 600px and it also adjusts itself to the container where the code is placed. However, you can also define the width of the timeline using the "width" property. The minimum width of the timeline is defined as 180px and the maximum width is set to 520px. - Theme
After creating your widget, if you want to use the same widget with various themes on various websites, you can do this by using the "data-theme" property. Valid values for this option are dark and light. - Link color
This property will allow you to change the colors of the hash tags and links present in your timeline. You can do this by using the "data-link-color" property. Valid value for this property is any hex value. - Chrome
This property controls the widget layout and chrome. You can do this by using the "data-chrome" property. It can be any combination of the following options using a space-separated set: - Border color
This property will allow you to change the border color between 2 Tweets on your embedded timeline. You can do this by using the "data-border-color" property. A valid value for this property is any hex value. - Language
By default, the Twitter timeline reads the language of the webpage you have rendered the timeline onto and adjusts accordingly. However, if you want to explicitly set the language of the embedded timeline then you can do this using the HTML lang attribute on the embedded code itself. - Tweet limit
Based on your website free space, you may want to show only a specified number of Tweets on your website. To do this, you will need to use the "data-tweet-limit" property that accepts any numeric number.
Now, let us customize it using some options. If you look closely at the embedded code of your Twitter widget, you will see an HTML markup as below
- <a class="twitter-timeline" href="https://twitter.com/niteshluharuka" data-widget-id="343079795556491265">Tweets by @niteshluharuka</a>
You just need to change this line with the required options. Based on the preceding options, I have rewritten this markup to display our timeline to be as in the picture above. I have configured the width, height, link color, border color and the number of Tweets displayed on the embedded timeline along with some changes to the layout of the timeline.
- <a class="twitter-timeline" href="https://twitter.com/niteshluharuka" width="350" height="400" data-theme="light" data-link-color="#cc0000" data-chrome="noscrollbar transparent" data-tweet-limit="4" data-border-color="#cc0000"
- data-widget-id="343079795556491265">Tweets by @niteshluharuka</a>
Join the conversation! Your thoughts help the community grow.