

Introduction
In this article I will create an Empty View application. We create an entire app using code. I mean we doesn't use an xib file here. In this app we make a rounded button and do an action on it.
To understand it we use the following.
Step 1
Open XCode by double-clicking on it.
Step 2
Create a New XCode Project by clicking on it.
Step 3
Now Select Empty View Application and click on Next.
Step 4
Now provide your Product Name and Company Identifier.
Step 5
Select the location where you want to save your project and click on Create.
Step 6
First we import the framework "QuartzCore" that is required.

Step 7
Now here we write code:
AppDelegate.h
- #import <UIKit/UIKit.h>
- #import <QuartzCore/QuartzCore.h>
- @interface AppDelegate : UIResponder <UIApplicationDelegate>
- @property(strong,nonatomic) UIButton *btn1,*btn2,*btn3;
- @property (strong, nonatomic) UIView *lineView1,*lineView2,*lineView3,*lineView4;
- @property (strong, nonatomic) UIWindow *window;
- @end
MapAppDelegate.m
- #import "AppDelegate.h"
- @implementation AppDelegate
- @synthesize btn1,btn2,btn3,lineView1,lineView2,lineView3,lineView4;
- - (void)dealloc
- {
- [_window release];
- [super dealloc];
- }
- -(void)click1
- {
- [btn1 setTitleColor:[UIColor blackColor] forState:UIControlStateNormal];
- [btn1 setTitle:@"I" forState:UIControlStateNormal];
- }
- -(void)click2
- {
- [btn2 setTitleColor:[UIColor blackColor] forState:UIControlStateNormal];
- [btn2 setTitle:@"Love" forState:UIControlStateNormal];
- }
- -(void)click3
- {
- [btn3 setTitleColor:[UIColor blackColor] forState:UIControlStateNormal];
- [btn3 setTitle:@"India" forState:UIControlStateNormal];
- }
- -(void)click{
- lineView1 = [[UIView alloc] initWithFrame:CGRectMake(85, 90, 198, 10)];
- lineView1.backgroundColor = [UIColor blackColor];
- [self.window addSubview:lineView1];
- [lineView1 release];
- lineView2 = [[UIView alloc] initWithFrame:CGRectMake(100, 100, 10, 80)];
- lineView2.backgroundColor = [UIColor blackColor];
- [self.window addSubview:lineView2];
- [lineView2 release];
- lineView3 = [[UIView alloc] initWithFrame:CGRectMake(185, 100, 10, 200)];
- lineView3.backgroundColor = [UIColor blackColor];
- [self.window addSubview:lineView3];
- [lineView3 release];
- lineView4 = [[UIView alloc] initWithFrame:CGRectMake(273, 100, 10, 300)];
- lineView4.backgroundColor = [UIColor blackColor];
- [self.window addSubview:lineView4];
- [lineView4 release];
- btn1 = [[UIButton alloc]initWithFrame:CGRectMake(65,180,80,80 )];
- btn1.backgroundColor = [UIColor greenColor];
- btn1.layer.cornerRadius = 80/2;
- [btn1 addTarget:self action:@selector(click1) forControlEvents:UIControlEventTouchUpInside];
- [self.window addSubview:btn1];
- btn2 = [[UIButton alloc]initWithFrame:CGRectMake(150,280,80,80 )];
- btn2.backgroundColor = [UIColor redColor];
- btn2.layer.cornerRadius = 80/2;
- [btn2 addTarget:self action:@selector(click2) forControlEvents:UIControlEventTouchUpInside];
- [self.window addSubview:btn2];
- btn3 = [[UIButton alloc]initWithFrame:CGRectMake(238,398,80,80 )];
- btn3.backgroundColor = [UIColor purpleColor];
- btn3.layer.cornerRadius = 80/2;
- [btn3 addTarget:self action:@selector(click3) forControlEvents:UIControlEventTouchUpInside];
- [self.window addSubview:btn3];
- }
- - (BOOL)application:(UIApplication *)application didFinishLaunchingWithOptions:(NSDictionary *)launchOptions
- {
- self.window = [[[UIWindow alloc] initWithFrame:[[UIScreen mainScreen] bounds]] autorelease];
- // Override point for customization after application launch.
- self.window.backgroundColor = [UIColor whiteColor];
- UIButton *button = [UIButton buttonWithType:UIButtonTypeCustom];
- [button setImage:[UIImage imageNamed:@"Sachin.png"] forState:UIControlStateNormal];
- button.frame = CGRectMake(5.0, 50.0, 80.0, 80.0);//width and height should be same value
- button.clipsToBounds = YES;
- button.layer.cornerRadius = 40;//half of the width
- button.layer.borderColor=[UIColor yellowColor].CGColor;
- button.layer.borderWidth=3.0f;
- [button addTarget:self action:@selector(click) forControlEvents:UIControlEventTouchUpInside];
- [self.window addSubview:button];
- [self.window makeKeyAndVisible];
- return YES;
- }
- @end
Step 8
Finally we click on the run button to show the output.
Output
Output 1 in iPhone:
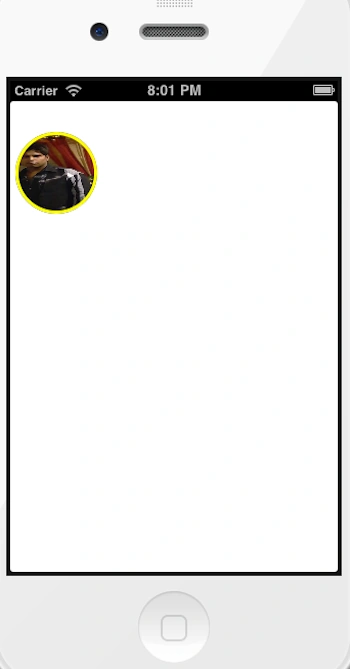
When we click on this image view button, the Path with rounded buttons will be shown.
When we click on this image view button, the Path with rounded buttons will be shown.
Output 2 in iPhone:
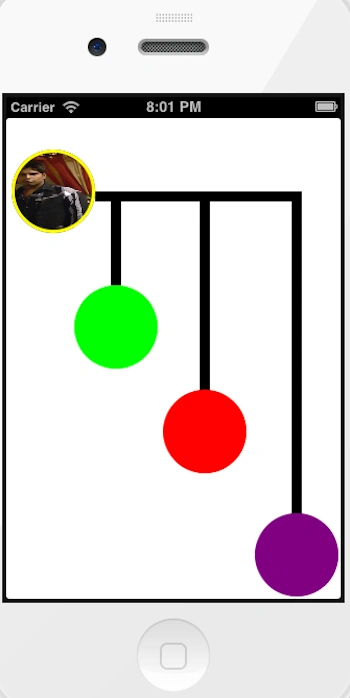
Here the rounded button with path is shown.
Here the rounded button with path is shown.
Output 3 in iPhone:
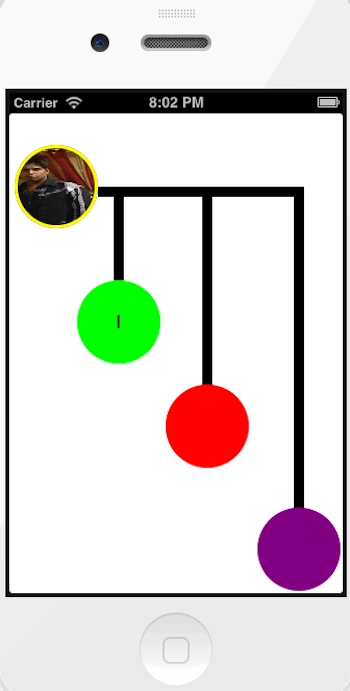
When we click on the Green button, an "I" will be shown on it.
Output 4 in iPhone:
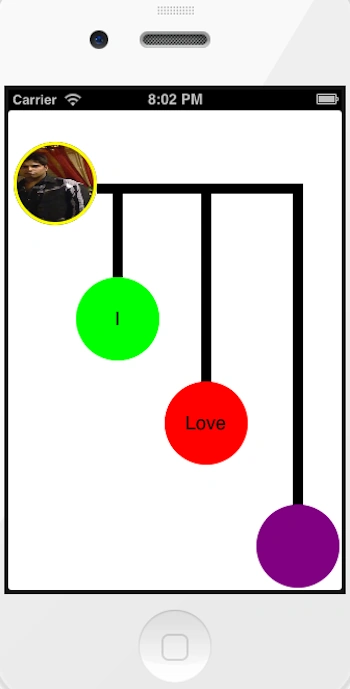
Here when we click on the Red button "love" will be shown on it.
Output 5 in iPhone:
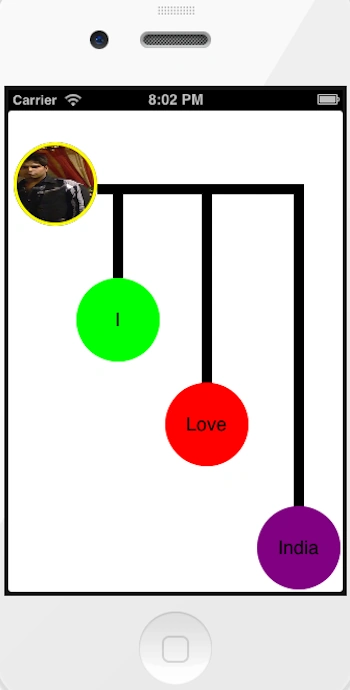
Here when we click on the Purple button "India" will be shown on it.
Ramzanali MominPosted Nov 20, 2018, 5:24 AM
Thanks for sharing..
Hadshana KamalanathanPosted Jul 22, 2018, 4:08 AM
Thanks for sharing..
Sachin BhardwajPosted Feb 8, 2013, 9:45 AM
Thanks Kush Sir.... I forget about TAG Concept....Thanks again for remember this
Kush MuchaalPosted Feb 8, 2013, 2:43 AM
You don't need to call 3 functions click1,click2,click3, This can be handle with respect to button's TAG value in a single function .