

What is Azure WebJobs?
Azure WebJob is a feature of Azure App Service that runs a program or script in the background using a WebApp or WebAPI context. There is no additional cost to use WebJob. There are two types of web jobs.
- Continuous WebJob.
- Triggered WebJob.
Continuous WebJob
- It starts immediately when Web Jobs is created.
- It runs in all instances of the Web App. You can optionally restrict the Web Jobs to a single instance.
- It supports remote debugging.
Triggered WebJob
- It starts manually or is triggered.
- It runs on a single instance for load balancing.
- It does not support remote debugging.
Developing Azure WebJob using Visual Studio
Here we will see how to develop Azure WebJobs using Visual Studio.
- Open Visual Studio 2019 and click Create a new project.
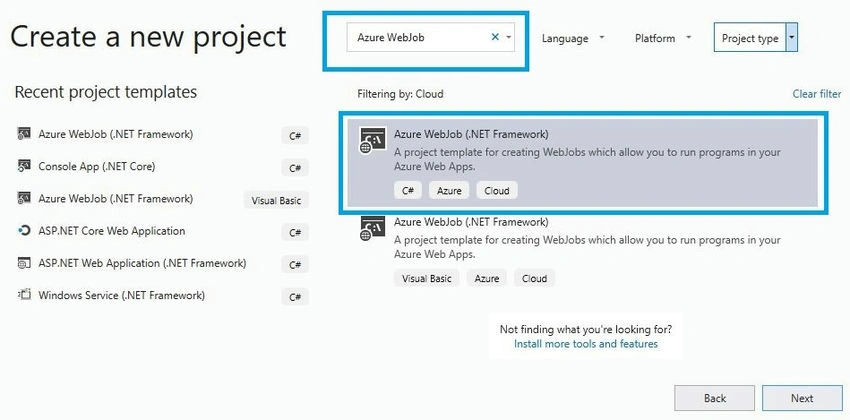
- Type Azure WebJob in the search box, choose Azure WebJob (.NET Framework) template, and click Next.
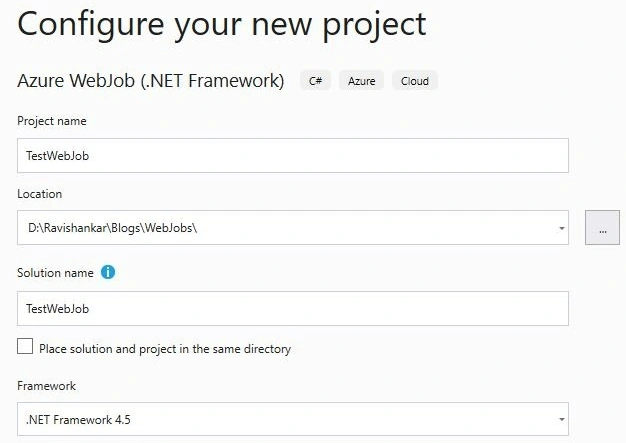
- Give the appropriate Project name and Solution name, choose the location, and select the Framework. Then click Create.
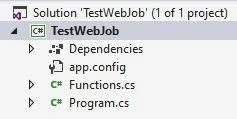
- This template creates a simple console application containing a program. cs with Main Method and Function. cs file.
- The WebJobs SDK looks for the Azure Storage connection string in the app. config file. So give the Azure Storage connection string like below.

Let’s create a manual trigger using the NoAutomaticTrigger attribute in the Function.cs file.
[NoAutomaticTrigger]
public void TriggerHandler(TextWriter log)
{
    try
    {
        log.WriteLine("Trigger is Fired");
    }
    catch (Exception ex)
    {
        log.WriteLine("Exception in Trigger Handler", ex);
        throw ex;
    }
}
In Program.cs file contains the main method, call the manual trigger using the JobHost function like below.
class Program
{
    // Please set the following connection strings in app.config for this WebJob to run:
    // AzureWebJobsDashboard and AzureWebJobsStorage
    static void Main()
    {
        var config = new JobHostConfiguration();

        if (config.IsDevelopment)
        {
            config.UseDevelopmentSettings();
        }

        var host = new JobHost(config);
        host.Call(typeof(Functions).GetMethod("TriggerHandler"));
    }
}
Deploy Azure WebJob In Azure App Service
- Build the solution in Release mode.
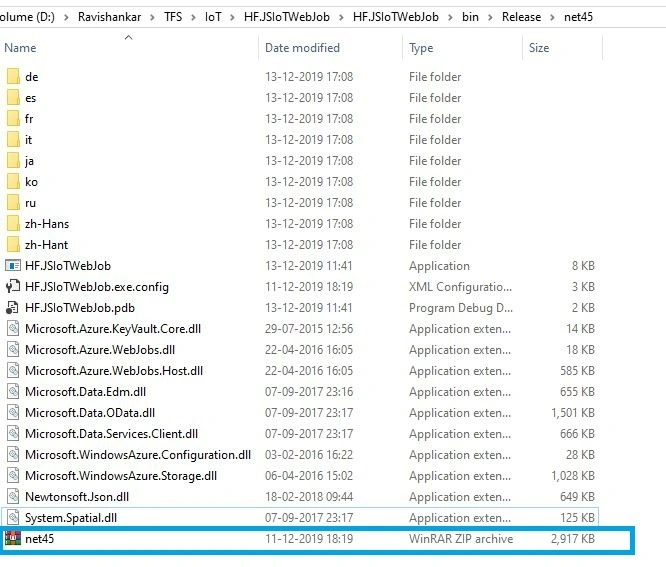
- Go to the bin/Release/net45 path of the application and add all the contents in a .zip file.
- Go to the Azure portal, select your App service then go to WebJobs and ADD a Job.
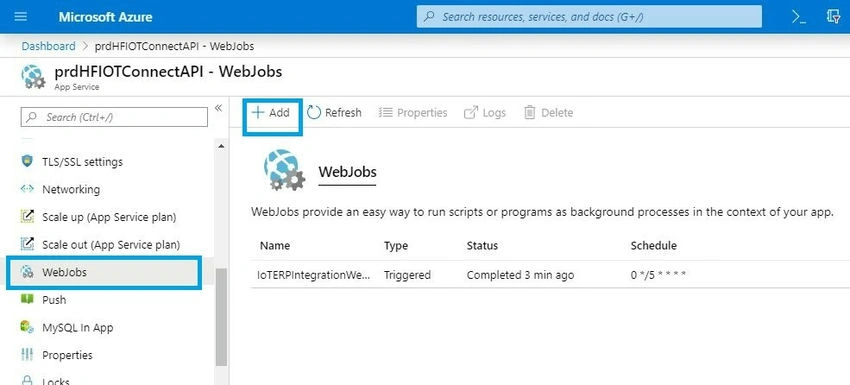
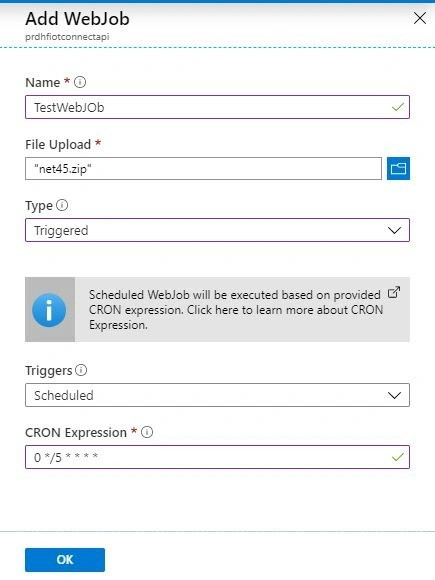
- Enter the Job name, and select the .zip file. Choose the type triggered. We can choose the Triggers by schedule or manually.
- The scheduled WebJob will be executed based on the provided CRON expression.
- Enter the CRON Expression and click OK.
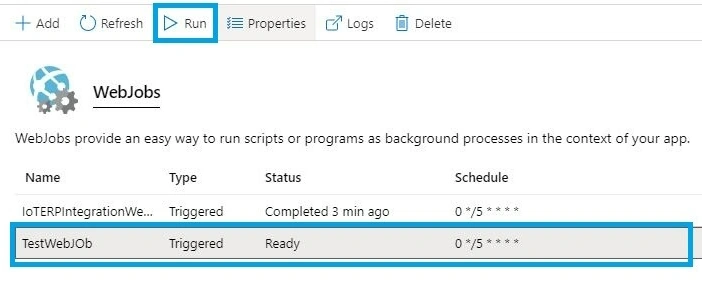
- It will take a few minutes to add the Web Job.
- Then select the WebJob you uploaded and click the Run button.
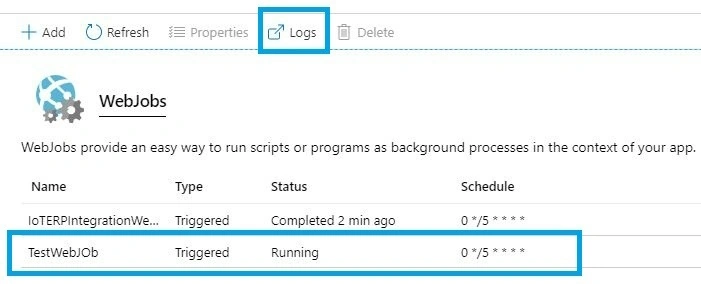
- You can see the status changed to Running, click Logs to see the WebJobs details like below.
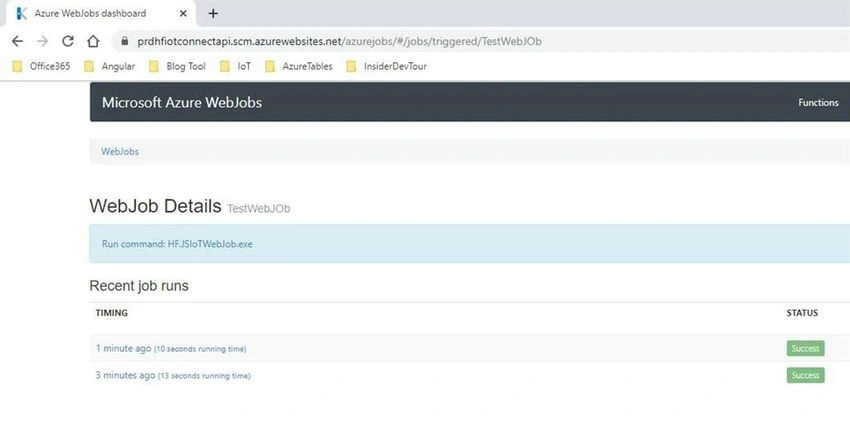
That’s it, I hope you have learned how to develop and deploy an Azure WebJobs in Azure App service. Feel free to fill up the comment box below if you need any assistance.
Annis YamaniPosted Mar 10, 2022, 10:50 AM
Great article I highly recommend it, also you can check here this wonderful template https://www.nardagency.com/portfolio
Baibhav KumarPosted Apr 18, 2021, 1:10 PM
I need to trigger web Job on an App service which is .Net application event such a Button Click. Is it possible in Web Job
Chittaranjan SwainPosted Dec 17, 2019, 10:50 AM
Nice article.
Dipa MehtaPosted Dec 17, 2019, 1:28 AM
Nice article on Azure jobs and careers.
Logesh PalaniPosted Dec 16, 2019, 11:17 PM
Help full one :)
Pritesh MaturkarPosted Dec 16, 2019, 9:25 PM
It is nice Article. it is very Usefully. Thanks for Sharing.
Vidyadharran GPosted Dec 16, 2019, 12:46 PM
Nice one bro:)
DeepikaPosted Dec 16, 2019, 10:59 AM
Can you take little complex problem to explain, this is very basic one. thank you