

Introduction
To proceed, you must first log in to Azure. Following that the non-Azure computer's security is monitored by Microsoft Defender for Cloud.
Note:
- Microsoft Defender for Cloud currently substitutes Azure Security Center and Azure Defender.
- Renamed the Azure Defender plans to Microsoft Defender plans.
- For instance, Azure Defender for Storage is now called Microsoft Defender for Storage.
You can access your non-Azure Computers in a variety of methods, including:
- Azure Arc-enabled servers can be used (recommended)
- From Defender Cloud's pages in the Azure portal (Getting started)
From the Azure portal, you can add non-Azure machines
Follow these steps,
Go to the Azure portal and log in.
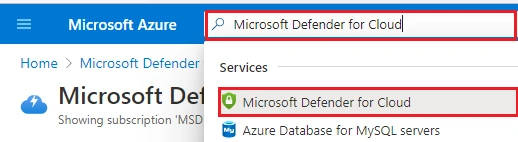
Type “Microsoft Defender for Cloud” into the search field and hit Enter.
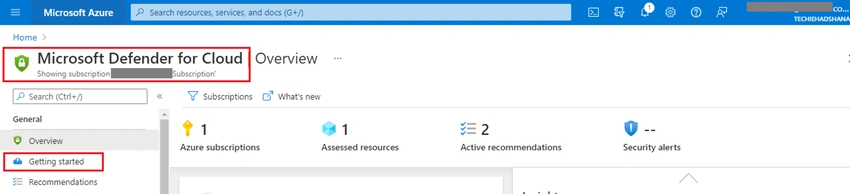
Open the Getting started page from the Defender for Cloud menu.
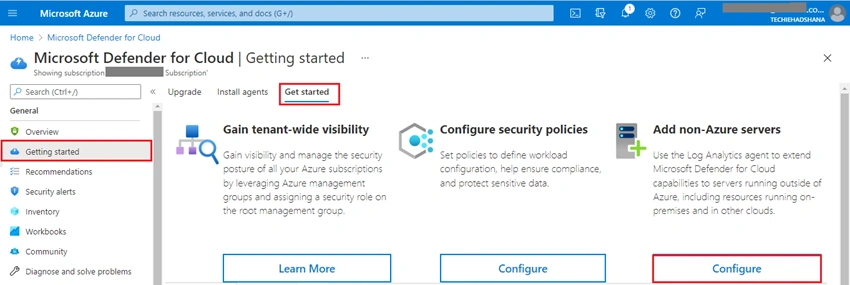
Choose the Get started option.
Select Configure from the list of non-Azure servers below Add non-Azure servers.
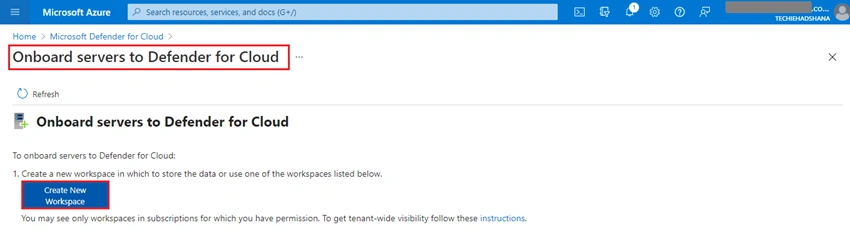
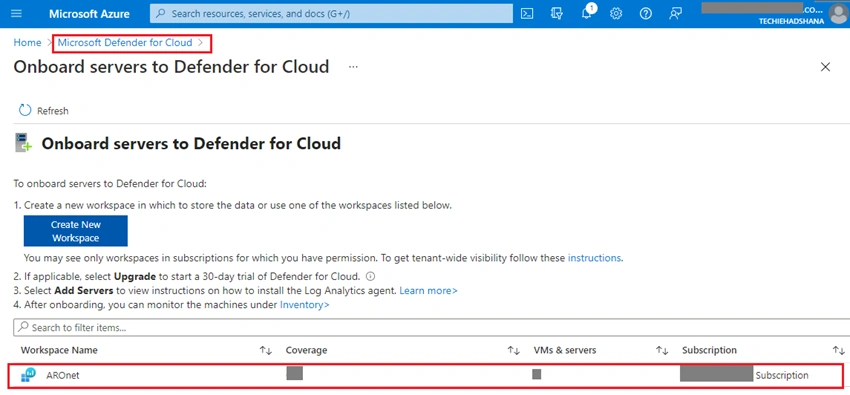
It displays a list of your Log Analytics workspaces. If automatic provisioning was enabled, Defender for Cloud produced a default workspace for you, which is included in the list. Choose if you want to utilize this workspace or another one.
You can either add computers to an existing workspace or start a new.
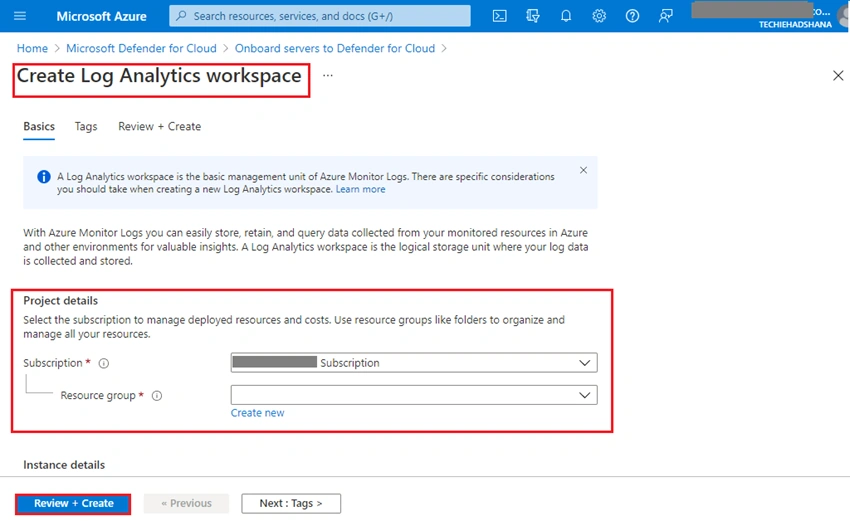
Select Create a new workspace if you want to make a new workspace.
Fill in the details for Create Log Analytics workspace.
After that, Open in the Created or existing Workspaces.
Deploying Windows on your machines
You'll need the information on the Agents management page as well as the necessary agent file (32/64-bit) to add Windows machines.
To download the setup file, click the Download Windows Agent link that belongs to your computer processor type.
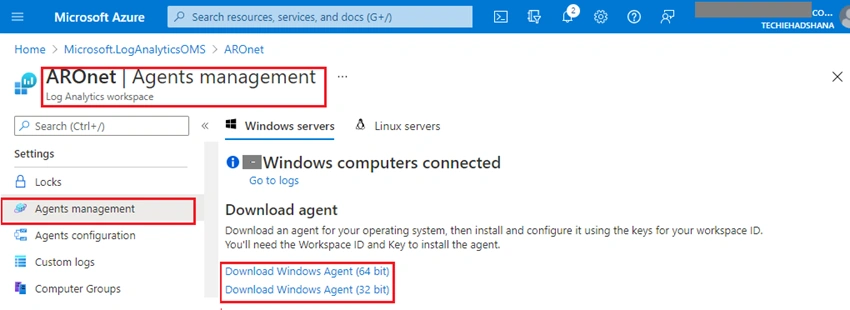
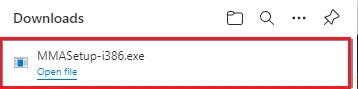
After that, Download the Windows Agent setup file,
Copy the Workspace ID and Primary Key from the Agents management page into Notepad.
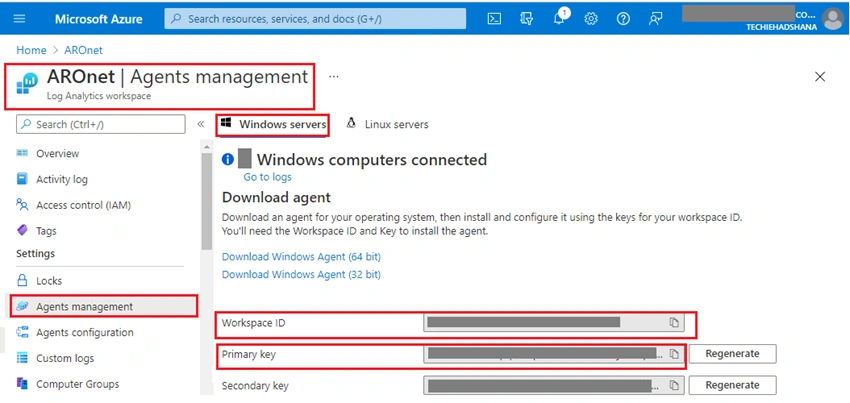
Then, run it “Download Windows Agent setup file”
Steps
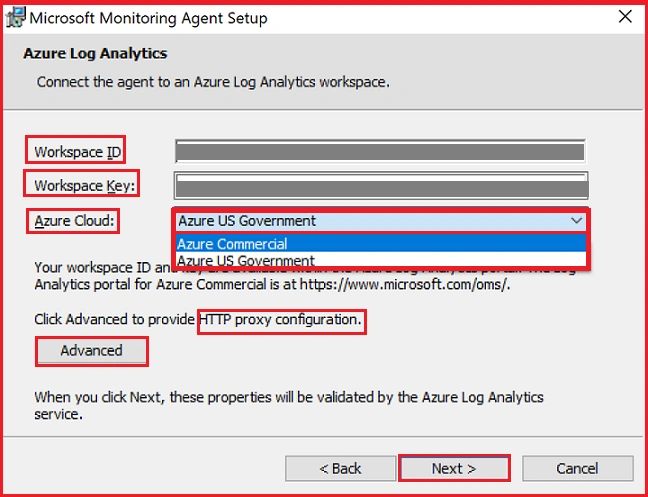
Follow the installation wizard's instructions (Next, I Agree, Next, Next)
- Copy the Workspace ID and Workspace Key (Primary Key) from Notepad and paste them both on the Azure Log Analytics page.
- Select Azure US Government from the Azure Cloud dropdown list Government cloud.
- Select Advanced and enter the proxy server's URL and port number if the machine needs to communicate with the Log Analytics service through a proxy server.
- Select Next once you've completed all of the configuration options.
- Select Finish on the Configuration finished successfully screen.
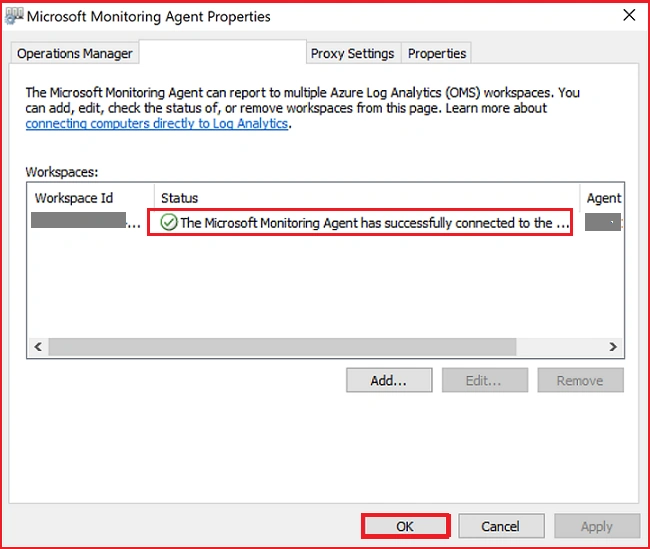
Check the agent's connection to Azure Monitor.
The Microsoft Monitoring agent appears in Control Panel once it's finished. You can check your setup and make sure the agent is connected there.
Summary
In this article, I showed you how to establish non-Azure machines to connect to Microsoft Defender for Cloud.
Viknaraj ManogararajahPosted Dec 6, 2021, 7:40 AM
Interesting Article!