

Introduction
Have you ever received an email from an automated process and wondered:
Which Power Automate flow sent this email?
This can become a problem when an organization has hundreds of Power Automate flows.
For example, imagine receiving this email every day:
Subject: Power Automate Demo Email - 2026-08-19T...
You know it came from Power Automate, but you don't know which flow generated it.
In this article, we will create a simple Power Automate flow and then use Microsoft 365 Message Trace and email headers to find the exact flow that sent the email.
Part 1 — Create a Demo Power Automate Flow
First, let's create a simple flow that sends an email.
Go to Power Automate → Create → Scheduled cloud flow.
Give the flow the name:
Demo - Daily Reminder Email
Choose a recurrence trigger.
For testing, you can configure it to run once a day.
Flow structure
Recurrence
     ↓
Send an email (V2)
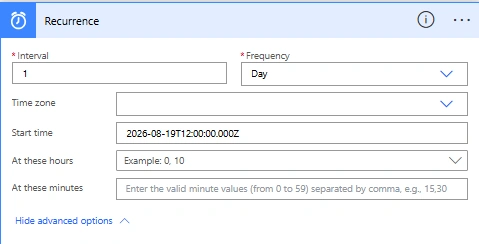
Configure the Recurrence Trigger
Set:
Frequency: Day
Interval: 1
For example:
Frequency: Day
Interval: 1
Part 2 — Configure the Email
Add:
Office 365 Outlook → Send an email (V2)
For the To field, enter your email address.
For example:
Use this subject:
Power Automate Demo Email - @{utcNow()}And use this body:
Hello,

This is a demo email sent using Power Automate.

We are going to use this email to identify the Power Automate flow that sent it.

Thank you.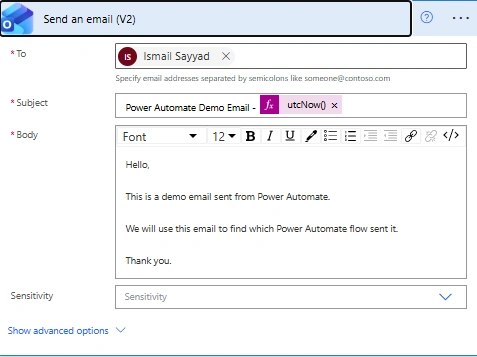
Save the flow.
Part 3 — Wait for the Email
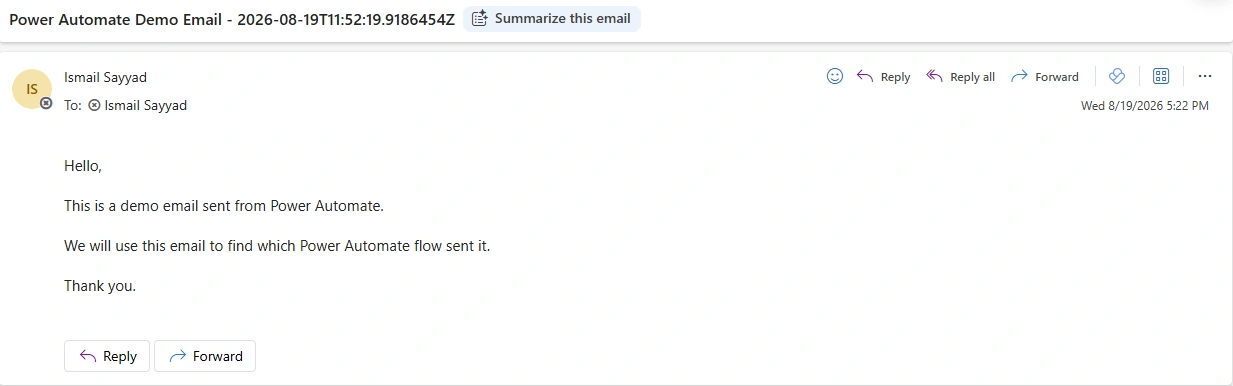
Once the flow runs, you should receive an email similar to:
Power Automate Demo Email - 2026-08-19T06:30:00Z
At this point, imagine that you don't remember which flow sent the email.
This is where the troubleshooting process starts.
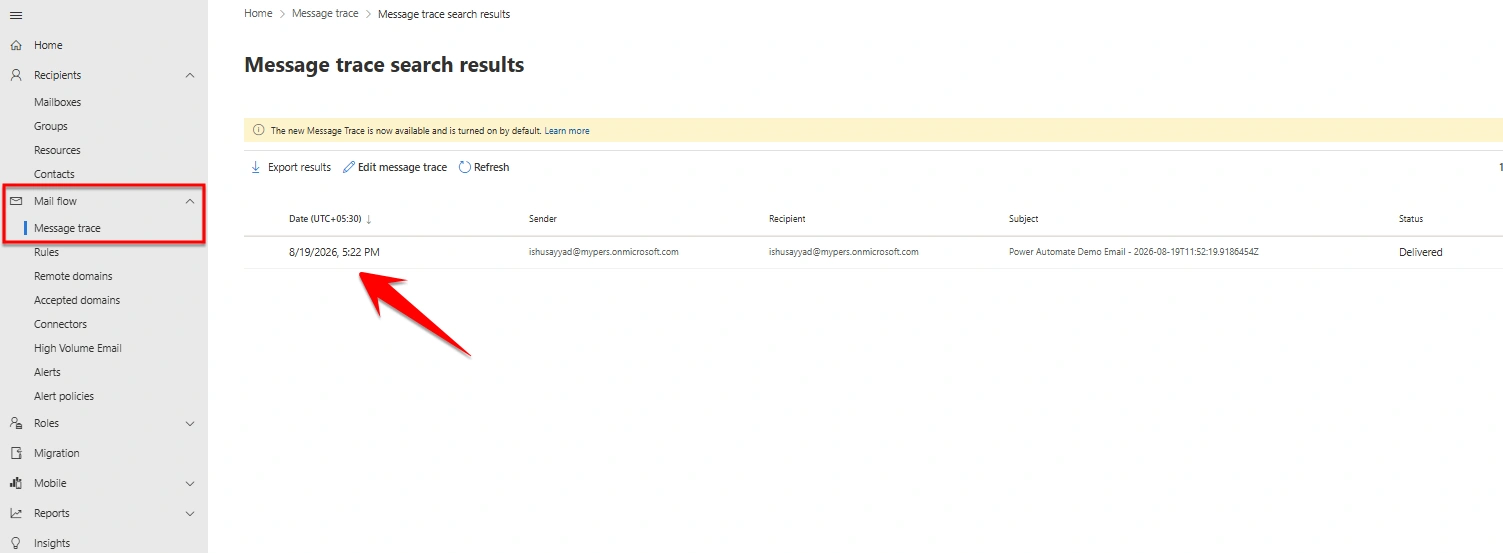
Part 4 — Open Message Trace
Go to:
Microsoft 365 Admin Center → Exchange Admin Center
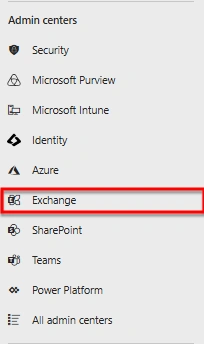
Then select:
Mail flow → Message trace
Search for your demo email.
You can use:
| Field | Example |
|---|---|
| Date | 19-Aug-2026 |
| Sender | Your automation mailbox |
| Recipient | Your email |
| Subject | Power Automate Demo Email |
You should see your email in the results.
Part 5 — Open the Message in Explorer
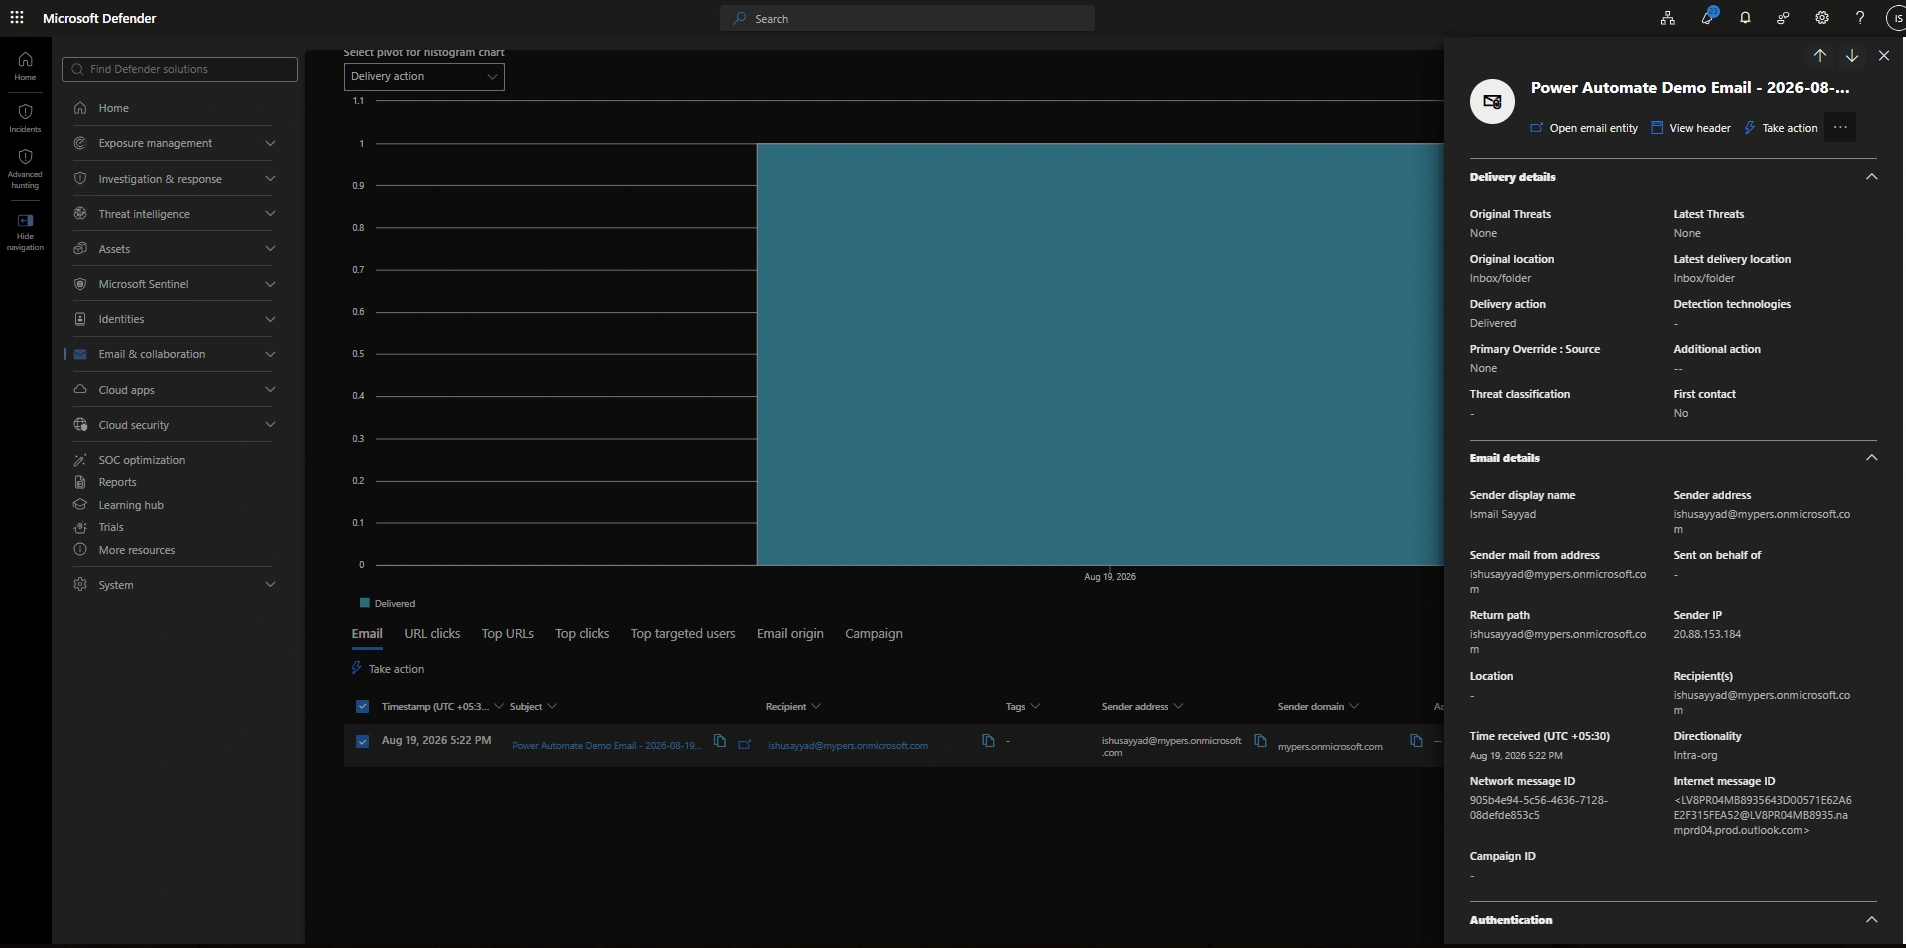
Select the email.
Click:
View in Explorer
This opens the email in Microsoft Defender Explorer.
You should see the email listed in Explorer.
Click the email to open its details.
Part 6 — View the Email Headers
Now open the message headers.
At first, the headers can look complicated.
For example, you may see something like:
Received: from ...
Authentication-Results: ...
Content-Type: ...
From: ...
To: ...
Subject: ...
Message-ID: ...
Don't worry about all of these values.
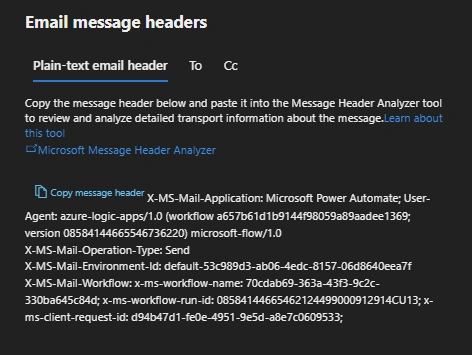
We are interested in the Power Automate-related headers.
Part 7 — Find the Power Automate Header
Search the headers for:
x-ms-mail-application
You should see something similar to:
x-ms-mail-application: Microsoft Power Automate
This tells us that the email was sent through Power Automate.
Now look for:
x-ms-mail-workflow
You may see:
x-ms-mail-workflow:

x-ms-workflow-name: 70cdab69-363a-43f3-9c2c-330ba645c84d;

x-ms-workflow-run-id: 08584144665462124499000912914CU13;

x-ms-client-request-id: d94b47d1-fe0e-4951-9e5d-a8e7c0609533;
Now we have something very useful.
Part 8 - Find the Flow in Power Automate
Now go back to:
Power Automate
Make sure you are in the same environment.
You can identify the environment using:
x-ms-mail-environment-id
For example:
x-ms-mail-environment-id: 53c989d3-ab06-4edc-8157-06d8640eea7f

x-ms-workflow-id: 70cdab69-363a-43f3-9c2c-330ba645c84d
The flow we created earlier should match:
Open the flow.
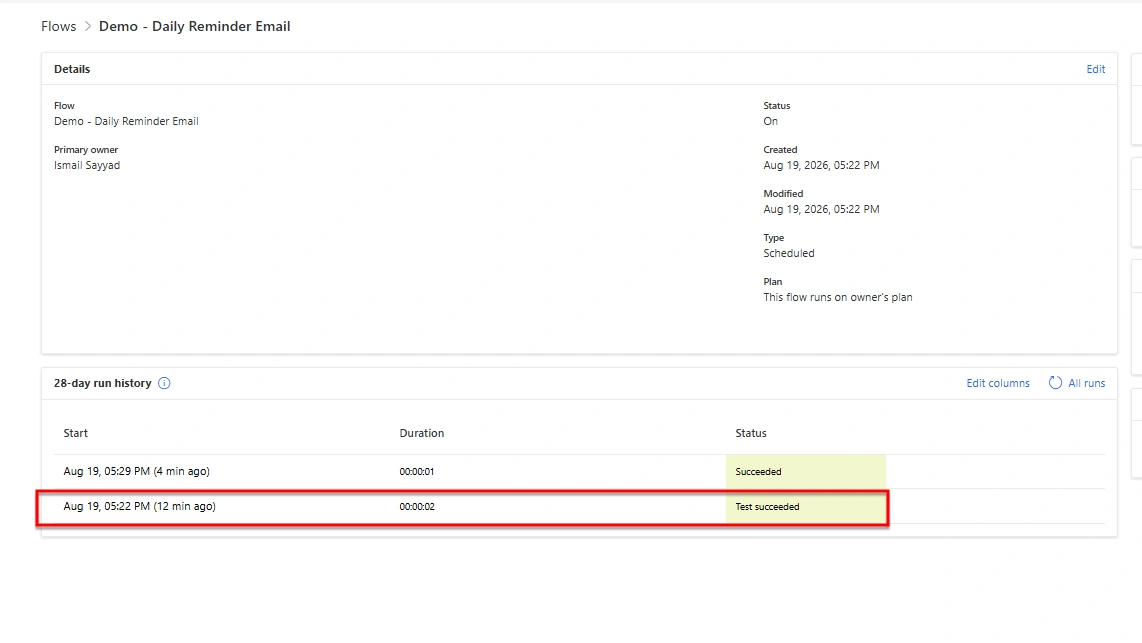
Part 9 — Verify the Run
Open:
Run history
Find the run that executed at approximately the same time as the email.
For example:
19-Aug-2026
05:30 PM IST
Open the run.
You should see:
Recurrence
↓
Send an email (V2)
Now you have successfully connected:
Email → Message Trace → Email Headers → Workflow ID → Power Automate Flow → Flow Run
The Main Concept
You can add this simple diagram to the article:
Email received
      ↓
Message Trace
      ↓
View in Explorer
      ↓
Email Headers
      ↓
x-ms-mail-workflow
      ↓
Workflow ID
      ↓
Power Automate
      ↓
Run History
      ↓
Exact Flow Run
This will make the article very easy to understand.
Conclusion
Finding which Power Automate flow sent an email can be difficult when you have many flows in your environment. Instead of checking each flow one by one, you can start with the email and trace it back to the flow.
Using Message Trace, Microsoft Defender Explorer, and the email headers, you can find useful Power Automate information such as the Workflow ID, Run ID, and Environment ID.
The next time you receive an email and wonder "Which Power Automate flow sent this?", don't start searching through hundreds of flows. Start with the email headers.
Vardhan Vyankatesh ChatlaPosted Aug 22, 2026, 9:58 AM
Insightful! Thanks for sharing.