

Introduction
Microsoft Power Automate provides run history to help developers monitor workflow execution, troubleshoot errors, and validate the data passed between actions. However, this run history can also expose sensitive information, such as customer email addresses, confidential business details, authentication-related values, and other private data.
For example, a Compose action might contain a customer's email address or a confidential reference number. By default, users with access to the relevant run details may be able to view that information in the action's inputs and outputs.
Power Automate provides two useful settings to reduce this exposure:
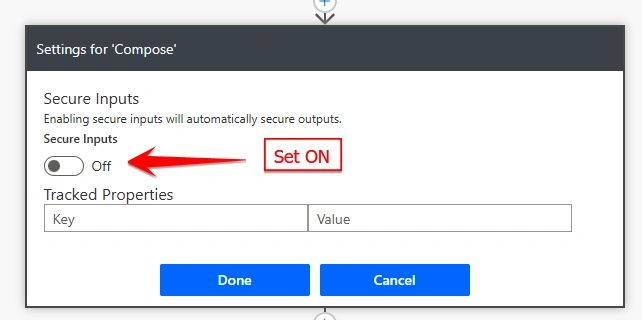
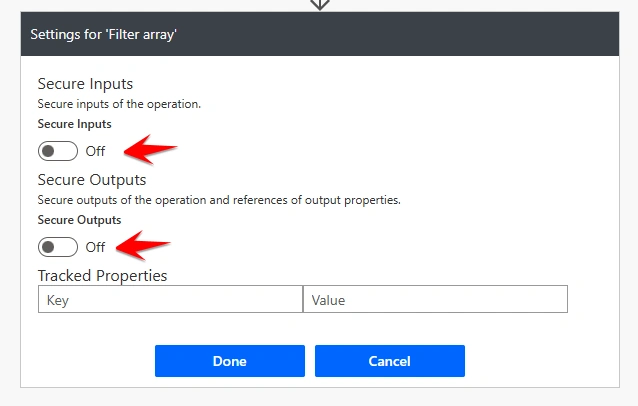
- Secure Inputs: Hides an action's input values in run history.
- Secure Outputs: Hides an action's output values in run history.
By enabling these settings on appropriate actions, developers can make workflow run history safer while preserving the workflow's intended functionality.
What Are Secure Inputs and Secure Outputs?
| Feature | Purpose | Example |
|---|---|---|
| Secure Inputs | Hides an action's input values in run history. | Customer details passed into a Compose action |
| Secure Outputs | Hides an action's output values in run history. | A response containing confidential customer information |
These settings control the visibility of supported action data in run history. They do not replace permissions, proper secret storage, or other security controls. See the official Microsoft Learn documentation.
Practical example
Suppose you are creating a flow that processes customer information.
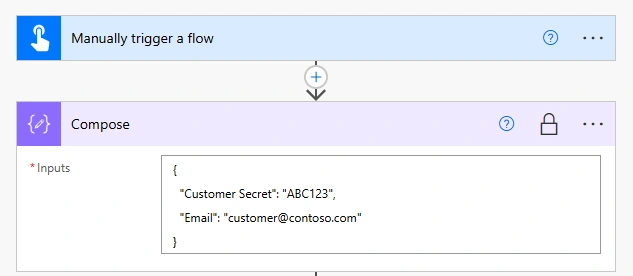
Sample input for a Compose action:
{
  "Customer Secret": "ABC123",
  "Email": "[email protected]"
}
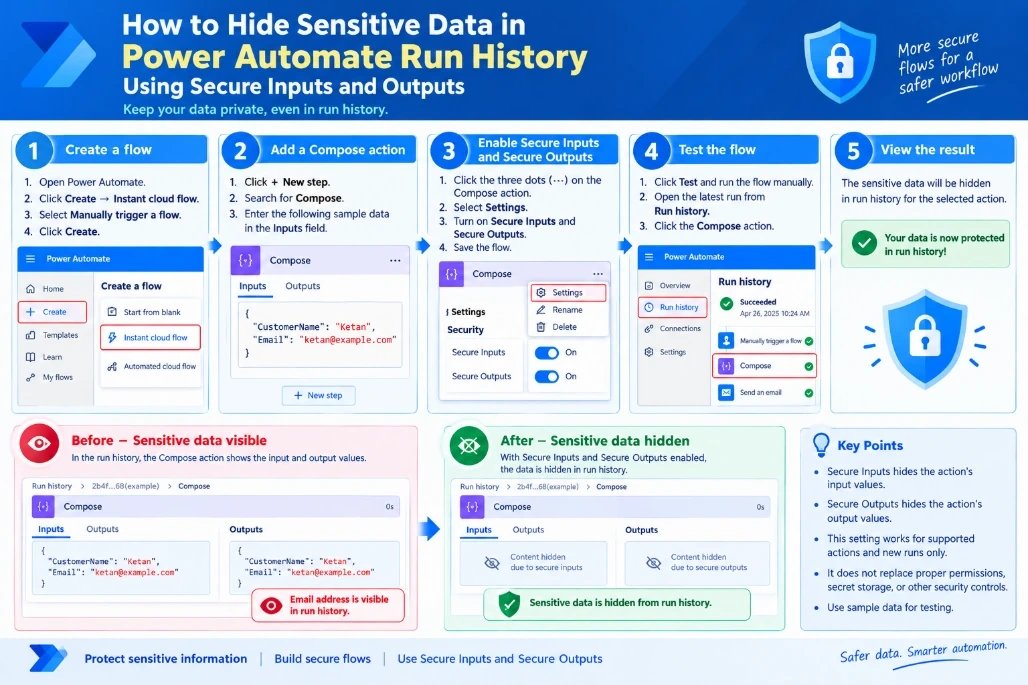
Before enabling security, the values may be visible in the action's run history.
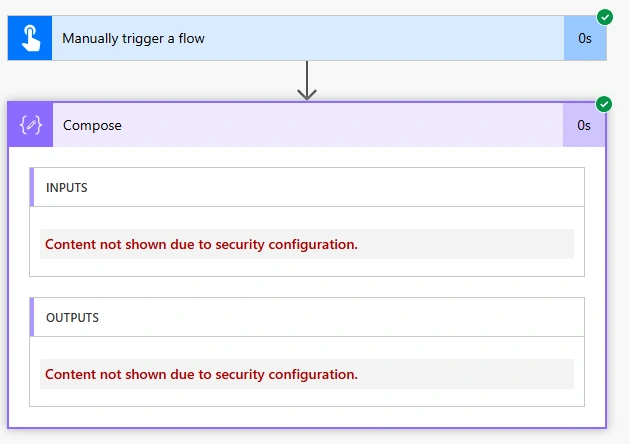
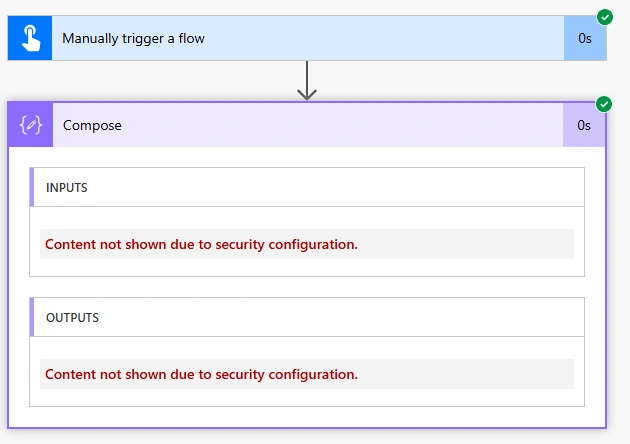
After enabling the appropriate security settings, the sensitive inputs and outputs are hidden in the run history. Depending on the action and designer, the values may appear as hidden content rather than literal asterisks.
Step-by-step implementation in Power Automate
Step 1: Create a flow
- Open Power Automate.
- Click Create → Instant cloud flow.
- Select Manually trigger a flow.
- Click Create.
Step 2: Add a Compose action
- Click + New step.
- Search for Compose.
- Enter the following sample data in the Inputs field.
Join the conversation! Your thoughts help the community grow.