

What exactly InApp is
InApp is an internal payment system for iOS and OSX. It allows developers to let users pay for some functionality, additional digital content, service, or any subscription.
Suppose, you have an app where you are showing ads and you want to add a “No-Adv” feature which will disable advertisement* on a nominal price payment. In such a case, you can use InApp Payment which includes digital content and some functionality (i.e. blocks of code which will execute after user's payment). Needless to say, there are several apps on App Store which give us the option to buy extra coins or extra features or any additional material and all of them are using InApp Payment (IAP).
Since there are different kinds of Product Type (by Product Type, I mean the feature which we’ll implement) which fulfill different requirements, every requirement or feature belongs to any of the categories.
Apple has basically four purchase categories.
- Consumable
- Non-Consumable
- Auto-Renewable Subscription
- Non-Renewable Subscription
Consumable In App Purchase can be purchased each time the user wants it. Suppose you have a game where you want your user to buy coins, ammunition, guns, or any features which you can purchase a number of times. Such features fall in this category where you have no foundation for purchasing a single time.
Non-Consumable In App Purchase can be purchased just once. As the name suggests, it is the exact opposite of Consumable Purchase. It can only be purchased once by the user and is available to all the devices where you’ve signed the same iTunes account. In case of any mishap, you can restore non-consumable product without paying for the same feature.
Suppose you have an Image Editor app where you have purchased Professional effects. Such features belong to you or your app as long as you have your same iTunes account. Such types of products don't expire and they belong to the lifetime of an iTunes account.
Auto-Renewable Subscription allows users to purchase periodic content or digital content for a set of time. With this purchase, subscription auto-renews after expiration. Suppose you have a Magazine App’s Subscription where you have to pay every month, it renews itself.
On the other hand, Non-Renewable Subscription allows users to purchase a service for a period of time. Then, it will expire. You are no longer allowed to use that service or feature. Or you may say, it’s a Time-Based access to certain content.
So far, we have covered what is InApp and the kind of In App Purchases that Apple allows.
Stages we need to follow.
- Create InApp Product Records in iTunes Connect Portal.
- Add Tester User in iTunes to test your app in Sandbox Environment.
- Ultimately, add your Codes and perform Product Info Retrieval or Product Payment Request or Restoration.
Create InApp Product Record in iTunes Connect Portal
Log into your Apple account on iTunes Portal ( https://itunesconnect.apple.com/ ). After successful login, create a new app and open its app Information page by clicking on it.
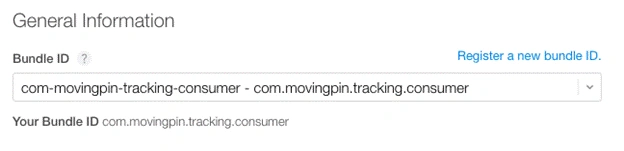
Make sure you have the same Bundle ID of your Xcode project as you have in your App Information page.
On the top-left corner, you have Features tab where you will create new In App Purchase Product.
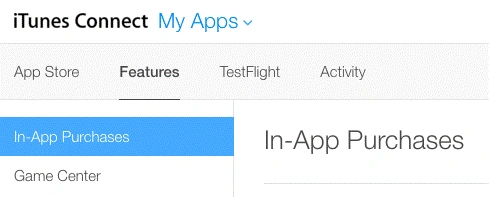
In this window, there is a plus button which will popup a window.

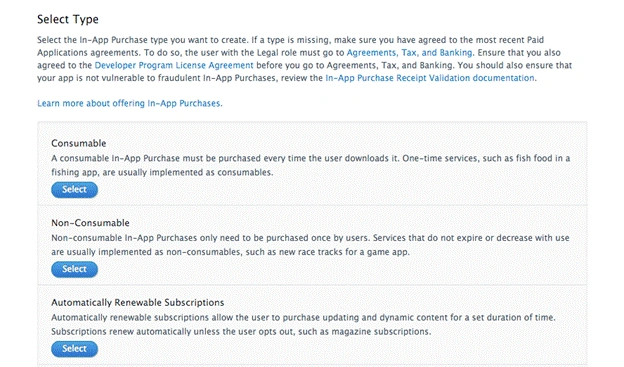
Here, you will choose the kind of product you want in your app. If you have no idea, then choose between Consumable or Non-Consumable.
As far as my requirement is concerned, I’m making my product Consumable.
Next, you’ll get an InApp purchase form where you are asked Reference Name and Product ID. Both of them must be unique and Product ID will be further used in your code. Better make it a descriptive identifier.
So far, we have done InApp product registration which is one of the prerequisites for debugging the process of InApp Payment.
Next, we’ll make a Test User Account which we will use in InApp Testing Purposes which is a Sandbox environment for testing.
Add Test User for InApp Testing
In Your iTunes Connect main screen, you have User And Roles where we will create a new Test User in Sandbox.
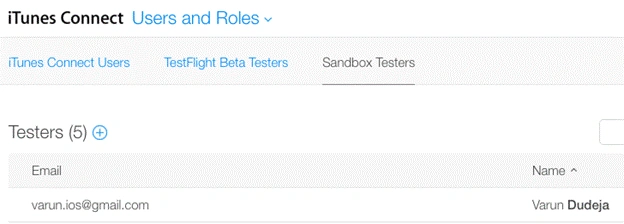
Click on the Plus (+) sign to create a new user. And, from here you will be moved to Registration page where you can pass dummy data for the sake of testing.
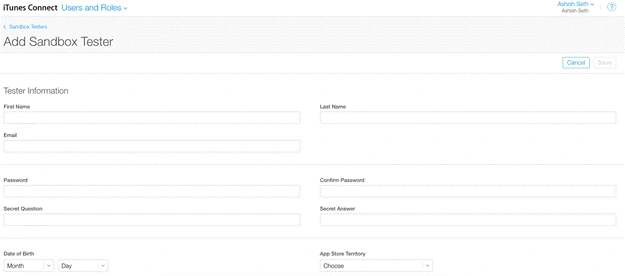
And, make a point when you are passing the App Store Territory as it determines the type of currency you have. Moreover, make a note of your Username and Password for further use.
And, you will use these credentials in your Device’s iTunes account for testing.
Configure your Device with Testing Account
[SNAPSHOT]
Go to Settings > App & iTunes Stores. There, you will click on your Apple ID and then, Sign Out.
[SNAPSHOT]
Overview, What We Are Going To Do,
[Have to write]
Now, Open Your Xcode
Before you start writing a code, you need to include an external class file called RMStore which is a wrapper class over Apple’s StoreKit.framework, without any dependencies.
Or, you can install RMStore from Cocoapods.
In Cocoapod file,
- <code>
- pod 'RMStore', '~> 0.7'
- </code>
Download - https://github.com/robotmedia/RMStore
Before I get into codes, I want to get in the flow of code blocks. From Apple’s developer website, there is a descriptive image which tells about the In App Payment Code structure.
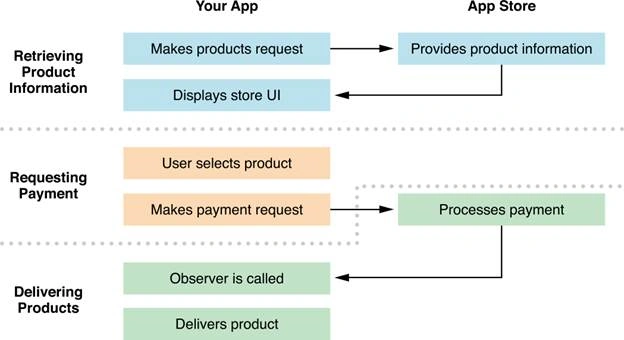
As per developers view, we have three phase,
- Retrieving Information from the iTunes about the In App Products.
- After Confirmation You are requesting to buy any of the product.
- Last, we will determine the response whether payment is successful or failed.
Requesting Product Information
In this stage, we will ask from iTunes about the InApp Product desired Details. So, there is a method named,
- <code>
- - (void) requestProducts:(NSSet*)identifiers
- success:(RMSKProductsRequestSuccessBlock)successBlock
- failure:(RMSKProductsRequestFailureBlock)failureBlock
- </code>
Let’s add some reference declaration what we are going to use in further steps,
- <code>
- @implementation ProductListTableViewController{
- UIActivityIndicatorView *activityView;
- NSMutableArray *modalProductArray;
- ModalProduct *product;
- NSMutableArray *LIST_OF_PRODUCT;
- }
- </code>
- <code>
- // Create an Array
- LIST_OF_PRODUCT = [[NSMutableArray alloc] initWithObjects:@"subscription_for_1Day",@"subscription_for_1Week",@"subscription_for_1Year",@"subscription_for_1Month", nil ];
- // Tranform it into NSSet Type
- NSSet *productsSet = [NSSet setWithArray:LIST_OF_PRODUCT];
- // Now, we'll call the RMStore Method which request about the product
- [[RMStore defaultStore] requestProducts:productIDList success:^(NSArray *products, NSArray *invalidProductIdentifiers) {
- // When Successfully identifies ProductID
- }
- failure:^(NSError *error) {
- // Your Codes when You have some error.
- }
- </code>
Suppose you are getting failure: callback every time you execute your code; then there must be something wrong with your Bundle ID or your ProductID name. It’s one of the fundamental issues while you are dealing with In App Payment.
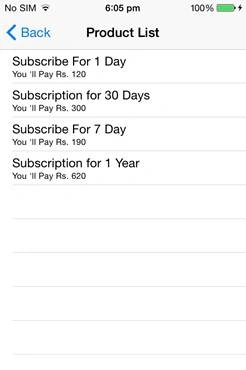
Next, we will write code when you are in succes: block. And, there are two array arguments where one is for successful product identifiers and second is invalid product identifiers.
- <code>
- // A Local Array where are storing Model Object’s instance
- modalProductArray = [[NSMutableArray alloc]init];
- for(SKProduct *productObject in products)
- {
- // Create Modal Object Instance
- product = [[ModalProduct alloc]init];
- product.productName = productObject.localizedTitle;
- product.productPrice = [RMStore localizedPriceOfProduct:productObject];
- product.productID = productObject.productIdentifier;
- product.region = [productObject.priceLocale objectForKey:NSLocaleCurrencyCode];
- [modalProductArray addObject:product];
- NSLog(@"Title : %@",product.productName);
- NSLog(@" Description : %@",product.description);
- NSLog(@"Price : %@",product.productPrice);
- NSLog(@"Region : %@",product.region);
- NSLog(@"Object ID : %@",product.productID);
- NSLog(@"============");
- }
- </code>
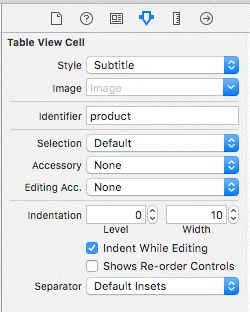
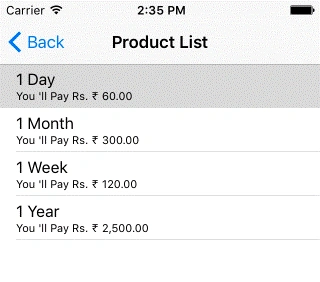
Joe WilsonPosted Oct 6, 2016, 11:54 AM
Thank you. It helped me.