

Introduction
This article demonstrates how to install and configure Syncfusion Essential Studio for Xamarin in Visual Studio 2017. Syncfusion provides Visual Studio toolbox for your Xamarin projects (Xamarin.Android, Xamarin.Forms, Xamarin.IOS). It supports only Visual Studio 2015 and above versions. This Syncfusion toolbox offers 130+ free controls that help us implement new, better functionality without coding (dragging and dropping the controls) in the XAML Designer.
Let’s start.
Step 1
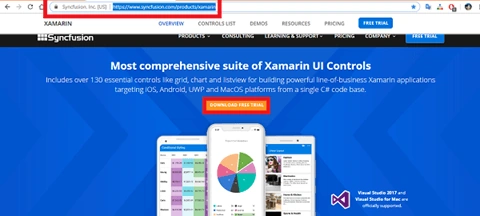
First, you can download Syncfusion Essential Studio for Xamarin, then double-click to open the executable file and run it.
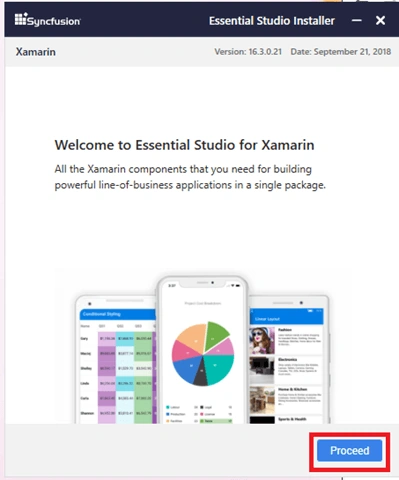
Figure 2 Install Syncfusion
After a few seconds, a new window shows up. In this window, click the Proceed button followed by clicking on Next and installing the button. After installation, open Syncfusion Xamarin Control Panel and go to the Add on & Utilities tab.
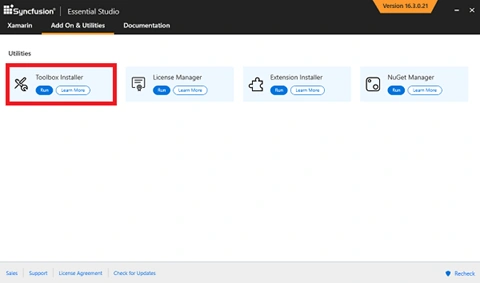
Figure 3 Toolbox Installation
Next, Run the Toolbar Installer. In the new window, select your Visual Studio version and click the Configure button. After successful configuration, restart Visual Studio.
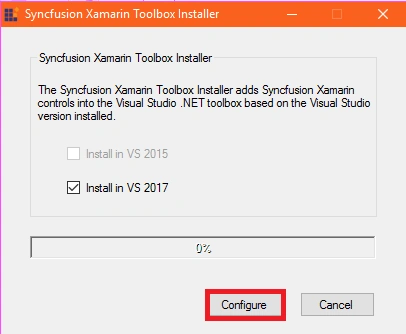
Figure 4 Configuration
Step 2
Step 2.1 - Syncfusion Xamarin Project Template
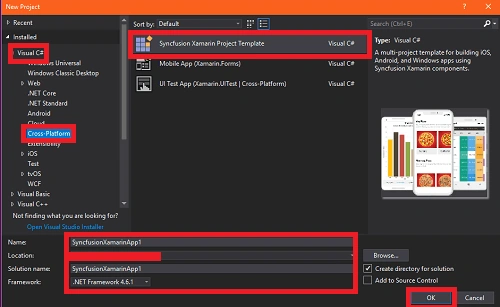
Figure 5 New Project
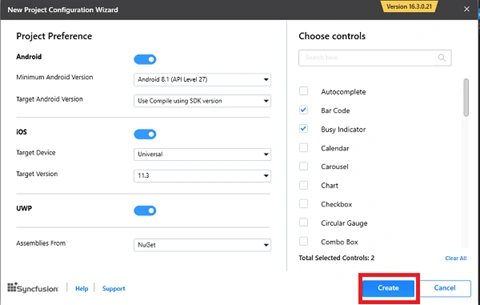
Figure 6 Create New Project
Step 2.2 - Add the Syncfusion Controls through Visual Studio Toolbox
Create the Xamarin Project and use the following steps to add the Syncfusion controls via Visual Studio Toolbox.
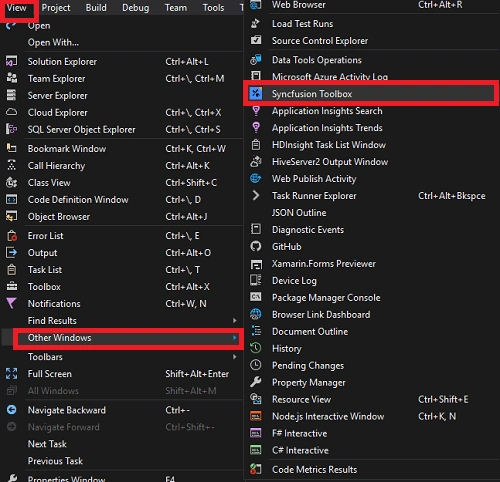
Figure 7 - Toolbar Windows
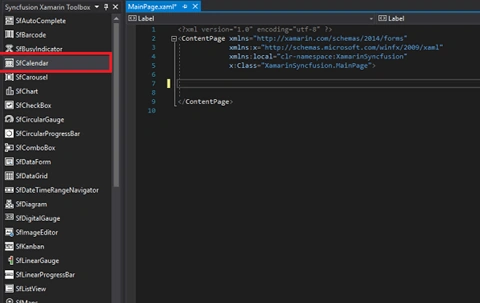
Figure 8 - Enable Window
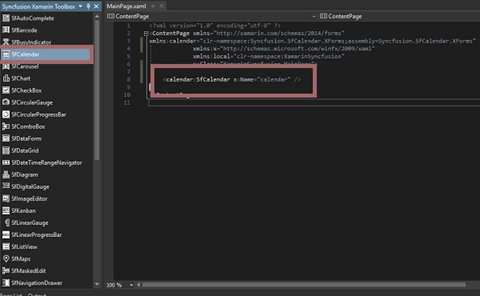
Install NuGet Packages based on the controls in your project - Refer to this link
Conclusion
Thus, we learned how to install and configure Syncfusion Essential Studio in Visual Studio 2017.
Join the conversation! Your thoughts help the community grow.