

Introduction
Windows Deployment Services is a server role that gives administrators the ability to deploy Windows operating systems remotely. WDS can be used for network-based installations to set up new computers so administrators do not have to directly install each operating system (OS).
I will provide step by step to install Windows Deployment Services with screenshots below.
Go to Hyper-V Manager, select the install Server-DC

Next Add roles and features

Click Next

Click Next

Click Next

Click Add Features

Next select the check box Windows Deployment Services and click Next

Click Next

Click Next

Select the check box Roles service. Click Next

Click Install

Next go to Server Manager Tools to select Windows Deployment Services


Next Right Click Configure Server
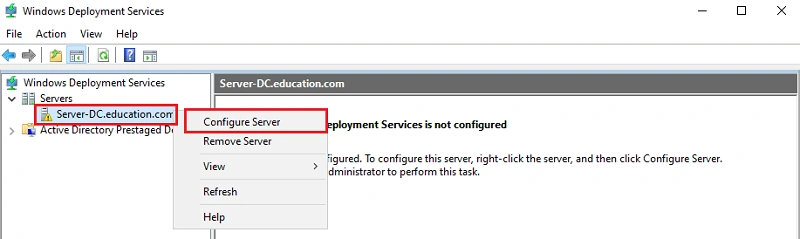
Click Next

Next Select the Install Options Click Next

Next Create the Installion Folder Location Click Next

Next PEX Server Initial Settings Click Next

Select the Install Images Right Click Add Image Group

Next Create the Image Group Name Click Next

Select the Image File following step. Click Next


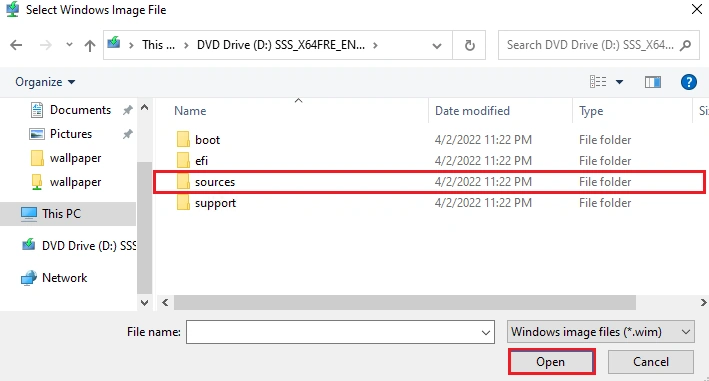


Next Select Images Click Next

Next Click Next

Next Click Finish


Next Select Boot Image

Next Right Click Add Boot Image following step. Click Next


Click Next

Click Next
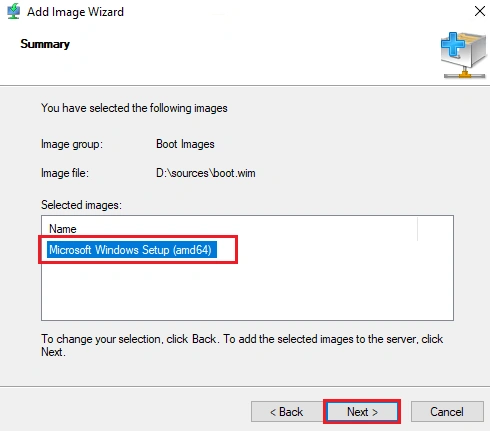
Next Finish
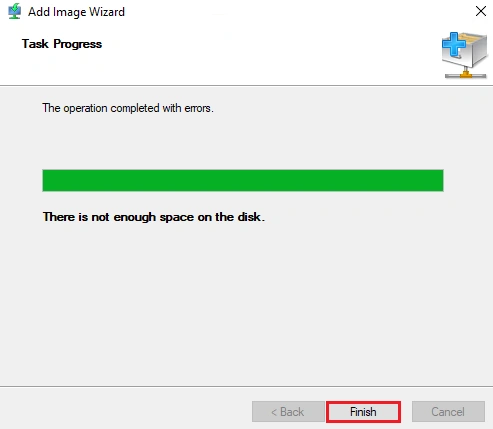
Windows Deployment Services Must importent DHCP Service following step
Next Select the Connect the Bootable Client VM go to Settings

Select the Firmware change the Boot order in Network Adapter Click Ok

Next Start Bootable Client Vm

Successfully Windows Deployment Services Run Client Bootable VM

Conclusion
This article taught us how to set up Windows Deployment Services . If you have any questions, please contact me.
Thanks.
Join the conversation! Your thoughts help the community grow.