

Introduction
MySQL is a popular open-source database system used around the world. It supports web apps, data systems, and business platforms. Installing MySQL 8.0 on Windows Server is simple with the MySQL Installer, which takes care of setup and needed files automatically.
This guide gives easy steps to install, set up, and check MySQL 8.0 on Windows Server.
Prerequisites
Before you start, make sure you have the following:
You are logged in as an Administrator on the Windows Server computer.
You have an internet connection (for the web installer) or have already downloaded the full installer.
Windows Server is updated with the latest updates.
The server has at least:
2 GB of RAM
200 MB of free disk space for installation
.NET Framework 4.5 or higher
Step 1: Download the MySQL Installer
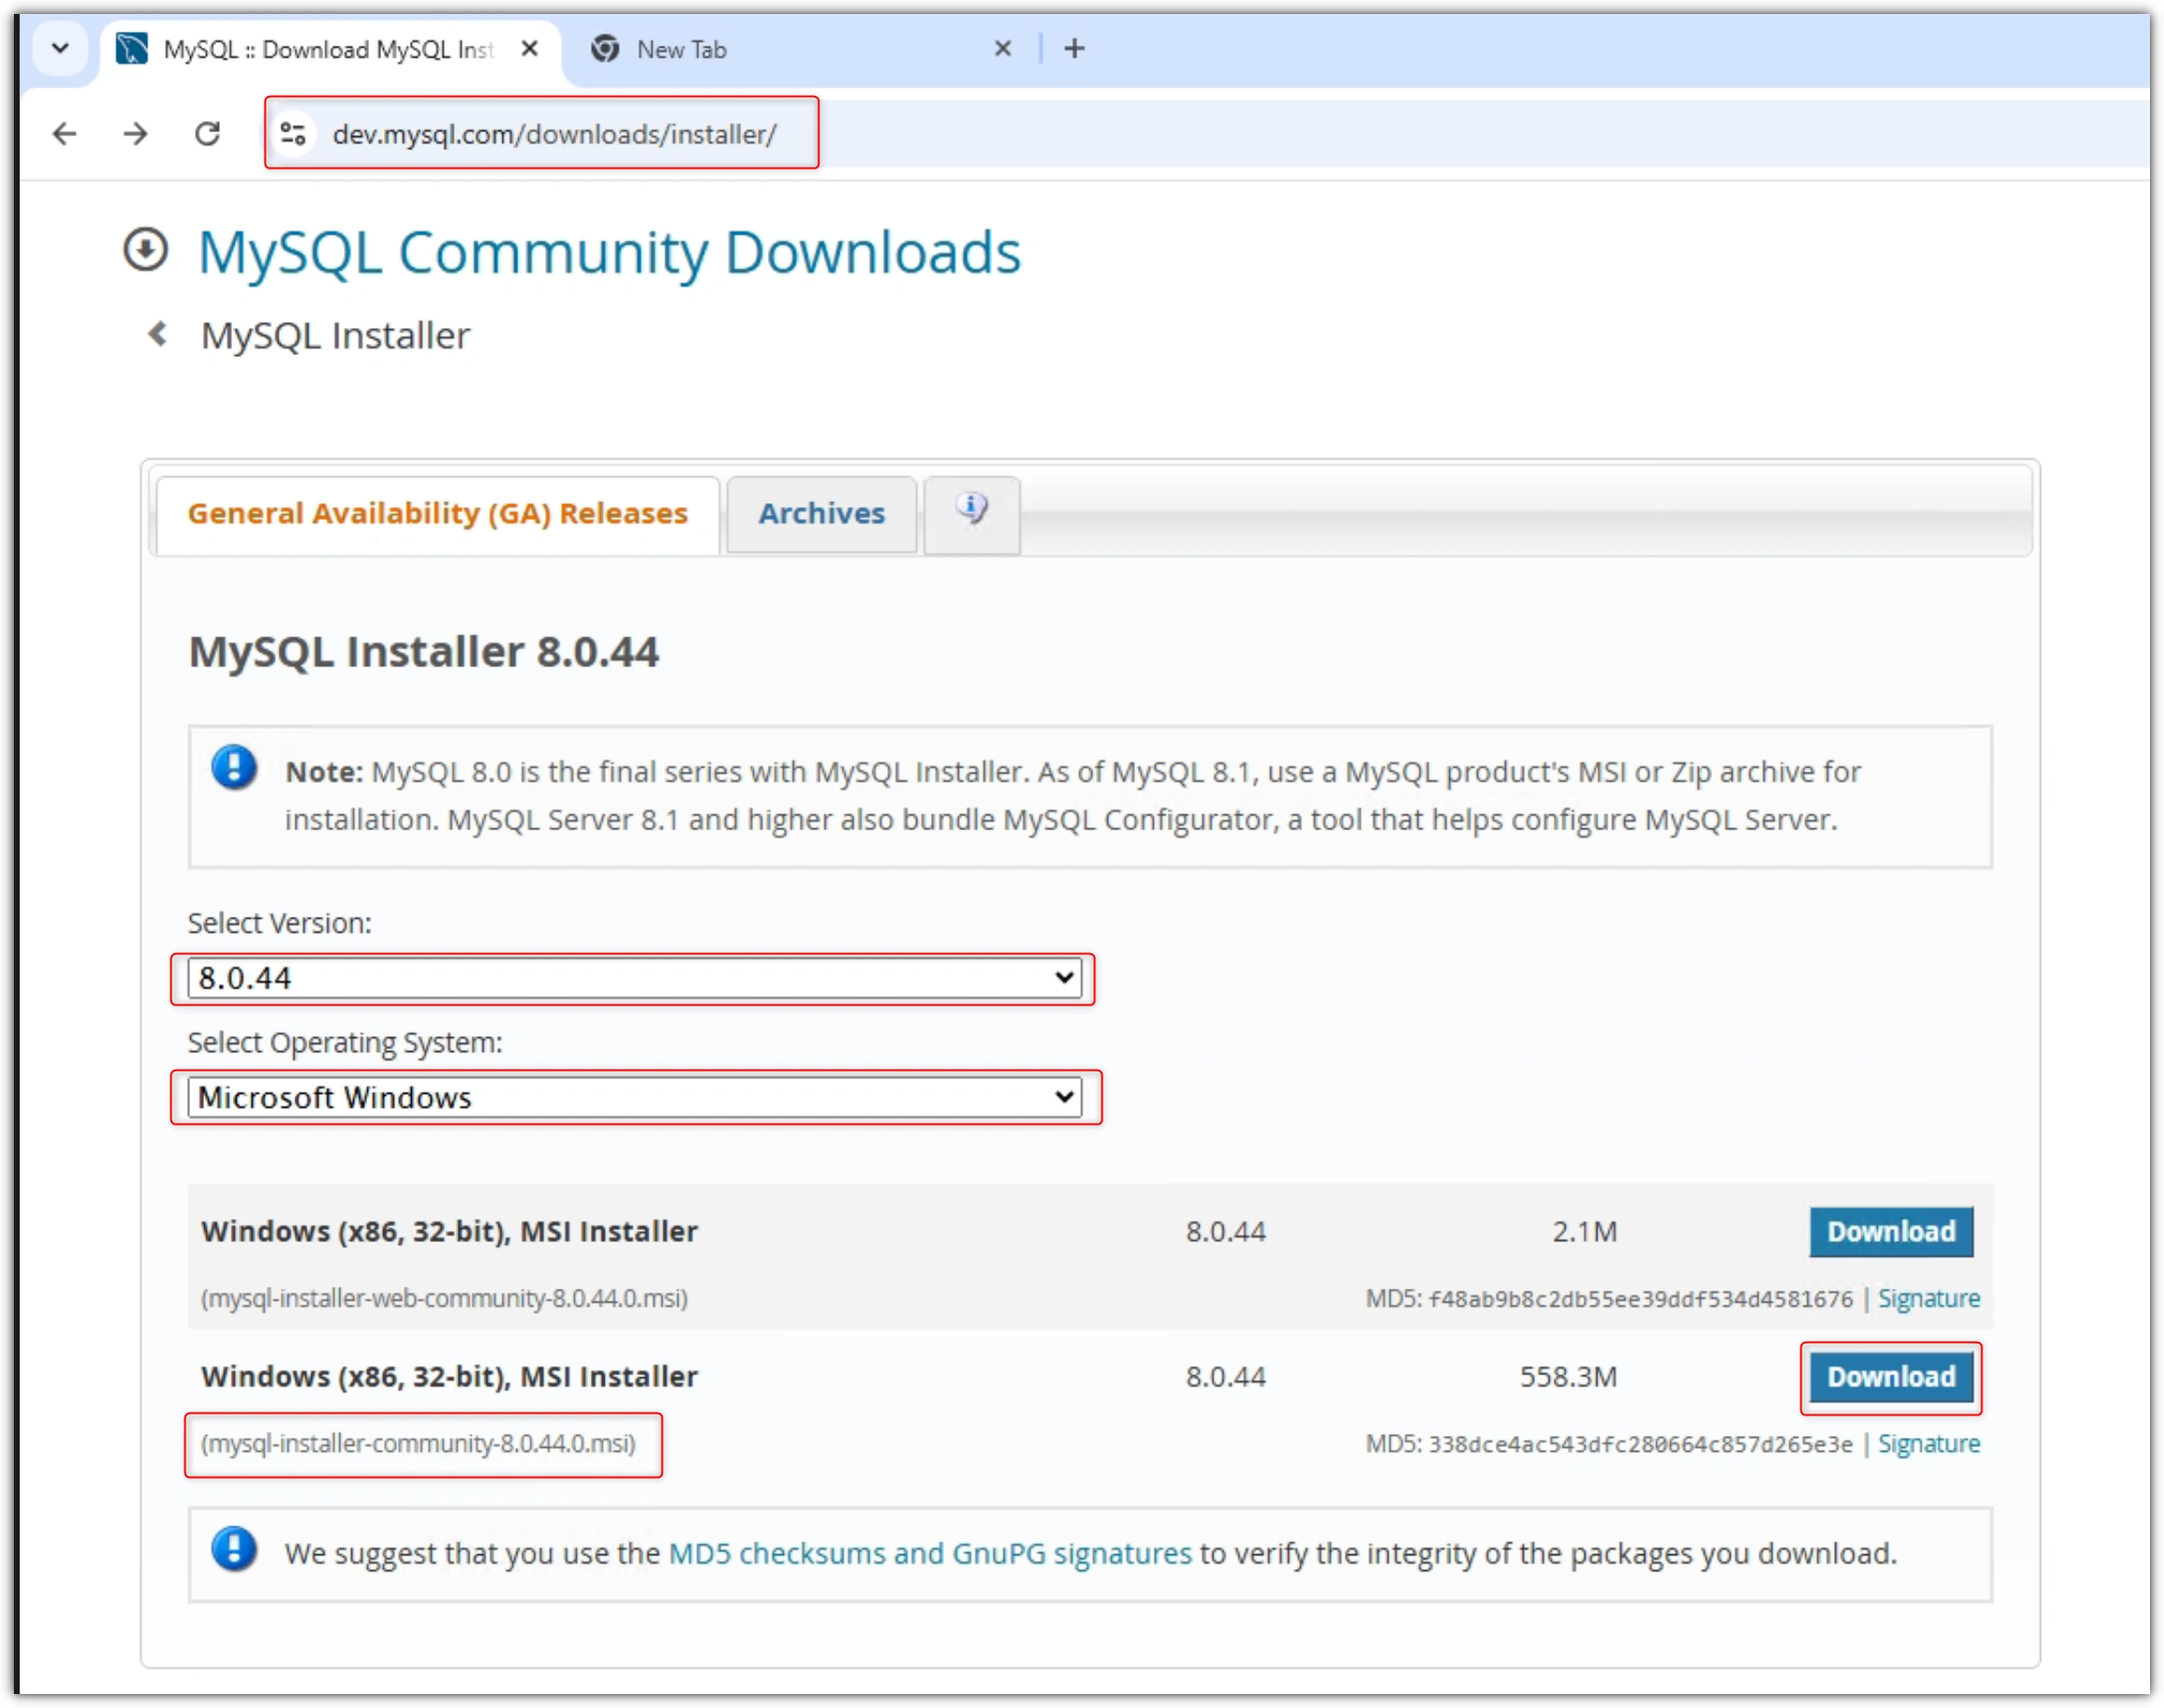
Go to the official MySQL website: https://dev.mysql.com/downloads/installer/
Choose Windows (x86, 64-bit), MySQL Installer MSI.
Select one of these options:
Web Installer (small size): Downloads the needed files during setup.
Full Installer (large size): Includes all files and works without internet.
Click Download, then run the installer after the download finishes.
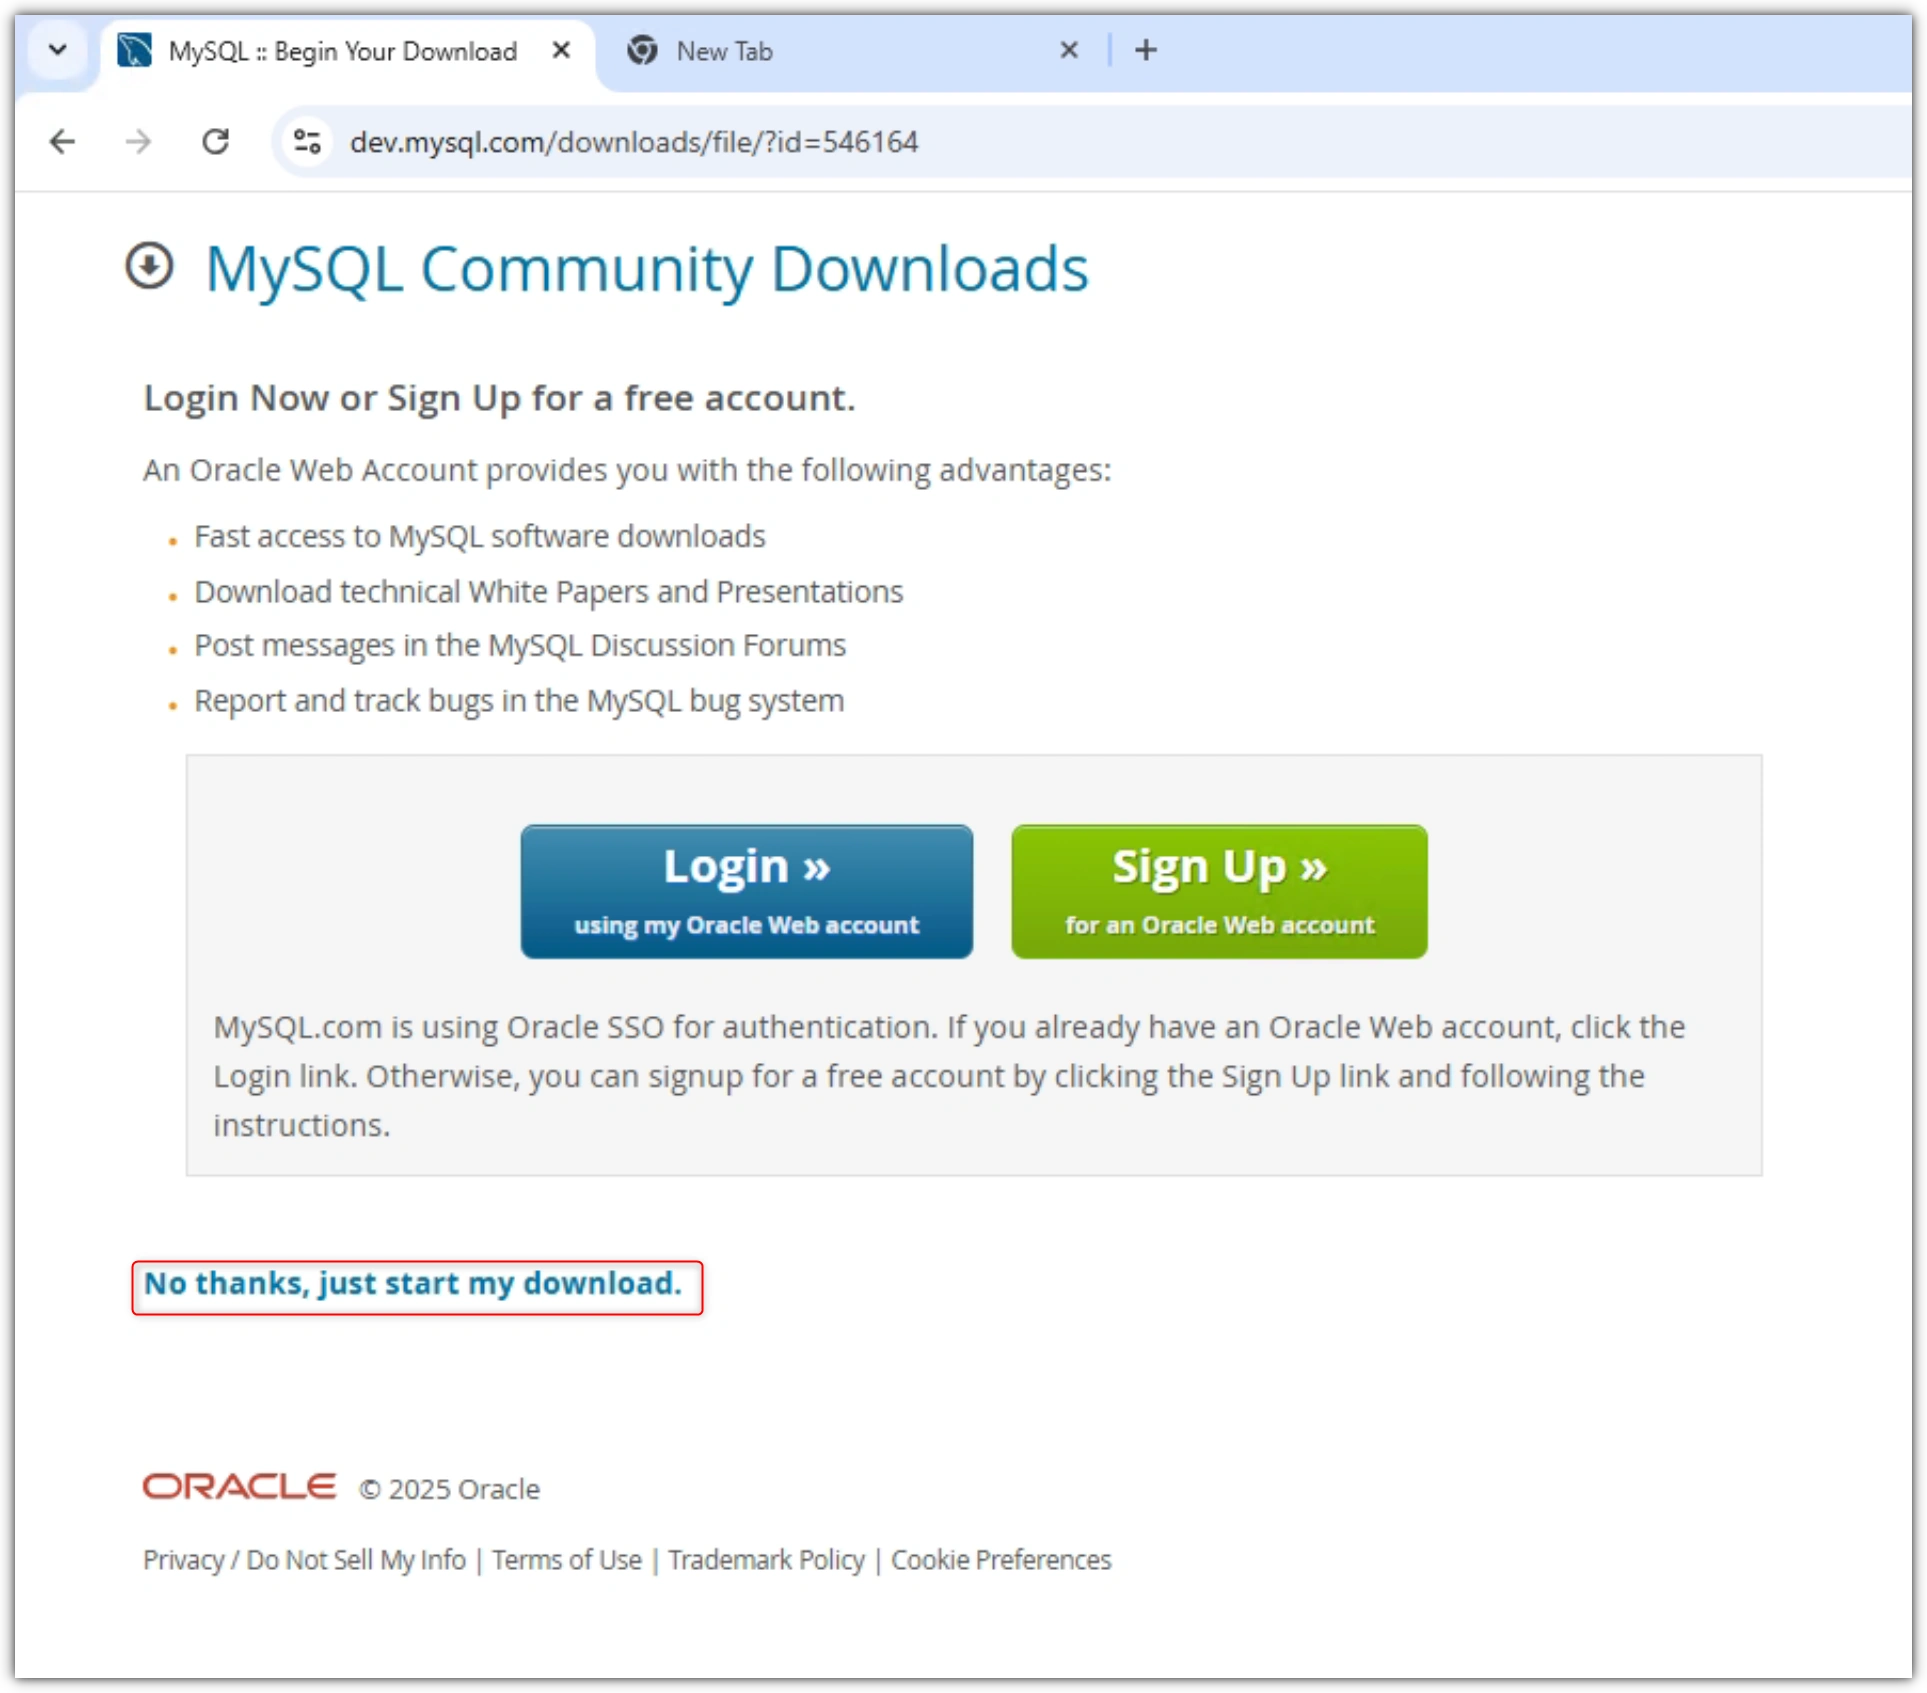
No thanks, just start my download.
Step 2: Run the Installer
Right-click the downloaded MySQL Installer and select Run as Administrator.
If a message from User Account Control (UAC) appears, click Yes to allow the changes.
Step 3: Choose Setup Type
The installer gives you different setup choices:
Server Only: Installs only the MySQL Server.
Client Only: Installs only the client tools.
Full: Installs all MySQL products.
Custom: Lets you choose what to install.
Select Full: Installs all MySQL products.
Then Click Next
Note. For most servers, choose Server Only, or Developer Default if you need tools like MySQL Workbench.
Click Next to continue.

Step 4: Check for Requirements
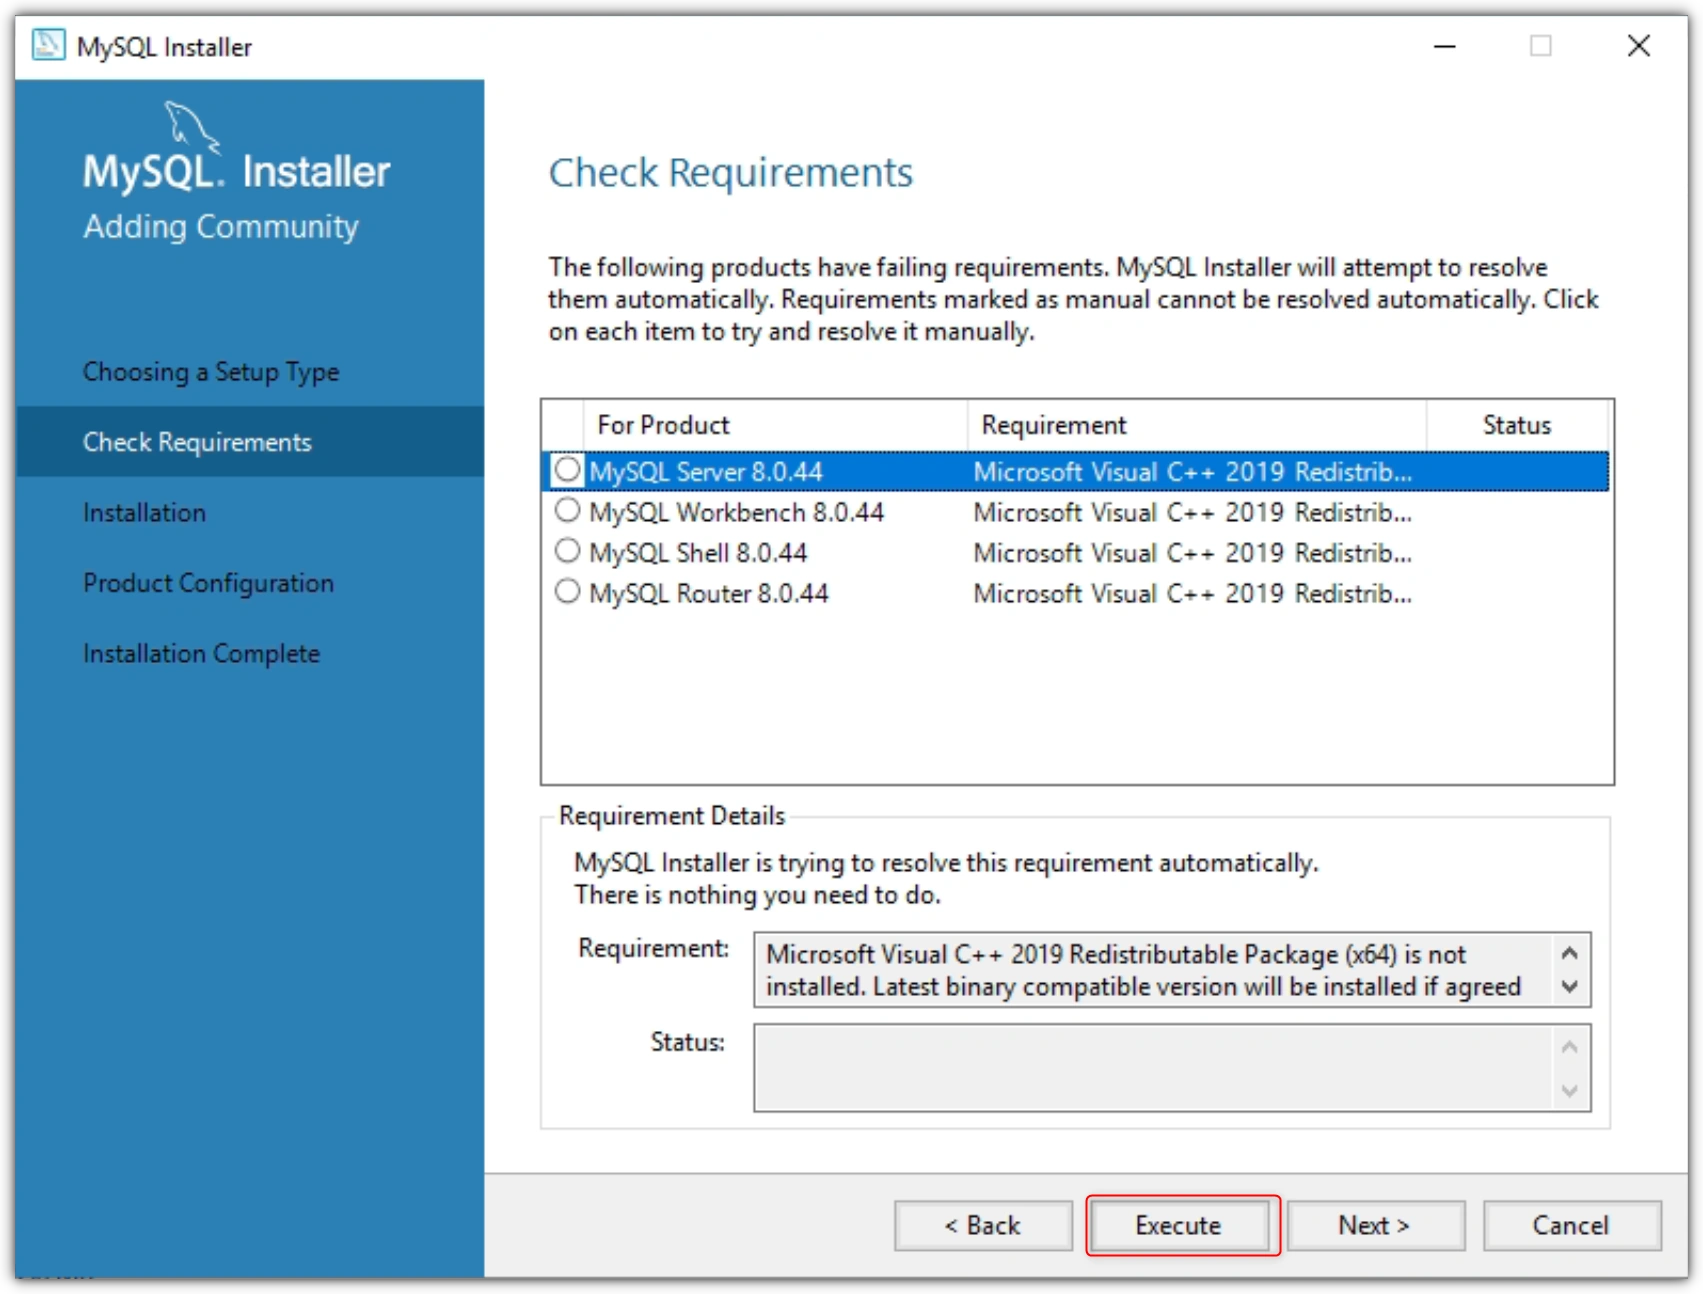
The installer will check if your system has the needed software (like Visual C++ Redistributable or .NET Framework).
If something is missing, it will download and install it automatically.
The Visual C++ Redistributable package was not found on this server. Click Install to install the required component.
When finished, click Next.
Step 5: Begin Installation
Click Execute to start installing MySQL.
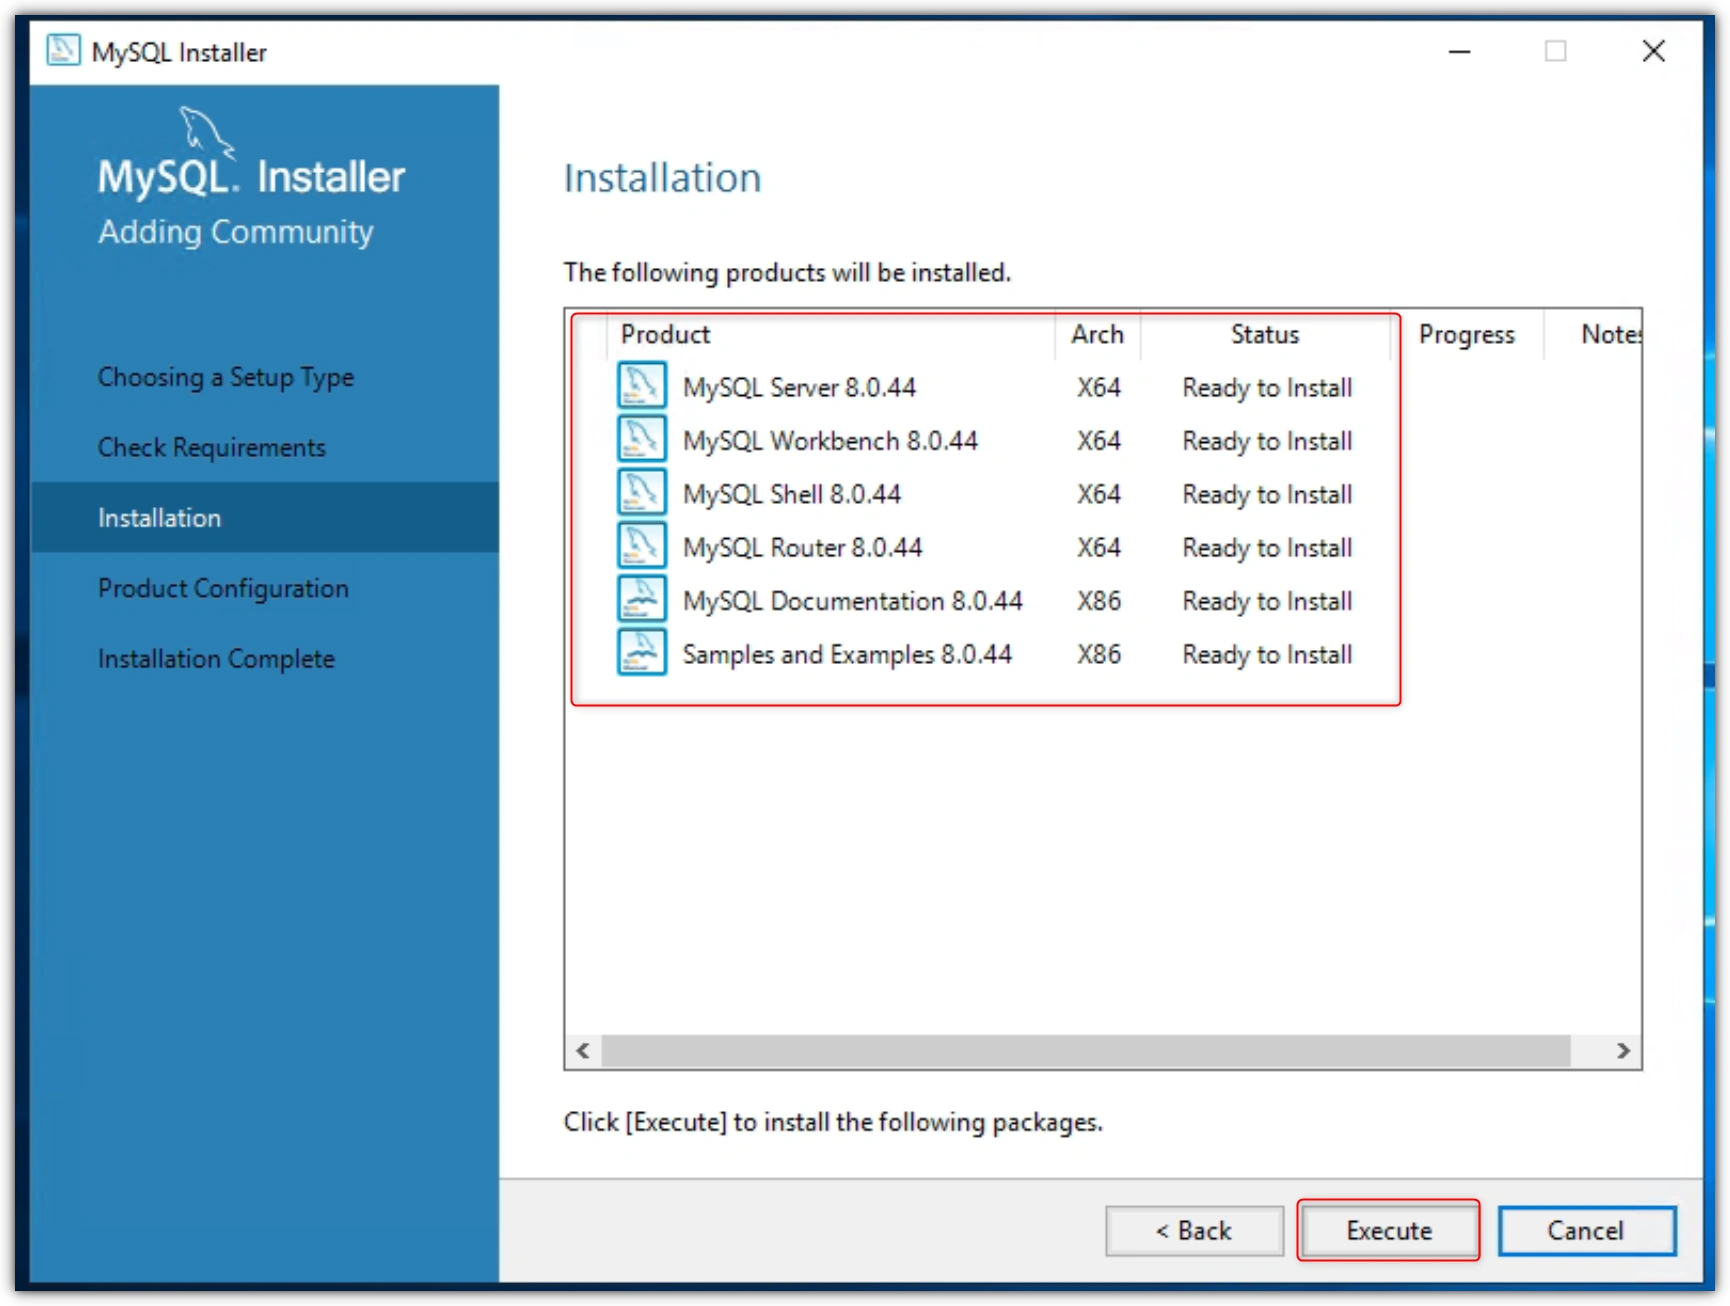
The installer will download and install all selected parts.
Wait until it finishes, then click Next.
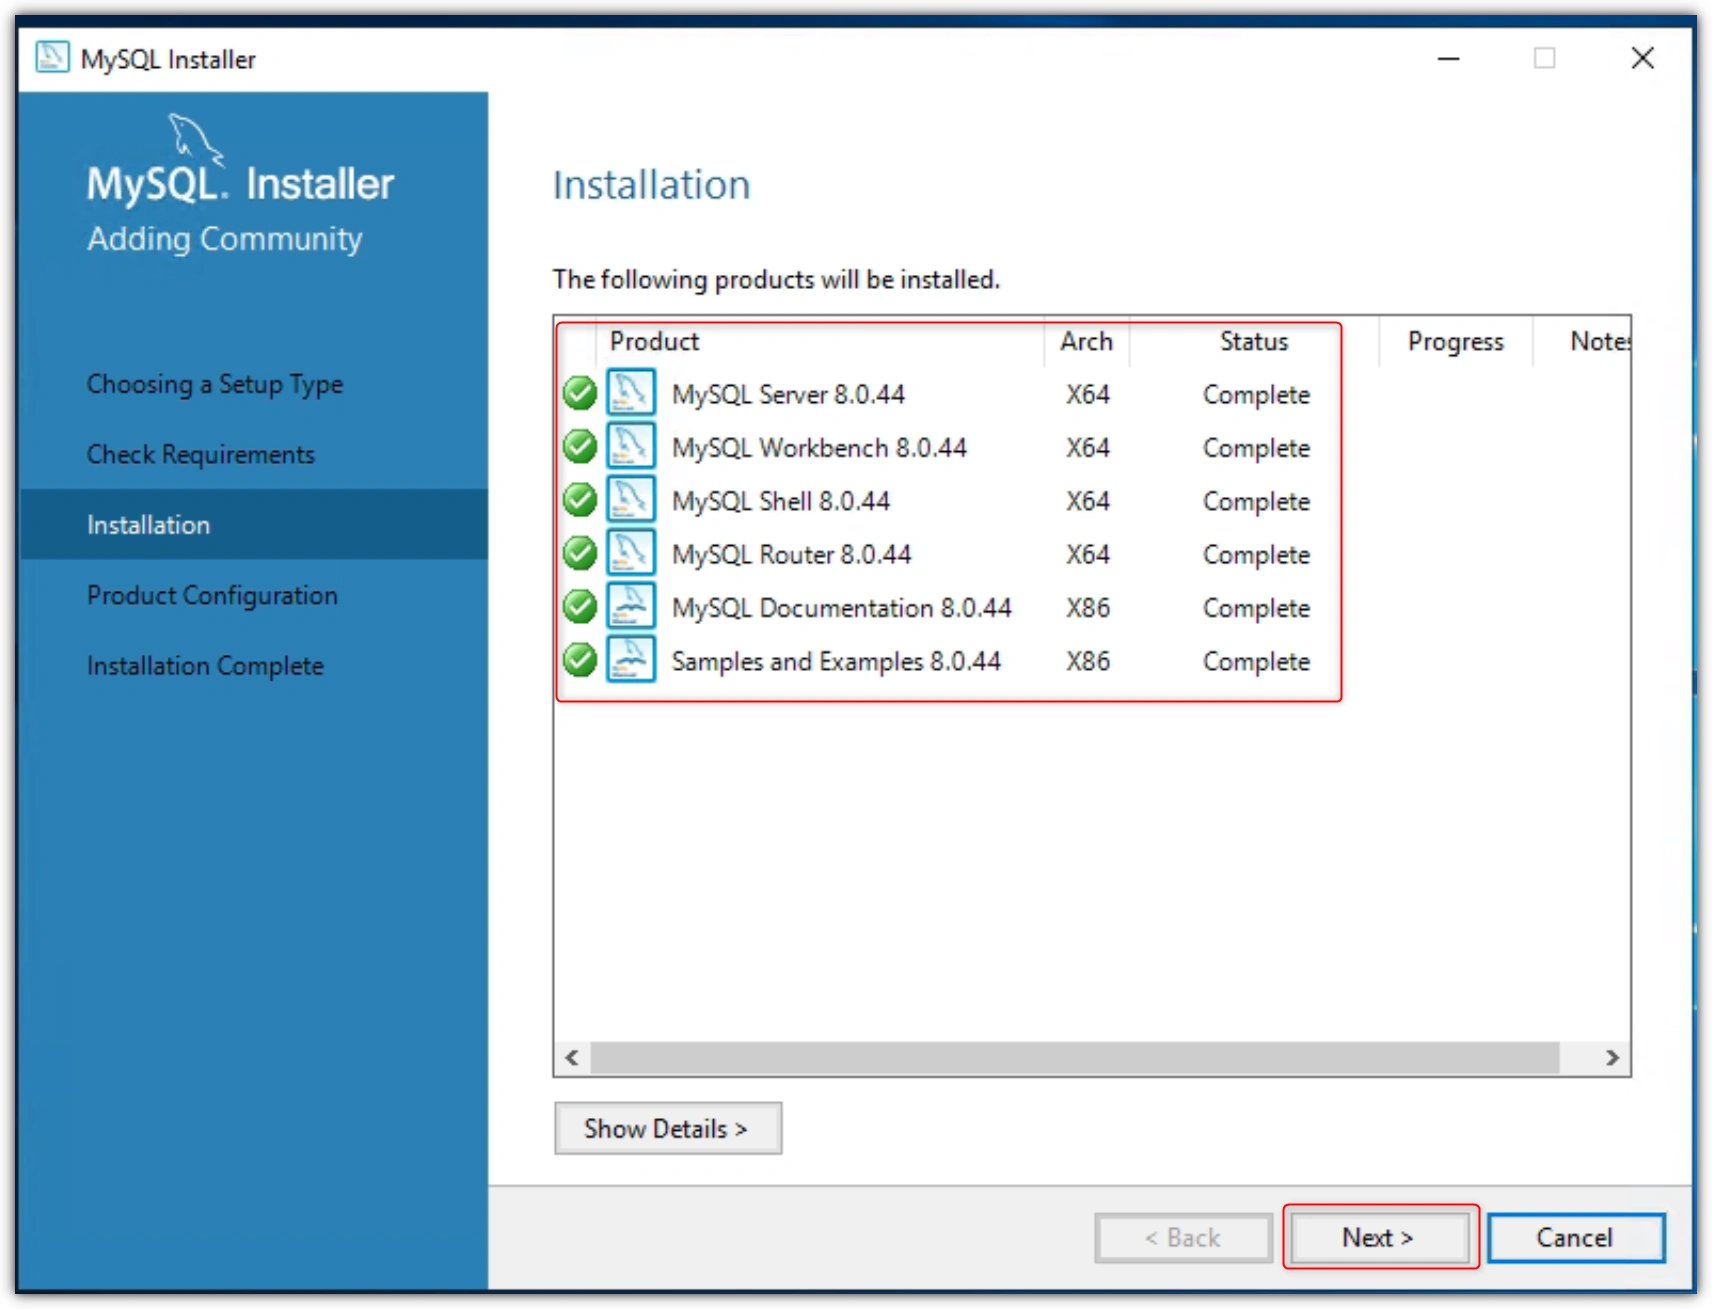
Step 6: Configure MySQL Server
After installation, the MySQL Configuration Wizard will open automatically.
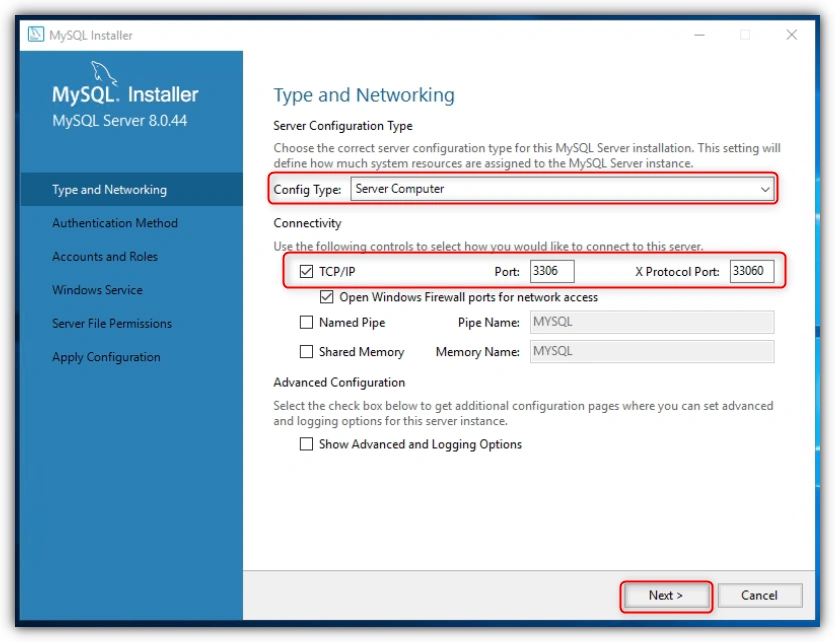
Type and Networking
Choose Standalone MySQL Server / Classic MySQL Replication.
Keep the TCP/IP port as 3306 (default).
You can check Open Firewall port for network access if you want remote access.
Click Next.
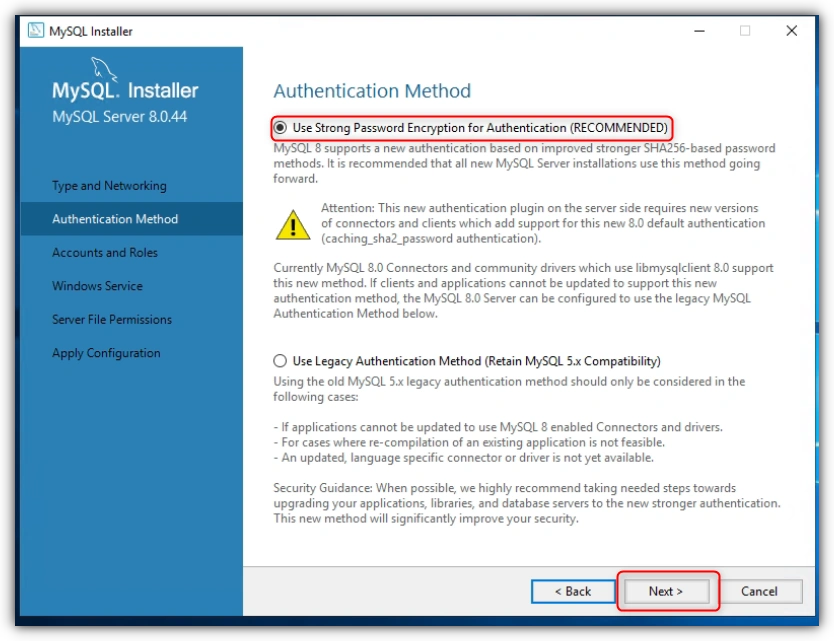
Authentication Method
Select Use Strong Password Encryption for Authentication (RECOMMENDED).
This gives better security and works with new clients.
Click Next.
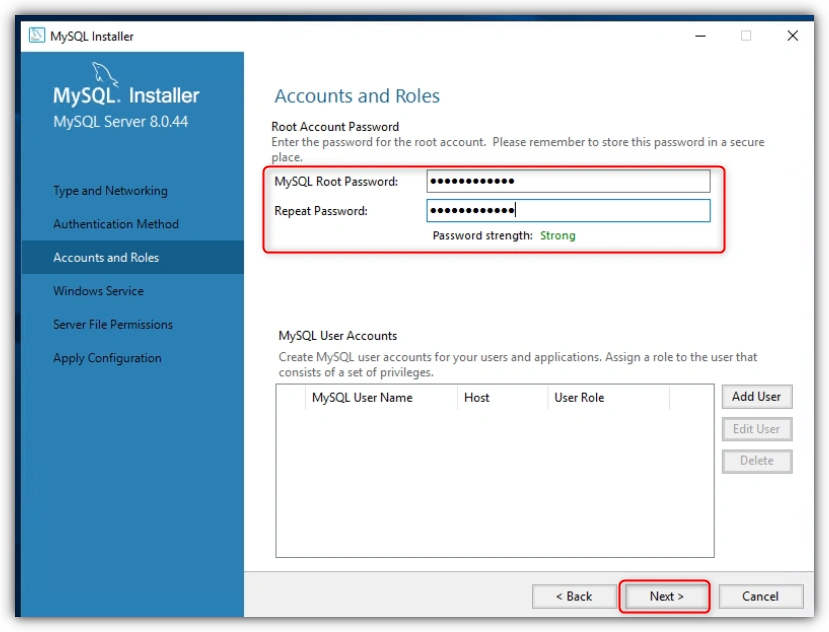
Accounts and Roles
Enter a strong root password.
You can also create extra user accounts if needed.
Click Next.
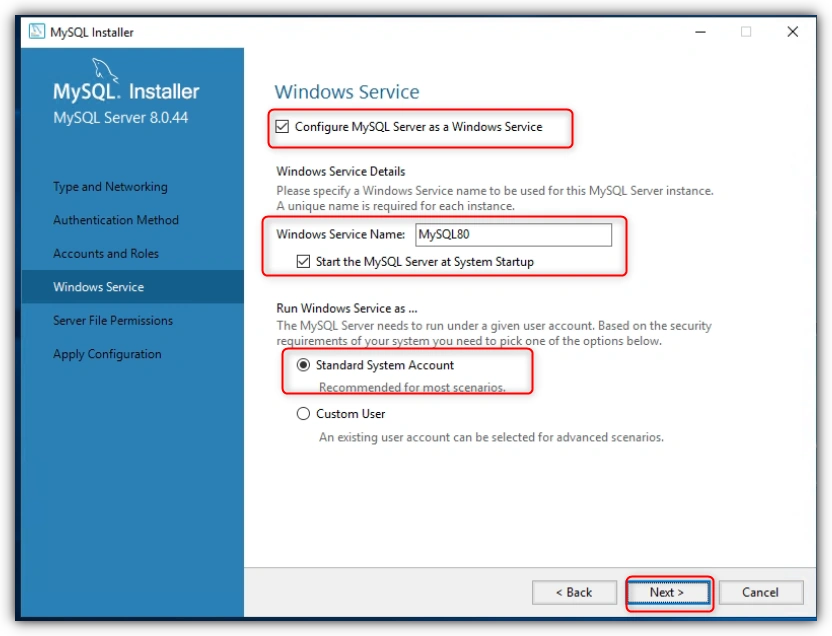
Windows Service
Check Configure MySQL Server as a Windows Service.
Keep the default service name (usually MySQL80).
Select Start MySQL at System Startup.
Choose Run Windows Service as Standard System Account.
Click Next.
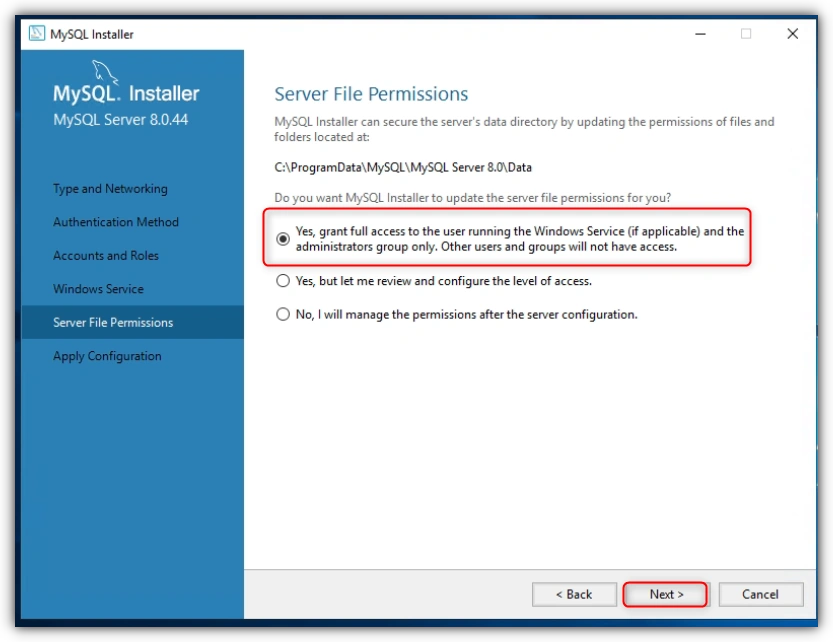
Server File Permission
Click Execute to apply the settings.
When it finishes successfully, click Finish.
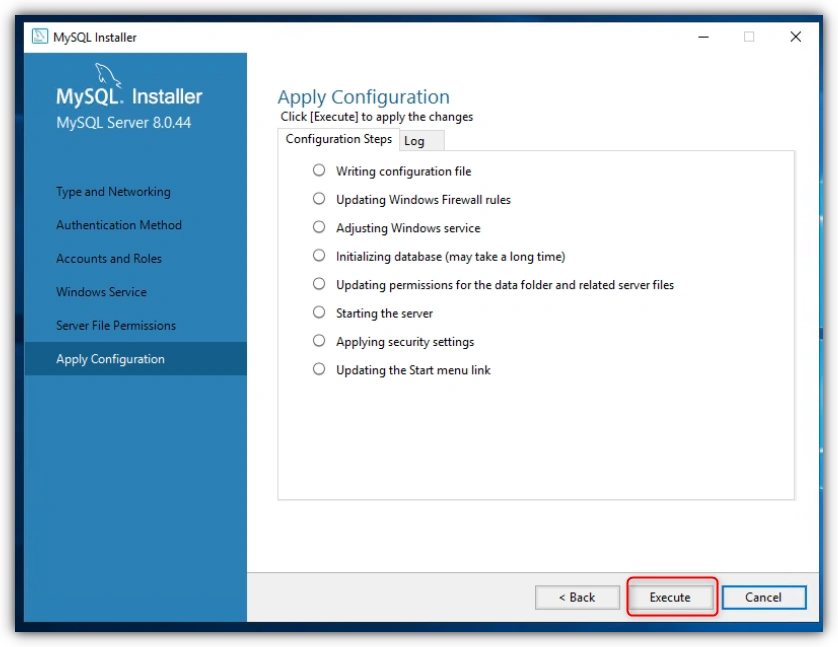
Apply Configuration
Click Execute to apply all configuration settings.
Once completed successfully, click Finish.
Step 7: Add MySQL to System PATH (Optional)
Press Windows + R, type:
sysdm.cpland press Enter.
Go to Advanced → Environment Variables.
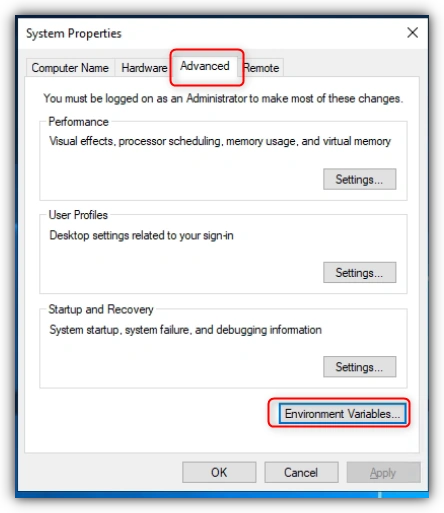
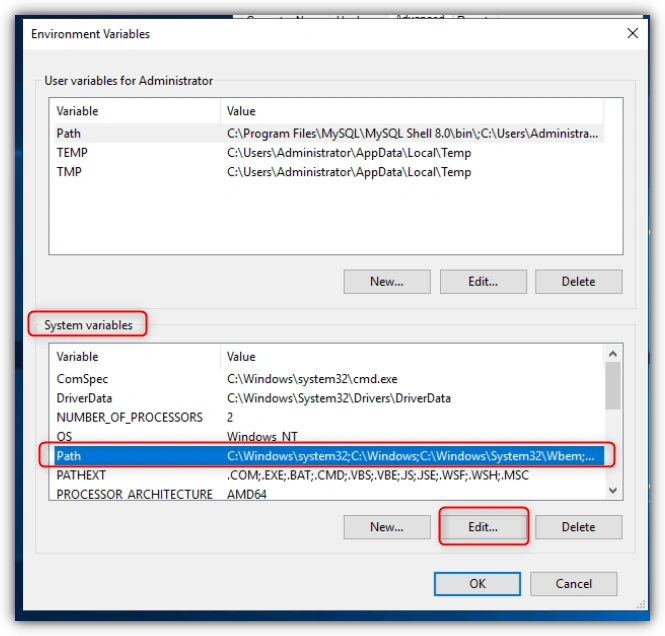
Under System variables, find Path, select it, and click Edit.
Click New, then paste the path to the bin folder
C:\Program Files\MySQL\MySQL Server 8.0\bin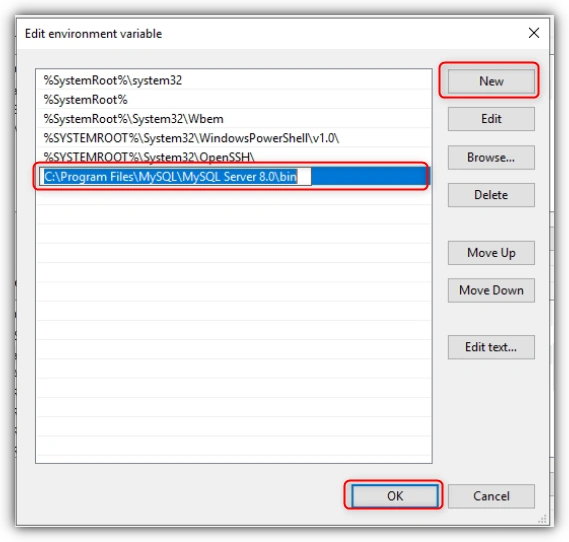
Click OK on all windows to save the changes.
Now you can use MySQL commands anywhere in the terminal.
Step 8: Verify the Installation
After setup, MySQL 8.0 is ready to use.
Option A: Using Command Prompt
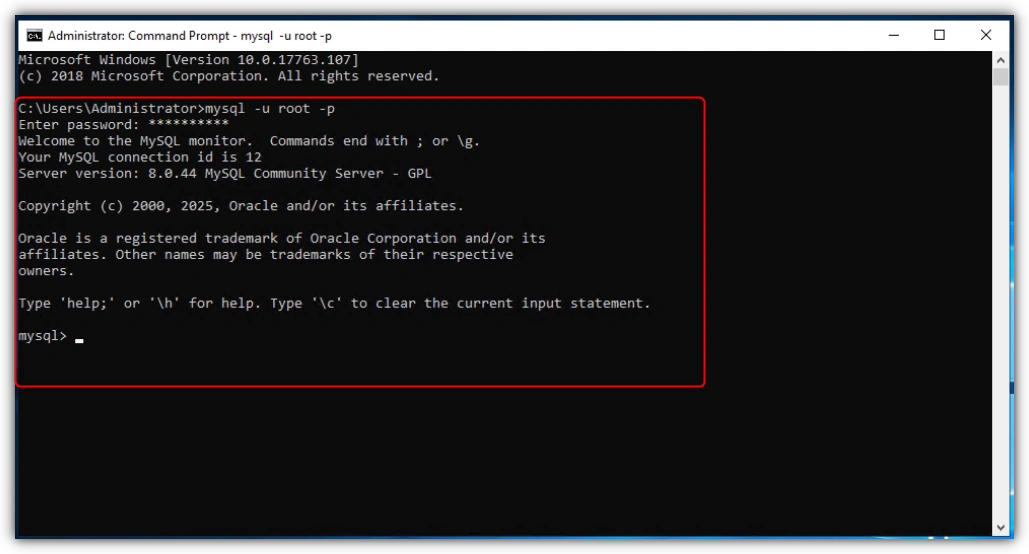
Open Command Prompt.
Type:
mysql -u root -pEnter your password.
If you see the MySQL prompt (mysql>), it means the installation worked
Option B: Using MySQL Workbench
Open MySQL Workbench.
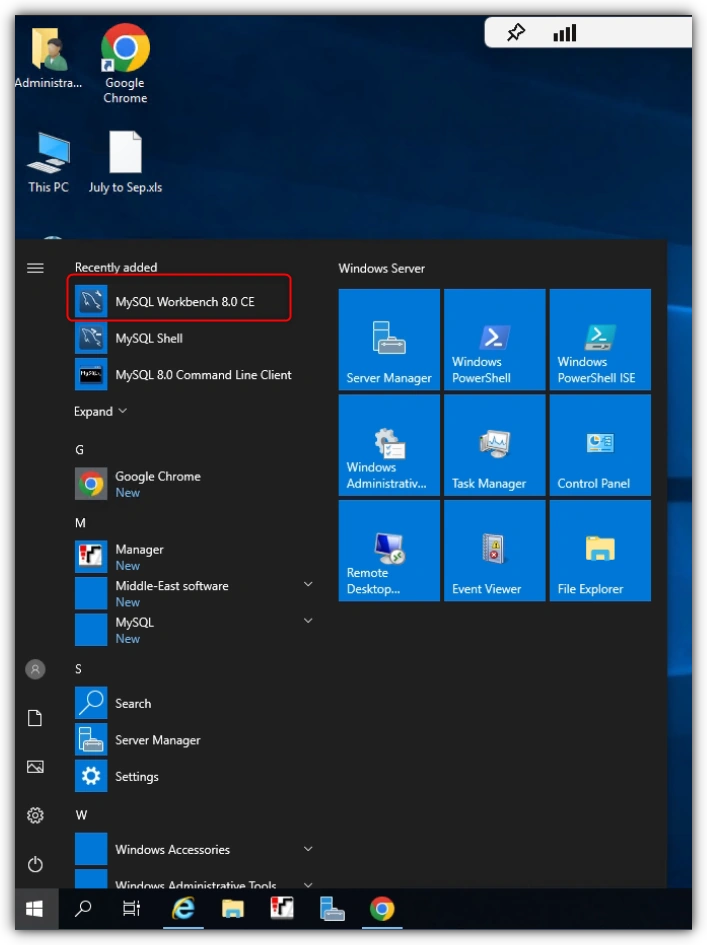
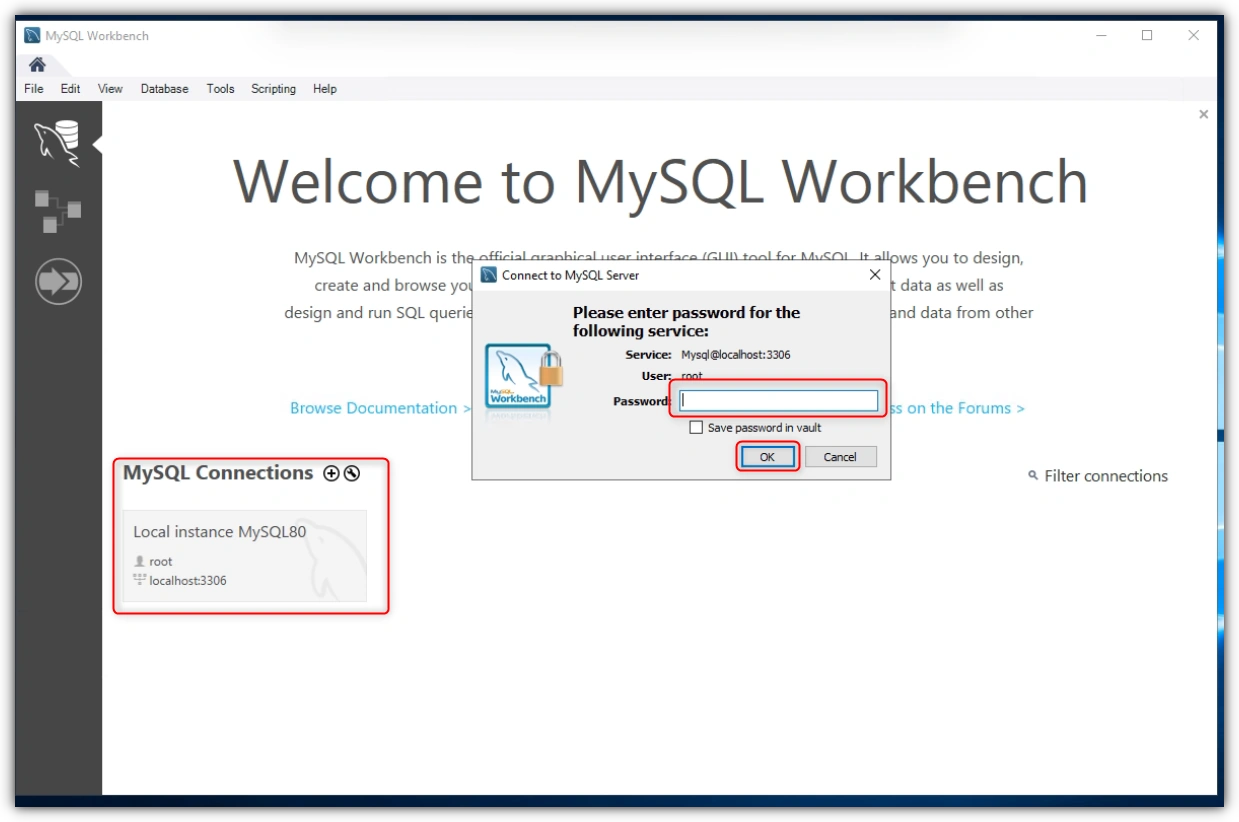
Under MySQL Connections,
select Local Instance MySQL80,
then enter the password,
and click OK.
If it opens successfully, it means MySQL is working correctly.
Step 9: Start and Stop MySQL Service
You can control MySQL using the Command Prompt:
Start MySQL
net start mysql80Stop MySQL
net stop mysql80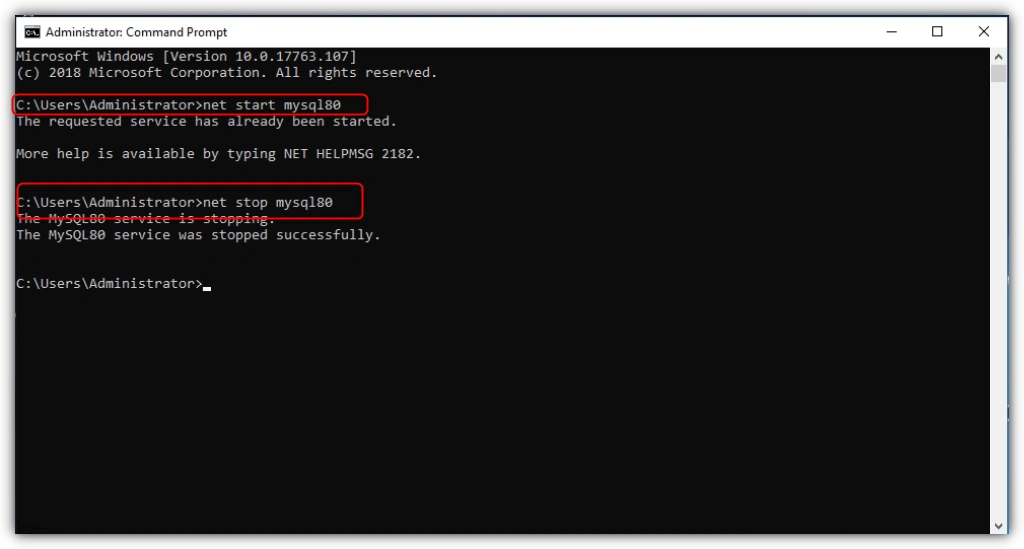
Step 10: Verify MySQL Version
To check the version, type:
mysql --versionExample output:
mysql Ver 8.0.39 for Win64 on x86_64 (MySQL Community Server - GPL)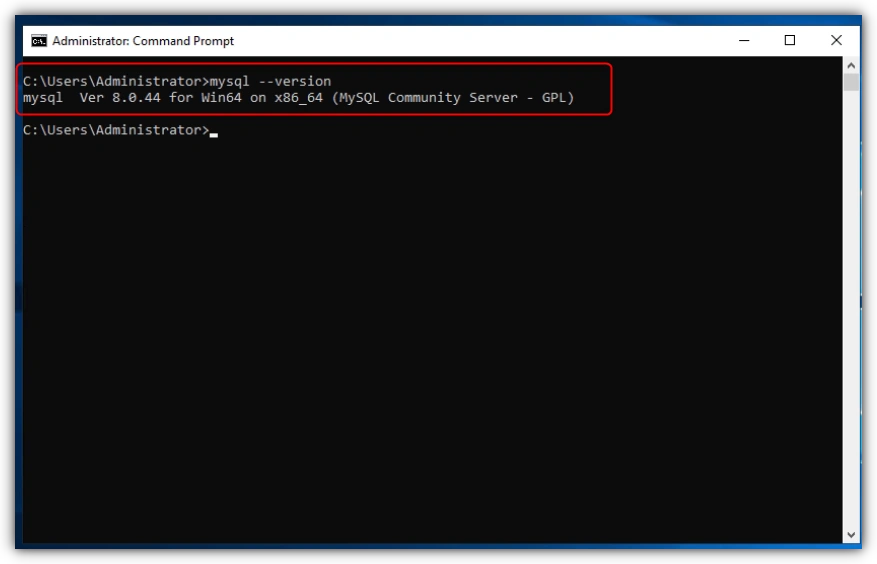
Conclusion
Installing MySQL 8.0 on Windows Server is easy and reliable.
The MySQL Installer handles setup and dependencies automatically, making it simple even for new users.
After installing, you can:
Allow remote access
Secure the server using
mysql_secure_installationSet up backups and monitoring
MySQL 8.0 offers great speed, strong security, and wide support, making it a good choice for modern systems running on Windows Server.
Join the conversation! Your thoughts help the community grow.