

Introduction
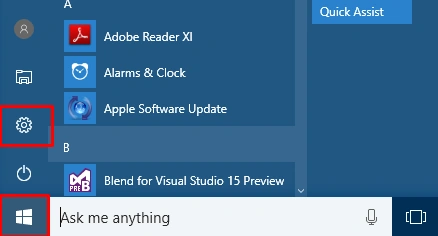
Step 2
In this step, you will select “System” icon.
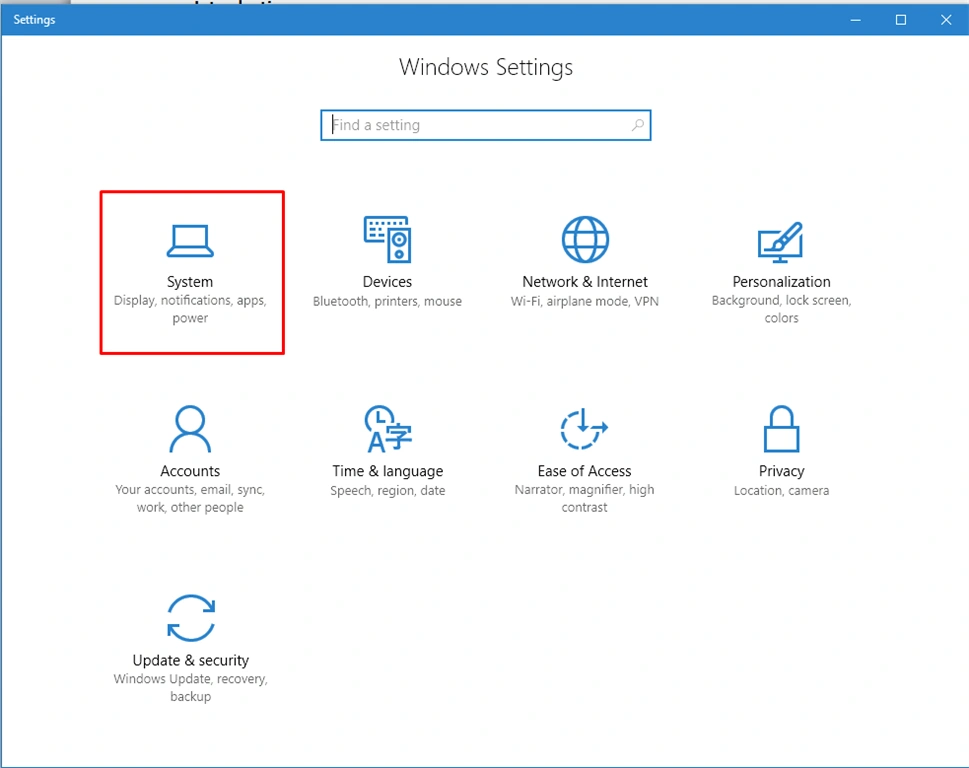 Step 3
In this step, you will select “ Display” icon. Here, you can change the text size, apps, other items and orientation.
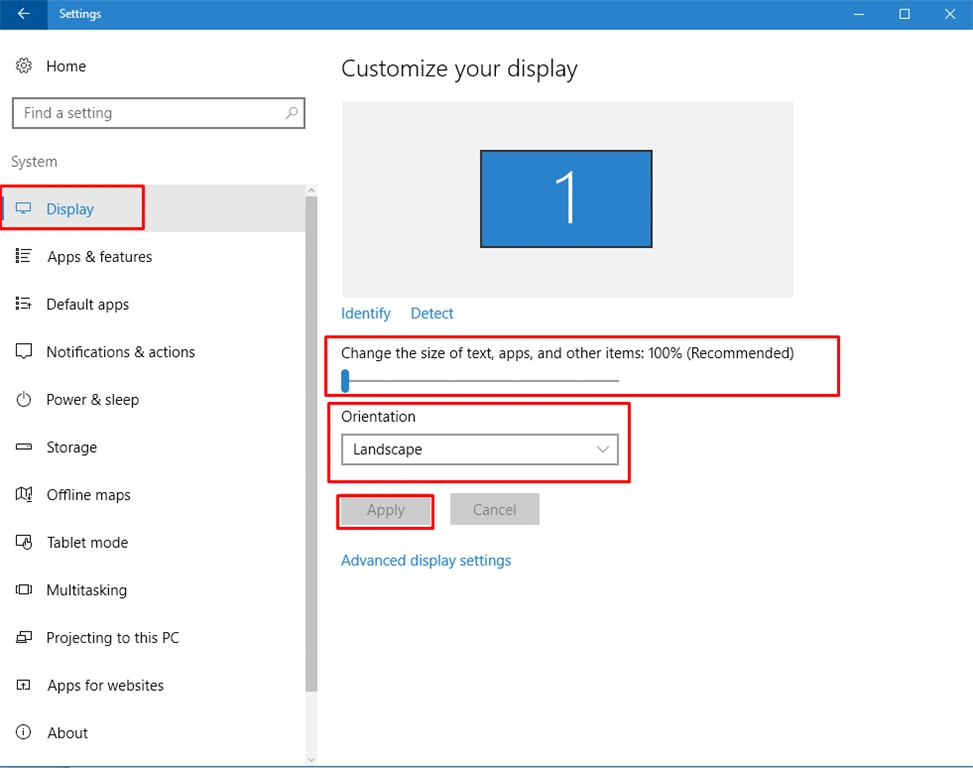
Step 4
In this step, you will select “Apps & feature” icon. Here, you can search and uninstall or move an app.
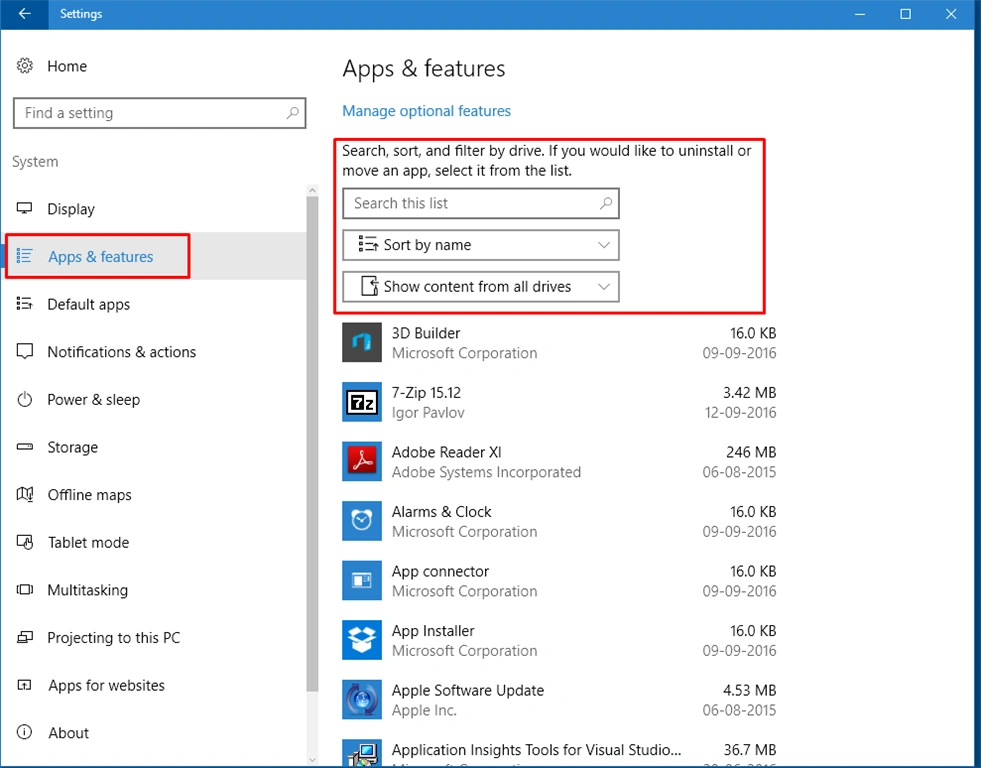 Step 5
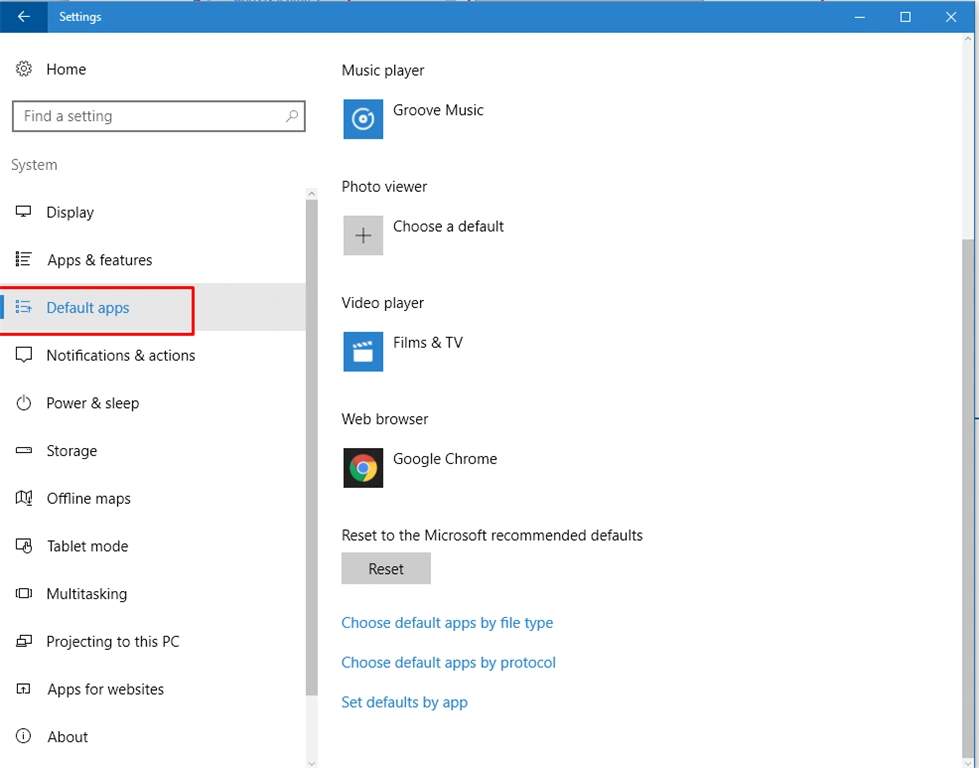
In this step, you will select “Default apps” icon. Here, you can choose any Windows apps which you use most on your PC.
Step 5
In this step, you will select “Default apps” icon. Here, you can choose any Windows apps which you use most on your PC.
Step 6
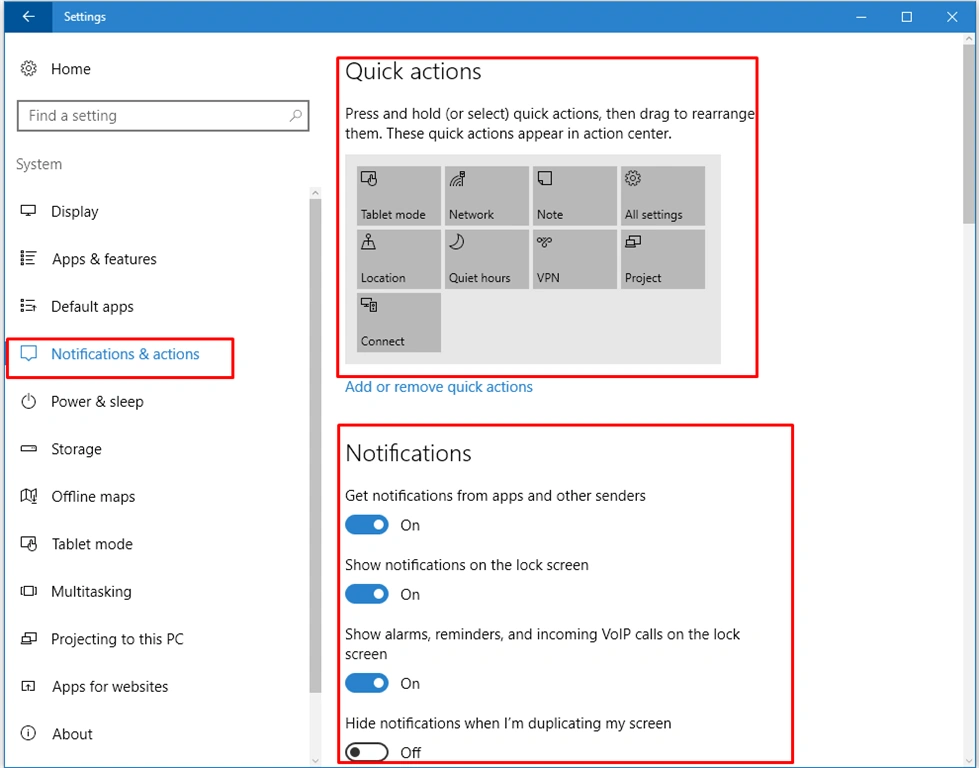
In this step, you will select “Notifications & actions” icon. Here, you can choose your Quick actions icons, which appear in the Action. In the Notifications section, you can also toggle different app notifications on and off.
Step 7
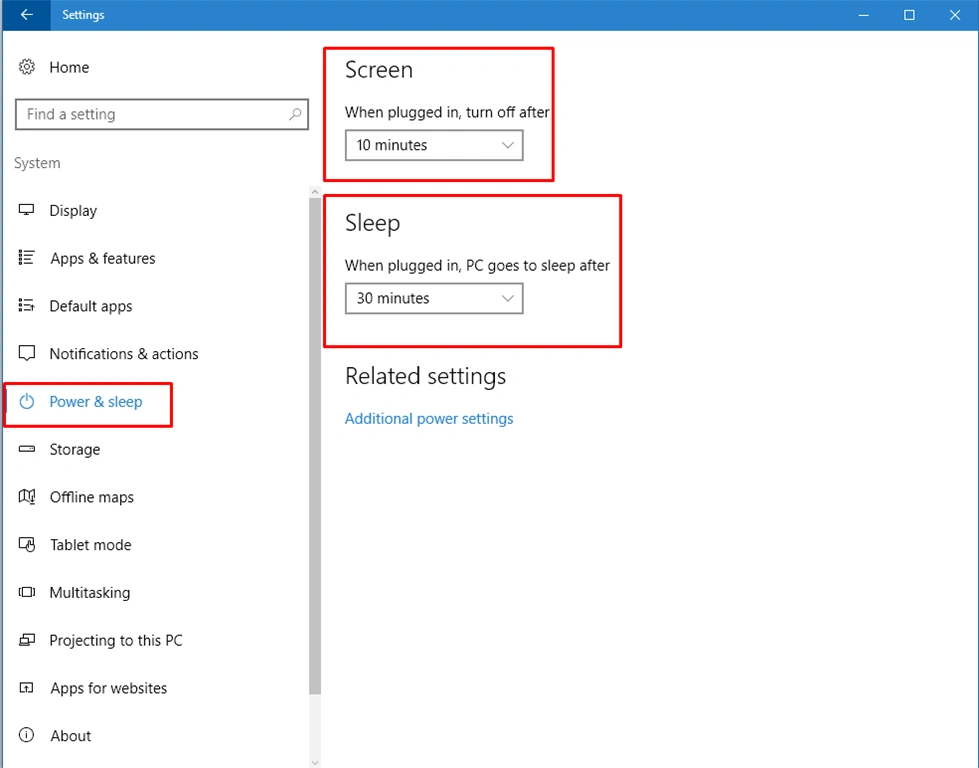
In this step, you will select “Power & sleep” icon. You can select turning off your screen, automatically.
Step 8
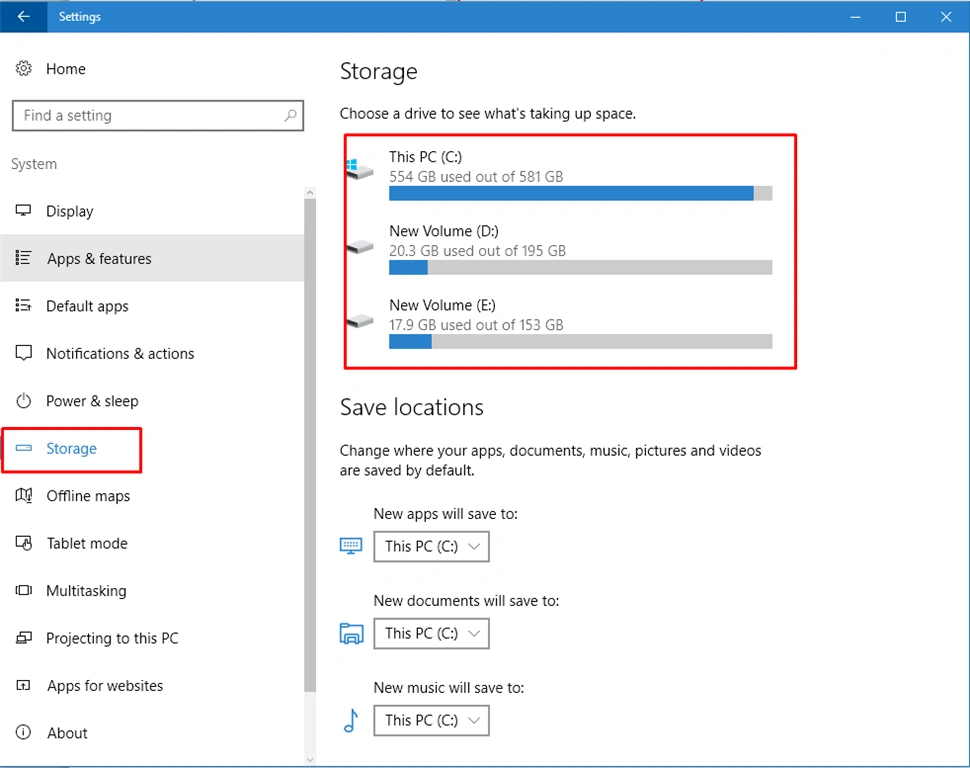
In this step, you will select “Storage” icon. You can select to see the Drive’s space and you can change the location. Your apps are stored by default.
Step 9
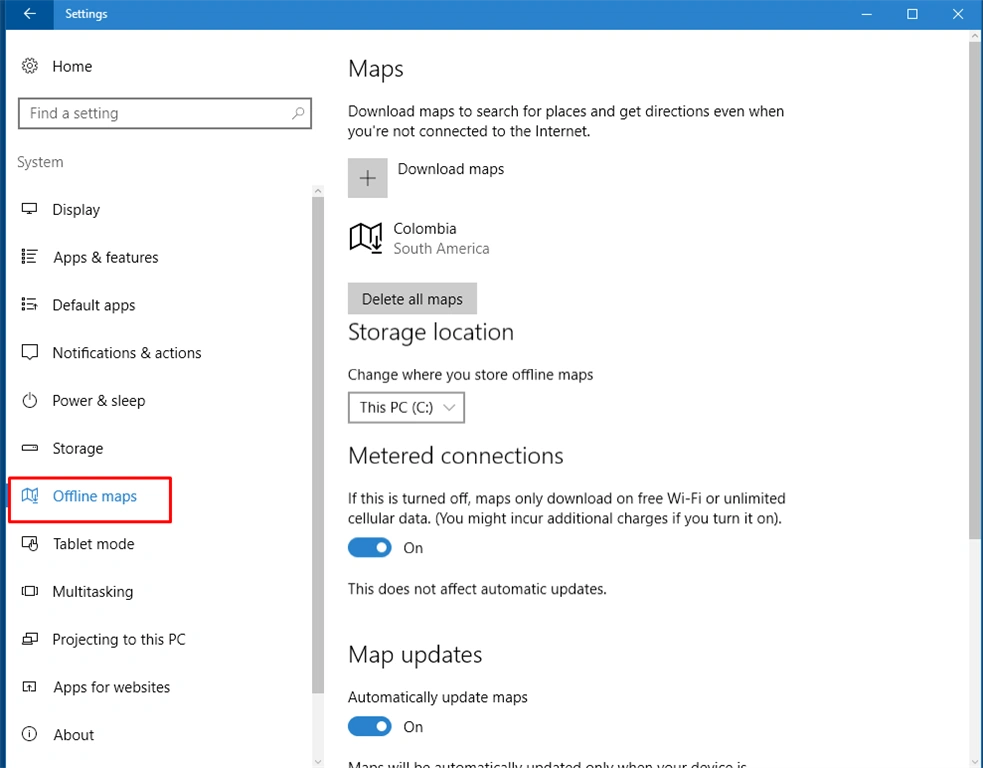
In this step, you will select “Offline maps” icon. You can select to search for places and directions, when you are not connected to the Internet but have downloaded the maps first.
Step 10
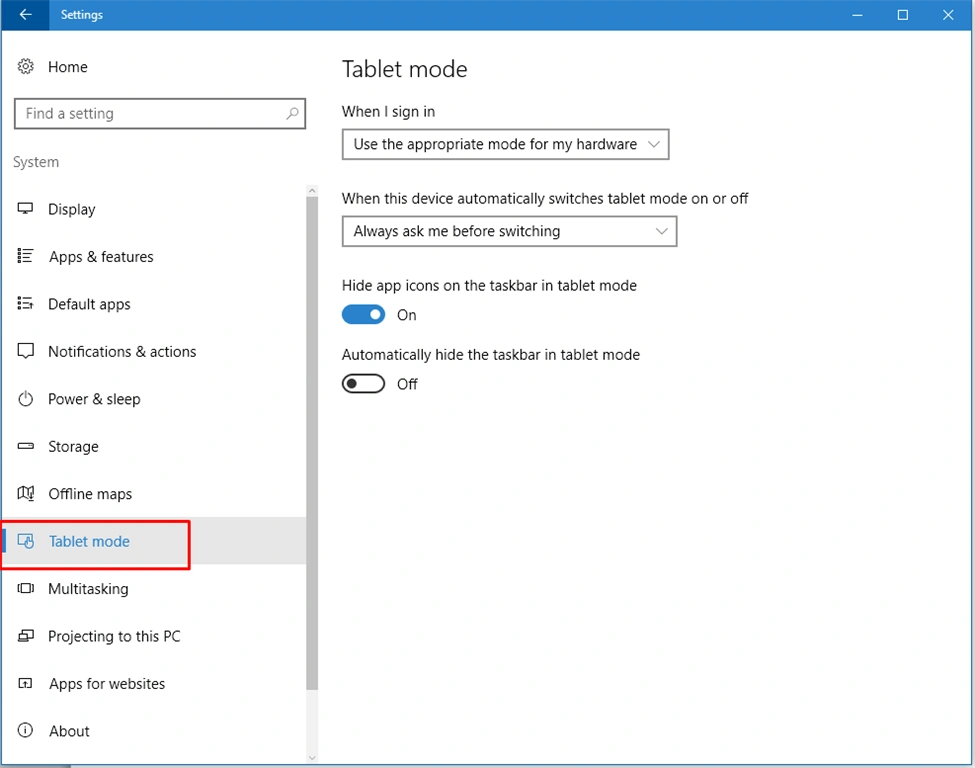
In this step, you will select “Tablet mode” icon. You can select Tablet mode, which is the classic mode, where some toolbar icons (apps) hide and the desktop Window opens with all the installed Applications.
 Step 11
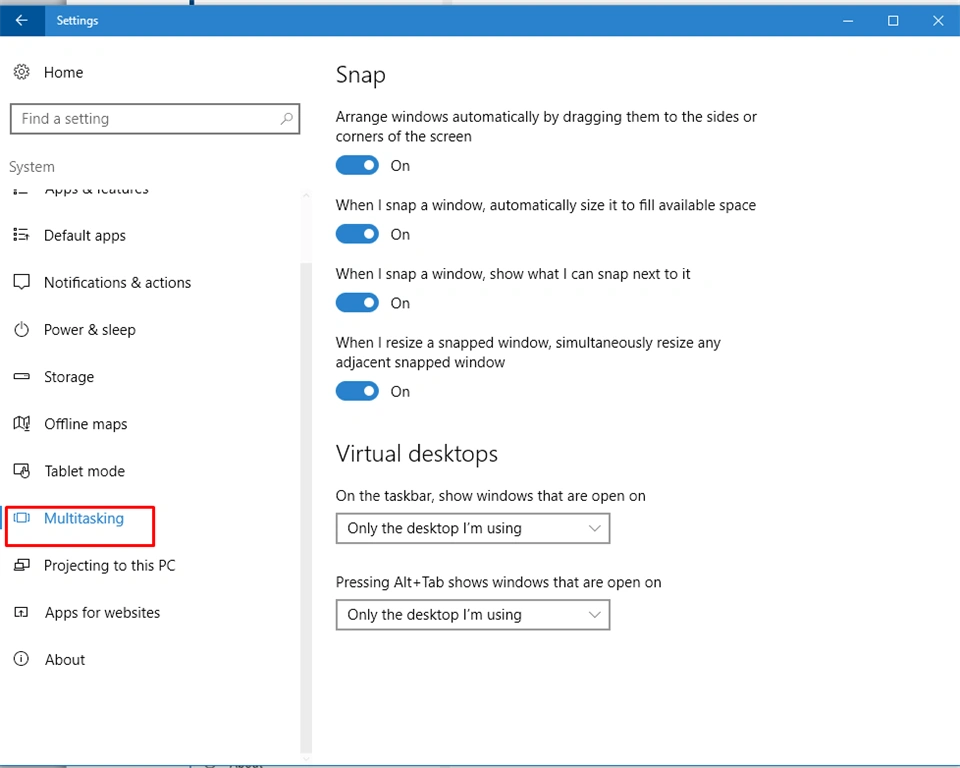
In this step, you will select “Multitasking” icon. You can select it to arrange Windows automatically by dragging to the sides or corners of the screen.
Step 12
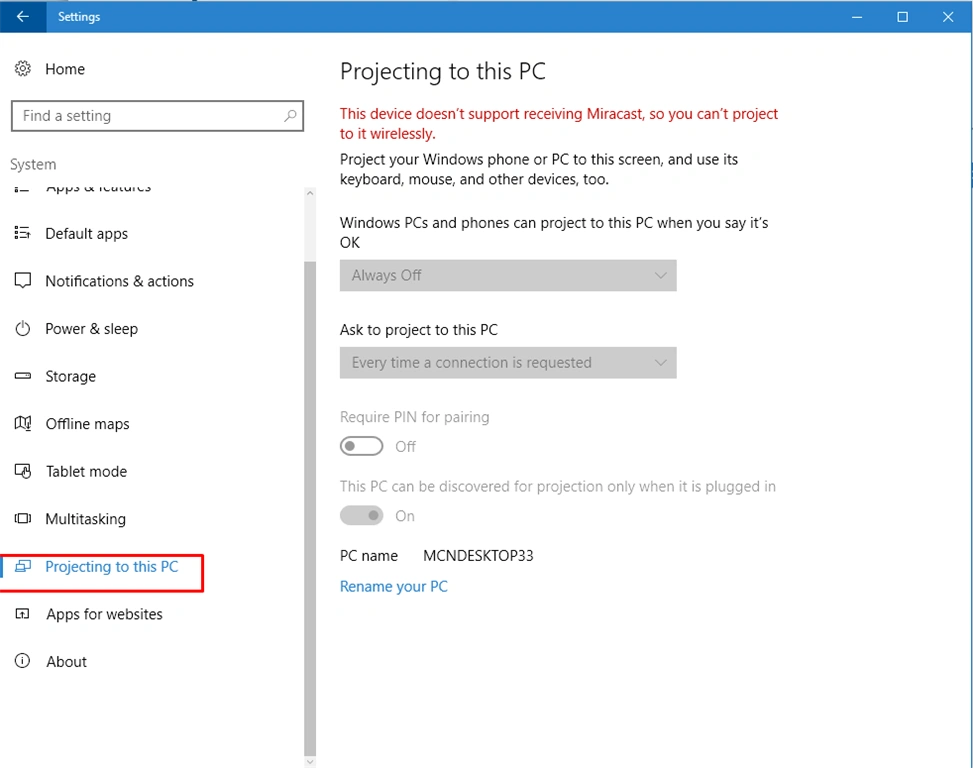
In this step, you will select “Projecting to this PC” icon.
Step 13
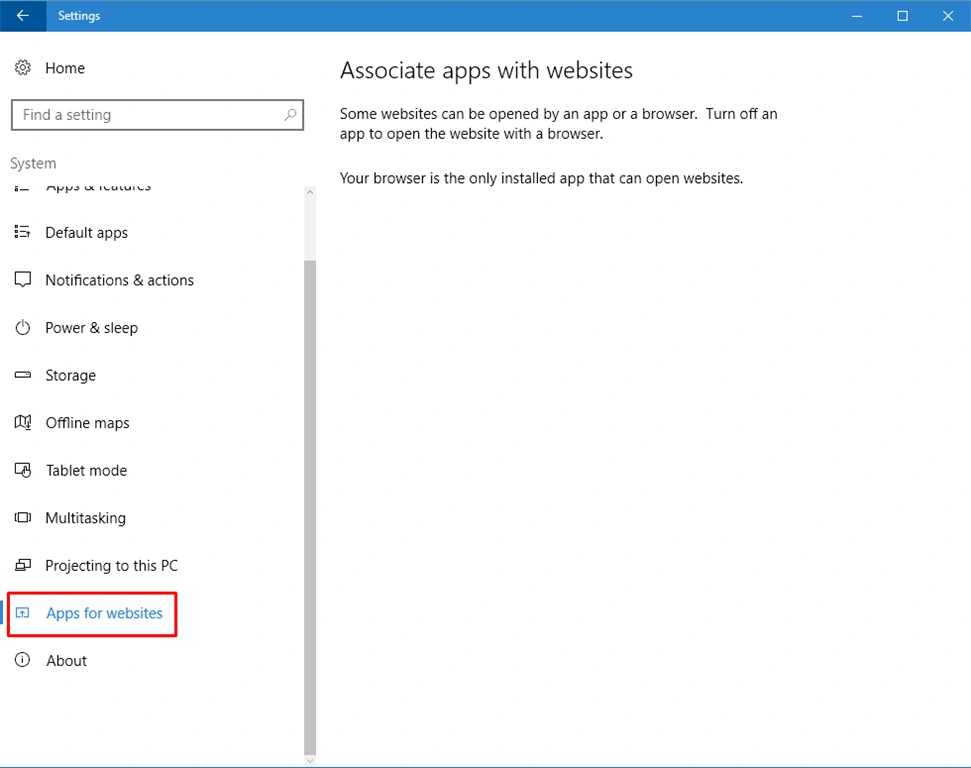
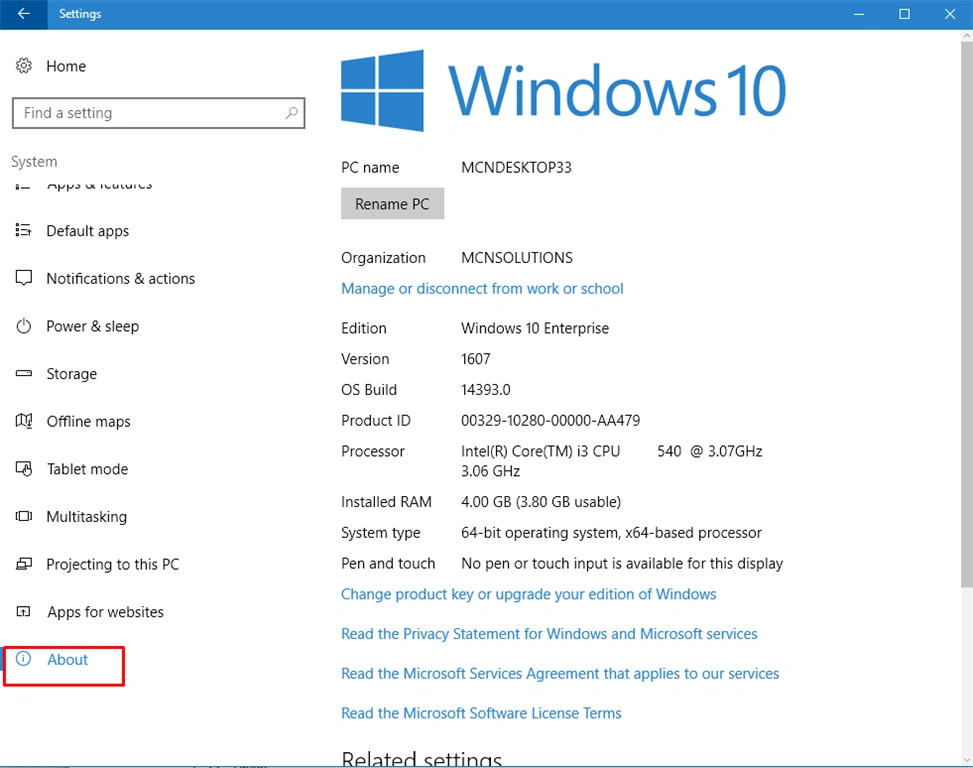
Summary
Thanks for reading this article.
Join the conversation! Your thoughts help the community grow.