

Introduction
In this article, we will explore how to perform an incremental migration of content to the same or higher version of SharePoint using Sharegate tool.
Scenario
In a migration project, especially on SharePoint, customers ask to perform an incremental content migration from the older SharePoint version to the same or a higher SharePoint version.
There are two cases here,
- Migrate content of specific period with a filter on the created date and modified date column.
- Migrate content which is newly added to the system (i.e. filter only on created date) of a specific period.
This article explains the step by step approach to performing this activity by using SharePoint third-party tools.
Prerequisites
Sharegate tool should be installed on your machine.
Approach 1 - Migrate content of a specific period with filter on the created date and modified date column
Step 1
Open Sharegate tool on your machine.
Step 2
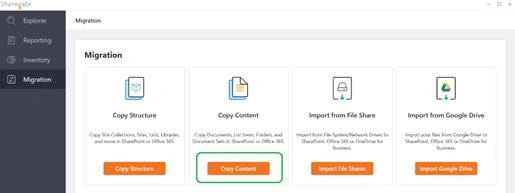
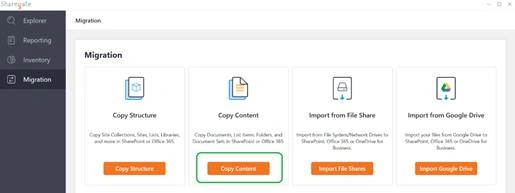
Select the "Copy Content" option as we want to migrate the content only.
Step 3
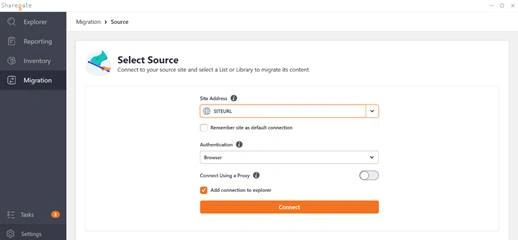
Connect to the source SharePoint site.
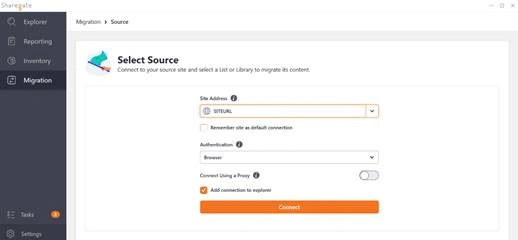
Note - It will ask to enter the credentials to connect to the source site.
Recommendation - Please use the user credentials having site collection administrator access.
Step 4
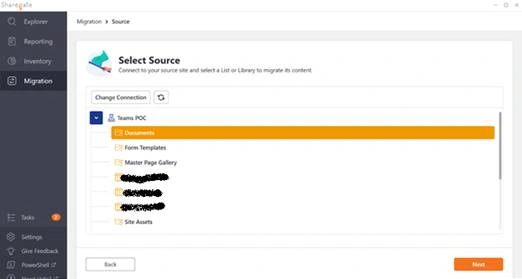
Select the list/library on which you want to perform this incremental migration.
Step 5
Connect to the destination site.
Step 6
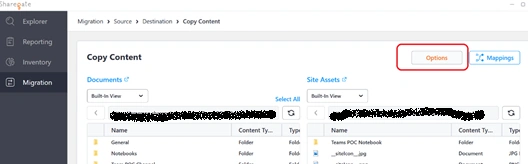
Click on the "Options" button as shown in the below snapshot.
Step 7
Select ‘Filter Options’.
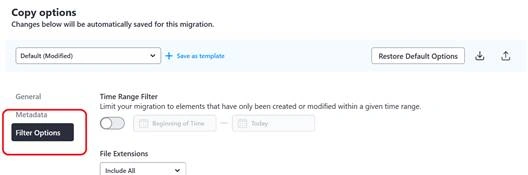
Step 8
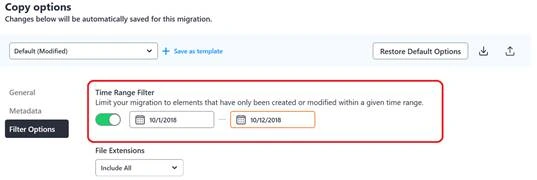
Enable the "Time Range Filter" option.
Now, Sharegate gives you an option to select the time range. Example: the beginning time will be ‘1st Oct’.
Note
Sharegate will use the most recent data. So, if an item was modified after it was created, the filter will use the modified date, and not the creation date.
Step 9
Close the window and start your migration.
Approach 2 - Migrate content which is newly added to the system (i.e. filter only on created date) of specific period
Step 1
Open SharePoint source site and create a SharePoint View (E.g. Name as ‘Migration View’) with filter on the created date column, as shown below.

Step 2
Open Sharegate tool.
Step 3
Select the "Copy Content" option as we want to migrate the content only.
Step 4
Connect to the source SharePoint site.
Note
It will ask to enter the credentials to connect to the source site. Use the credentials having site collection administrator access.
Step 5
Select the list/library on which you want to perform the incremental migration.
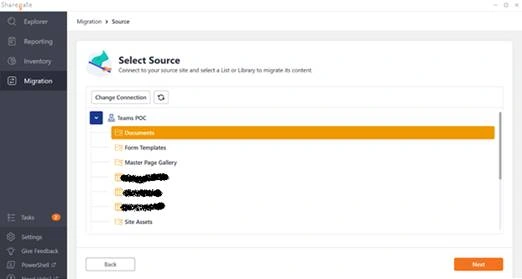
Step 6
Connect to the destination site.
Step 7
Select the source and destination list/library.
Step 8
Select the name of the View which we have created in Step #1 above.
It will populate the filtered content based on the created date column in our case.
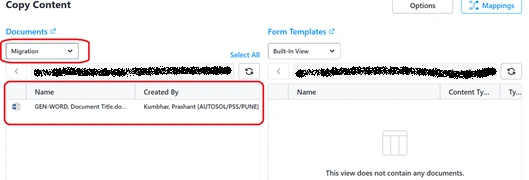
Step 9
Select the items to copy as shown above, and start copying the content.
Murali KrisPosted Nov 14, 2019, 10:37 AM
Hi Prashant , How to apply filter on columns ....? example we have a1,a2,a3 columns, in the initial phase, migrated only a1,a2 now a3 i added in destination how to migrate with apply filter and migrate only a3-a3 columns, i am trying to copy if newer option buts skipping. really not happy with ShareGate since there is no custom copy option like metalogix content matrix.
Sagar PardeshiPosted Oct 26, 2018, 4:26 AM
Good article...prashant..keet it up
Nanddeep NachanPosted Oct 24, 2018, 5:07 AM
Nice article. How about "Copy if newer" option of Sharegate? Any downfall of using it?
Deepak NamdeoPosted Oct 24, 2018, 12:49 AM
Great!! It will be really helpfull.