

Introduction
Nowadays, enabling secure authentication on any app is not that complicated, as we have enough automated features.
Securing Azure App service using Azure Active Directory is explained in another article here, how to Secure your Azure App Service with Azure’s AD Authentication.
The way to restrict access to users from accessing the Azure App enabled with Azure AD authentication is explained here: How to restrict users from accessing the Azure App Service with Azure AD Authentication
Creating Facebook Client App
Step 1
You need a Facebook account, to create a Facebook account go to facebook.com
Step 2
Go to facebook for Developers and login using your facebook account
Step 3
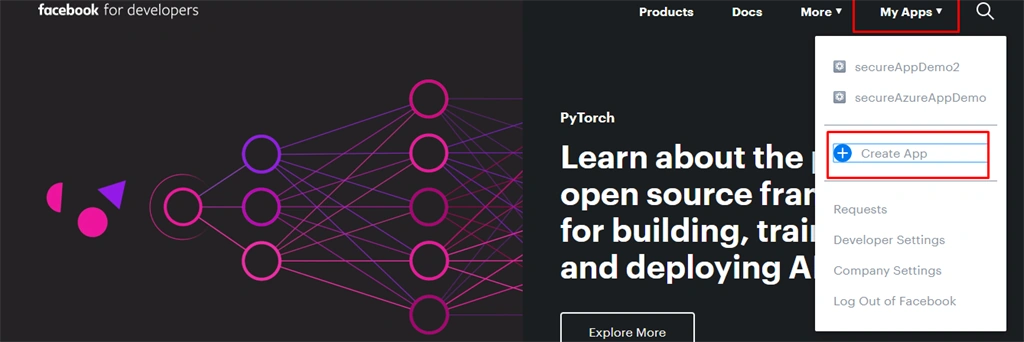
Once you have logged in, go to My Apps section in the top nav and select “Create App” as below
Step 4
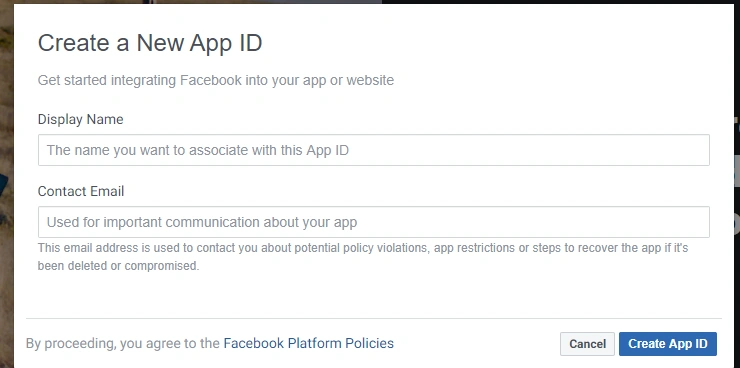
In the upcoming popup give a unique name for your app and add the contact email then click “Create App ID”
Step 5
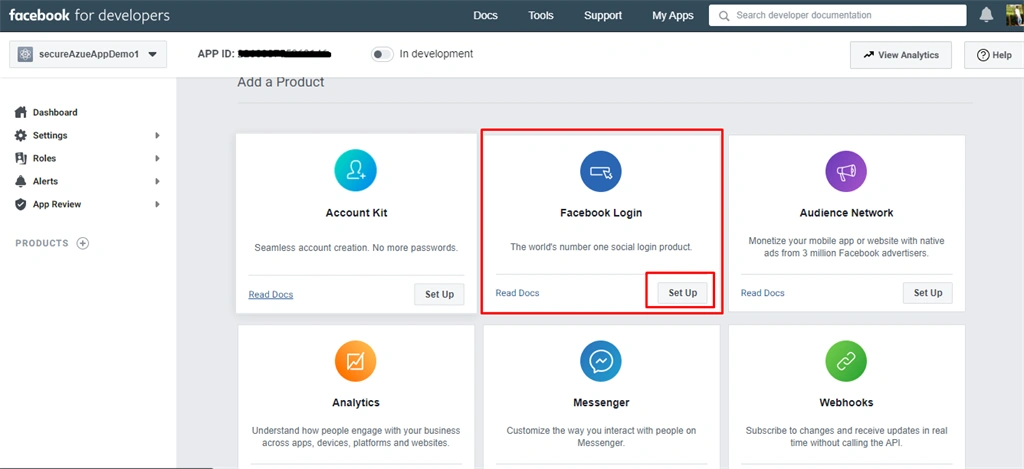
Complete the security check and click submit which will open your App Dashboard. Click on the Setup button in the “Facebook Login” widget like below,
Step 6
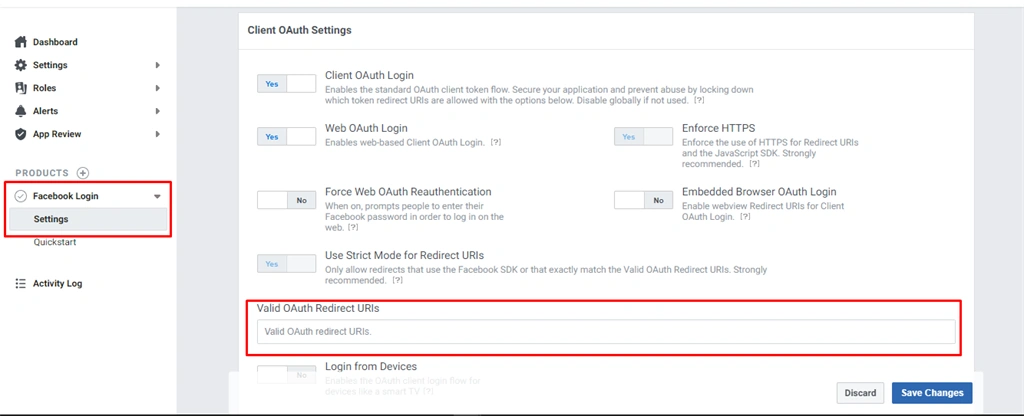
From left navigation go to settings, and look for “Valid OAuth Redirect URIs” fill in the value as below and click Save Changes
https://<YourAzureAppServiceName>.azurewebsites.net/.auth/login/facebook/callback
Replace the term “<YourAzureAppServiceName>” as your azure app service name.
Step 7
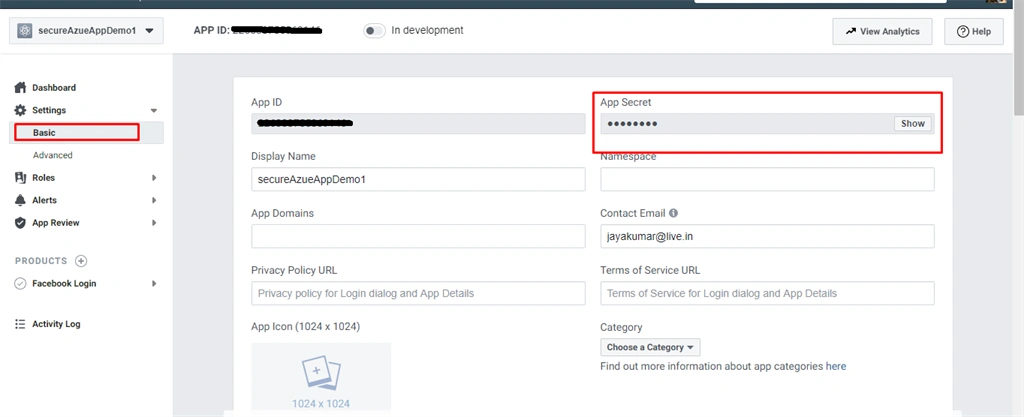
Now, go to general Settings->Basic area where you can configure the basic app information like appName, Privacy policy URL, Term Service URL, App Logo. This information will be visible when user tries to login to your application.
Click “Show” button in App Secret and copy the secret key of your app. Don’t share this key with anyone.
Make a note of this App ID and App Secret, you will need this to configure in Azure App.
Step 8
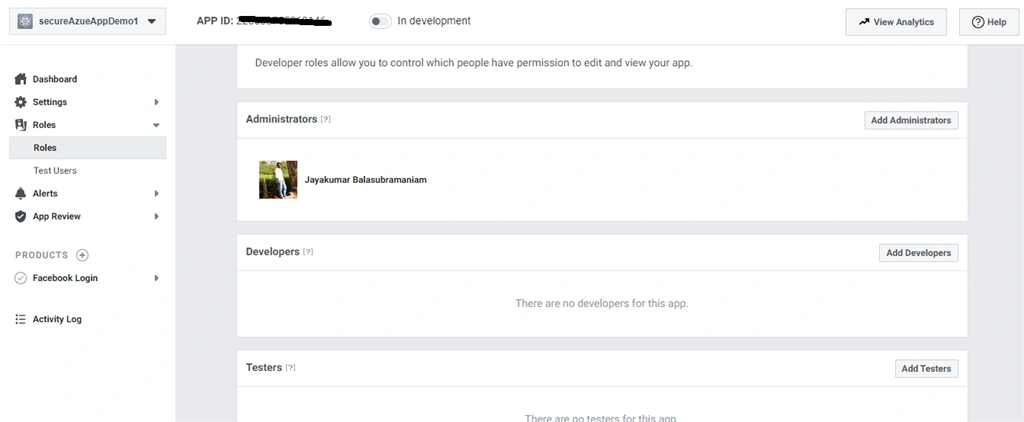
The account which you used to create this app is the administrator of this app. Only this user can access the Azure app now, if you want to allow your team, go to Roles in the left navigation and grant permission to your team based on the role.
Step 9
Once you are done with the development, you need to make this app live to allow public users to access your app. It can be done by turning off “In Development” mode.

Configuring Facebook Authentication in Azure App Service
Step 1
Login to Azure Portal, with enough permission to access the app service.
Step 2
Click on any of the app service application on which you wish to enable Facebook authentication.
Step 3
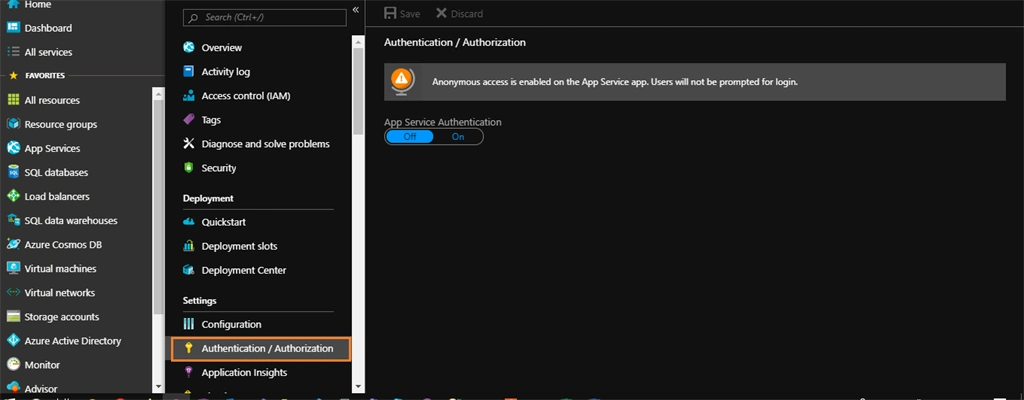
In the upcoming properties pane look for Authentication/Authorization option like below. By default, Authentication is disabled, enable it using the toggler like you see in the below screenshot.
Step 4
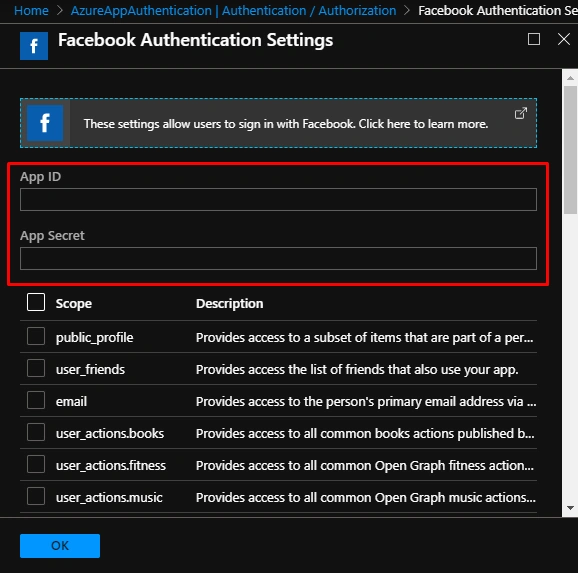
In the upcoming screen select “Facebook” as the authentication type. Enter the App ID and App Secret you obtained from Facebook developer account and configure the scopes needed by your application and click OK button.
Step 5
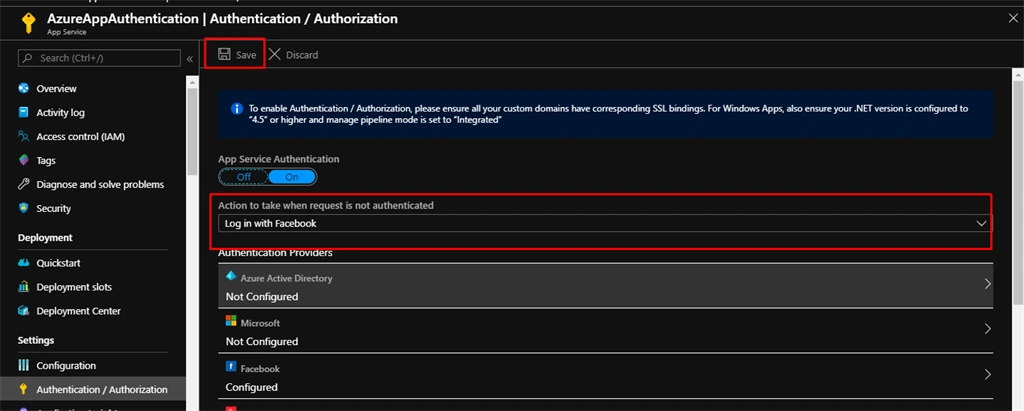
Now, in authentication screen choose “Action to take when request is not authenticated” as “Log in with Facebook” and click Save.
Step 6
Now we are all set with the Facebook authentication, browse your application in the browser and you will be prompted to enter your Facebook credentials. Once your Facebook credentials are validated you will get below screen with the app information you configured in the developer account.
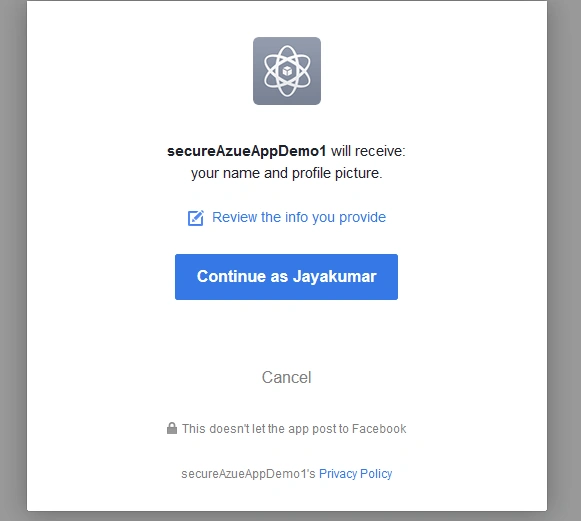
Click “Continue”, which will take you to your actual Azure App Service application.
I hope this article helps you to enable Facebook authentication on an Azure App Service. If you have any questions/issues about this article, please let me know in the comments.
Imran HassanPosted Mar 28, 2021, 10:13 AM
How to access the data in .net core application which is returned by the facebook.