
Introduction
- <?xml version="1.0" encoding="utf-8" ?>
- <LinearLayout
- android:layout_width="fill_parent"
- android:layout_height="fill_parent"
- xmlns:android="http://schemas.android.com/apk/res/android"
- android:orientation="vertical"
- android:background="#80000000">
- <ImageView
- android:layout_width="wrap_content"
- android:layout_height="wrap_content"
- android:id="@+id/imageView1"
- android:layout_gravity="center"/>
- <Button
- android:layout_width="wrap_content"
- android:layout_height="wrap_content"
- android:text="New Button"
- android:id="@+id/button" android:layout_gravity="center"
- android:visibility="invisible"/>
- <HorizontalScrollView
- android:layout_width="200dp"
- android:layout_height="wrap_content"
- android:id="@+id/scrollView"
- android:layout_gravity="center">
- <LinearLayout
- android:layout_width="fill_parent"
- android:layout_height="wrap_content"
- android:orientation="horizontal">
- <ImageView
- android:src="@drawable/image2"
- android:layout_width="125dp"
- android:layout_height="fill_parent"
- android:id="@+id/imageView2"
- android:padding="15dp"/>
- <ImageView
- android:src="@drawable/image3"
- android:layout_width="125dp"
- android:layout_height="125dp"
- android:id="@+id/imageView3"
- android:layout_gravity="center"
- android:padding="15dp"/>
- <ImageView
- android:src="@drawable/images4"
- android:layout_width="125dp"
- android:layout_height="125dp"
- android:id="@+id/imageView4"
- android:layout_gravity="center"
- android:padding="15dp"/>
- <ImageView
- android:src="@drawable/image5"
- android:layout_width="125dp"
- android:layout_height="125dp"
- android:id="@+id/imageView5"
- android:layout_gravity="center"
- android:padding="15dp"/>
- <ImageView
- android:src="@drawable/image6"
- android:layout_width="125dp"
- android:layout_height="125dp"
- android:id="@+id/imageView6"
- android:layout_gravity="center"
- android:padding="15dp"/>
- <ImageView
- android:src="@drawable/image7"
- android:layout_width="125dp"
- android:layout_height="125dp"
- android:id="@+id/imageView7"
- android:layout_gravity="center"
- android:padding="15dp"/>
- </LinearLayout>
- </HorizontalScrollView>
- <TextView
- android:layout_width="fill_parent"
- android:layout_height="wrap_content"
- android:textAppearance="?android:attr/textAppearanceMedium"
- android:text="Click on the Image"
- android:id="@+id/textView"
- android:layout_marginTop="50dp"
- android:textColor="#45454545"
- android:layout_marginLeft="120dp"/>
- </LinearLayout>
- package com.wallpaer;
- import android.graphics.Bitmap;
- import android.graphics.BitmapFactory;
- import android.os.Bundle;
- import android.app.Activity;
- import android.view.View;
- import android.widget.Button;
- import android.widget.ImageView;
- import java.io.IOException;
- import java.io.InputStream;
- public class MainActivity extends Activity implements View.OnClickListener{
- ImageView imageView1;
- Button button;
- int tophone;
- @Override
- protected void onCreate(Bundle savedInstanceState) {
- super.onCreate(savedInstanceState);
- setContentView(R.layout.activity_main);
- imageView1=(ImageView)findViewById(R.id.imageView1);
- tophone=R.drawable.ic_launcher;
- ImageView imageView2=(ImageView)findViewById(R.id.imageView2);
- ImageView imageView3=(ImageView)findViewById(R.id.imageView3);
- ImageView imageView4=(ImageView)findViewById(R.id.imageView4);
- ImageView imageView5=(ImageView)findViewById(R.id.imageView5);
- ImageView imageView6=(ImageView)findViewById(R.id.imageView6);
- ImageView imageView7=(ImageView)findViewById(R.id.imageView7);
- button=(Button)findViewById(R.id.button);
- imageView2.setOnClickListener(this);
- imageView3.setOnClickListener(this);
- imageView4.setOnClickListener(this);
imageView5.setOnClickListener(this);imageView2.setOnClickListener(this);
- imageView6.setOnClickListener(this);
- imageView7.setOnClickListener(this);
- button.setOnClickListener(this);
- }
- public void onClick(View v)
- {
- switch(v.getId())
- {
- case R.id.imageView2:
- imageView1.setImageResource(R.drawable.image2);
- tophone=R.drawable.image3;
- break;
- case R.id.imageView3:
- imageView1.setImageResource(R.drawable.image3);
- tophone=R.drawable.image5;
- break;
- case R.id.imageView4:
- imageView1.setImageResource(R.drawable.images4);
- tophone=R.drawable.ic_launcher;
- break;
- case R.id.imageView5:
- imageView1.setImageResource(R.drawable.image2);
- tophone=R.drawable.ic_launcher;
- break;
- case R.id.imageView6:
- imageView1.setImageResource(R.drawable.image6);
- tophone=R.drawable.ic_launcher;
- break;
- case R.id.imageView7:
- imageView1.setImageResource(R.drawable.image7);
- tophone=R.drawable.ic_launcher;
- break;
- case R.id.button:
- InputStream a=getResources().openRawResource(tophone);
- Bitmap whatever= BitmapFactory.decodeStream(a);
- try{
- getApplicationContext().setWallpaper(whatever);
- }
- catch(IOException e){
- e.printStackTrace();
- }
- break;
- }
- }
- }
First, the User Interface will appear like this:
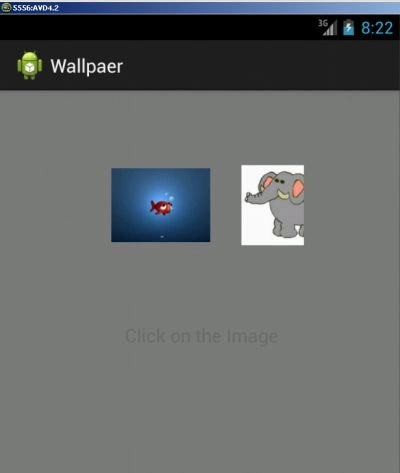
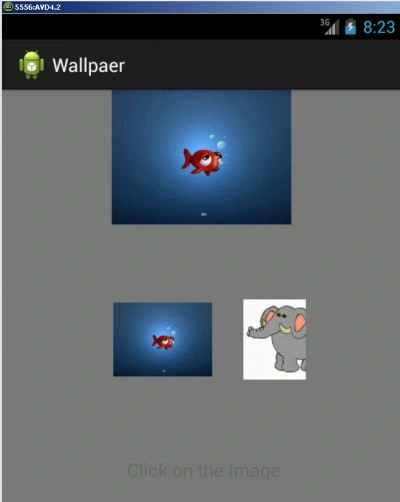
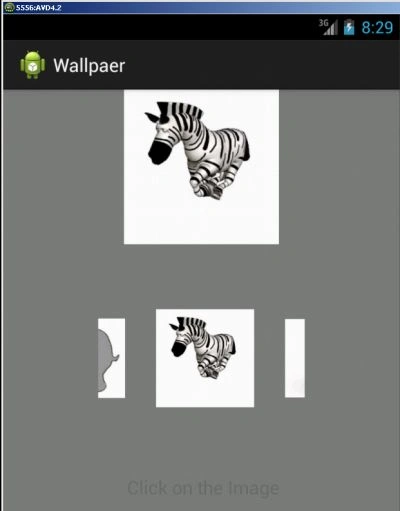
Summary
In this article, we learned about How to Set Image in an Image View on Click in Android Studio.
kalu singh raoPosted Jul 12, 2016, 6:25 AM
Nice...
Anu VPosted Nov 13, 2015, 6:50 AM
nice post