

Introduction
Setting Windows 10 default printer is straight forward. This article provides step by step instructions on how to set the Default Printer in Windows 10.
1. Printer Settings
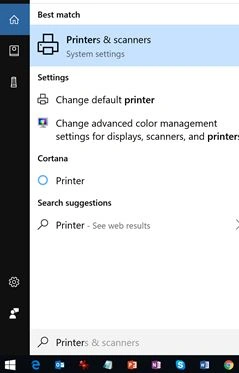
Enter WIN+S on your Windows 10 machine and search for “Printers”.
Select Printers & Scanners.
2. Remove Let Windows Manage my Default Printer
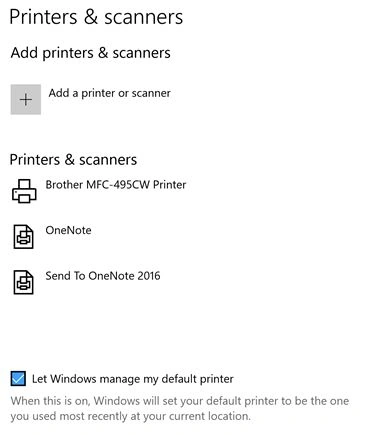
By default, Windows manages your default printer.
Uncheck “Let Windows manage my default printer.” See the checkbox on the below screen.
3. Open Manage Default Printer
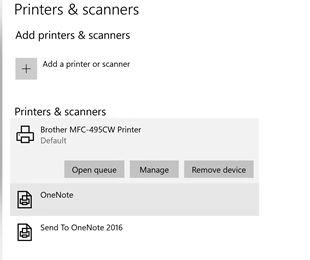
Click on the Manage button.
4. Set Default Printer
On this screen, you will see the “Set as default” button. Click on this button. It will make this printer as the default printer.
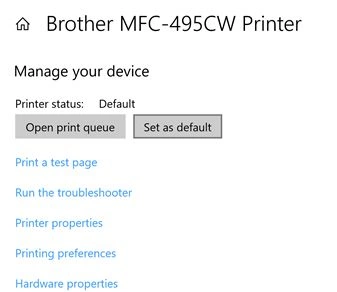
You’re all set. Close this window and you're done.
Summary
In this article, we learned about Set Default Printer In Windows 10.
Join the conversation! Your thoughts help the community grow.