

Introduction
With the increase in Microsoft Teams adoption, companies are switching to Microsoft team's development for extending the capabilities for Microsoft Teams for better collaboration. To make this development easy to use and to centralize it, the PnP team has generator a yeoman scaffolder for Teams applications. So let's look into setting up the environment and creating a sample bot for Microsoft Teams.
Environment Setup
Step 1 - Install nvm-windows
We will use nvm-windows for installing Node.js because we can easily use a different version of Node.js and upgrading Node.js or using the previous version using nvm-windows is very easy. However, we can skip this step if we want to install Node.js directly.
Download nvm-windows from below link use nvm-setup.zip file for more information on nvm-windows check my blog
https://github.com/coreybutler/nvm-windows/releases
Step 2 - Install the latest version of Node.js
We can install Node.js directly from the below link:
https://nodejs.org/en/download/
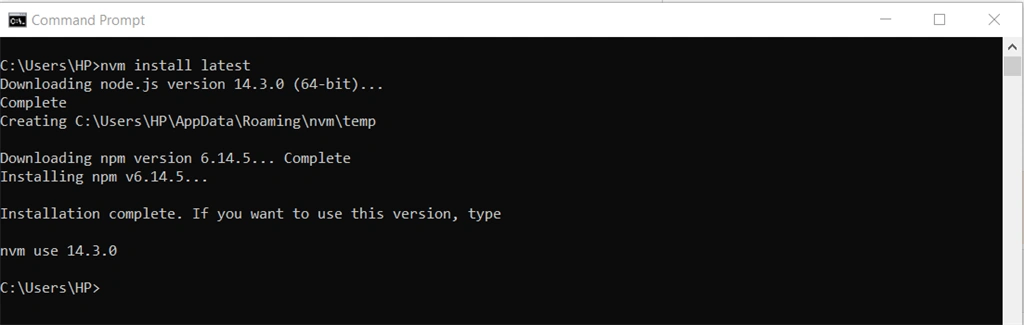
If we are using nvm-windows, use the below command to install the latest version of Node.js:
nvm install latest
Step 3 - Install Yeoman and Gulp CLI
To scaffold projects using the Teams generator, we need to install the Yeoman tool as well as the Gulp CLI task manager.
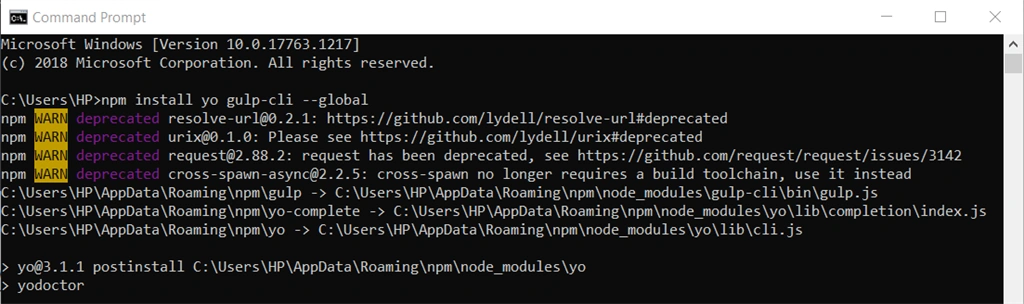
Using the below command, we are able to install the above dependencies.
npm install yo gulp-cli --global
Step 4 - Install Yeoman generator for Microsoft Teams apps
Now we need to install the Yeoman generator for Microsoft Teams. Use the below command to install it.
npm install generator-teams --global
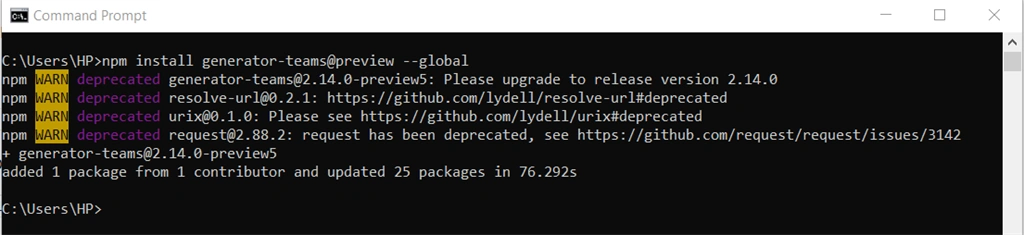
To install the preview version which would provide the feature which is still in preview, use the below command:
npm install generator-teams@preview --global
Generate Bot Project for Microsoft Teams
Step 1 - Create a Folder
Let's create a bot for Microsoft teams. To create the bot, we would use yeoman teams generator for scaffolding the project:
To create a project for use of the project files, use the below command to create a folder:
mkdir yoTeamsBot
Now let's navigate to the created folder using the below command:
cd yoTeamsBot

Step 2 - Create an Azure AD Application and Register a New Bot
To create a Bot, we are required to register an Azure AD application. To register a new application, use the below steps:
- Navigate to here.
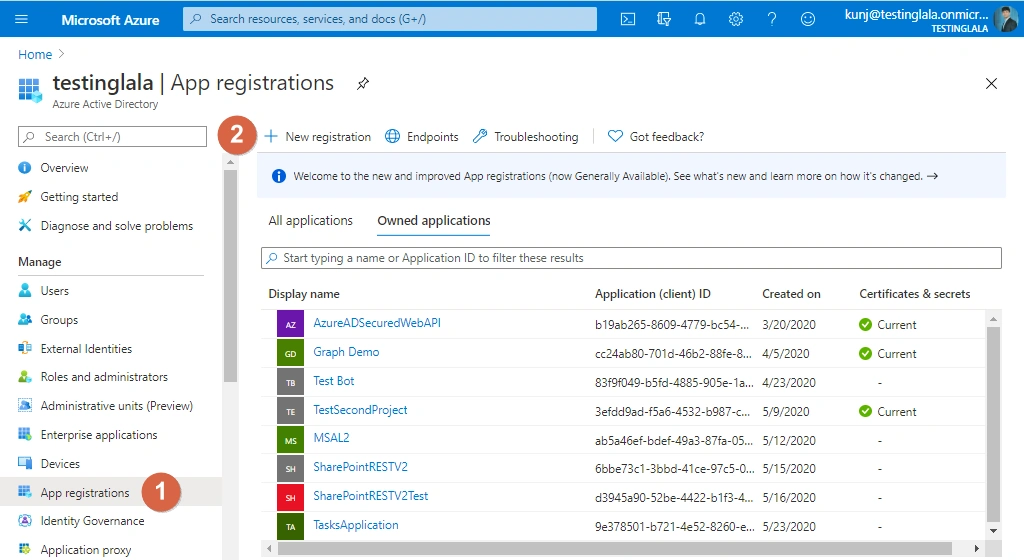
- Select Azure Active Directory and from the left navigation, select App registrations.
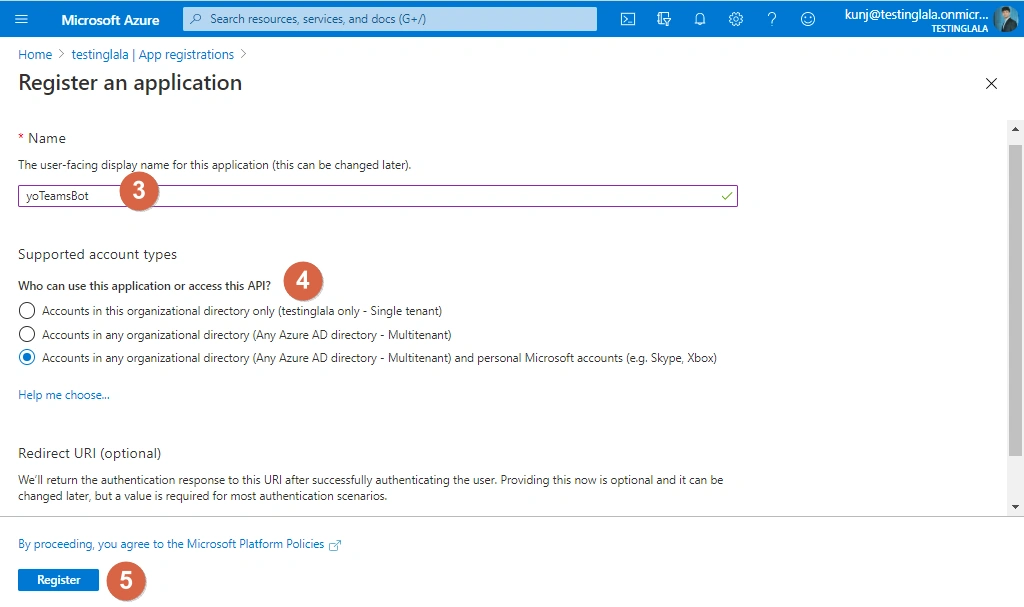
- Click on New Registration, as displayed in the image below.
- Add an appropriate name for the application and register the application (Copy the Client ID that is generated).
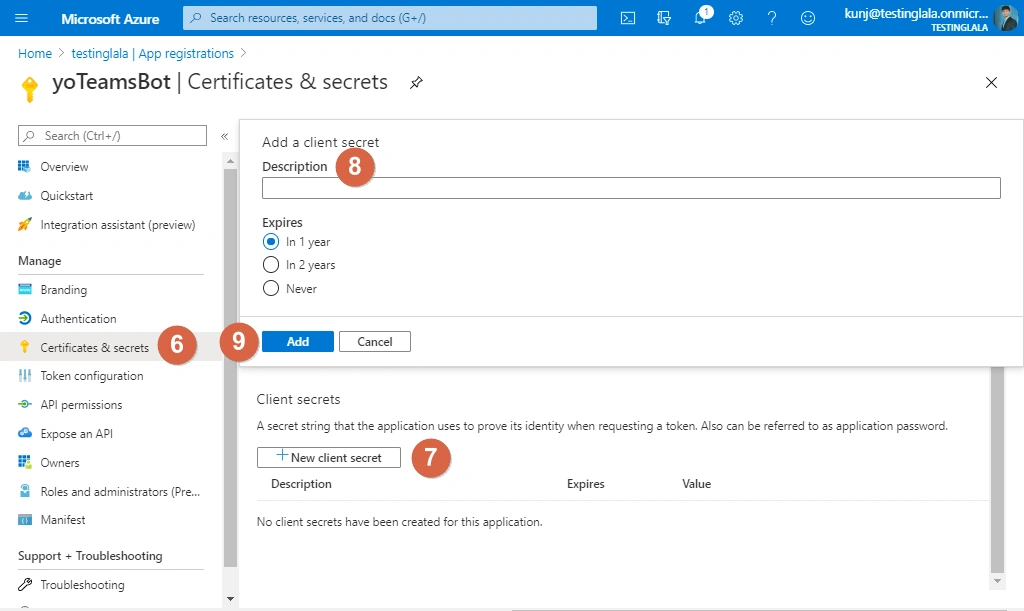
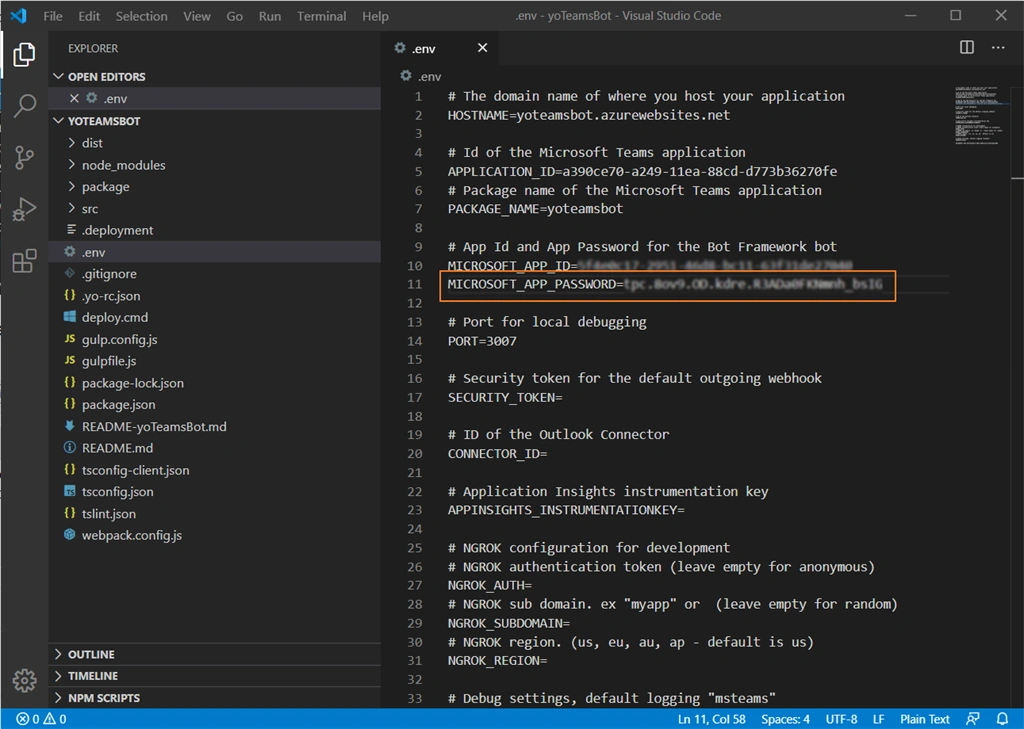
- Once the application is created, click on Certificates and Secret and Create a Client Secret Copy. This we use while generating the application.
Jyoti SanganiPosted Jun 4, 2020, 4:33 AM
Good very informative