

Introduction
Azure Pass-through Authentication (PTA) is a new authentication method introduced in Azure AD Connect in the 2.1.15.0 or latest version.
Benefits of Pass-through Authentication (PTA)
- Synchronizes objects from On-prem AD to AAD
- Password writeback
- Seamless-Sign-On (SSO)
- Hybrid Identity Solutions
Prerequisites
Please consider the configuration below if you are using a firewall or any proxy in your On-prem to Azure AD environment.
Make sure that authentication is the agent that can make an outbound request to Azure AD over the following ports.
- 80
- 443
- 8080
Step 1
I have downloaded the latest Azure AD Connect from Microsoft's official website, and below I have included the download link also.
Step 2
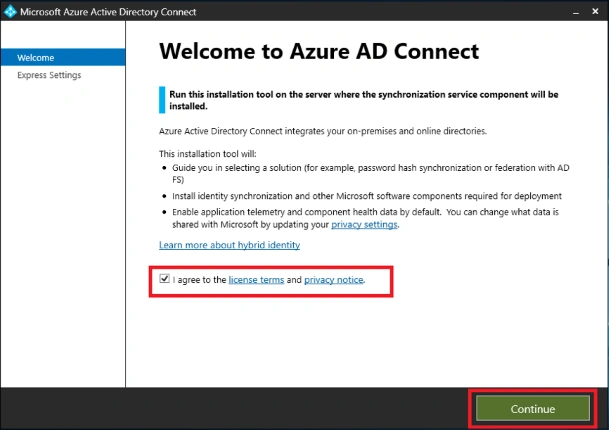
Just tick I agree and click Continue.
Step 3
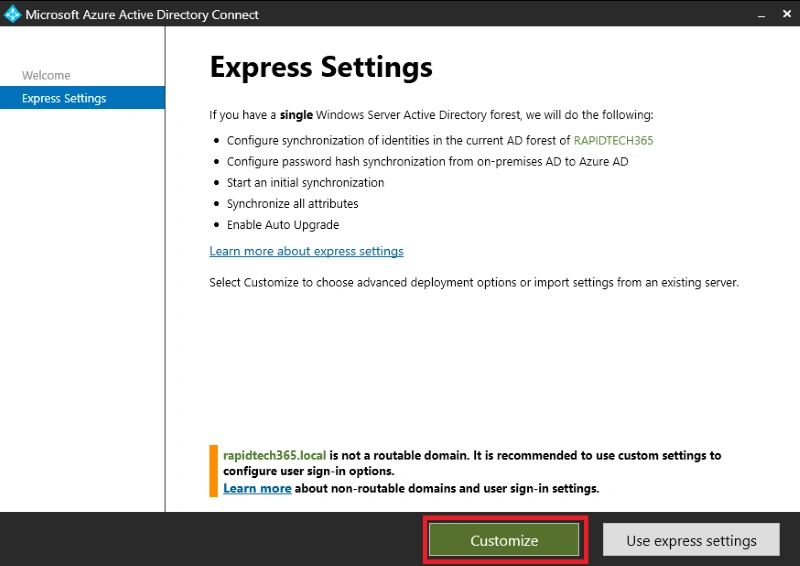
Go to the Customize Option here.
Step 4
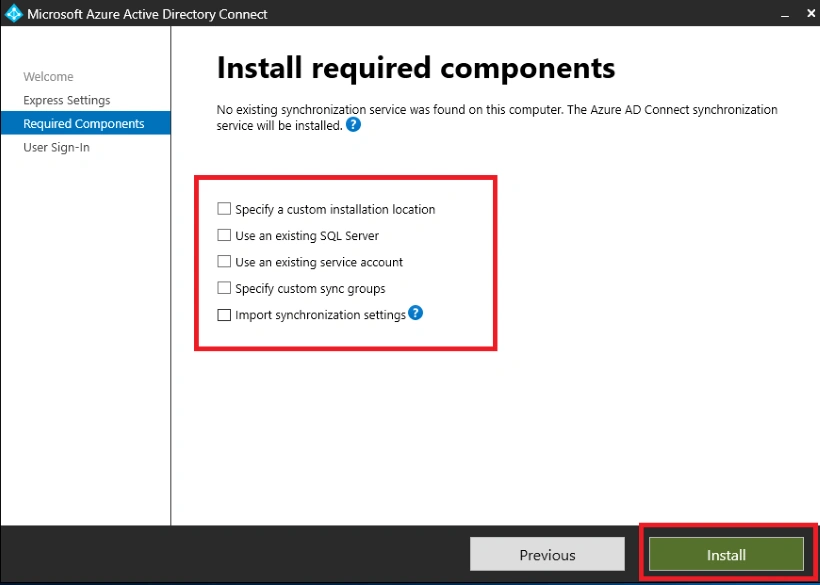
Just leave all the tick options empty and click Install.
Step 5
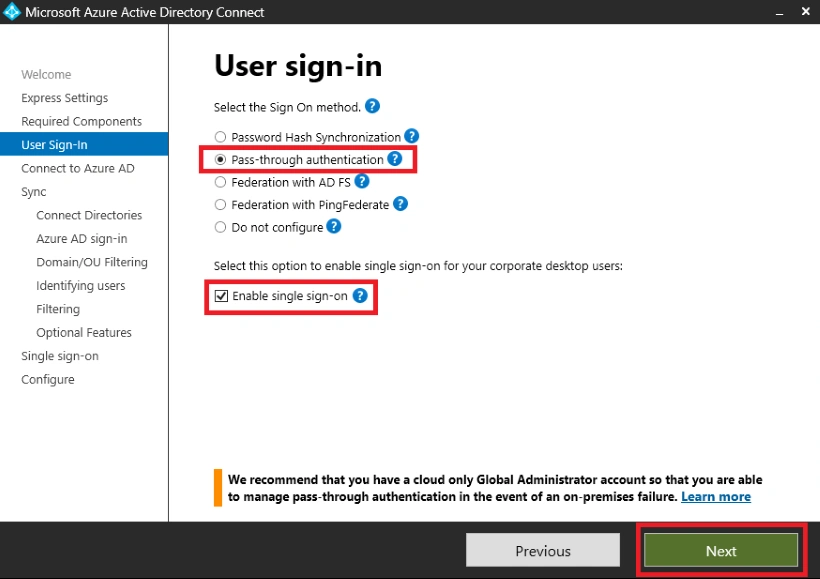
Here, select Pass-through authentication and enable Single-Sign-On. Click Next.
Step 6
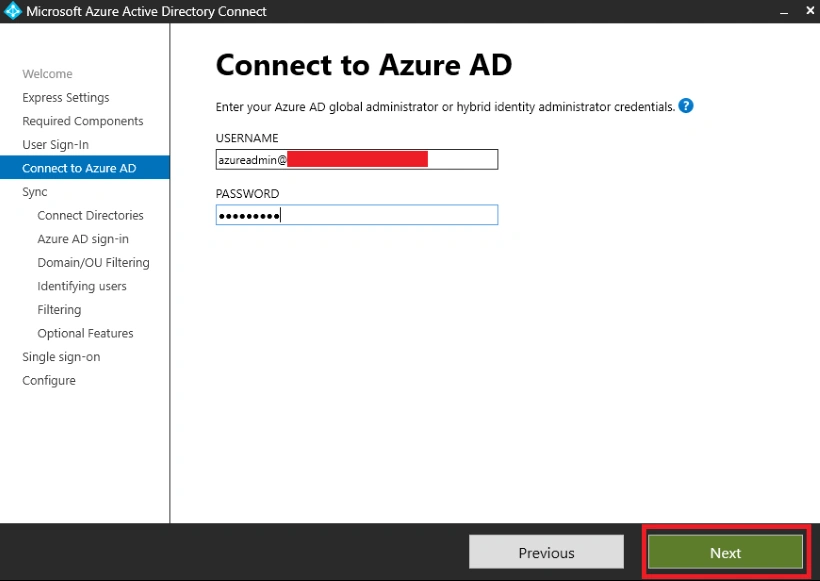
Here you should enter your M365 Global Administrator Credentials. I have mentioned my credentials below in the screenshot.
Step 7
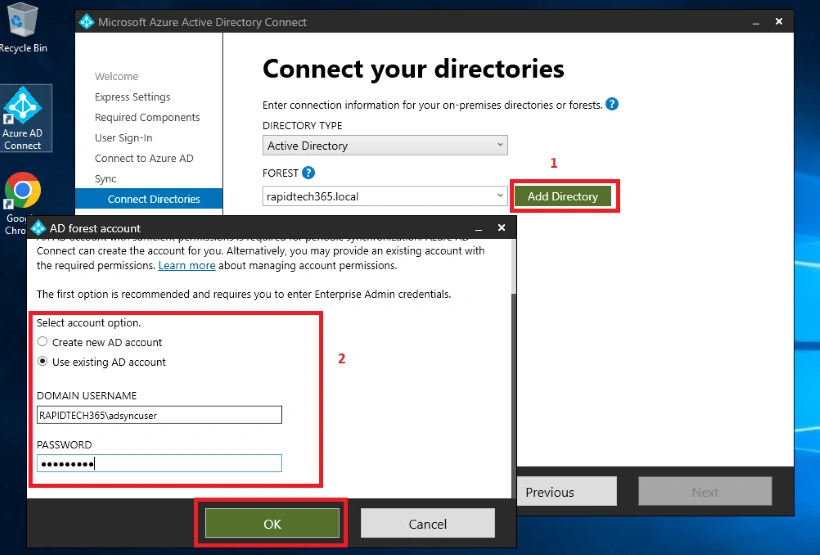
Click Add Directory, then get the AD forest account Wizard and enter any user of your On-prem AD. In my case, I have created an adsyncuser in my OU group.
Step 8
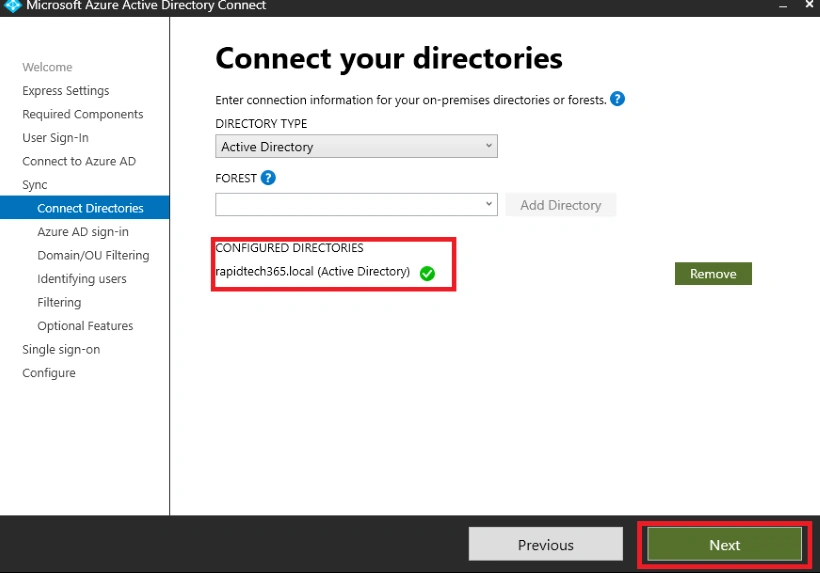
Once you have verified your local domain directory, you can click Next.
Step 9
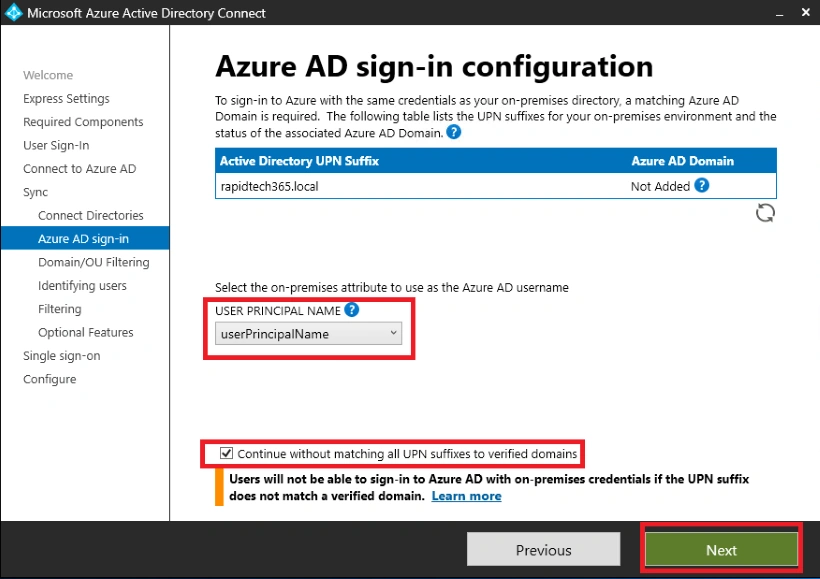
Now, please do what is in the following screenshot.
Step 10
This is my On-prem AD user. Now I'm going to sync my O365 OU user to Azure AD.
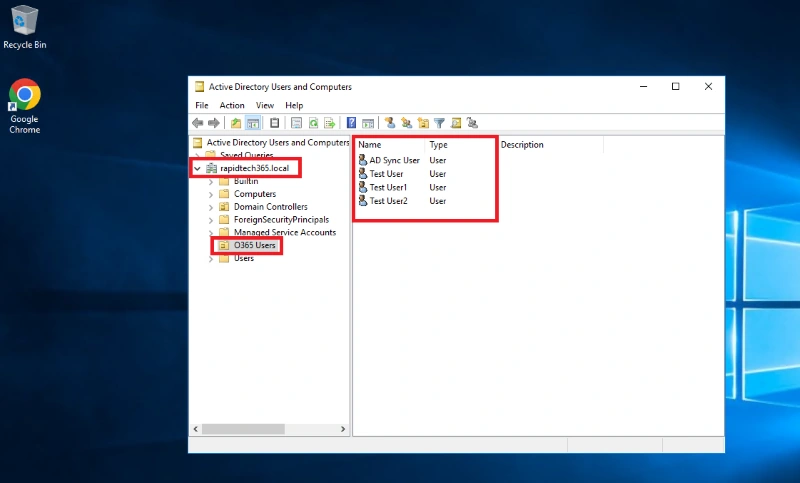
Step 12
In optional features, just tick Password writeback only.
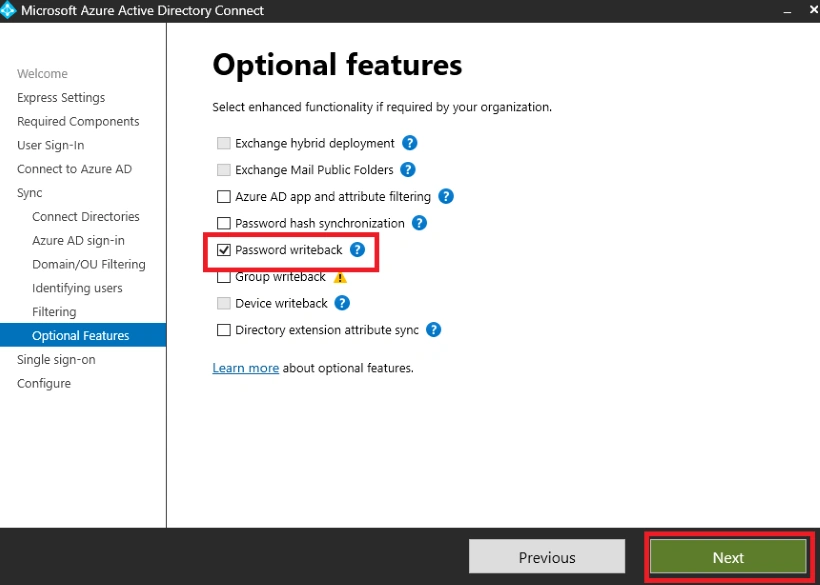
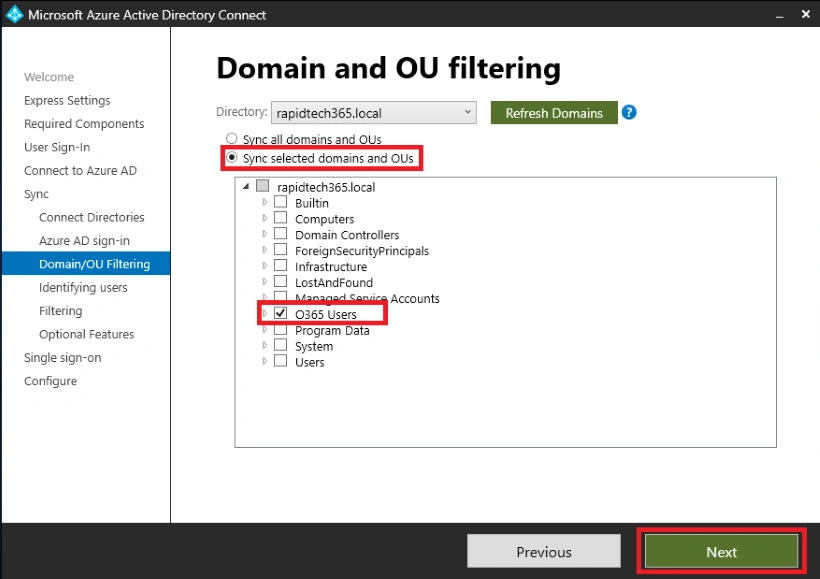
Step 11
I have selected my O365 OU.
Step 13
Enter your On-prem Administrator Credentials.
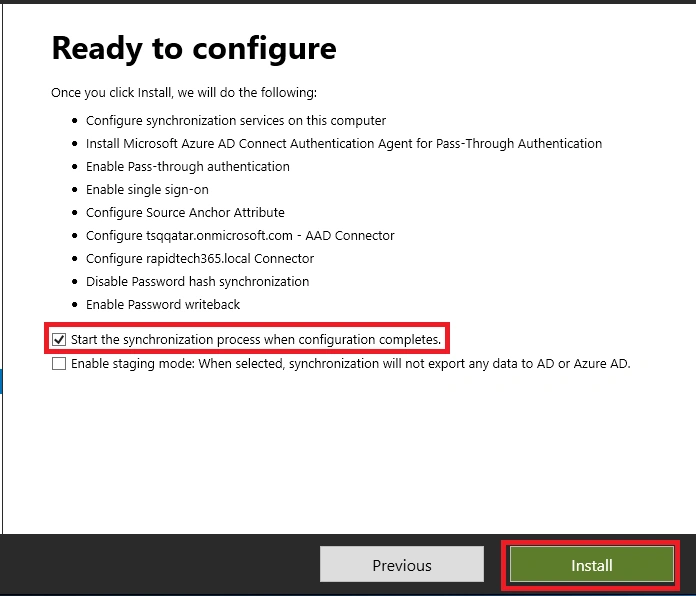
Step 14
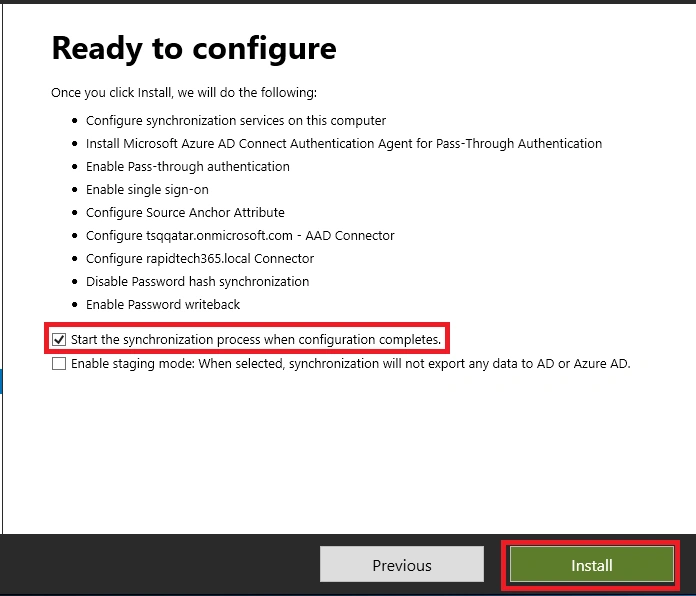
Review your configuration and Install it.
Step 15
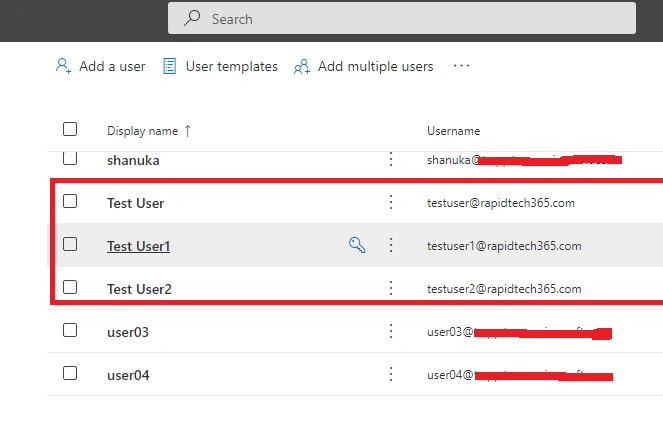
My on-prem AD user successfully synchronized to the Azure AD account.
Seamless Sign-On Group Policy Steps
Step 1
Open the Group Policy Management Editor tool.
Step 2
Edit the group policy that is applied to some or all of your users. This example uses Default Domain Policy.
Step 3
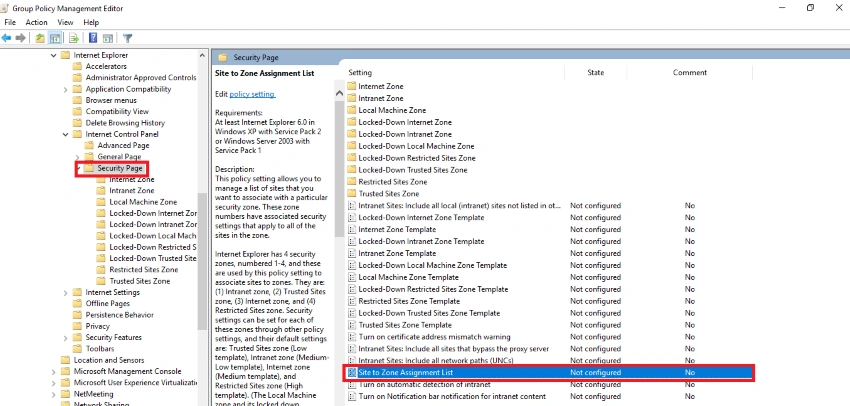
Navigate to User Configuration > Policies > Administrative Templates > Windows Components > Internet Explorer > Internet Control Panel > Security Page. Then select Site to Zone Assignment List.
Step 4
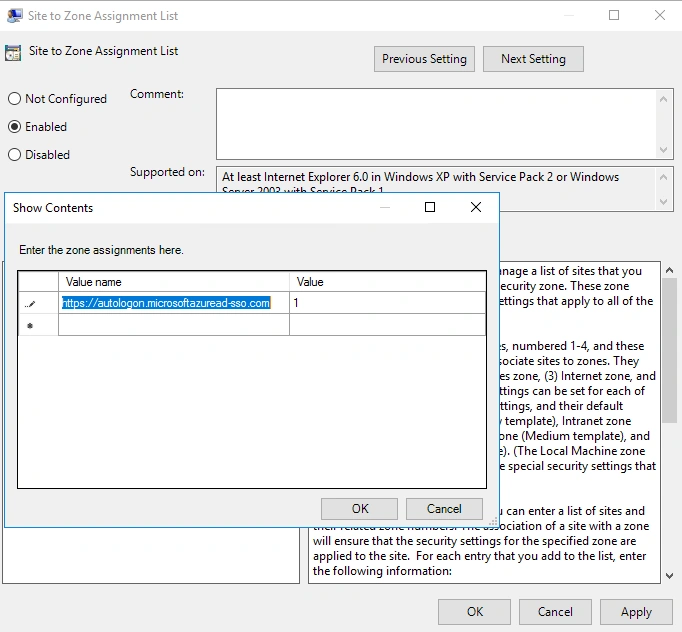
Enable the policy and add the below mentioned URL and Data Value.
Value name: https://autologon.microsoftazuread-sso.com
Value (Data): 1
Step 5
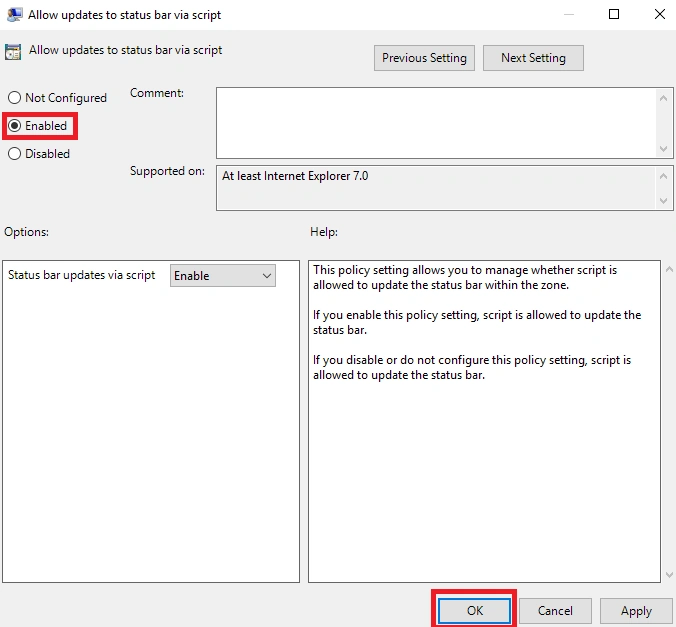
Navigate to User Configuration > Policies > Administrative Templates > Windows Components > Internet Explorer > Internet Control Panel > Security Page > Intranet Zone. Then select Allow updates to status bar via script.
Step 6
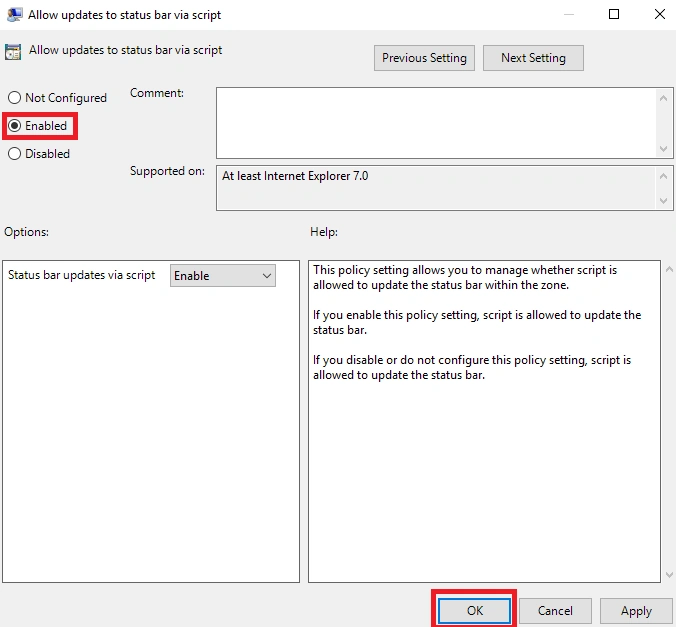
Enable the policy setting, and then select OK.
Group policy preference config setup
Step 1
Open the Group Policy Management Editor tool.
Step 2
Edit the group policy that is applied to some or all ofyour users. This example uses Default Domain Policy.
Step 3
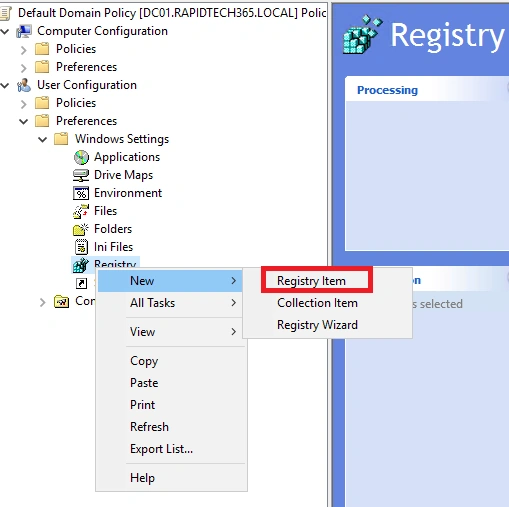
Navigate to User configuration > Preferences> Windows Settings > Registry > New> Registry item.
Step 4
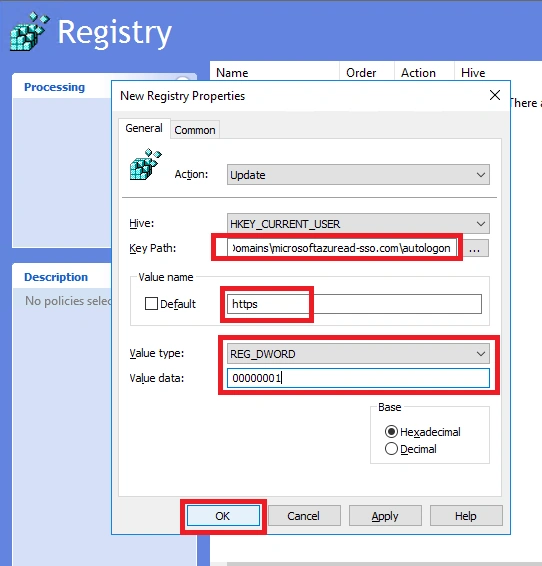
Make sure the mentioned values have been entered correctly.
- KeyPath: Software\Microsoft\Windows\CurrentVersion\InternetSettings\ZoneMap\Domains\microsoftazuread-sso.com\autologon
- Value name: https
- Value type: REG_DWORD
- Value data: 00000001

Step 5
This is my domain logged-in computer.
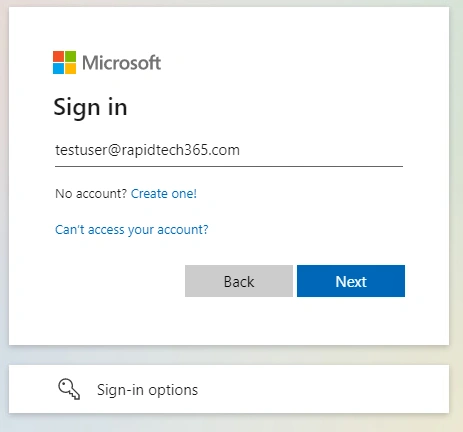
Now, successfully working on my SSO configuration, I have given only my email address here.
Step 6
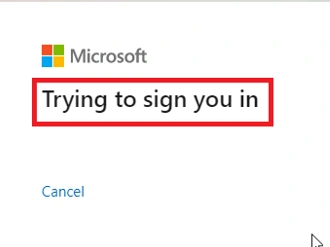
I have signed in successfully without any password.
Conclusion
This article taught us how to setup Pass-through authentication PTA and Seamless-Sign-On SSO in Azure AD Connect. And if you have any questions please contact me.
Thanks.
Sarthak VarshneyPosted Jul 21, 2022, 4:11 AM
Good article :)
Viknaraj ManogararajahPosted Jul 20, 2022, 4:39 AM
Excellent article Shanuka, keep up the good work.
Viknaraj ManogararajahPosted Jul 20, 2022, 4:38 AM
Excellent article Shanuka, keep up the good work.