

Introduction
While working with PowerApps, there are many situations where we want to ask users for confirmation before performing an action. For example, deleting a record, submitting a form, or navigating away from a screen.
Earlier, we had to create custom popup dialogs using containers, variables, and a lot of manual work. But now, PowerApps provides a built-in Confirm function which makes this process much simpler and cleaner.
In this article, we will understand the basics of the Confirm function, its syntax, and the properties we can use to customize it.
What is the Confirm Function?
The confirm function is used to display a modern confirmation dialog box in PowerApps.
It allows users to either:
Confirm an action
Cancel an action
Syntax with Properties
Confirm(
    "",
    {
        Title: "",
        Subtitle: "",
        ConfirmButton: "Yes",
        CancelButton: "No"
    }
)
Each Property Explanation
Here is what each property does:
Title
This is the main heading of the confirmation dialog. It should clearly indicate the purpose of the action.Subtitle
This provides more details about the action. You can explain what will happen if the user proceeds.ConfirmButton
This will allows you to customize the text of the confirm button (for example: Yes, Delete, Submit, etc.).CancelButton
This will allows you to customize the cancel button text (for example: No, Cancel, Go Back, etc.).
Now. we will see how to delete a record using the Confirm function in PowerApps, where users will get a confirmation dialog before the record is deleted.
Prerequisite
Before we start, make sure you have already created a Gallery in your PowerApps and it is connected to your data source. so we can perform the delete operation on a selected record.
Steps
Step 1: Check PowerApps Authoring Version
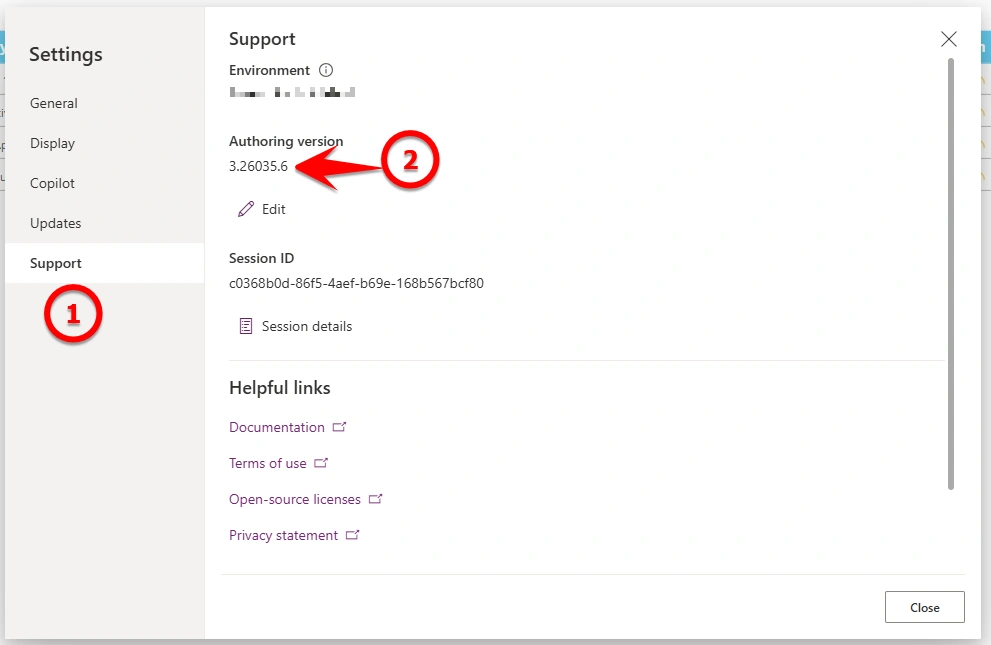
Open your app in PowerApps, then go to App Settings. From there, navigate to the Support section where you can see the Authoring Version of your app.
Make sure the version is greater than or equal to 3.26035.6. If it is lower, update it to the latest version to use the Confirm function.
Step 2: Enable Modern Controls and Themes
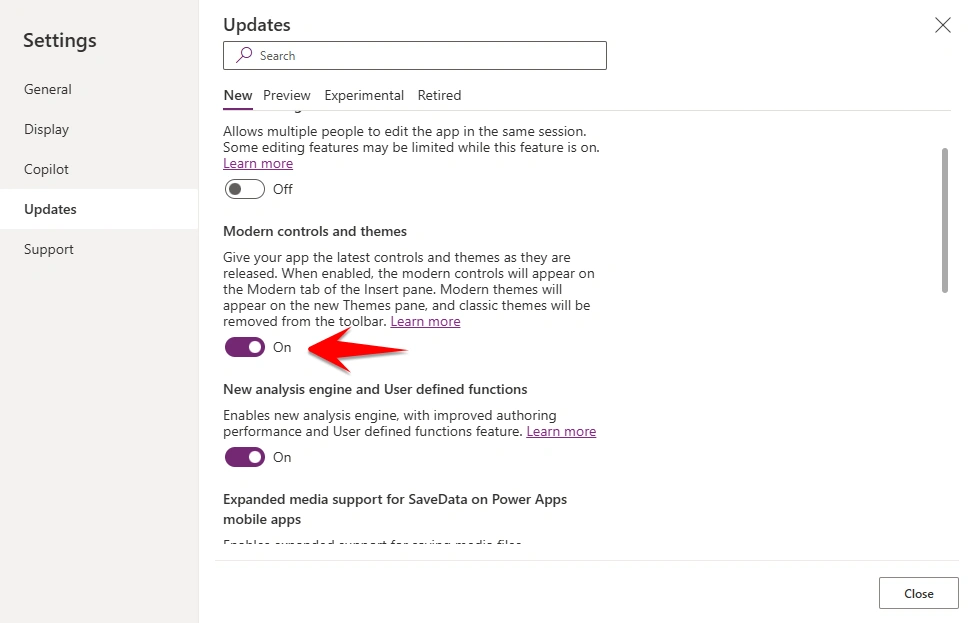
Go to App Settings in your PowerApps, then navigate to the Updates section. Here, make sure the Modern controls and themes option is turned On.
This setting is required because the Confirm function works only with modern controls and UI. If it is turned off, the confirmation dialog will not work.
Step 3: Add Confirm Logic on Delete Button
I am assuming that you have already created a Gallery and added a Delete button inside it.
Now, select the Delete button and go to its On Select property. Add the following logic:
If(
    Confirm(
        "",
        {
            Title: "Are you sure you want to Delete Record?",
            ConfirmButton: "Yes",
            CancelButton: "No"
        }
    ),
    Remove(
        YourListName,
        ThisItem
    )
)
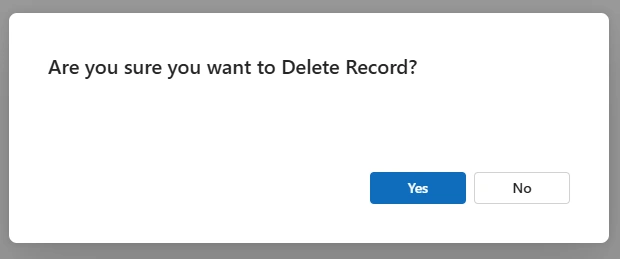
If the user selects Yes, the record will be deleted from the data source. If the user selects No, nothing will happen. Also, make sure to replace YourListName with your actual list or table name.
Result
Conclusion
By following these steps, you can easily use the Confirm function in PowerApps to show a confirmation dialog before performing any important actions.
Join the conversation! Your thoughts help the community grow.