

How to use Editable Grid Screen in Light Switch using Visual Studio 2012
In this article I describe how to perform operations using an Editable Grid Screen using LightSwitch in Visual Studio 2012.
Procedure for publishing a Desktop Application
Step 1
- Open the Visual Studio 2012.
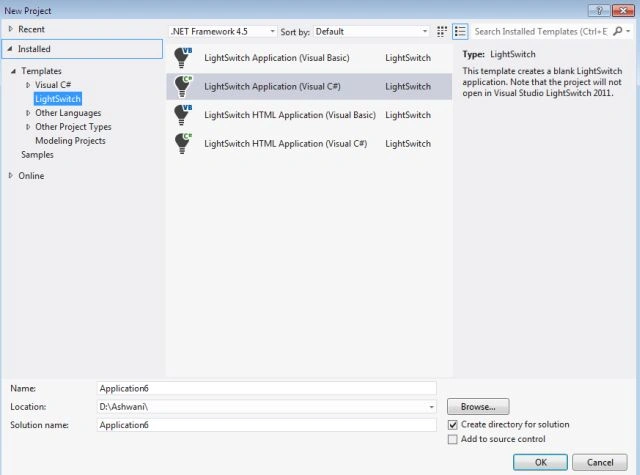
- Go to "File" => "New" => "Project..."
- In "New Project" => "Installed" => "Template"
- In "Template" => "LightSwitch"
- Select "LightSwitch Application (Visual C#)".
- Enter the Name and choose the location.
- Click "OK".
Step 2
Go to the Solution Explorer, right-click on the Data Source and select "Add Table".

Step 3
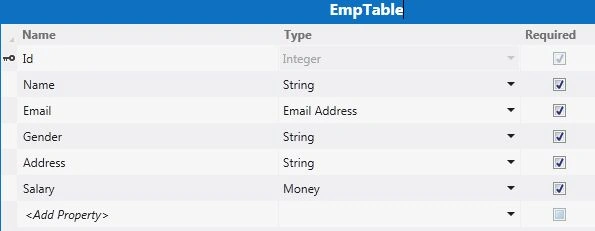
Insert the data in the following table and rename it.
Step 4
Go to the Solution Explorer and right-click on the Screens and select "Add Screen".

Step 5
The Screen Designer appears.

Step 6
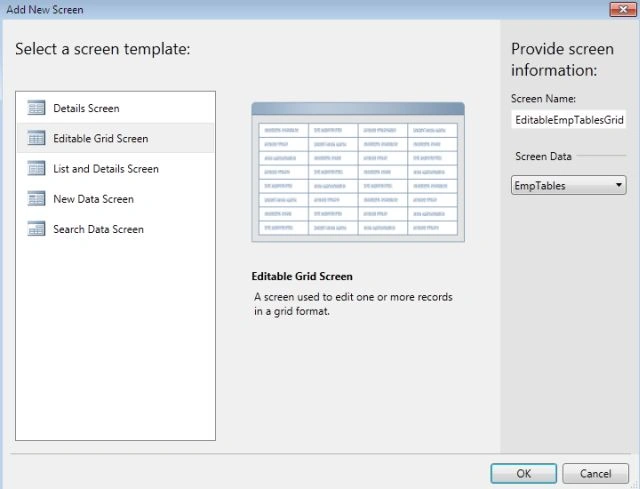
Select the Editable Grid Screen Template and provide the screen information and click the "OK" button.
Step 7
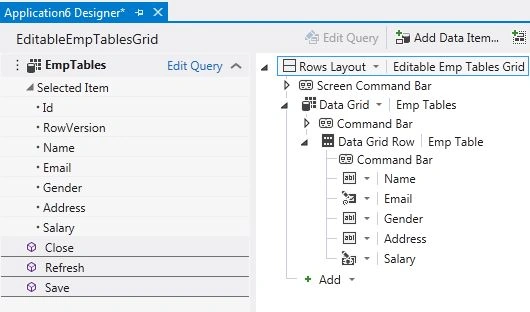
The Application Designer appears.
Step 8
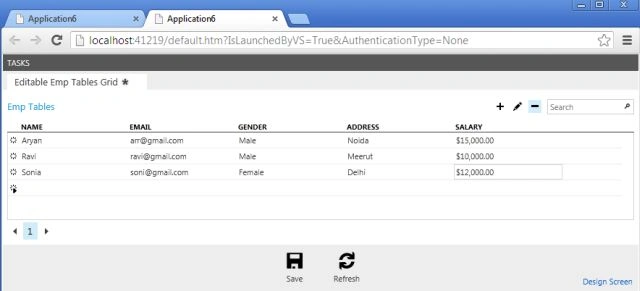
Now start debugging the following application. It will appear as shown.
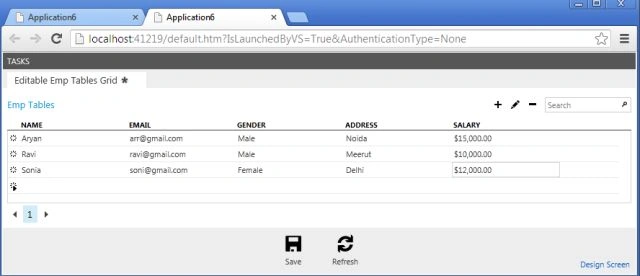
Step 9
In the Screen we have the add (+) option order to add a new record.

Step 10
When we click on the add (+) option the Add New Emp Table dialog box appears.
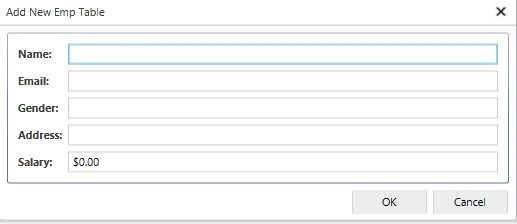
Step 11
Now we insert the value in the following box and click on the OK button.
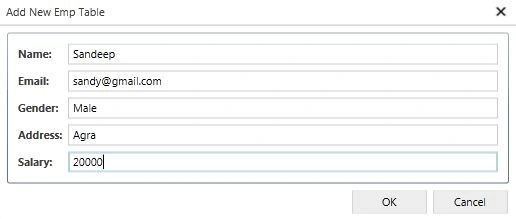
Step 12
We will notice that the data will be added in the Editable Emp Tables Grid.
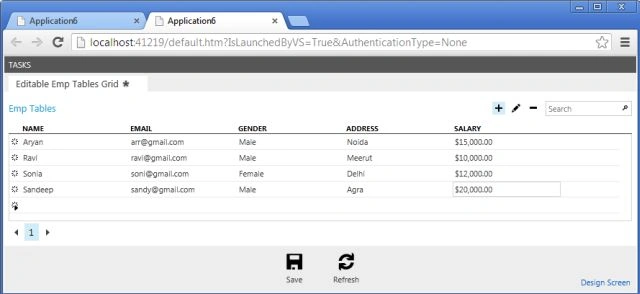
Step 13
In the same manner we will click on the Edit option in order to do the editing in the data.

Step 14
The Edit Emp Table appears. After editing we will click on the OK button.

Step 15
After editing we will notice that the data is edited in the Editable Emp Tables Grid.

Step 16
Similarily the delete (-) option is also in the Editable Emp Tables Grid to delete the data.

Step 17
When we click on the delete option the data will be deleted
Join the conversation! Your thoughts help the community grow.