

Introduction
Android is one of the most popular operating systems for mobile. Face API is used to locate the face while taking a picture and also, it detects the face impressions, like happy, sad, male or female, and your approximate age, etc.
In this article, I will show you how to use Face API in Android applications using Android Studio. Android is the kernel-based operating system, in which users can modify the GUI components and source code.
Requirements
- Android Studio
- Little knowledge of XML and Java
- Android Emulator (or) Android mobile
- Stable internet connection during execution
- Download link (Android Studio)
Steps to be followed
Carefully follow these steps to use Face API in Android applications using Android Studio. Source code is available for download.
Step 1
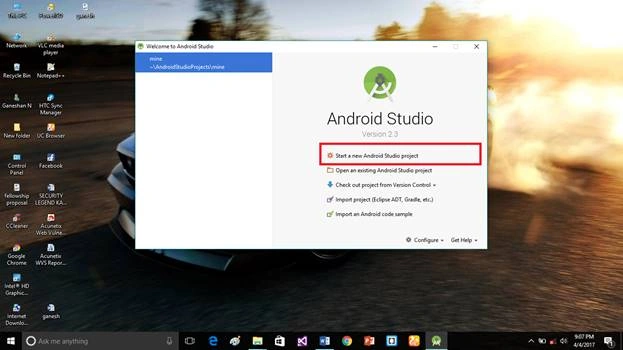
Open the Android Studio and start a new project.
 Step 2
Put the application name and company domain. If you wish to use C++ for coding the project, mark the "Include C++ support" checkbox and click Next.
 Step 3
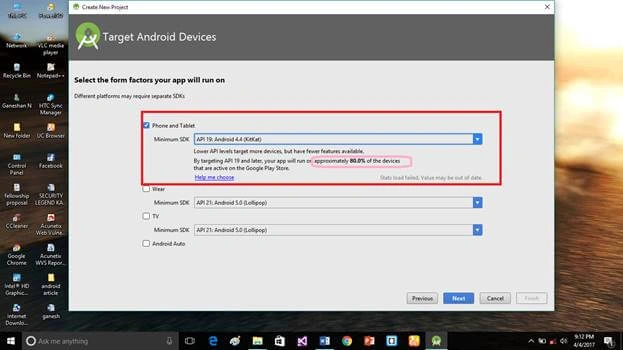
Select the Android minimum SDK. Click Next.
 Step 4
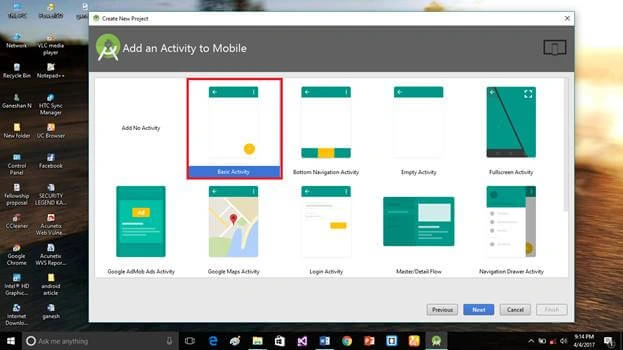
Choose "Basic activity" and click Next.
 Step 5
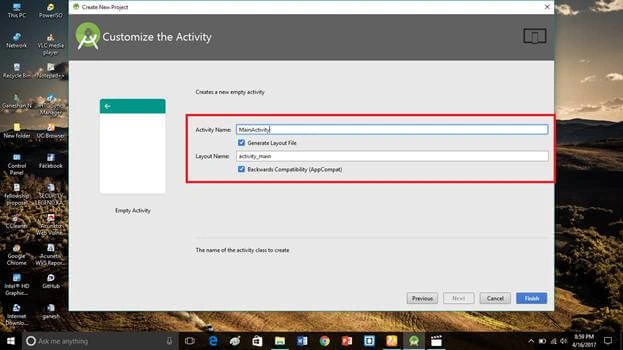
Put the activity name and layout name. Android Studio basically takes the java class name the same as what you name the activity. Now, click Finish.
 Step 6
Go to the below link and choose FACE API. Then, click the "Create" option.
Link https://azure.microsoft.com/en-us/try/cognitive-services/
 Step 7
Choose your region and agree to the agreement. Then, click Next.

Step 8
Sign in to create the API via Outlook, GitHub, LinkedIn or Facebook account.
 Step 9
Copy your API keys and endpoint.
 Step 10
Paste your API key into the strings.xml file.
 Deliverables
Here, we have successfully implemented the Face API in Android applications.
Thank you for reading my article. Don't forget to like and follow me. If you have any doubts, just comment below.
Mohd AmanPosted Oct 29, 2018, 11:39 AM
How to get package ganeshannt.emotionapi;
deepak aPosted Jun 17, 2017, 6:36 AM
Nice one .........