

Introduction
Using Parent and Child flows in Power Automate is a best-practice approach for managing complex automation. Instead of building one large, hard-to-maintain flow, you break tasks into smaller, reusable components (Child Flows) that are triggered by a main workflow (Parent Flow).
This guide walks through a practical scenario—Automated Invoice Approval—to demonstrate how to set up flows, pass data, and return results effectively.
Why Use Parent and Child Flows?
Reusability - Build once, use across multiple flows (e.g., a reusable “Send Notification” child flow).
Maintainability: Fix bugs and update logic in a single, focused flow rather than editing a massive workflow.
Readability - Break complex logic into structured, manageable components.
Error Handling - If a child flow fails, you can manage the error without stopping the entire parent process.
Prerequisites
Before you begin:
Both flows must be created inside a Solution
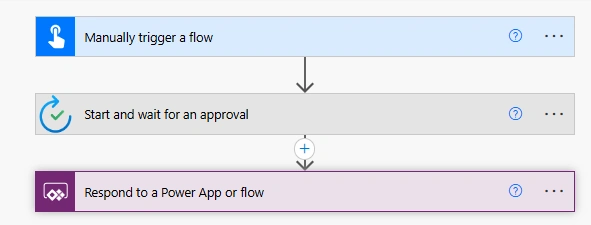
The Child flow must use the “Manually trigger a flow” trigger
The Child flow must end with “Respond to a PowerApp or flow” action
🛠️ Practical Example: Invoice Approval Workflow
We’ll create a system where:
A Parent flow detects a new invoice in SharePoint
A Child flow handles the approval process
Phase 1: Create the Child Flow (Reusable Approval Logic)
1️⃣ Create a Solution
Go to Solutions
Create a new solution named: Invoice Automation
2️⃣ Create the Child Flow
Inside the solution, click: New → Automation → Cloud Flow → Instant
Name the flow: Child_InvoiceApproval
Select trigger: Manually trigger a flow
3️⃣ Add Inputs (Data from Parent)
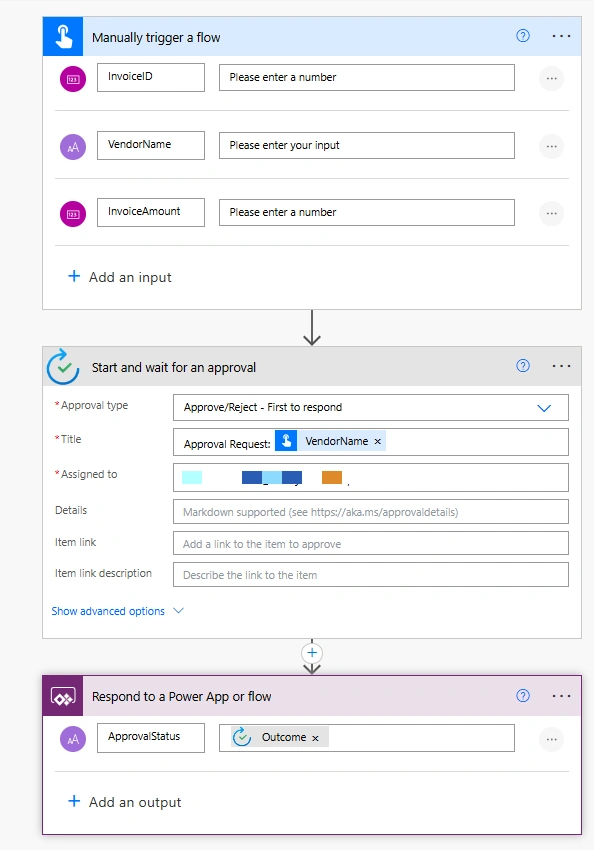
Click “Add an input” in the trigger and define:
InvoiceID (Number)
InvoiceAmount (Number)
VendorName (Text)
These inputs allow the parent flow to pass invoice data.
4️⃣ Add Approval Action
Add: Start and wait for an approval
Use dynamic content from the trigger:
Example Title:
Approval Request - {VendorName}5️⃣ Add Response Action
Add: Respond to a PowerApp or flow
Add output type: Text
Name it: ApprovalStatus
Map it to: Outcome (from the approval action)
✅ Save and exit.
Your reusable approval component is now complete.
Phase 2: Create the Parent Flow (Trigger & Orchestration)
1️⃣ Create the Parent Flow
In the same solution, click: New → Automation → Cloud Flow → Automated
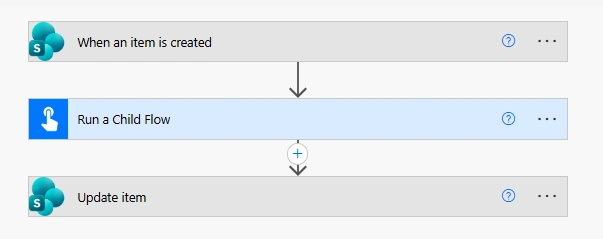
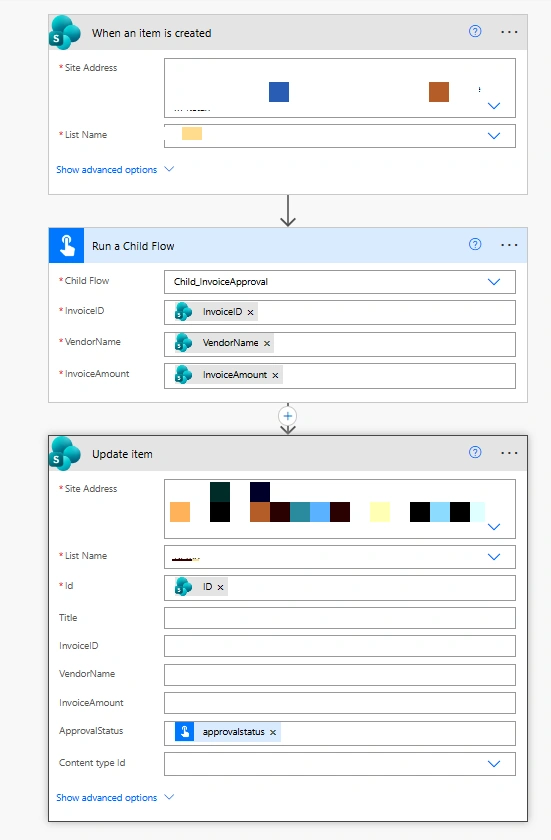
Choose trigger: SharePoint – When an item is created
Select your Site and List
2️⃣ Add “Run a Child Flow” Action
Click New Step
Search for: Run a Child Flow
Select: Child_InvoiceApproval
3️⃣ Map the Data
Map SharePoint fields to child inputs:
| SharePoint Column | Child Input |
|---|---|
| InvoiceID | InvoiceID |
| InvoiceAmount | InvoiceAmount |
| VendorName | VendorName |
4️⃣ Handle the Response
After Run a Child Flow, add a Condition:
If
ApprovalStatus= Approved → Update SharePoint status to ApprovedElse → Update status to Rejected
✅ Save and test your workflow.
⚠️ Crucial Tips & Best Practices
🔧 Fix “Run Only User” Errors
If the parent flow fails to call the child:
Open the Child Flow
Click Run-only users
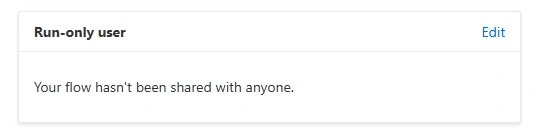
Change connections to:
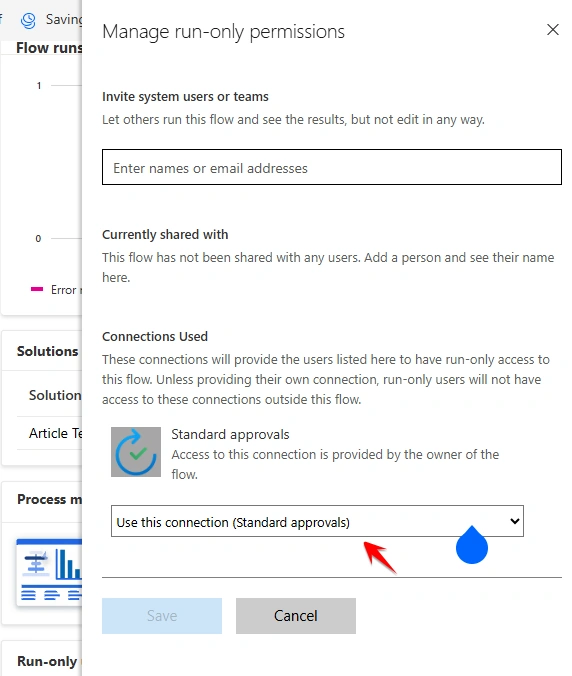
A specific service account
Or Use this connection
Avoid using “Provided by run-only user” unless required.
Conclusion
Solutions: Both flows must be in the same solution.
Trigger: Child flows must use the "Manually trigger a flow" trigger.
Connections: You must configure the child flow to use specific connections, not user-provided ones.
Response: If passing data back, use the "Respond to a PowerApp or flow" action.
Join the conversation! Your thoughts help the community grow.