Introduction
When we create flows in Power Automate, we often use multiple actions to complete a business process. As the flow grows, managing all the actions can become difficult.
To make flows easier to manage, Power Automate provides an action called Scope.
A Scope helps us group related actions into one container. It makes workflows easier to understand, troubleshoot, and maintain.
Let's understand how to use Scope with a simple Leave Approval example.
What Is a Scope?
A Scope is a container that allows us to group multiple actions together.
For example, in a Leave Approval flow, we can create separate scopes for request validation, manager approval, SharePoint updates, and email notifications.
Real-World Example: Leave Approval Process
Suppose an employee submits a leave request using a Power Apps application. The request is stored in a SharePoint list, and the manager needs to approve or reject it.
We will create a Power Automate flow using Scope actions to manage this process.
Step-by-Step: Create a Flow Using Scope
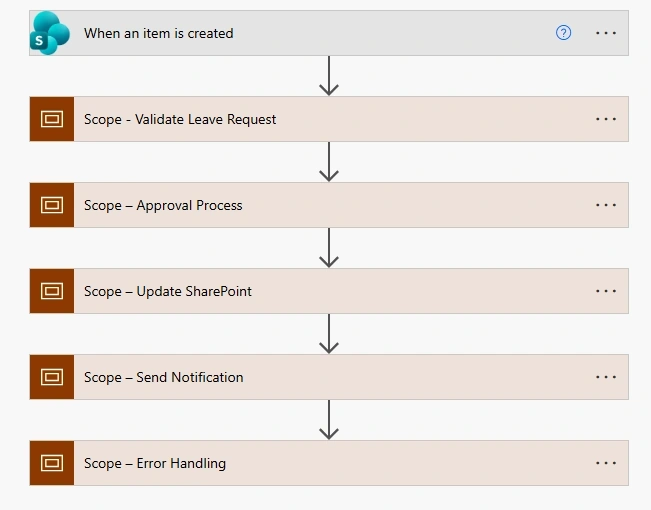
Step 1: Create a Flow
- Open Power Automate.
- Select Create.
- Choose Automated cloud flow.
- Enter the flow name as
Leave Approval Process. - Select the SharePoint trigger When an item is created.
- Select your SharePoint site and Leave Request list.
- Click Create.
Now, whenever an employee submits a new leave request, the flow will start automatically.
Step 2: Create the Validate Leave Request Scope
- Click the plus icon below the trigger.
- Select Add an action.
- Search for Scope.
- Add the Scope action.
- Rename it to
Validate Leave Request. - Add the required actions inside this scope.
For example:
- Get item from SharePoint.
- Check employee details.
- Validate leave dates.
This scope is responsible for checking the leave request information.
Step 3: Create the Approval Process Scope
- Add another Scope action below the first scope.
- Rename it to
Approval Process. - Add Start and wait for an approval inside it.
- Set the approval type to Approve/Reject – First to respond.
- Select the manager's email in Assigned to.
- Add the leave request details in the approval description.
The manager will receive an approval request and can approve or reject the leave.
Step 4: Create the Update SharePoint Scope
- Add another Scope action.
- Rename it to
Update SharePoint. - Add a Condition to check the approval outcome.
- If the outcome is Approve, update the SharePoint status to Approved.
- If the outcome is Reject, update the SharePoint status to Rejected.
- Save the manager's comments.
This scope updates the latest leave request information in SharePoint.
Step 5: Create the Send Notification Scope
- Add another Scope action.
- Rename it to
Send Notification. - Add the Send an email (V2) action.
- Configure the employee's email address.
- Add the approval or rejection result to the email subject and body.
The employee will receive an email with the latest leave request status.
Step 6: Create an Error Handling Scope
Now let's handle errors in our flow.
- Add another Scope action.
- Rename it to
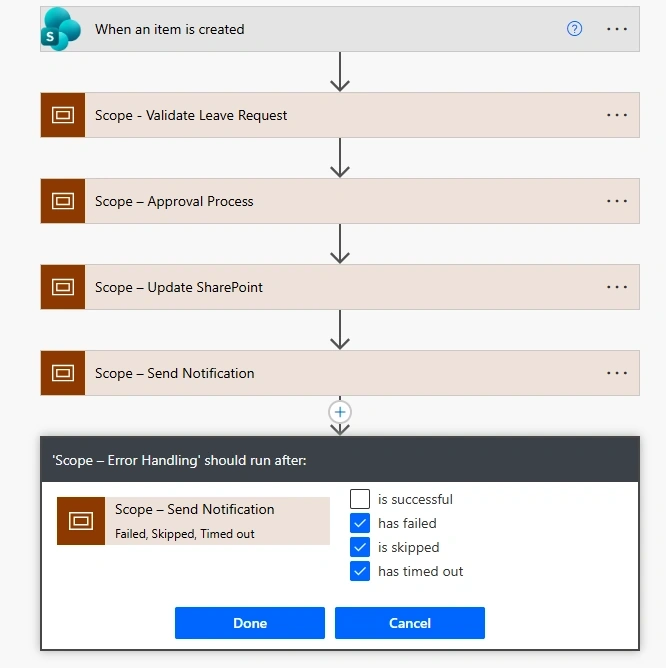
Error Handling. - Open the three-dot menu of this scope.
- Select Configure Run After.
- Select the previous main process scope.
- Choose has failed and has timed out.
- Click Done.
Inside the Error Handling scope, add:
- Send an email to the administrator.
- Include the flow failure details.
- Update the request status if required.
Now, if the main process fails,Skipped or times out, the error-handling scope can execute.
Final Flow Structure
Your flow will look like this:
- When an item is created (SharePoint)
- Scope – Validate Leave Request
- Scope – Approval Process
- Scope – Update SharePoint
- Scope – Send Notification
- Scope – Error Handling
Note: Configure the main process and error-handling scopes with appropriate Run After settings. For example, the error scope should run after the main process fails or times out.
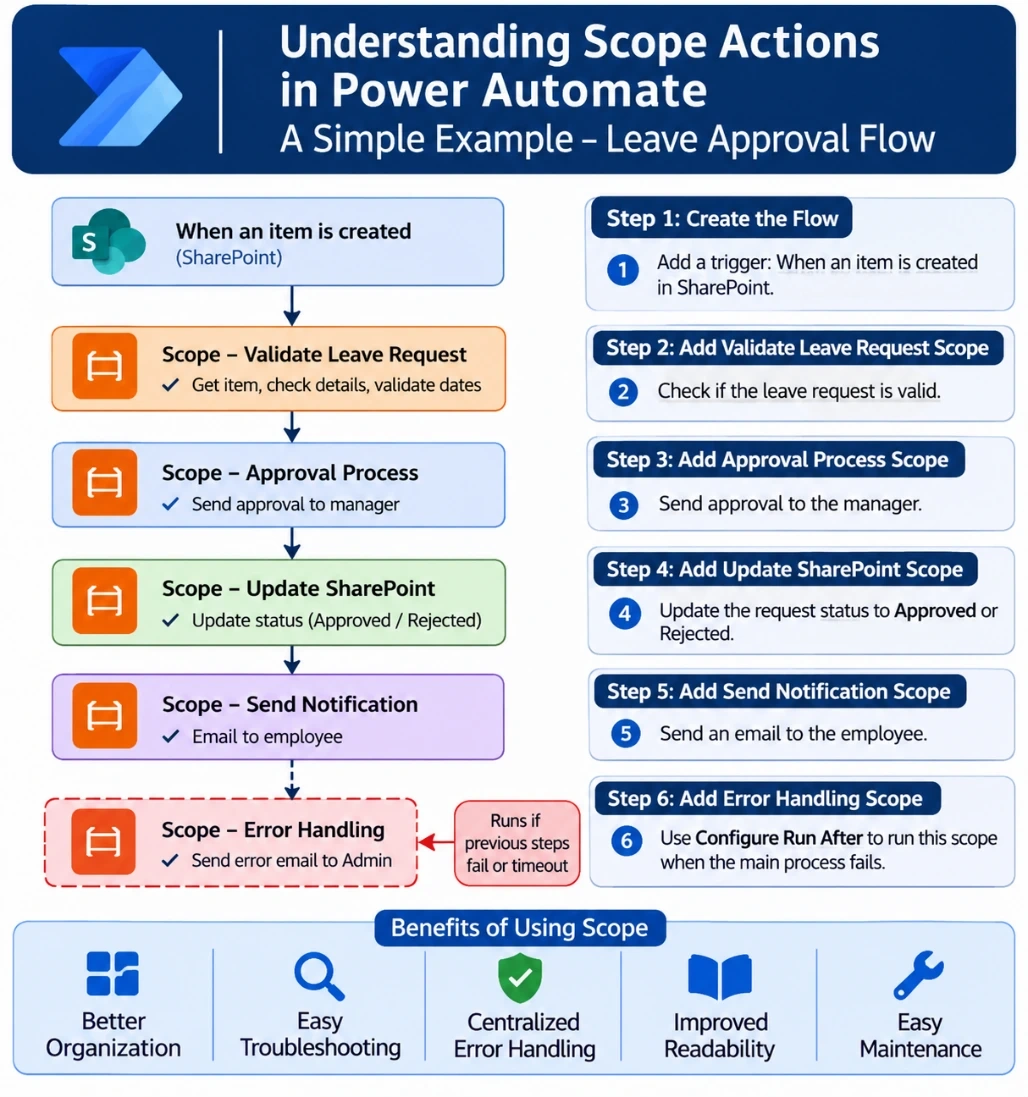
Benefits of Using Scope
- Better Organization: Group related actions together.
- Easy Troubleshooting: Identify which scope failed.
- Error Handling: Manage failures using Configure Run After.
- Improved Readability: Make complex flows easier to understand.
- Easy Maintenance: Update specific sections without changing the entire flow.
Conclusion
Scope is a simple but powerful action in Power Automate. It helps us organize multiple actions into meaningful sections and makes workflows easier to manage.
By using Scope in a Leave Approval process, we can separate validation, approval, SharePoint updates, notifications, and error handling.
If you are building large Power Automate flows, try using Scope to make your workflows cleaner and easier to maintain.
Power AutomateScope actionConfigure Run Aftererror handlingleave approval workflowSharePoint


Join the conversation! Your thoughts help the community grow.