

Introduction: This article explains how to use an XML file to store and retrieve data dynamically using ASP.NET with C#. This article will also help to create child nodes in a XML file using ASP.NET.
Use the following procedure to create a simple application (BookStore) for storing data to and retrieving data from an XML file.
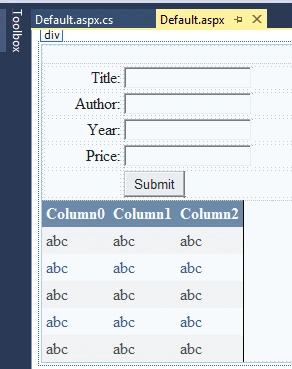
| Control Id | Control | Purpose |
| tbTitle | TextBox Control | To enter the title of the book. |
| tbAuthor | TextBox Control | To enter the Author Name of the book. |
| tbYear | TextBox Control | To enter the publishing year of the book. |
| tbPrice | TextBox Control | To enter the price of the book. |
| btnSubmit | Button Control | To Submit the data. |
| gvBookStoreRecords | GridView Control | To display data of XML File |
I have designed my aspx page like as in the following:
- <%@ Page Language="C#" AutoEventWireup="true" CodeFile="Default.aspx.cs" Inherits="_Default" %>
- <!DOCTYPE html>
- <html xmlns="http://www.w3.org/1999/xhtml">
- <head runat="server">
- <title></title>
- <style type="text/css">
- .auto-style1 {
- text-align: right;
- width: 75px;
- }
- </style>
- </head>
- <body>
- <form id="form1" runat="server">
- <div>
- <br />
- <table style="width: 100%;">
- <tr>
- <td class="auto-style1">Title:</td>
- <td>
- <asp:TextBox ID="tbTitle" runat="server"></asp:TextBox>
- </td>
- </tr>
- <tr>
- <td class="auto-style1">Author:</td>
- <td>
- <asp:TextBox ID="tbAuthor" runat="server"></asp:TextBox>
- </td>
- </tr>
- <tr>
- <td class="auto-style1">Year:</td>
- <td>
- <asp:TextBox ID="tbYear" runat="server"></asp:TextBox>
- </td>
- </tr>
- <tr>
- <td class="auto-style1">Price:</td>
- <td>
- <asp:TextBox ID="tbPrice" runat="server"></asp:TextBox>
- </td>
- </tr>
- <tr>
- <td class="auto-style1"> </td>
- <td>
- <asp:Button ID="btnSubmit" runat="server" Text="Submit" />
- </td>
- </tr>
- </table>
- <asp:GridView ID="gvBookStoreRecords" runat="server" CellPadding="4" ForeColor="#333333" GridLines="None">
- <AlternatingRowStyle BackColor="White" ForeColor="#284775" />
- <EditRowStyle BackColor="#999999" />
- <FooterStyle BackColor="#5D7B9D" Font-Bold="True" ForeColor="White" />
- <HeaderStyle BackColor="#5D7B9D" Font-Bold="True" ForeColor="White" />
- <PagerStyle BackColor="#284775" ForeColor="White" HorizontalAlign="Center" />
- <RowStyle BackColor="#F7F6F3" ForeColor="#333333" />
- <SelectedRowStyle BackColor="#E2DED6" Font-Bold="True" ForeColor="#333333" />
- <SortedAscendingCellStyle BackColor="#E9E7E2" />
- <SortedAscendingHeaderStyle BackColor="#506C8C" />
- <SortedDescendingCellStyle BackColor="#FFFDF8" />
- <SortedDescendingHeaderStyle BackColor="#6F8DAE" />
- </asp:GridView>
- </div>
- </form>
- </body>
- </html>
Step 2: Add an XML file within the project solution, provide it the name BookStore.xml. Create a root node in it as in the following:
- <?xmlversion="1.0"encoding="utf-8"?>
- <bookstore>
- </bookstore>
- protected void btnSubmit_Click(object sender, EventArgs e)
- {
- // creating object of XML DOCument class
- XmlDocument XmlDocObj = new XmlDocument();
- //loading XML File in memory
- XmlDocObj.Load(Server.MapPath("BookStore.xml"));
- //Select root node which is already defined
- XmlNode RootNode = XmlDocObj.SelectSingleNode("bookstore");
- //Creating one child node with tag name book
- XmlNode bookNode = RootNode.AppendChild(XmlDocObj.CreateNode(XmlNodeType.Element, "book", ""));
- //adding node title to book node and inside it data taking from tbTitle TextBox
- bookNode.AppendChild(XmlDocObj.CreateNode(XmlNodeType.Element, "Title", "")).InnerText = tbTitle.Text;
- //adding node Author to book node and inside it data taking from tbAuthor TextBox
- bookNode.AppendChild(XmlDocObj.CreateNode(XmlNodeType.Element, "Author", "")).InnerText = tbAuthor.Text;
- //adding node Year to book node and inside it data taking from tbYear TextBox
- bookNode.AppendChild(XmlDocObj.CreateNode(XmlNodeType.Element, "Year", "")).InnerText = tbYear.Text;
- //adding node tbPrice to book node and inside it data taking from tbPrice TextBox
- bookNode.AppendChild(XmlDocObj.CreateNode(XmlNodeType.Element, "Price", "")).InnerText = tbPrice.Text;
- //after adding node, saving BookStore.xml back to the server
- XmlDocObj.Save(Server.MapPath("BookStore.xml"));
- //Calling grid view binding method.
- gridDataBind();
- }
Step 4: Create a gridDataBind Method to retrieve the data from the XML file:
- public void gridDataBind()
- {
- DataSet ds = new DataSet();
- //reading data from the BookStore.xml...
- ds.ReadXml(Server.MapPath("BookStore.xml"));
- //Adding dataset ds as a datasource of the grid view...
- gvBookStoreRecords.DataSource = ds;
- //binding data with grid view...
- gvBookStoreRecords.DataBind();
- }
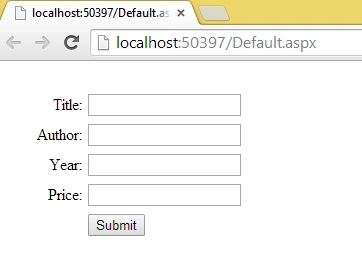
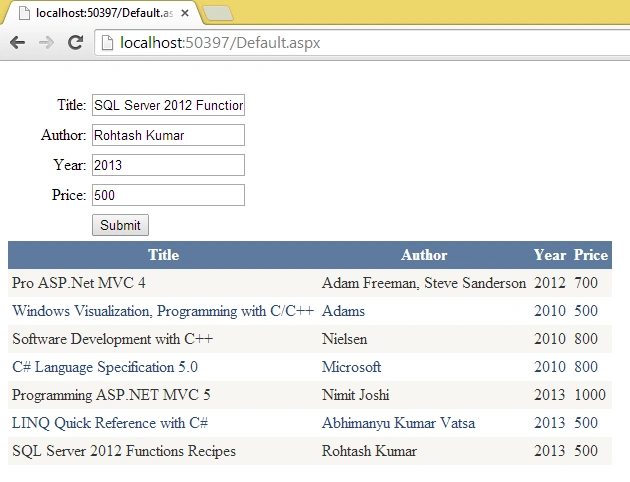
Step 5: Now run the project and you will see the following outputs:
- When the project loads the first time then:
- After adding some data:
Jules ClaudelPosted May 17, 2021, 10:47 AM
I tried this method and there is an Error 500 around the Save.
Ritin SinghPosted Dec 27, 2019, 6:16 AM
Superb artical for learn freshers
Naresh KumarPosted Jul 11, 2019, 2:49 AM
How do u call this function btn_submit on the event of button click ?? using ajax?? @Sourab Somani
Dharmendra Kumar PanditPosted Feb 4, 2019, 11:22 AM
Very good Topic ....
Junaid FarooquiPosted Mar 30, 2015, 5:33 AM
HI, Good One this, but i need to upload a image as well like book cover, is it possible that i can upload image which store in a folder and image path retrieve through xml file, above code is 90% ok for my requirements, but i need image upload option, please help me out if you can.
Chetan ChannePosted Sep 25, 2014, 10:04 AM
Good one