

Introduction
In my "HTML For Beginners: Part 3" I provided an introduction to HTML and explained HTML tables and HTML lists.
In this, the fourth part of the HTML beginners series, we will cover the following topics:
- Form Element
- Form Controls
Form
Forms are the essential and inevitable component of any web application and web site. HTML Forms are one of the main points of interaction between a user and a website. Forms allow the collection of data from the site visitors. For example, If you want to collect information from the user during registration like Name, Email, Address, Password, Address, Mobile Number, age and so on then a form is used.
A form takes input from the site visitor and posts that information to the back end server or back end application.
The <form> element defines an HTML Form.
- <form>
- <!--Form Elements-->
- </form>
A HTML <form> contains form elements. There is various types of elements available, like text fields, textarea, password fields, email fields, drop-down, checkbox, radio button, buttons and so on.
In the HTML <form> element we will discuss the following controls:
- Input type Control
- Textarea
- Select Control
- Button Control
Input Control: In HTML, to get input from users, we have various input controls. In HTML we have the following input controls:
- Text (Single Line)
- Password
- Submit
- Reset
- Button
- URL
- Color
- Search
- Radio
- Checkbox
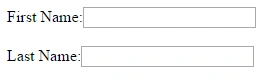
Text: This provides a single line of text in HTML.
Syntax
- <input type="text"/>
- <form>
- First Name:<input type="text"><br/><br/>
- Last Name:<input type="text">
- </form>
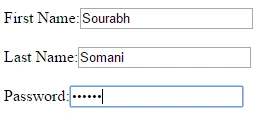
Password: The input type password defines a password input control in an HTML document.
Syntax
- <input type="password">
- <form>
- First Name:<input type="text"><br/><br/>
- Last Name:<input type="text"><br/><br/>
- Password:<input type="password"><br/><br/>
- </form>
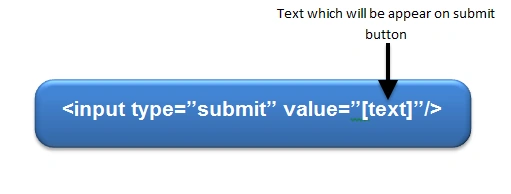
Submit: The submit defines a button for submitting form input to a form handler. The form handler is a script and that script processes the data to the server.
Syntax
Example
- <form>
- First Name:<input type="text"><br/><br/>
- Last Name:<input type="text"><br/><br/>
- Password:<input type="password"><br/><br/>
- <input type="submit" Value="Click Here to Submit"/>
- </form>


If we look at the preceding code when we click on the button the form is submitted and the data is cleared. We will discuss later where the data is actually going.
Reset: The reset type defines a button that can reset the form or reset all the values of the form to their default values.
Example
- <form>
- First Name:<input type="text"><br/><br/>
- Last Name:<input type="text"><br/><br/>
- Password:<input type="password"><br/><br/>
- <input type="submit" Value="Click Here to Submit"/>
- <input type="reset"/>
- </form>
Button: This defines a button, a simple button that is neither used for submitting the form nor used to reset the form.
Example

Email: Email defines a TextBox to enter an email address. The email attribute is an essential attribute that is mainly used in the registration and login process in web pages. The email input type provides validation for an email address entered by the user, so there is no need for JavaScript validation. Mainly the browser will expect a user input that matches the syntax of an email address.
Example
- <form>
- <h2>Subscribe Me</h2>
- Email:<input type="Email"/>
- <input type="submit" value="Subscribe"/>
- </form>

URL: The URL input element only expects a URL and validates the URL.
Example

Color: The color input type is quite self-explanatory, it allows users to select the color. When the user selects a color then it returns the hex value of the color. This color input type is the same as a color picker; we can use this to pick the color.
- <form>
- <label for="color1">What is your favorite color:</label>
- <input type="color" name="color1" id="color1" />
- </form>
Initially when the page is loaded, by default the selected color will be black as in the following:

When you click on the color box then:

After picking a color:

Search: The search type is used for the search field. This search field behaves the same as a regular text field.
Example
- <form>
- <label for="search1">Search:</label>
- <input type="search" name="search1" id="search1" />
- <input type="submit" />
- </form>
Initially when the page is loaded:

When some input provided in the search field:

You can more learn about input types of HTML by clicking the link: HTML 5 input types
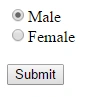
Radio: Radio is used to define a Radio Button in HTML page. By using a Radio Button the user can select only one of the specified choices. So you need to define the same name for all the Radio Buttons in a group.
- <form>
- <input type="radio" name="sex" value="M" checked>Male
- <br>
- <input type="radio" name="sex" value="F">Female
- <br><br>
- <input type="submit">
- </form>
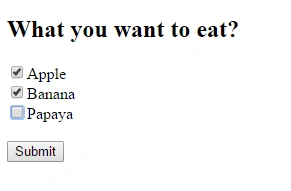
Checkbox: This defines checkboxes in a page. Using a checkbox you can select multiple choices.
- <form>
- <h2>What you want to eat?</h2>
- <input type="checkbox" name="fruit" value="Apple">Apple
- <br>
- <input type="checkbox" name="fruit" value="Banana">Banana
- <br>
- <input type="checkbox" name="fruit" value="Papaya">Papaya
- <br><br>
- <input type="submit">
- </form>
Textarea
A Text Area tag defines multi-line text input control. It can hold an unlimited number of characters. But you can specify your maximum limit of characters using maxlength attribute. The size of a textarea can be defined by using the rows and cols attribute.
Example
- <form>
- Address:<br><textarea maxlength="50" rows="4" cols="30"></textarea>
- </form>

Select Control: The <select> tag is for drawing a drop-down list. Inside the select tag, the <option> tag defines the options inside the drop-down list.
Example
- <!DOCTYPE html>
- <html>
- <body>
- Select Country
- <select>
- <option value="India">India</option>
- <option value="Pakisthan">Pakisthan</option>
- <option value="USA">USA</option>
- <option value="UK">UK</option>
- <option value="Nepal">Nepal</option>
- <option value="China">China</option>
- </select>
- </body>
- </html>
Output

Multiple attributes in select: If you want to select multiple items, like in a listbox, then you can do that using multiple attributes of a form tag as in the following:
- <!DOCTYPE html>
- <html>
- <body>
- Select Country
- <select multiple>
- <option value="India">India</option>
- <option value="Pakisthan">Pakisthan</option>
- <option value="USA">USA</option>
- <option value="UK">UK</option>
- <option value="Nepal">Nepal</option>
- <option value="China">China</option>
- </select>
- </body>
- </html>
Output

Summary
- A Form tag is an HTML Form and is one of the main points of interaction between a user and a website.
- An HTML form tag contains many controls, like TextBox, password, email, select and so on.
In the next part of the series you will learn more about forms.
Shresthi JaiswalPosted Sep 23, 2016, 3:01 AM
Thanks Sir :)
SubashPosted Sep 23, 2016, 12:36 AM
Nice one shresthi
Shresthi JaiswalPosted Apr 15, 2015, 2:33 AM
thankyou ! :)
Rahul Kumar SaxenaPosted Apr 14, 2015, 2:23 PM
Good Show...
NitinPosted Apr 14, 2015, 6:57 AM
nice one
Shresthi JaiswalPosted Apr 14, 2015, 6:11 AM
THANKYOU !! :)
Aditya MishraPosted Apr 14, 2015, 5:11 AM
keep it up..nice work..
Shresthi JaiswalPosted Apr 14, 2015, 3:19 AM
Thanku !! :)
Abhishek JaiswalPosted Apr 14, 2015, 2:51 AM
Keep going! :)
Sibeesh VenuPosted Apr 14, 2015, 1:31 AM
Nice one.
Santhakumar MunuswamyPosted Apr 13, 2015, 11:02 PM
Good work