

Introduction
Today, we'll learn how to access the Web API 2 in the ASP.NET MVC 5 application. Previously we have already learned how to work with the ASP.NET Web API 2.
Therefore in this article we'll create the Web API and access the Web API using MVC 5.
So, let's proceed with the following procedure:
- Create ASP.NET Web API Application
- Working with Web API Application
- Working with MVC Controller
- Adding MVC View
Prerequisites
To create this application, there are the following prerequisites:
- Visual Studio 2013
- ASP.NET MVC 5
Create ASP.NET Web API Application
In this section we'll create the ASP.NET Web Applicaiton using the Web API Project Template. So, start with the following procedure.
Step 1: Open Visual Studio and click on New Project.
Step 2: Select the ASP.NET Web Application and enter the name for the application.

Step 3: Select Web API Project Template and tick the check box of MVC and click OK.

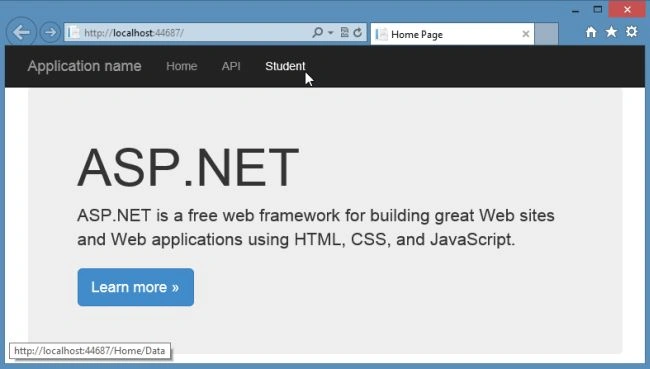
Visual Studio automatically creates the Web API application using the MVC 5 based projects. When you run the application, the following is the home page of your application.
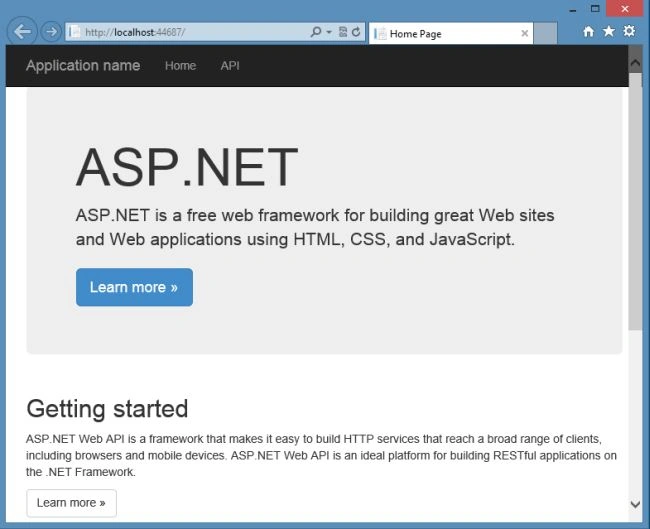
You can also click on the Web API option to view the default API structure in the browser. The application Solution Explorer contains all the files and folders associated with the Web API application.

Working with Web API Application
Now, we have created the Web API application that uses the MVC 5 based architecture. Now we'll proceed with the following procedure.
Adding Model
In this section, we'll add a class and an interface for creating the model. Use the procedure described below.
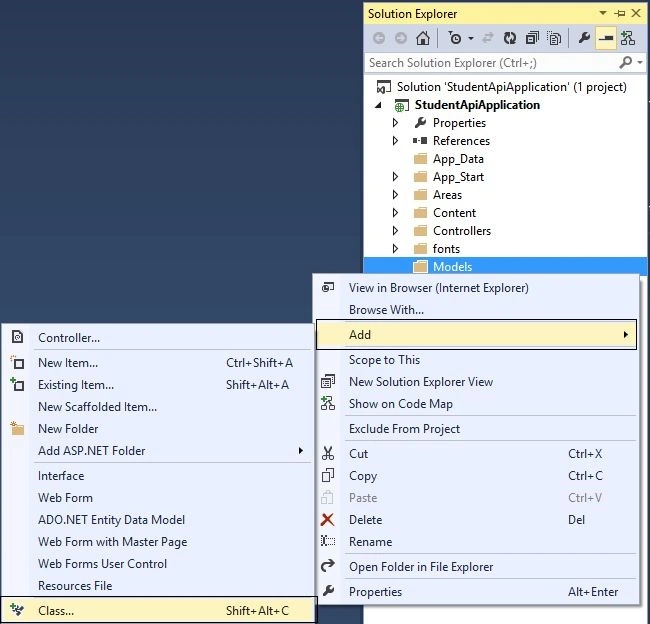
Step 1: In the Solution Explorer, right-click on the Models folder and click on Add to add class named Student.
Step 2: Replace the code with the following code:
- using System;
- namespace StudentApiApplication.Models
- {
- public class Student
- {
- public int ID { get; set; }
- public string Name { get; set; }
- public string City { get; set; }
- public string Course { get; set; }
- }
- }
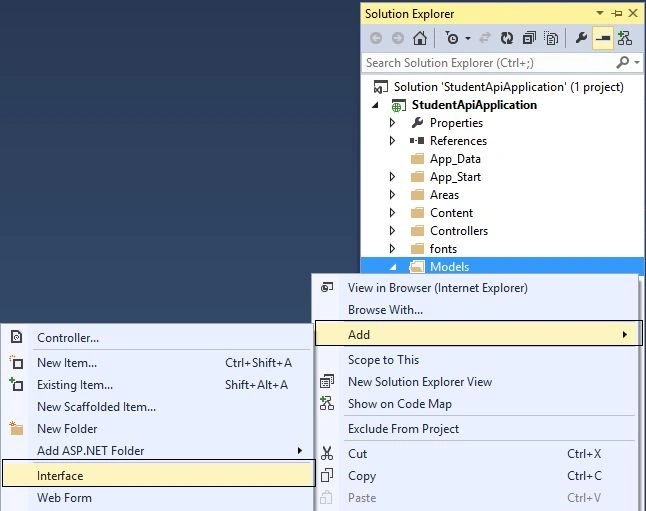
Step 3: Now add an interface to the models folder named IStudentRepository.
Step 4: Replace the code with the following code:
- using System;
- using System.Collections.Generic;
- namespace StudentApiApplication.Models
- {
- interface IStudentRepository
- {
- IEnumerable<Student> GetAllStudents();
- Student AddStudent(Student student);
- }
- }
Step 5: Now we'll add a repository class in the models folder and after adding it, implement the interface in this class using the following code:
- public class StudentRepository : IStudentRepository
- {
- }
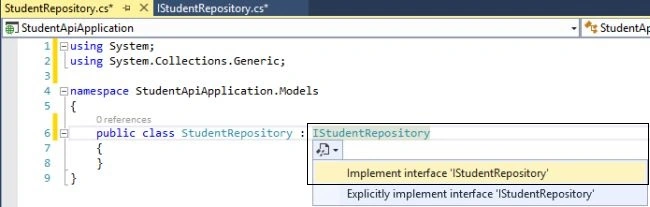
Step 6: Now implement the interface using the following screenshot:
Now modify the code with the following code:
- using System;
- using System.Collections.Generic;
- namespace StudentApiApplication.Models
- {
- public class StudentRepository : IStudentRepository
- {
- private List<Student> items = new List<Student>();
- private int next = 1;
- public StudentRepository()
- {
- AddStudent(new Student { ID = 1, Name = "Ashish", City = "New Delhi", Course = "B.Tech" });
- AddStudent(new Student { ID = 2, Name = "Nimit", City = "Noida", Course = "MCA" });
- AddStudent(new Student { ID = 3, Name = "Prawah", City = "Dehradun", Course = "B.Tech" });
- AddStudent(new Student { ID = 4, Name = "Sumit", City = "Nainital", Course = "MCA" });
- }
- public IEnumerable<Student> GetAllStudents()
- {
- return items;
- }
- public Student AddStudent(Student student)
- {
- if (items == null)
- {
- throw new ArgumentNullException("student");
- }
- student.ID = next++;
- items.Add(student);
- return student;
- }
- }
- }
Adding Controller
So far we have created the model, now we'll create the controller to use the model. Use the following procedure.
Step 1: In the Solution Explorer, right-click on the Controllers folder and click on Add to add the Controller.
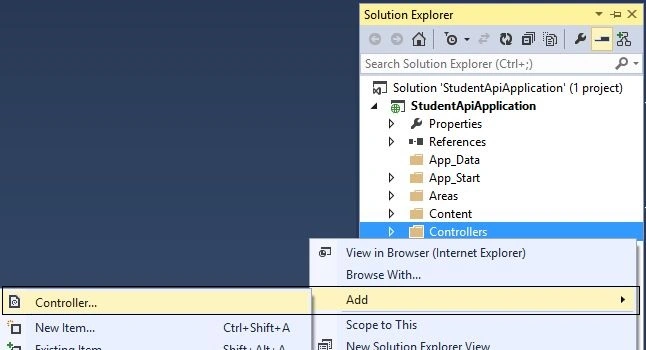
Step 2: In the Add Scaffold wizard, select the Web API 2 Empty Controller.

Step 3: Specify the name of the controller.
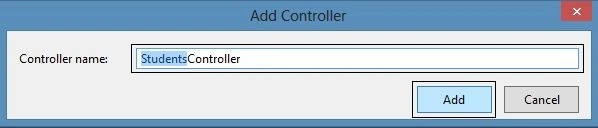
Step 4: Replace the code with the following code:
- using StudentApiApplication.Models;
- using System.Collections.Generic;
- using System.Web.Http;
- namespace StudentApiApplication.Controllers
- {
- public class StudentsController : ApiController
- {
- static readonly IStudentRepository studentRepository = new StudentRepository();
- public IEnumerable<Student> GetAll()
- {
- return studentRepository.GetAllStudents();
- }
- }
- }
Working with MVC Controller
In this section, we'll add an action method to the existing controller. You can also create a new controller. So now open the HomeController.cs in the Controllers folder and modify it with the following code:
- using System.Web.Mvc;
- namespace StudentApiApplication.Controllers
- {
- public class HomeController : Controller
- {
- public ActionResult Index()
- {
- ViewBag.Title = "Home Page";
- return View();
- }
- public ActionResult Data()
- {
- ViewBag.Title = "Student Details";
- return View();
- }
- }
- }
In the code above, I've added an extra ActionResult method that is returning the View.
Adding MVC View
We'll add the MVC view here and work with the newly added view. Use the following procedure.
Step 1: In the HomeController class, right-click on the Data() and click on Add View.
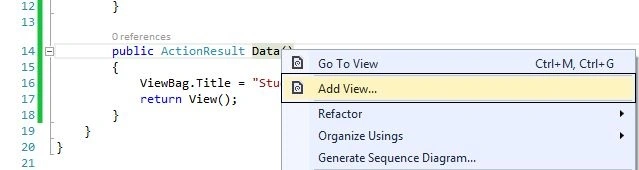
Step 2: Enter Data for view name and click on Add.
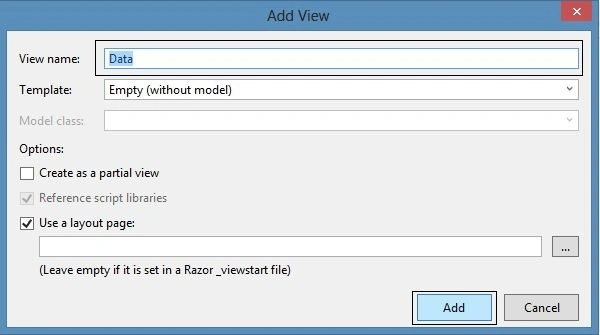
Step 3: Replace the code with the following code:
- @{
- ViewBag.Title = "Data";
- }
- <script src="~/Scripts/jquery-1.10.2.min.js"></script>
- <script type="text/javascript">
- $(document).ready(function () {
- $.ajax({
- url: "http://localhost:44687/api/students",
- type: "Get",
- success: function (data) {
- for (var i = 0; i < data.length; i++) {
- $("<tr><td>" + data[i].Name + "</td><td>" + data[i].Course + "</td><td>" + data[i].City + "</td></tr>").appendTo("#students");
- }
- },
- error: function (msg) { alert(msg); }
- });
- });
- </script>
- <h2>Index</h2>
- <div id="body">
- <section class="content-wrapper main-content">
- <table id="students" class="table">
- <thead>
- <tr>
- <th>@Html.DisplayName("Name")</th>
- <th>@Html.DisplayName("Course")</th>
- <th>@Html.DisplayName("City")</th>
- </tr>
- </thead>
- </table>
- </section>
- </div>
In the code above, I've used the jQuery to call the Web API.
Step 4: Open the Views/Shared/_Layout.cshtml page and add an ActionLink to redirect to your View.
- <li>@Html.ActionLink("Student", "Data", "Home", new { area = "" }, null)</li>
Step 5: Now run the application. In the Home Page, click on the Student link.
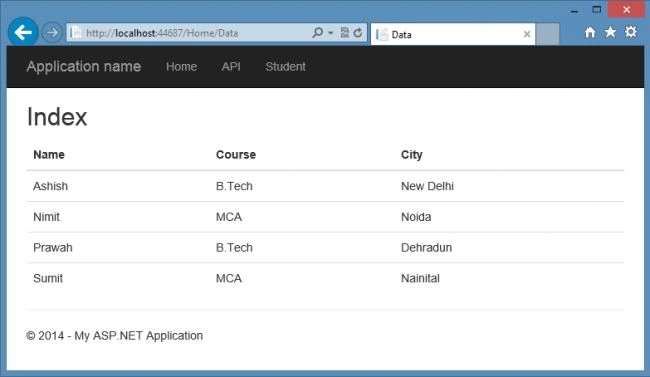
You can see in the following screenshot that, the data is coming by the Web API.
Summary
This article described how to create the Web API and access that Web API in the ASP.NET MVC 5. We'll show the CRUD operations in further articles. Thanks for reading.
Parameswaran RPosted Mar 8, 2018, 5:47 AM
Hi , Add new project choose MVC instead of Web API ho to add API to solution.
Asha KPosted Jan 18, 2017, 4:31 AM
I am not able to understand from view part, can you please explain me on this i am not able to product same output. not able to undestand where i am missing
Back UpPosted Jun 20, 2016, 5:28 PM
Great tutorial!, Tnx. The only thing I will add is the reason why the ajax Get call to url: "http://localhost:44687/api/students" hit the GetAll action in the "Students" controller. That's because we had made a Get request and this is the only get method in the Students controller. If we had more then one, then it would be choosed by the signature of the method (it's parameters).
Sr KarthigaPosted Feb 21, 2016, 11:18 PM
nice one
Sr KarthigaPosted Feb 21, 2016, 11:18 PM
Nice explanation
Shuvo SarkerPosted Jan 21, 2016, 5:05 AM
Give the Source code plz.it will be clear for us.
Mukesh KumarPosted Oct 20, 2015, 12:52 AM
I like your writing style, please keep it up
pritesh chaudhariPosted Sep 22, 2015, 6:10 AM
HI, in this article you have explained very well how to create web api and consume as well.so please mention after step 3 ,to replace the api url with readers' own url .it will be helpful for beginners to understand that under API tab,they will get help on all the API created and how to use them .under Student tab you have consumed students api.
nikolai yemenevPosted Aug 27, 2015, 7:37 PM
Thanks. One more question, How do I make calls to a WEB API & REST API using C# Console Application 1. How do you upload (POST) contact or list data (not using a file) from MSSQL Server database to WEB API & REST API, via curl and C# 2. How do you upload (POST) a file from MSSQL Server database to WEB API & REST API, via curl and C# Another way to explain is: How do I make calls to a WEB API & REST API using C# Console Application Call a Web API and & REST API from a .NET Client (C# Console Application)
nikolai yemenevPosted Aug 25, 2015, 5:47 PM
Hi Nimit, how do you modify the App to retrieve values from MSSQLServer database (instead of using static values in StudentApiApplication.Models) ?
Alan KaeserPosted May 19, 2015, 10:58 AM
I am attempting to follow your directions, but get stuck at the add interface step. I do not see interface in my add context menu when I right click the models folder. Is it a specific version of 2013 that supports that? I am using the professional version of vs 2013.
neha thakurPosted May 1, 2015, 8:53 AM
my project does not show me students results .Why ?
Murali krishnaPosted Dec 9, 2014, 4:47 AM
Thanks sir, It is helped to me i have small doubt in this url http://localhost:44687/api/students where /api/ is the default path? can we change the path? i gave like this http://localhost:44687/student but it is returning json error?
Puneeth NagarajPosted Sep 30, 2014, 4:12 AM
It's Simple Straight Forward but Informative about WebApi for the both freshers and Experienced.. Good Job Nimit